How to Place a Lab Order?
Follow the workflow mentioned above to land on the ‘Received Results’ screen.
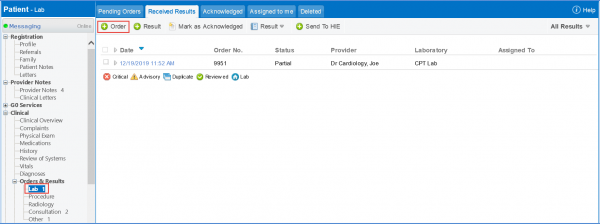
Click ‘+Order’ to display ‘Add Lab Order’ screen. Select the required lab and fill in the data fields with appropriate criteria. The specimen dropdown displays only the supported specimen in each test and for each new test added the specimen are populated from previous tests.
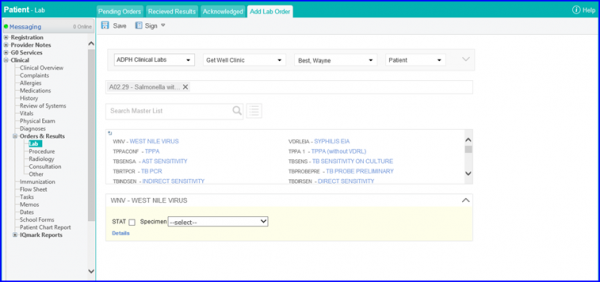
The CureMD application allows specimens to be selected for each test individually, but for State Lab, a common specimen needs to be selected for all tests being ordered.

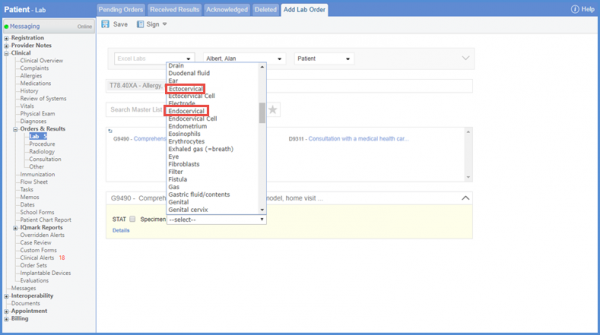
From the ‘Specimen’ dropdown, ‘Ectocervical’ and ‘Endocervical’ can also be selected as specimens.
Order requisition can be printed, emailed or faxed once they have been signed by the user. Select Signed Order and click on the desired action from the Requisition dropdown menu.
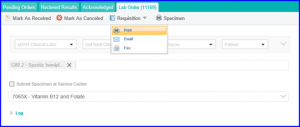
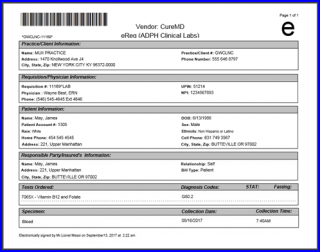
Moreover, the specimen label template features some additional data fields for ADPH. Select Signed Order and click on Print from the Requisition dropdown menu.
In case any outbound orders are not successfully transmitted, they can be located in the outbound problem list. For more details on Outbound Message, click here
For information about configuring a laboratory, click here.
The system receives results automatically for the submitted orders. For more information on received results, click here.
In case any results could not map the orders automatically, they can be located in the Problem List. To find more about Problem List click here.
Sent lab orders can be found in Orders & Results Tracking. To find more information about sent lab orders, click here.
When adding a new lab order, preferred laboratory is auto-populated if a laboratory has been selected in the patient’s ‘Preferences’.
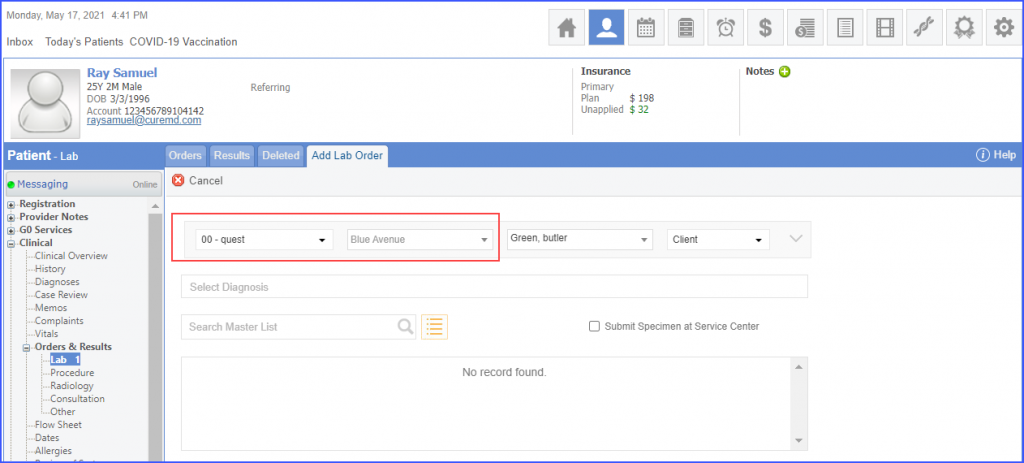
To select a preferred laboratory, click here.
Print logs can be viewed for lab orders. This helps in keeping track of printing actions performed by users.
If the user creates a lab order, signs it and then prints it, the system maintains a log of the printing action.
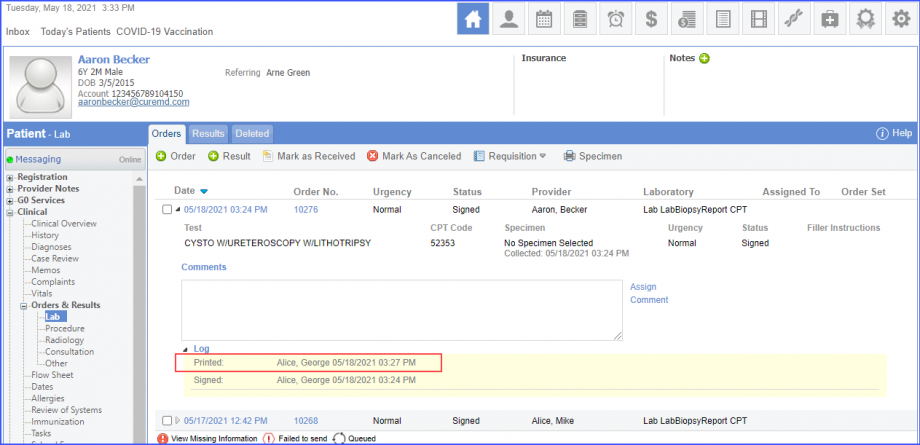
Similarly, a log of the printing activity is maintained, if a user prints an already signed lab order.
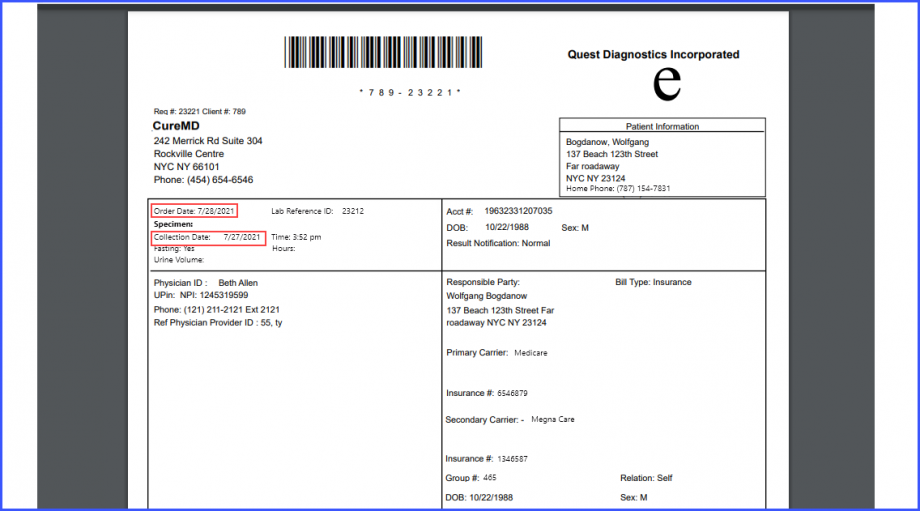
Specimen order and collection date are displayed on the printed quest diagnostics requisition.
Add a lab order and select a lab with order report template, ‘LabQuestReport’.
In order to see how to choose a lab order template, click here.
Then select a specimen and print the lab order. The printed lab requisition has the specimen order and collection date mentioned on it.
If the user has not selected any specimen in the lab order, then the printed requisition does not have the collection date on it.
Mobile number is displayed on the printed lab order for a laboratory having template, ‘Lab_Corp’.
Users can easily view the complete contact information on the printed order.
Add a lab order and select a lab with order report template, ‘Lab_Corp’.
In order to see how to choose a lab order template, click here.
Print the lab order and the printed lab requisition has the mobile number mentioned on it.
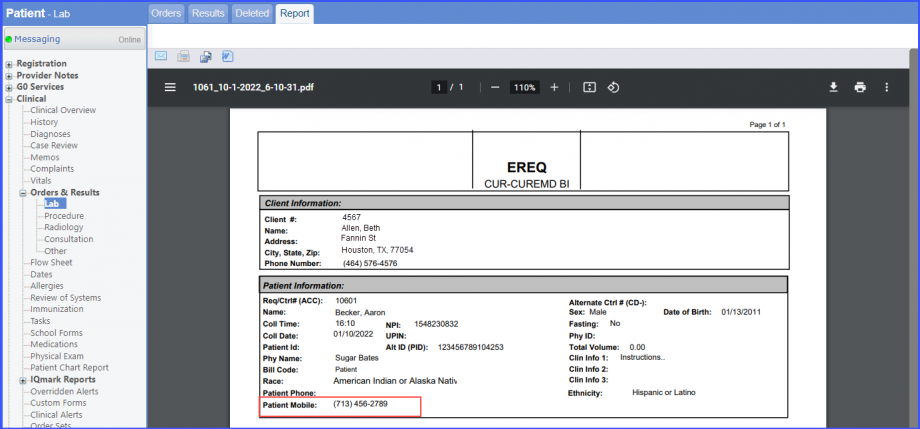
The mobile number is not printed on the lab order if the patient does not have a mobile number added in the patient demographics.
Lab orders can be signed for a future date.
This helps users in creating a treatment plan for a patient with future dates.
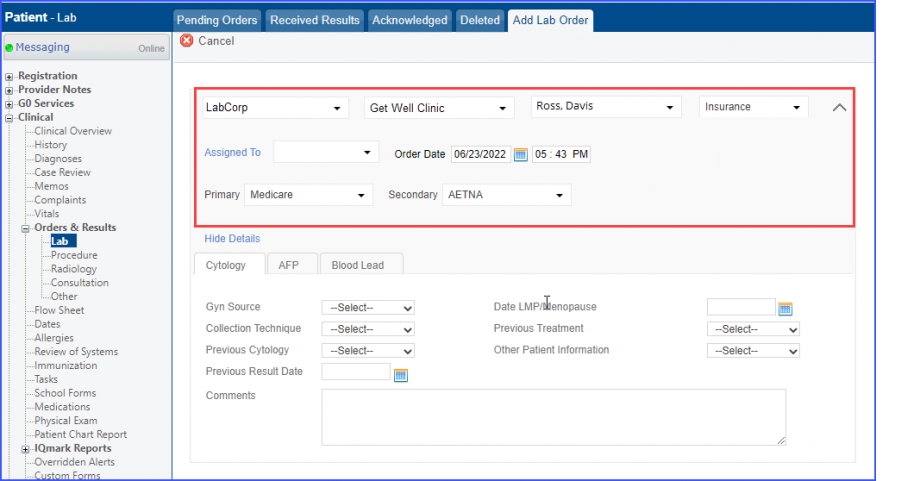
Once a user adds a lab order and clicks the expand icon, the system displays the ‘Order Date’ field. Users can pick a date from the date picker and enter a time.

After the lab order is signed, it is scheduled to be sent to the lab on the selected date and time. The system maintains a log of the sign, and the order date and time.
If the lab order submission method is ‘Manual’, a lab order signed with a future date is only submitted on the selected date after it has been processed manually. Alternatively, if the lab order submission method is ‘Automatic’ in the settings, then the order is queued until the date and time of the submission.
In order to see how to select a lab order submission method in the settings, click here.
LabCorp ABN requirement can be printed on the requisition.
Users can check if the ABN for the lab order is required or not.
If the patient’s primary insurance is selected as any Federal Medicare insurance and the corresponding lab is selected as LabCorp, ’05’ is printed on the requisition against the ‘Payor/Carrier Code’ field.
If the Advance Beneficiary Notice of Noncoverage (ABN) is required against the order, ‘Yes’ is printed in the ABN section of requisition.

Meanwhile, ‘No’ is printed on the requisition if the ABN is not required.

Users can query and check for the LabCorp ABN forms in real time.
This allows the patient to be aware of if the ordered lab tests are covered by the insurance or not.
In order to check for the LabCorp ABN, the below-mentioned criteria must be fulfilled.
- LabCorp profile is selected as the ordering Lab.
- Bill type is selected as ‘Insurance’.
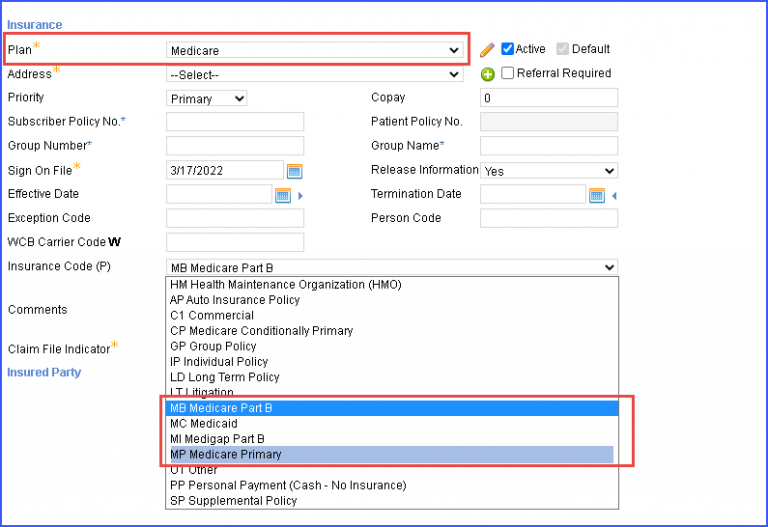
- The patient’s primary insurance must be Federal Medicare insurance & Insurance Code must be either “MP” or “MB”.
The user must select at least one diagnosis and lab code in order to run query for LabCorp ABN.
Click on either the “Save” or “Sign” button to trigger the query to verify if the ABN is required.
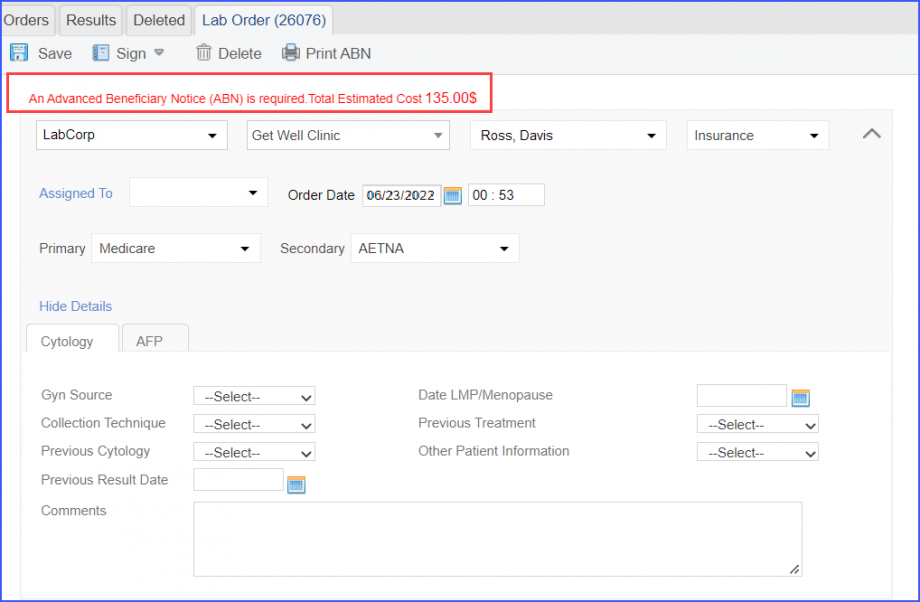
If the ABN is required, the system displays a message which states:
‘An Advanced Beneficiary Notice (ABN) is required.’ Along with the total estimated cost of all the selected tests, which are displayed in red color on top left corner of the page.
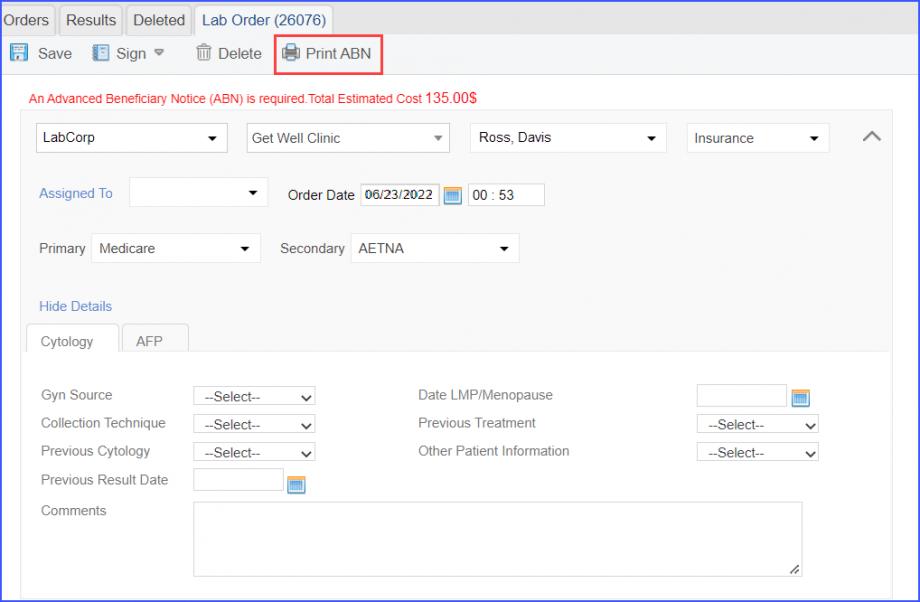
The user clicks on the ‘Print ABN’ button to print the ABN form.
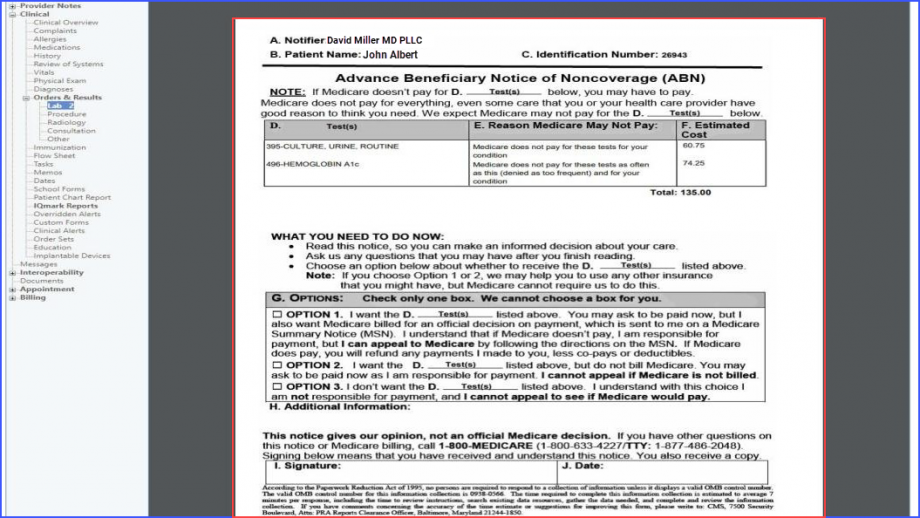
The ABN template displays the Estimated Costs for all the related test combinations for which the insurance might not cover.
If the ABN requirement is detected and the lab order is signed, the system displays a confirmation pop-up stating:
‘ABN is required with an estimated cost of $ (Amount). Do you wish to continue?’
The popup is displayed to verify if the patient is notified and has agreed to the ABN terms.
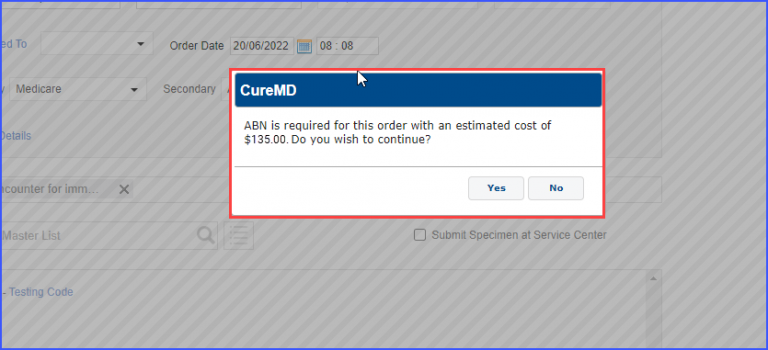
When the user selects ‘Yes’ the lab order is signed and completed.
Whereas, the order is saved as a draft if ‘No’ is selected, allowing user to discuss the ABN form with the patient.
The Patient’s address and responsible party information is printed on the requisition.
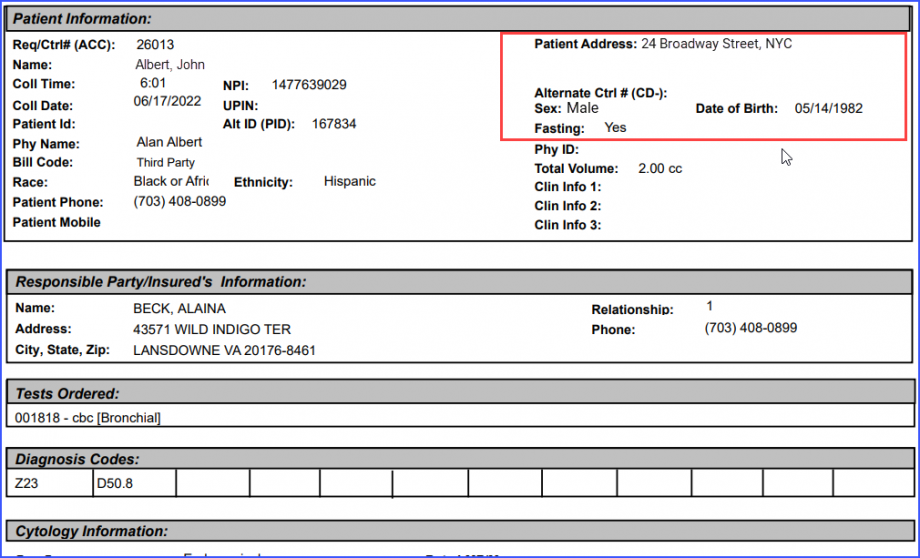
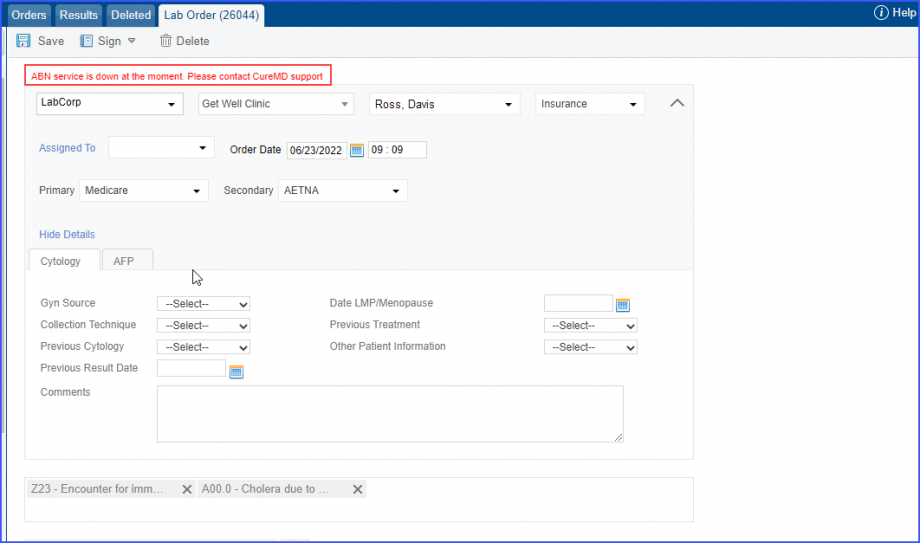
If the system fails to fetch a response when Saving or Signing a Lab Order due to any technical difficulty, the system displays a prompt at the top of the page stating:
‘ABN service is down at the moment. Please contact CureMD support’
The user may contact the support team to diagnose the issue.
The Patient’s address and responsible party information is printed on the requisition.
Provider’s title is printed on requisition along with their signature.
Provider’s role can be easily identified from the requisition.
Click here to learn how to select ‘Title’ for a ‘Practice Provider’ from ‘Settings’.
Navigate to the lab orders tab and selects any of the lab from the followings:
- Screening
- Confirmation
- Definitive_M
- Definitive_C
The system prints the signing provider’s credential along with his/her signature.

Users have to validate their credentials for electronic signatures before signing an order or a provider note.
This ensures reliability as electronic signatures are compliant with 21 CFR part 11 regulations.
When the user clicks ‘Sign’ to sign the Lab Order, the user verification popup titled ‘Electronic Signature’ is displayed.
If the user signing the provider note is the same who has created it, then the popup states ‘By entering your password you confirm that you have created this note and you wish to proceed with signing it‘.
If the user signing the provider note is not the same as the one who created it, then the popup states ‘By entering your password you confirm that you have reviewed this note and you wish to proceed with signing it‘.
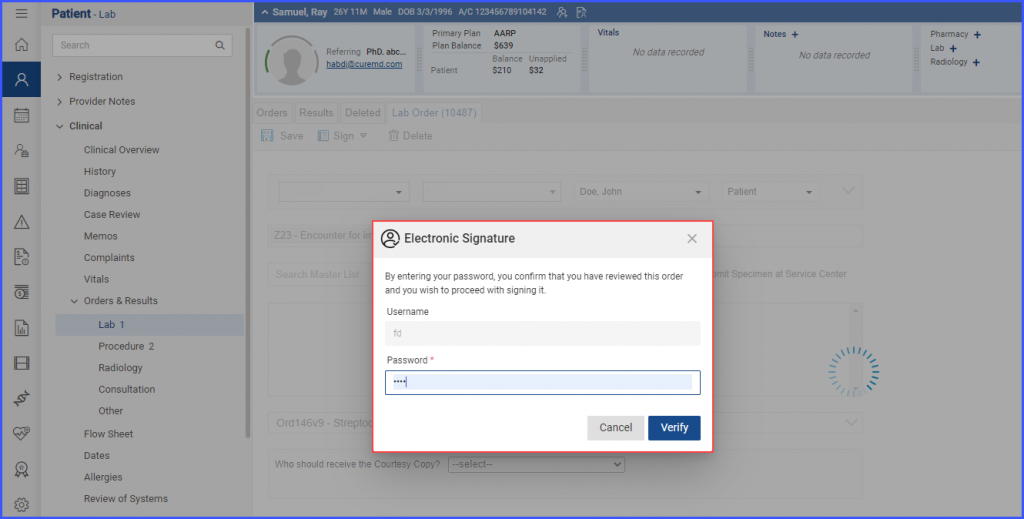
After typing in the password, click the ‘Verify’ button to sign the note.
A similar enhancement has been made in the Radiology Orders section of the ‘Clinical’ node. Click here to view the change.
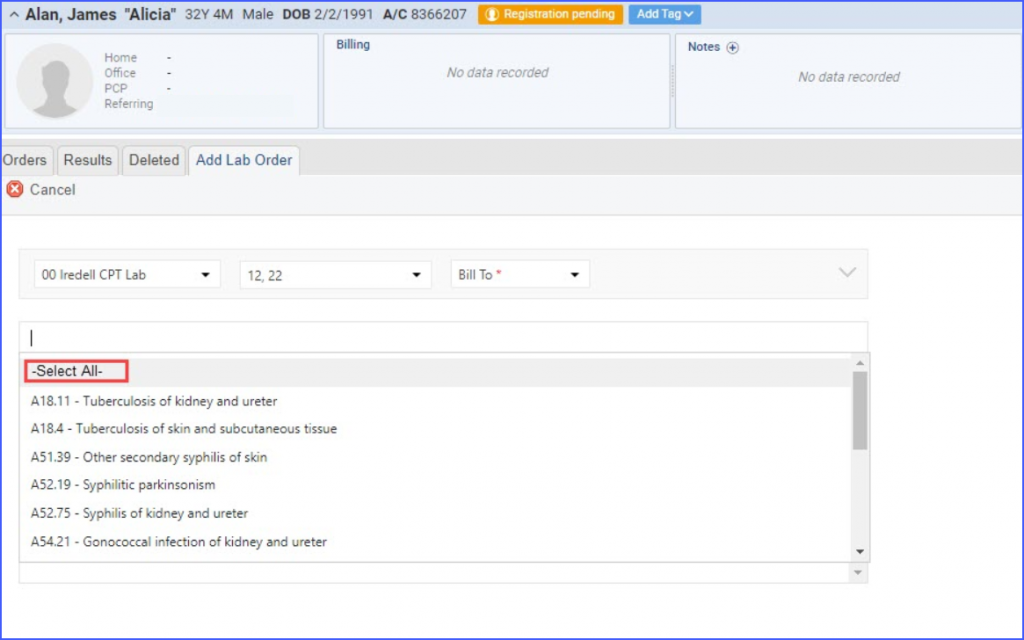
Users can select all diagnosis at once when creating an order.![]()
When the user clicks on the ‘Select Diagnosis’ field, a ‘Select All’ option is displayed at the top of the list.

Click on this option to select all diagnosis from the list at once.
A similar enhancement has been made in the Radiology section, click here to view.
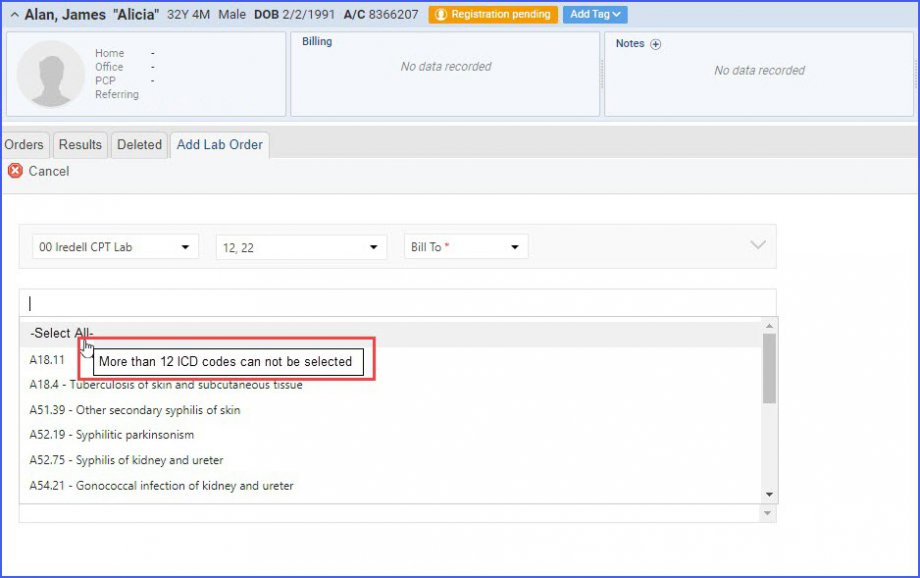
The option to ‘Select All’ diagnoses automatically gets disabled once the drop-down list has more than 12 diagnoses in it.
In this case, the blue hyperlink for ‘Select All’ changes to black and becomes unclickable. Additionally, when the user hovers over this text, a tooltip indicates that ‘More than 12 ICD codes cannot be selected’.
