How to Add a Vaccine Lot?
Follow the workflow mentioned above to land on the Vaccine Lot screen.
Click ‘+Lot’ button.
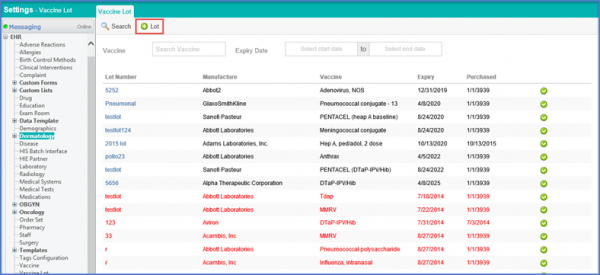
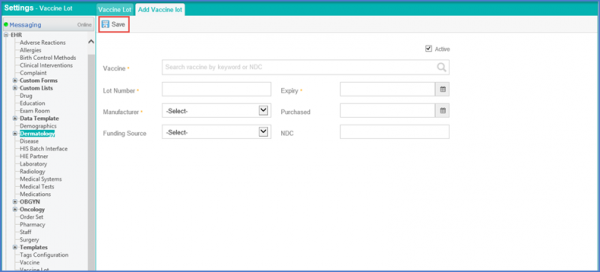
Enter the following mandatory fields:
- Vaccine
- Lot Number Expiry
- Manufacturer
Additional fields include:
- Purchased
- NDC
- Funding Source
Click ‘Save’ when done.
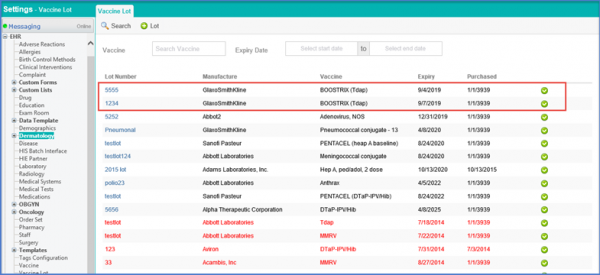
The Vaccine Lot is added and displayed.
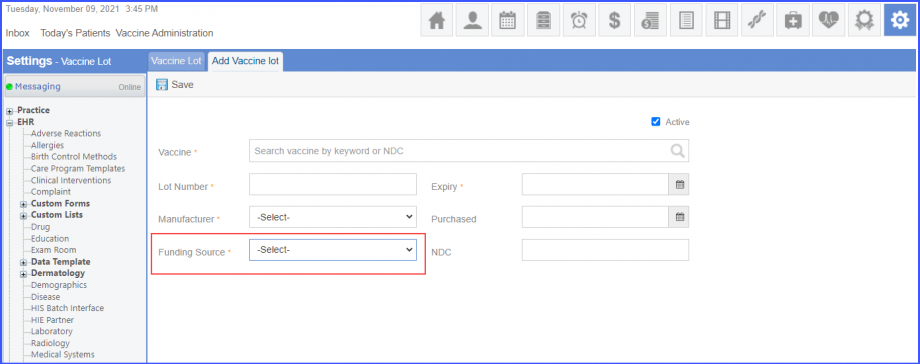
It is mandatory for the users to populate ‘Funding Source’ field while adding a vaccine lot.
This ensures that the claims are not rejected by the insurance.
Users cannot save a vaccine lot without selecting a funding source from the ‘Funding Source’ dropdown.
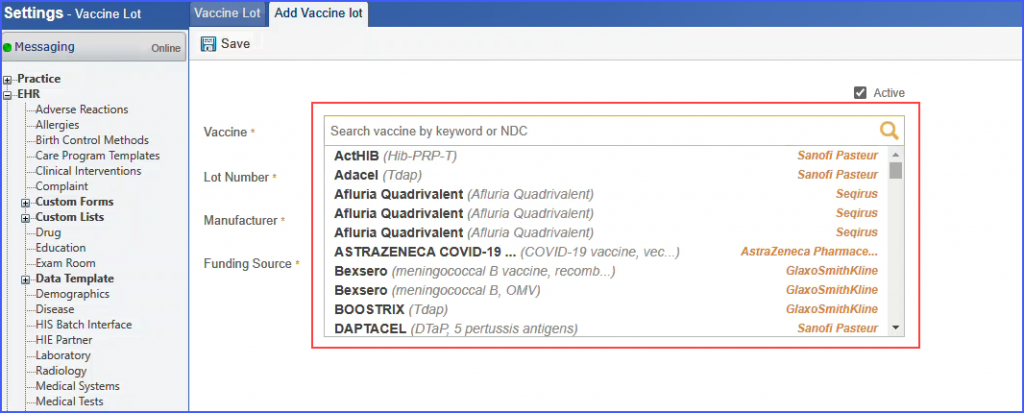
The system does not display generic vaccines in the vaccine list while adding a vaccine lot.
This ensures that vaccine lots are created using the branded vaccines only.
A disclaimer is also displayed on the immunization chart to notify the users about creating vaccine lots with branded vaccines only. In order to view the disclaimer, click here.
The system displays the registry-specific funding sources while adding a vaccine lot.
This ensures that the immunization data is successfully submitted to the registry.
Select a registry from the ‘Registry’ dropdown and then click the ‘Funding Source’ dropdown. Only the funding sources acceptable by the registry are displayed in this dropdown.

Click here to see a similar enhancement made in the ‘Provider Notes’ section.
Users can map eligibility with vaccine lots. ![]()
This ensures that complete vaccine is added when a new vaccine lot is registered.
On the ‘Add Vaccine Lot’ screen, the system displays an ‘Eligibility’ dropdown. The desired eligibility can be selected by clicking on the dropdown.

Click here to see similar enhancement on ‘Immunization’ section in ‘Patient’ Module.
Click here to see similar enhancement in ‘Immunization’ section on ‘Provider Note’.
