How to Enable User Permissions for Clinical Components?
Follow the workflow above to land on the ‘Permissions’ screen.
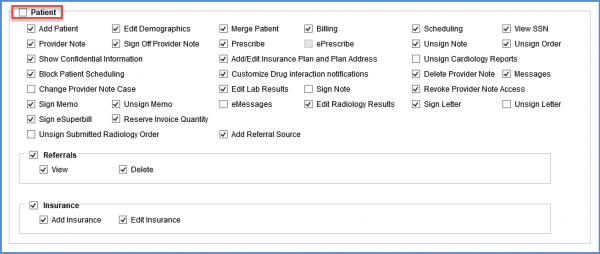
In the ‘Permissions’ section, enable the ‘Patient’ checkbox.
This will display the ‘Patient’ and ‘Clinical’ component permissions.


Enable the required checkboxes under ‘Patient’ and ‘Clinical’ sections to give the particular user access to those components.
Enabling the ‘Estimated Due Date’ checkbox enables user to view ‘EDD’ and populate it on ‘Provider Notes’.
The ‘Care Plan’ component can be enabled for users by marking the relevant checkbox in the ‘Clinical’ section.
In the ‘Clinical’ section, ’Risk’ checkbox can also be enabled to allow users to view the ‘Risk’ component of the application.
The ‘Risk’ checkbox can also be enabled from the ‘Role’ component. To see how it is done, click here.
To access the ‘Risk’ component, click here.
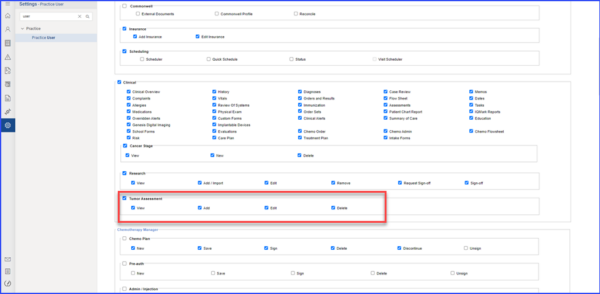
A new “Tumor Assessment” section is available under Clinical permissions, allowing administrators to grant or restrict user access and actions within the Tumor Assessment tab. 
The “View” permission enables users to see the Tumor Assessment button in the Patient Profile’s Clinical section and access the tab. The “Add” permission allows users to add new tumor assessments and timepoints. Users with the “Edit” permission can modify the assessment name, baseline, subsequent timepoints, and dropdown responses. The “Delete” permission enables users to remove assessments or specific timepoints within the Tumor Assessment section. These permissions provide fine-tuned control over who can manage tumor assessments in the system.

