How to Add an Immunization in Provider Note?
Follow the above mentioned workflow to add an immunization in the provider note.
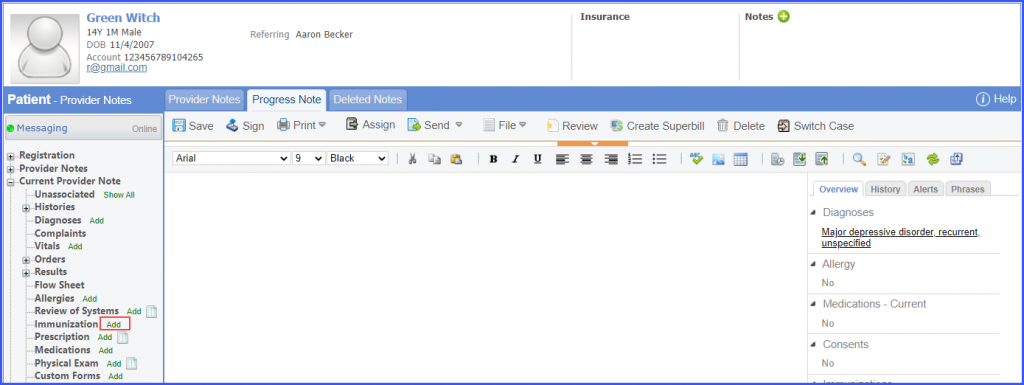
Click the ‘Add’ hyperlink next to ‘Immunization in the left tree menu.
Hover over ‘Dosage’ to view the ‘Administer Vaccine’ option.
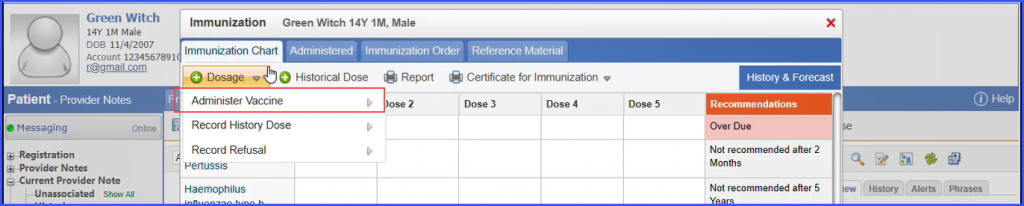
Then hover over ‘Administer Vaccine’ to view the vaccine options.
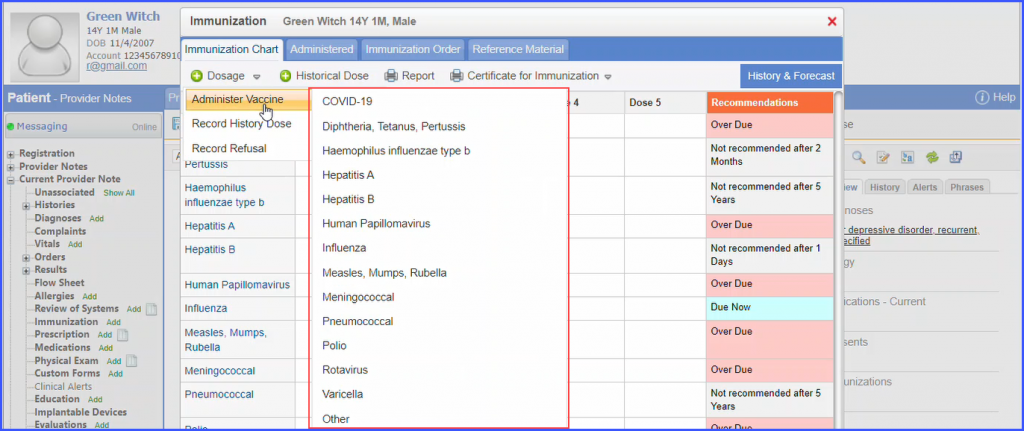
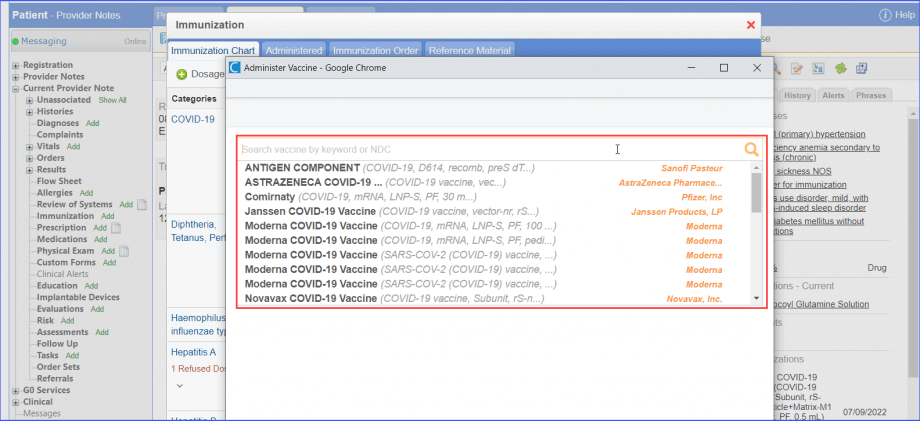
Select the desired vaccine and then select the brand of the vaccine from the vaccine brand selection search bar.
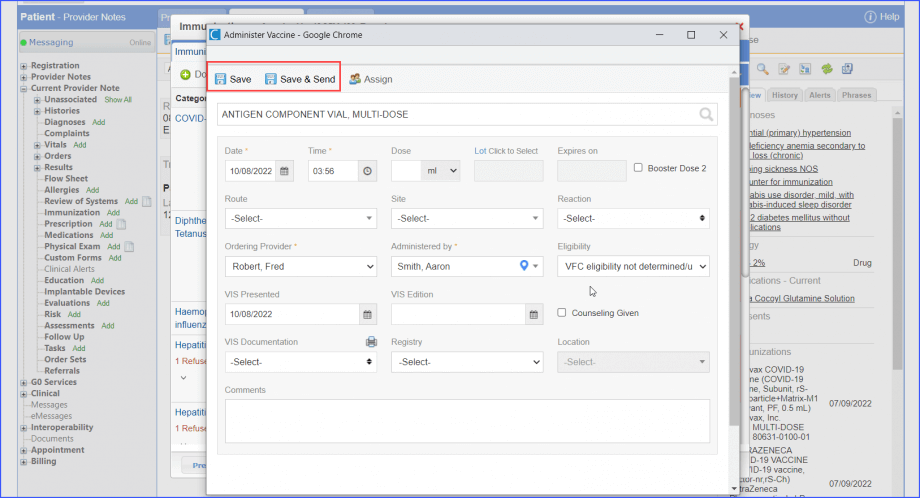
Complete the vaccination details. Next, click ‘Save’ or ‘Save & Send’ button.
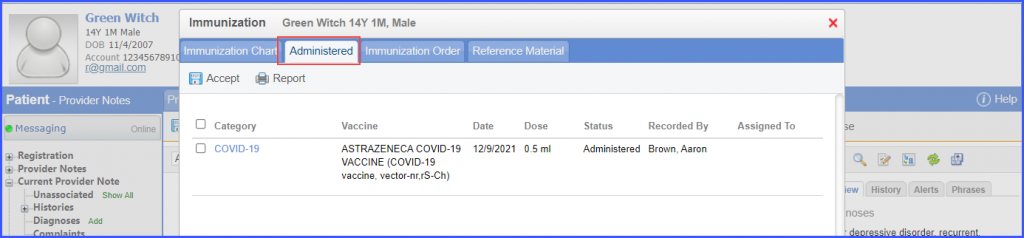
Open the ‘Administered’ tab, mark the checkbox next to the administered vaccination, and click the ‘Accept’ button. The vaccination is added to the provider note.
The system only displays the branded vaccines in the vaccine brand selection search bar.
This ensures that the users do not administer a generic vaccine by mistake.
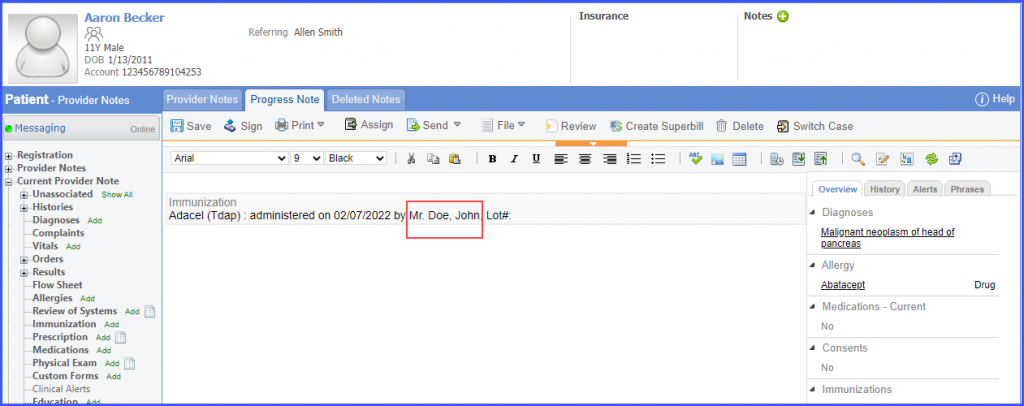
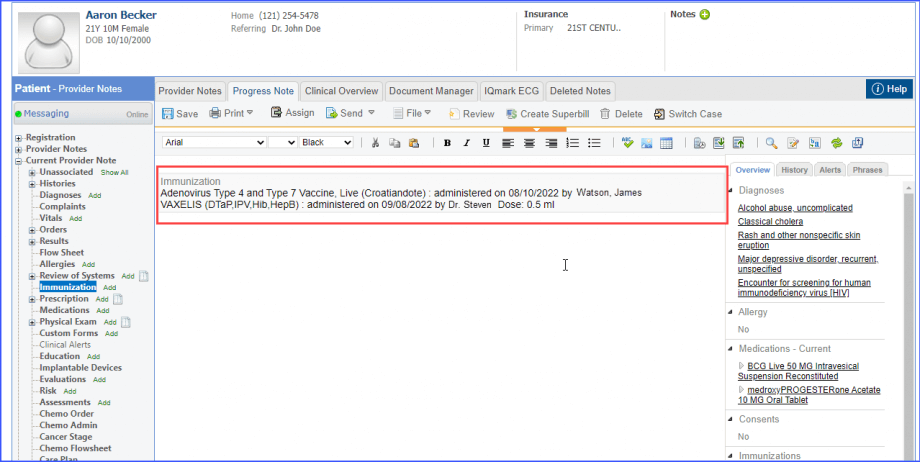
The title of immunization administering provider is displayed in the provider note SOAP text.
Users can easily view the provider title in the provider note.
When an immunization is added to a provider note, the SOAP text also displays the title along with the name of the administering provider.
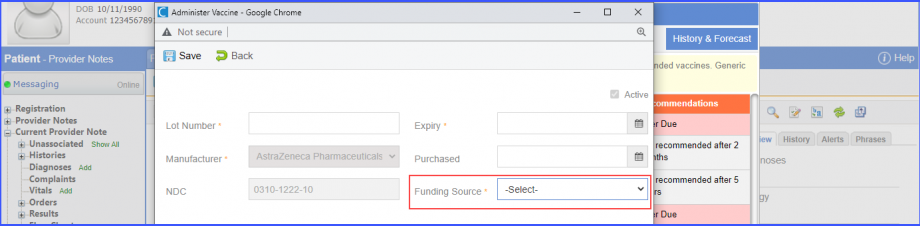
The system displays the registry-specific funding sources while adding a vaccine lot.
This ensures that the immunization data is successfully submitted to the registry.
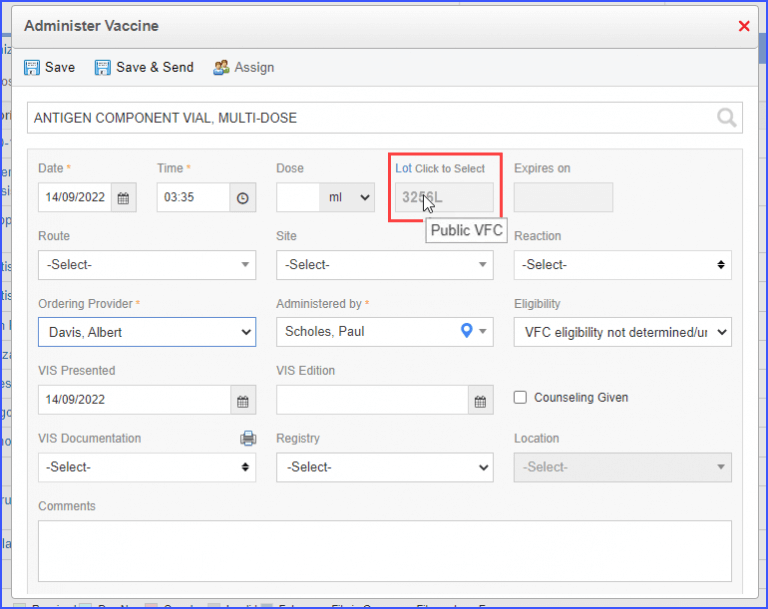
In the ‘Administer Vaccine’ pop-up, select a registry from the ‘Registry’ dropdown.
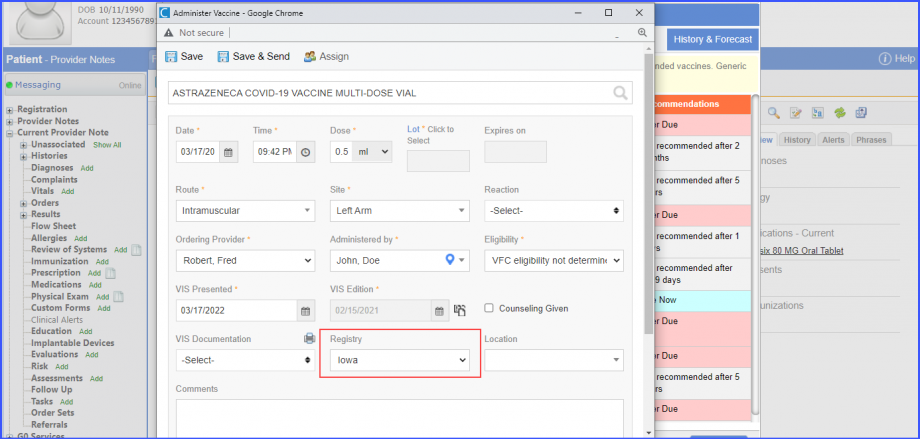
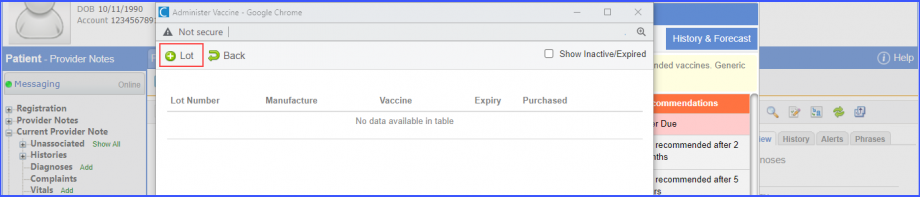
Next, click the ‘Lot’ hyperlink. Then click ‘+ Lot’ to add a vaccine lot.
In the ‘Funding Source’ dropdown, only the funding sources acceptable by the registry are displayed.
The vaccine that is being used the most can be pinned at the top of the vaccine list.
Users can easily access and select the most required vaccines from the list.
On the ‘Administer Vaccine’ screen, when the user hovers over a vaccine in the list, a pin icon appears next to the vaccine manufacture’s name.
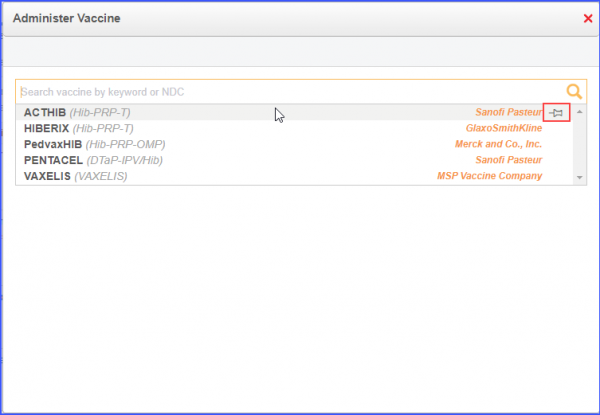
Clicking on the pin icon pins the vaccine to the top of the vaccine list. Once done, the pin icon turns blue.
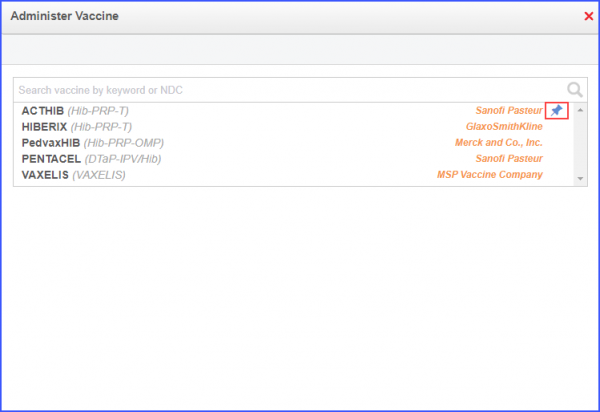
Most recently pinned vaccine appears at the top of the list.
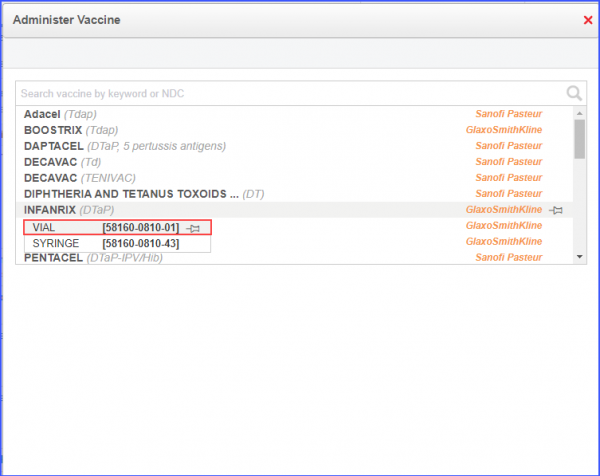
Similarly, users can also pin a specific NDC or all NDCs present within a vaccine.
To do that, hover over the NDC within a vaccine and click on the pin icon present next to that specific NDC.
Once done, the vaccine with the pinned NDC appears at the top of the list.
Meanwhile, the same vaccine with unpinned NDCs remain at the original position in the list.
To pin all NDCs at the same time, click the pin icon that appears next to the manufacturer’s name on the vaccine. This automatically pins all associated NDCs.
Users can pin the relevant NDC of the vaccine by clicking on the pin icon next to the NDC code.
User can continue to access the vaccine from the vaccine list even after it has been pinned.
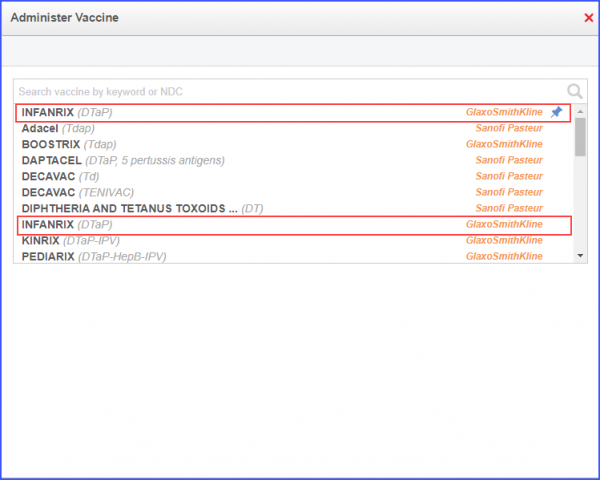
Users can unpin a vaccine from the top by clicking on the ‘blue pin’ icon.
Similar enhancement has been made on the ‘Immunization’ section. Click here to view the change.
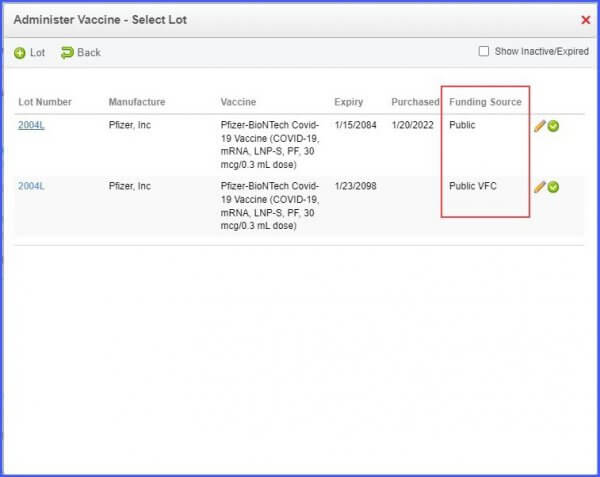
A ‘Funding Sources’ column has been added to the Vaccine Lot.
Users can identify and administer vaccines from their required lot. They can also differentiate between vaccines with identical names and lot numbers by considering their respective funding sources..
The user clicks on the ‘Lot’ hyperlink to select the relevant lot. Here, the ‘Funding Source’ column is displayed on the right side of the lot list.
Once the user has added the vaccine lot, the system displays ‘Funding Sources’ column in the vaccine lot listing.
Meanwhile, if the user hovers over the ‘Lot’ field, the system displays a ‘Tooltip’ that states the funding source of the selected lot.
If there is no lot populating the ‘Funding Score’, then no tooltip appears upon hovering over the ‘Lot’ field.
Similar enhancement has been made on the ‘Immunization’ section. Click here to view the change.
Similar vaccines appear only once in the Immunization administered tab.
This ensures that there is no repetition of vaccine names in the SOAP text.
If the user has administered a combo vaccine, the then combo vaccine appears as one entry in the ‘Administered’ box with different categories separated by the slash ‘/’ sign.

The same administered vaccines are displayed once in the Provider Note ‘SOAP’ text.
Similar enhancement has been made on the ‘Immunization’ section. Click here to view the change.
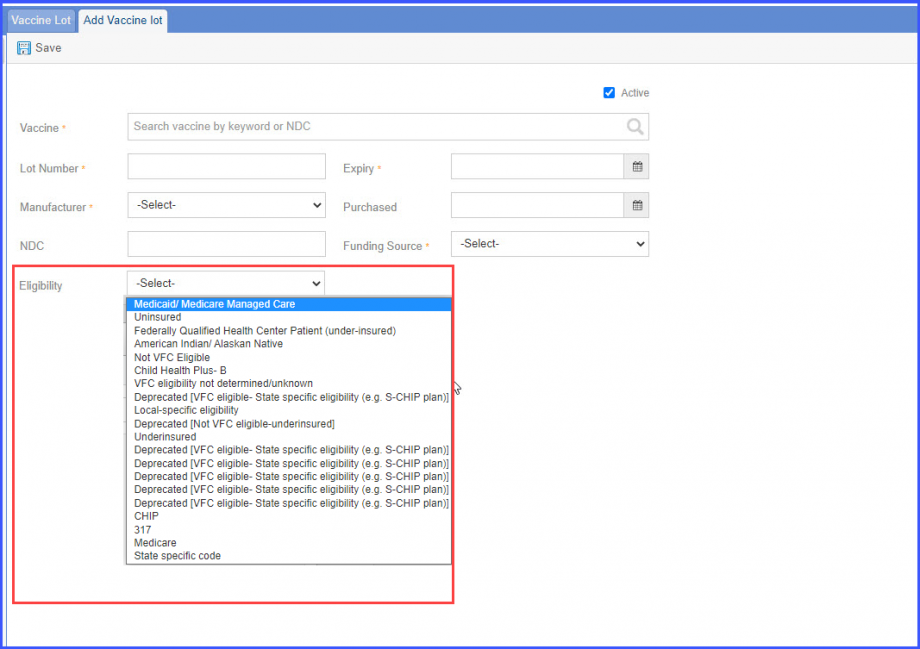
Users can map eligibility with vaccine lots.
This ensures that complete vaccine is added when a new vaccine lot is registered.
On the ‘Add Vaccine Lot’ screen, the system displays an ‘Eligibility’ dropdown. The desired eligibility can be selected by clicking on the dropdown.
The system displays a disclaimer when Patient’s next of kin and complete address is missing on the Immunization Chart.![]()
This ensures that immunization data of a patient is submitted successfully.
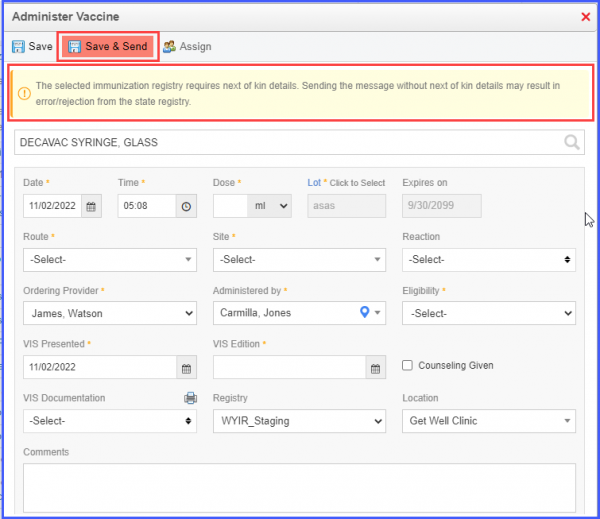
When a registry is selected against a patient and the age of patient is 18 or below, provision of next of kin information becomes mandatory.
If next of kin is missing, the system displays an alert at the top of the ‘Administer Vaccine’ page and highlights the ‘Save & Send’ button in red.
The alert states:
‘The selected immunization registry requires next of kin details. Sending the message without next of kin details may result in error/rejection from the state registry.’
If the patient’s address is incomplete along with the next of kin information, an alert is displayed at the top of the ‘Administer Vaccine’ page and the ‘Save & Send’ button is highlighted in red.
The alert states:
‘The patient’s next of kin and address is incomplete or missing. Sending the message to the state registry without filling in these details may result in message rejection.’
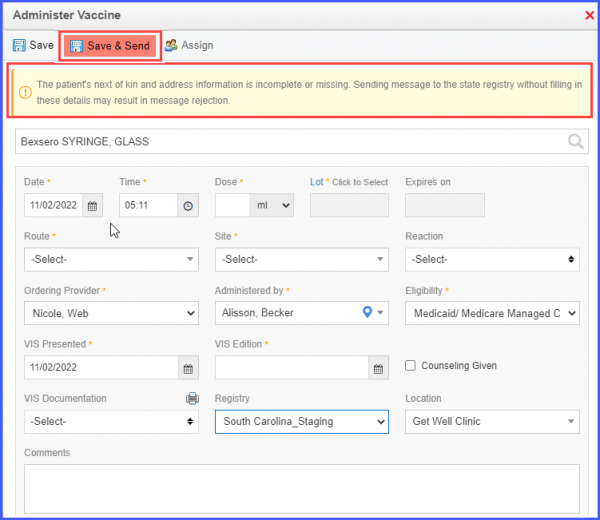
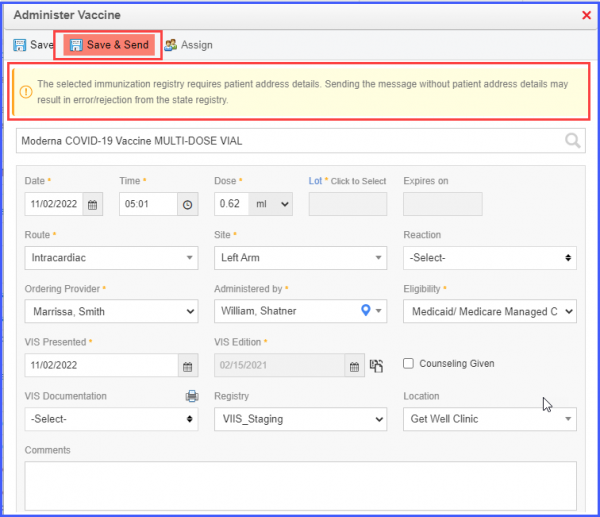
However, if the patient’s address is missing then the system displays an alert at the top of the ‘Administer Vaccine’ page and highlights the ‘Save & Send’ button in red.
The alert states:
‘The selected immunization registry requires patient address details. Sending the message without patient address details may result in error/rejection from the state registry.’
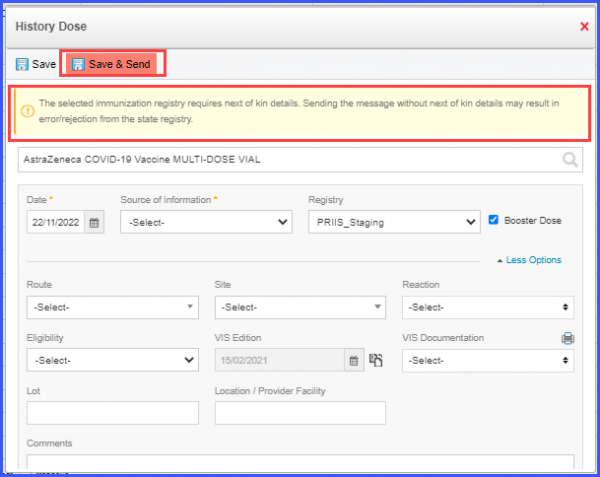
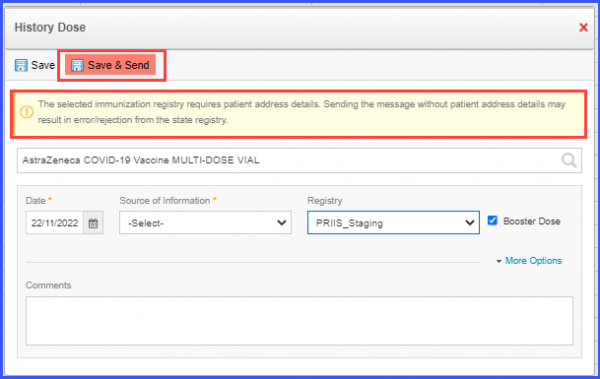
When a registry is selected against a patient on ‘History Dose’ page and the age of patient is 18 or below, it is necessary to provide next of kin information.
If next of kin is missing, the system displays an alert at the top of the ‘History Dose’ window and highlights the ‘Save & Send’ button in red.
The alert states:
‘The selected immunization registry requires next of kin details. Sending the message without next of kin details may result in error/rejection from the state registry.’
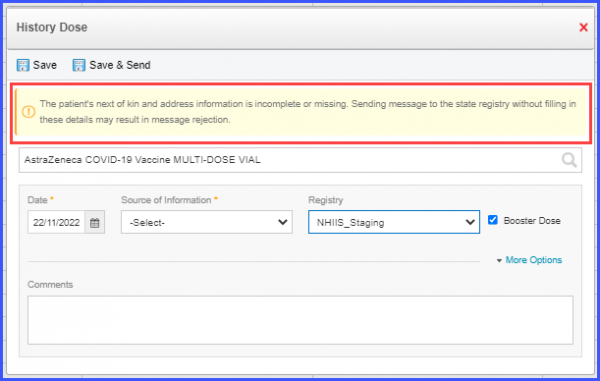
If the patient’s address is incomplete along with the next of kin information, an alert is displayed at the top of the ‘History Dose’ window, and the ‘Save & Send’ button is highlighted in red.
The alert states:
‘The patient’s next of kin and address is incomplete or missing. Sending the message to the state registry without filling in these details may result in message rejection.’
However, if the patient’s address is missing then the system displays an alert at the top of the ‘History Dose’ window and highlights the ‘Save & Send’ button in red.
The alert states:
‘The selected immunization registry requires patient address details. Sending the message without patient address details may result in error/rejection from the state registry.’
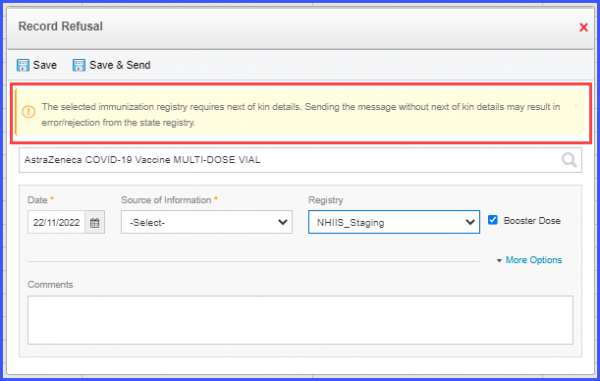
When a registry is selected against a patient on ‘Record Refusal’ page and the age of patient is 18 or below, next of kin information is required to be filled.
If next of kin is missing, the system displays an alert at the top of the ‘Record Refusal’ window and highlights the ‘Save & Send’ button in red.
The alert states:
‘The selected immunization registry requires next of kin details. Sending the message without next of kin details may result in error/rejection from the state registry.’
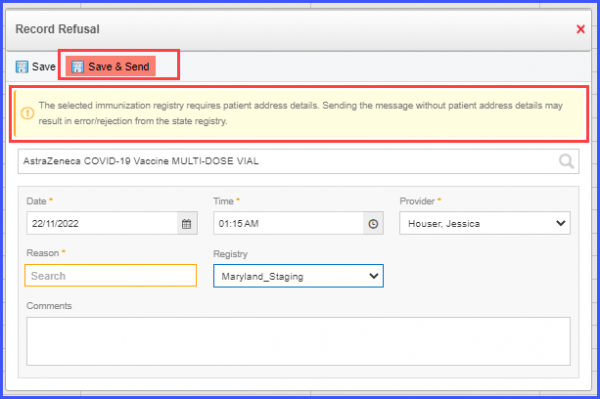
However, if the patient’s address is missing then the system displays an alert at the top of the ‘Record Refusal’ window and highlights the ‘Save & Send’ button in red.
The alert states:
‘The selected immunization registry requires patient address details. Sending the message without patient address details may result in error/rejection from the state registry.’
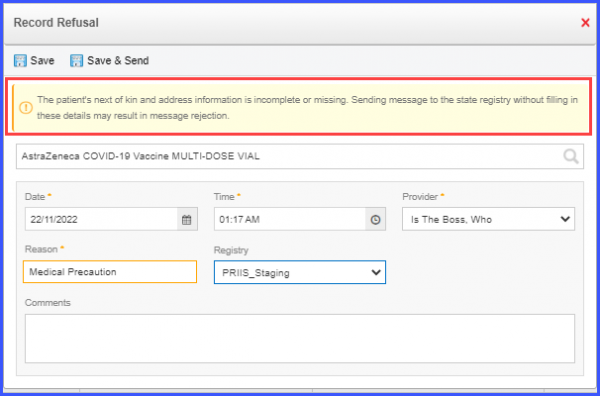
If the patient’s address is incomplete along with the next of kin information, an alert is displayed at the top of the ‘Record Refusal’ window and the ‘Save & Send’ button is highlighted in red.
The alert states:
‘The patient’s next of kin and address is incomplete or missing. Sending the message to the state registry without filling in these details may result in message rejection.’
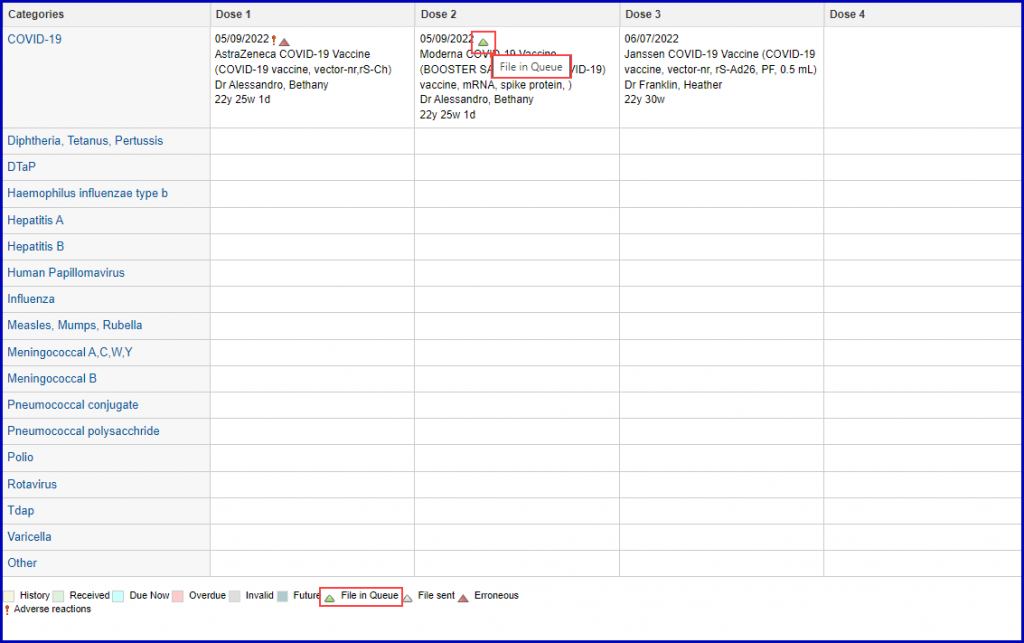
Icons are displayed against immunization related messages to notify users about their failed or successful status.
This ensures that only the correct information is being shared with the state registry.
The user sends information pertaining to the administration of a vaccine.
The system displays a white carat icon when the message has been sent successfully. Hovering over the icons displays a tooltip labelled ‘Message Successful’.
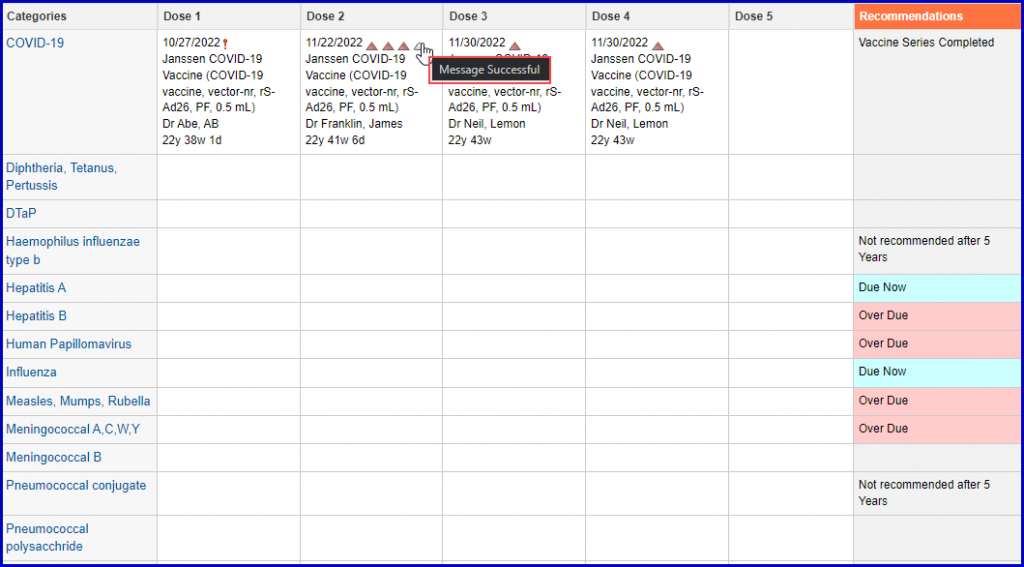
The system displays a red carat icon when the message could not be sent. Hovering over the icons displays a tooltip labelled ‘Message Failed’.
If the message is in queue, a green icon is displayed. Hovering over this displays ‘File in Queue’.
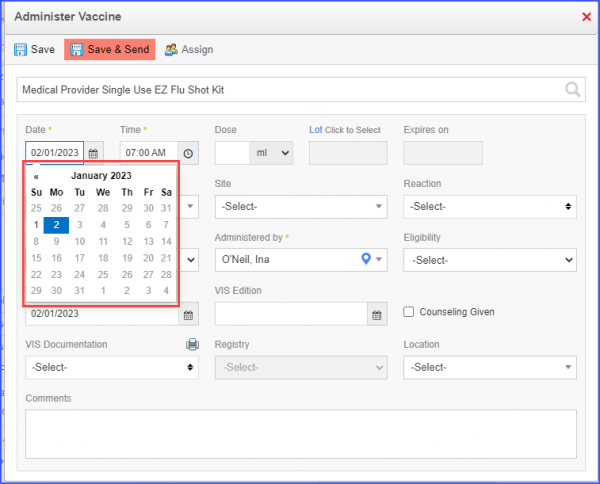
Future dates are disabled when recording a date for vaccine administration, history doses and refusal of vaccine.![]()
This ensures users record the correct date for vaccine administration.
Click on the ‘Date’ text-field or the ‘calendar’ icon next to it to open the calendar. The user can manually select a date for when the vaccine was administered.
The user cannot select a date for vaccine administration which has not yet occurred. Hence, future dates have been disabled.
Click on the ‘Date’ text-field or the ‘calendar’ icon next to it to open the calendar. The user can manually select a date for when the history dose for the vaccine was administered.
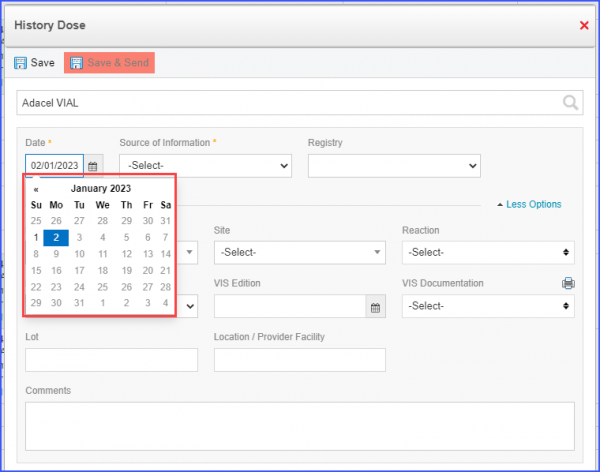
Similarly, to record patients’ refusal for vaccine, the user can select a date from the calendar, with the exception of future dates.

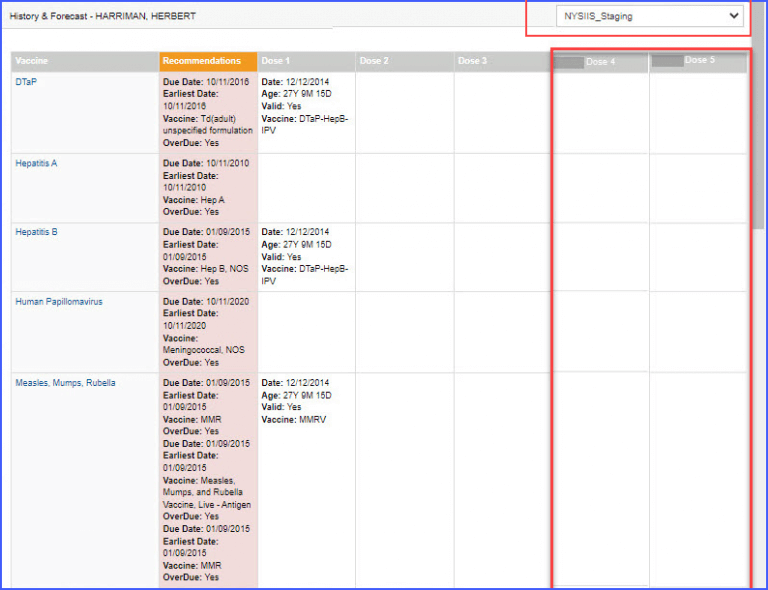
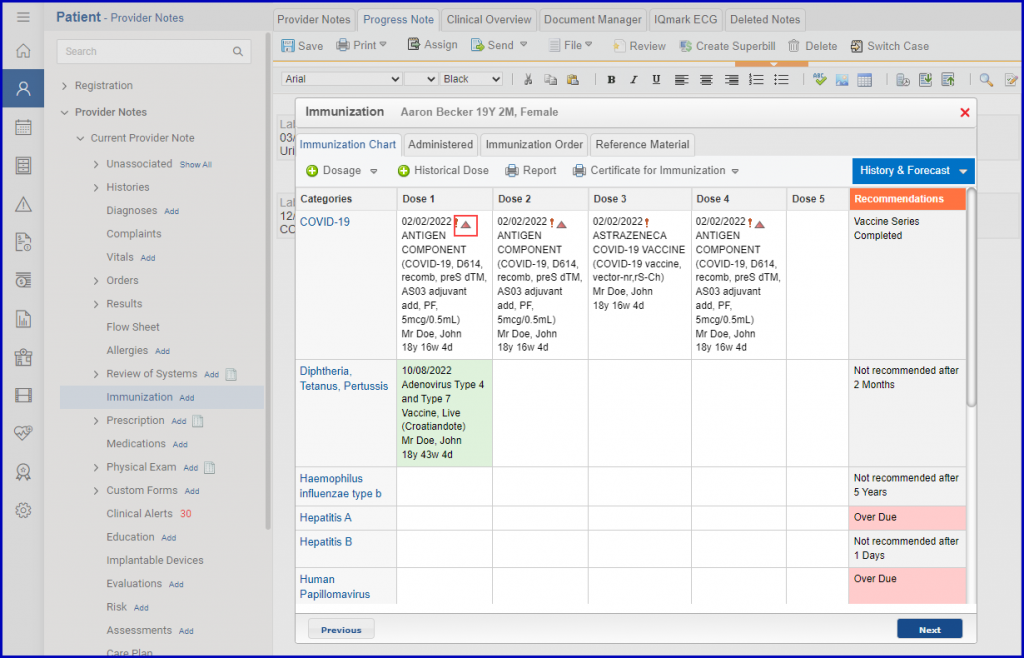
Two extra dose columns have been added in the History & Forecast section increasing the number from 3 to 5.