How to Prescribe a New Medication?
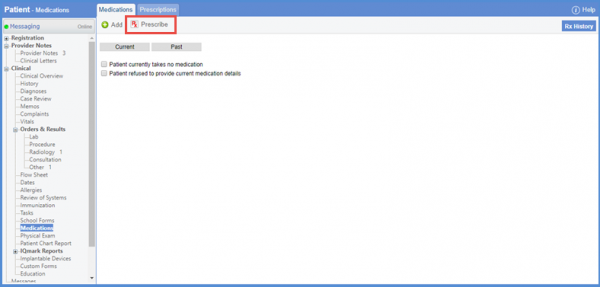
Follow the above mentioned workflow to land on the ‘Medications’ page.
Click the ‘Prescribe’ button.
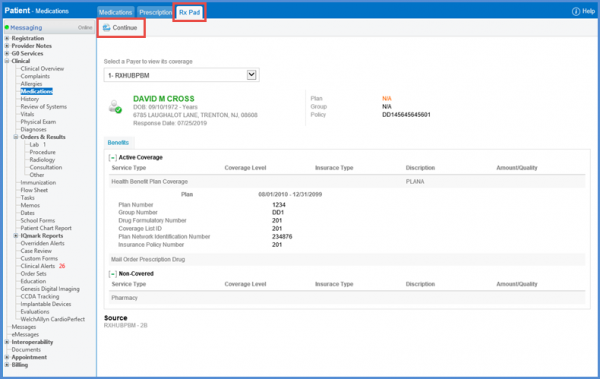
Doing so opens the ‘Rx Pad’ screen. System checks the patient’s eligibility and displays the patients’s benefits coverage.
From the ‘Rx Pad’ screen, click ‘Continue’ button.
Search the medication in the search bar or select from the hot list.

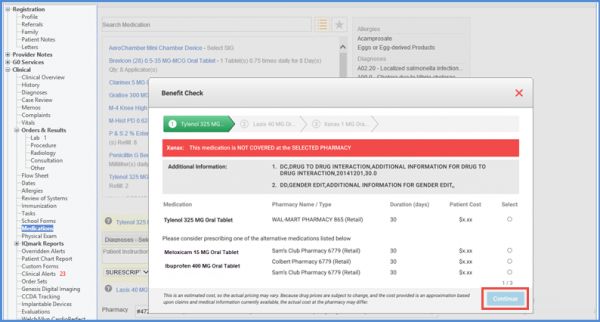
If the patient is eligible for pharmacy benefits, users are able to see ‘Benefit Check’ screen. Here, details of the prescribed and suggested alternate medications along with pharmacy details are displayed.
Top section of Benefit Check lightbox displays details of the medication coverage. Green indicates medications which are covered by insurance and red indicates otherwise.
User can either select the original or an alternate medication.
Click the ‘Continue’ button to move to the next medication.
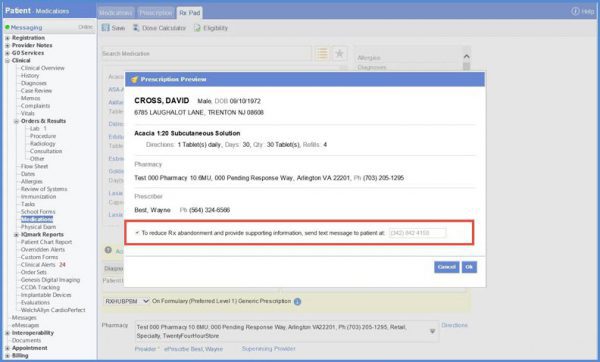
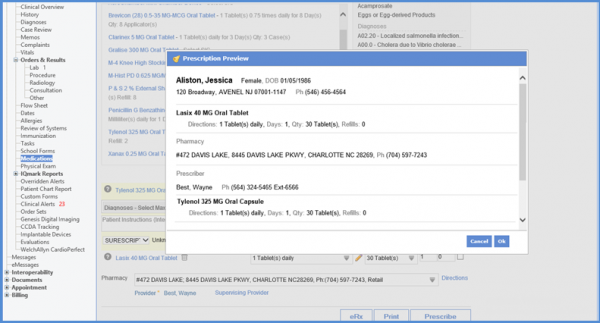
User can see the ‘Rx Pad – Prescription Preview’ pop up.
Patients are able to receive the text messages of prescriptions if their phone number is saved.
Mark the checkbox to enable the message alert for the patient and click ‘Ok’.
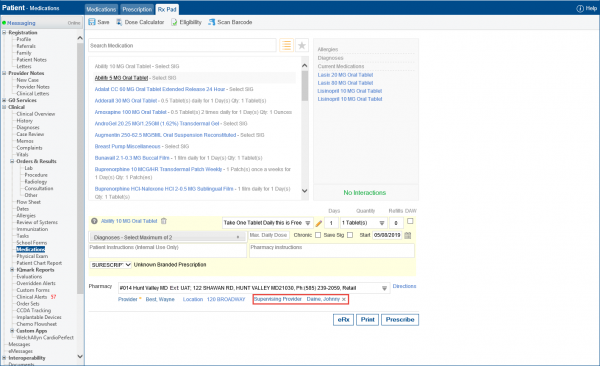
User is taken back to the ‘Rx Pad’ screen. Here, user can see the details of the prescribed medication. Details of pharmacies and associated medicines are displayed in the tooltip.
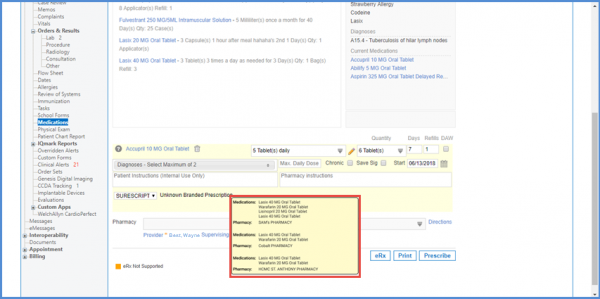
After the benefit check is completed for all medications, an eRx Summary popup displays all selected medications grouped by Pharmacy.
The user has the option to select pharmacist while prescribing a medication.
To enable the ‘Pharmacist’ hyperlink, contact the CureMD Support team.
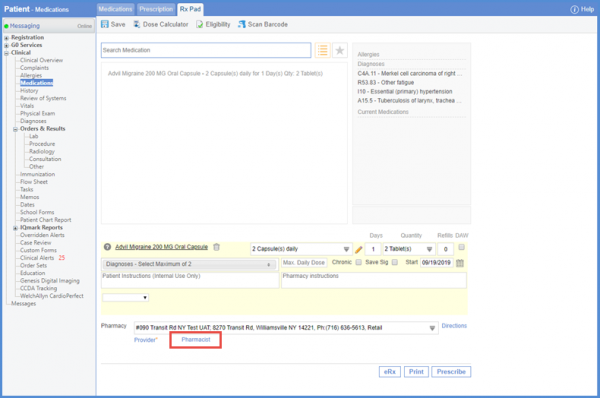
Clicking the ‘Pharmacist’ hyperlink displays a drop down, allowing the user to select a pharmacist.
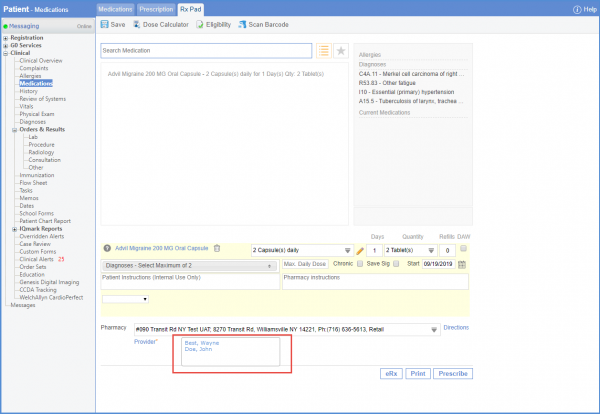
The supervising provider’s name is auto-populated. To complete the prescription, click ‘Prescribe.’
An invoice is posted to the Inventory module containing the pharmacist details. To view the invoice, click here.
Uncoded medications are displayed in red on Rx Pad tab.
Uncoded medications can be added to Rx Pad through ‘Scan Bardcode’ option. Click ‘Scan Barcode’.
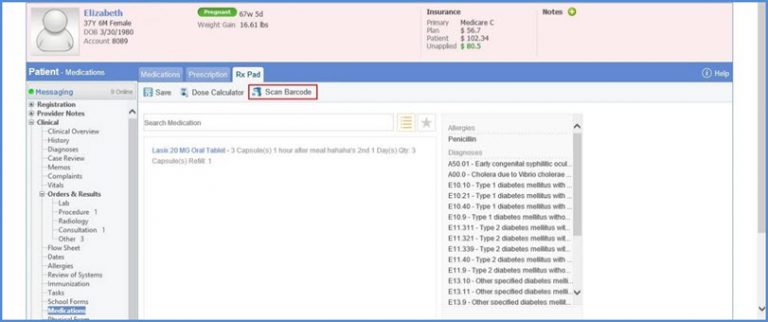
‘Scan Barcode’ popup is displayed on the screen.

In case, a medication is found matching the product code details from inventory, it is automatically populated on the Rx Pad.
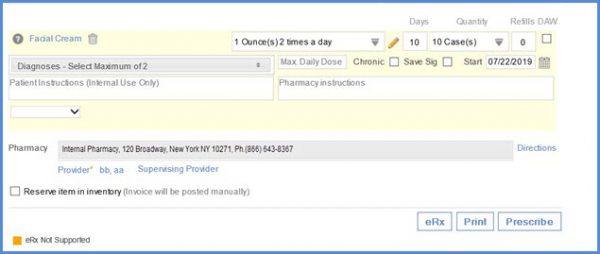
User can disable the ‘Select Lot’ option while prescribing a medicine. To see how to configure it, click here.
New providers joining a practice, who have not yet had their identity proofing done through CureMD, must undergo identity proofing before they can send e-prescription orders to pharmacies.
This ensures secure and reliable transmission of electronic prescriptions in accordance with regulations set forth for e-prescribing.
When a provider clicks on the ‘Prescribe’ button, the following prompt is displayed: ‘To begin e-prescribing, you must complete the identity verification process. To initiate the process, click Get Started’.
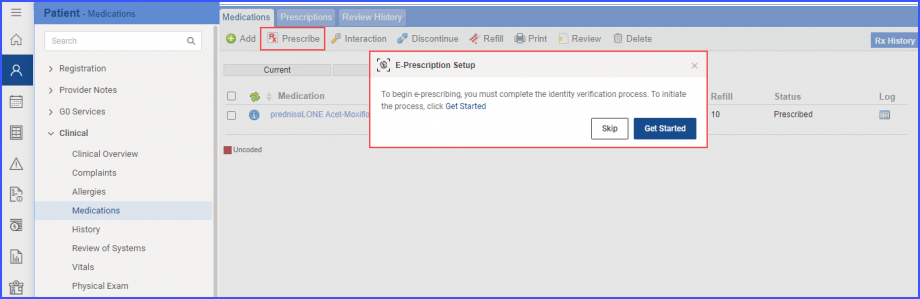
If the provider clicks on the ‘Skip’ button, the Rx Pad is displayed. However, the provider cannot send prescriptions to pharmacies.
To be able to send prescriptions, click on the ‘Get Started’ button.
This displays the E-Prescription Setup window. This window contains a list of requirements, titled ‘Guidelines’, for the completion of the identity verification process.
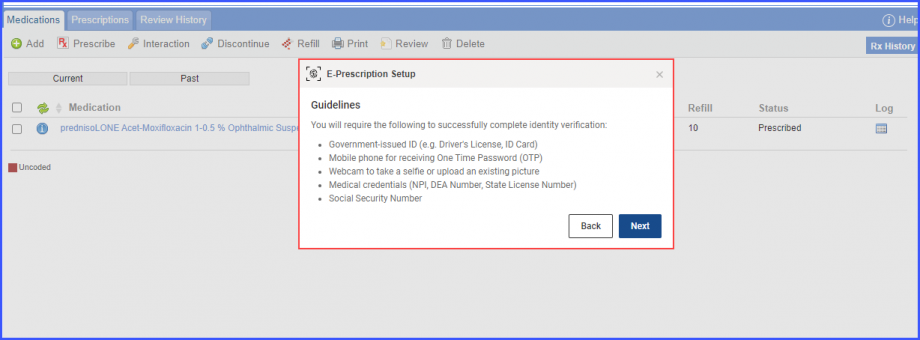
To proceed, click on the ‘Next’ button.
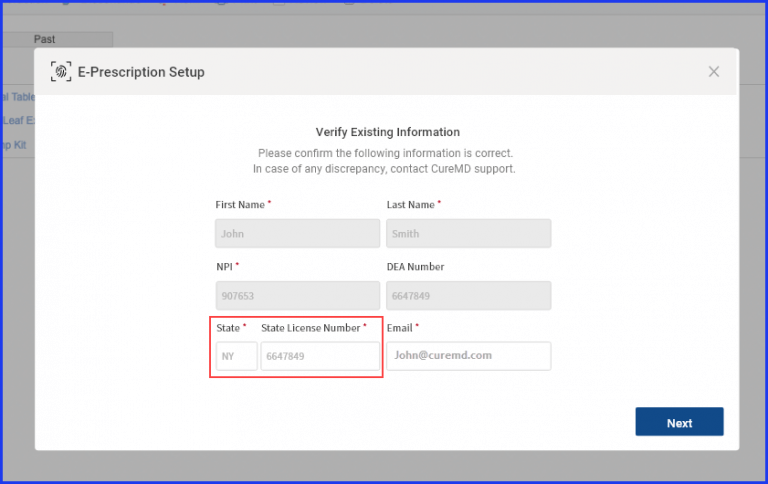
This displays the ‘Verify Existing Information’ section on the setup window. The First and Last Name, State License Number, NPI, and DEA Number fields are auto populated with existing information.
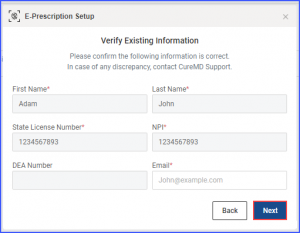
The provider cannot change any of this information manually.
To proceed, type the email address in the ‘Email’ field and click on the ‘Next’ button.
If the device cannot be verified, a pop-up is displayed which states ‘Unable to authenticate this device. Kindly use another browser or device to complete the E-Prescription.’
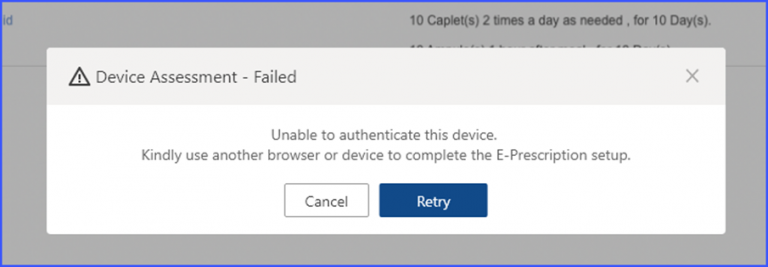
If the Device Assessment fails, click on the ‘Retry’ button to reinitiate the identity proofing process.
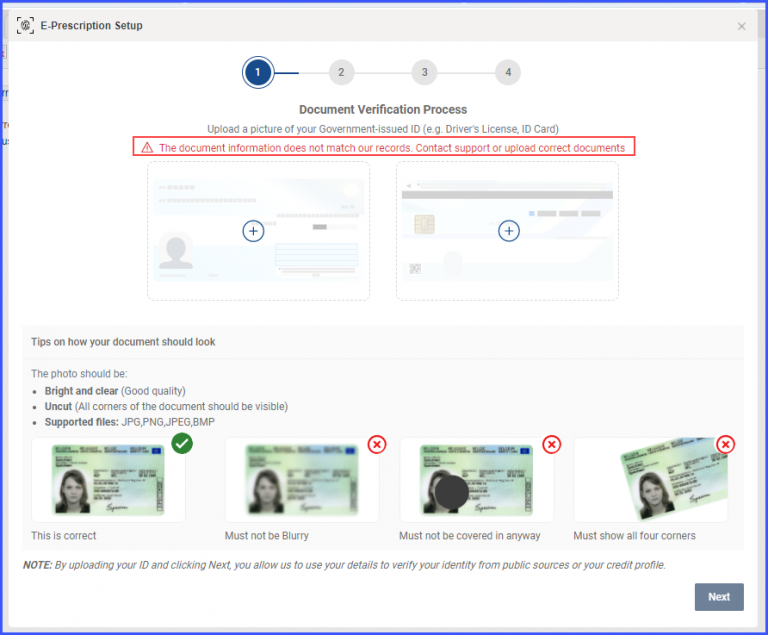
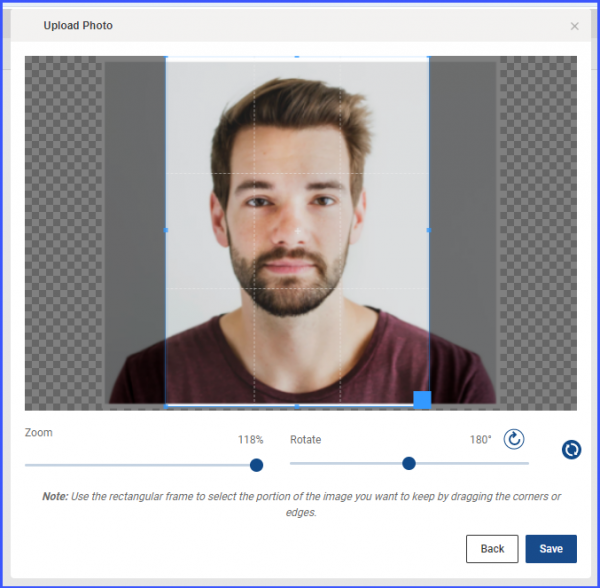
Once the device verification is successful, the provider is navigated to the document verification window. Here, the provider can upload either a ‘State issued ID’ or their ‘Driver’s’ license.
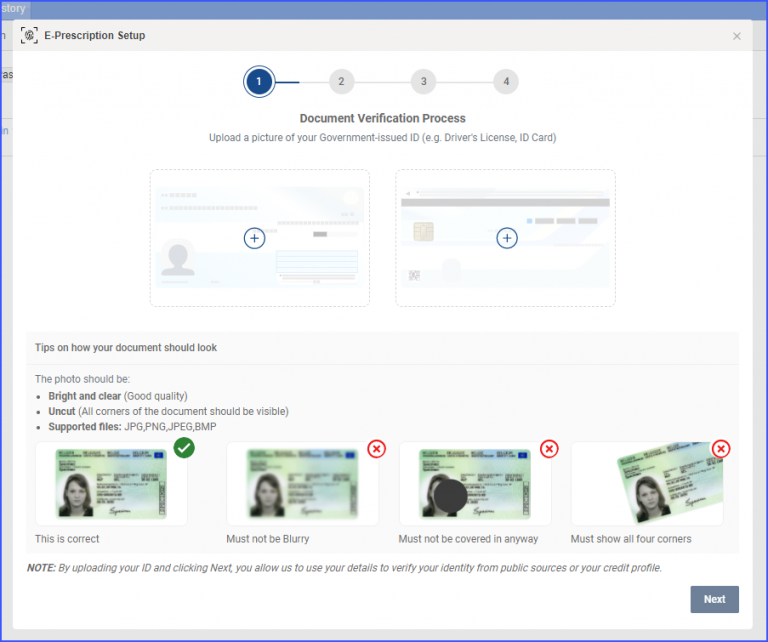
To upload documents, click on the ‘+’ icon on the image place holder.

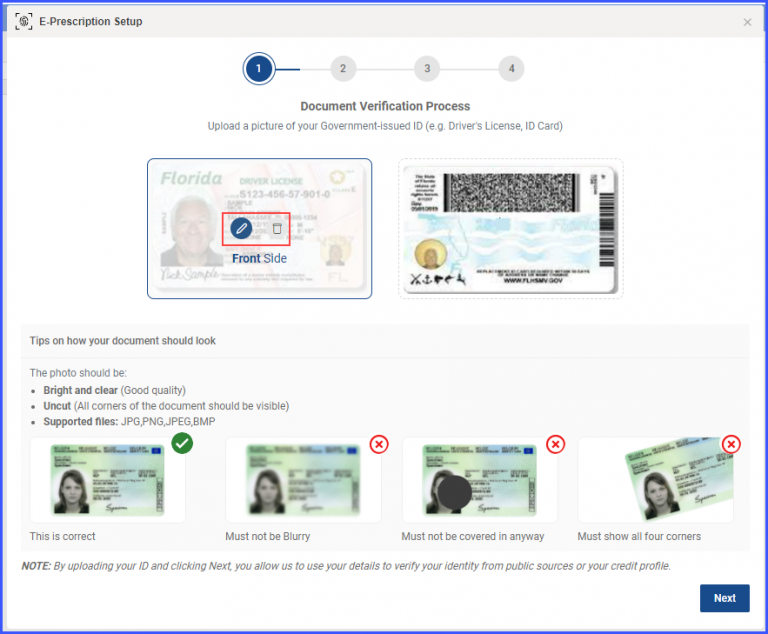
The uploaded document appears in the ‘Edit Document’ window. From this window the provider can
perform the following actions:
- Zoom
- Rotate
- Crop
- Change Document
- Save

If the document verification fails, the following message is displayed: ‘The document information does not match our records. Contact support or upload correct documents.’
Once the provider saves the document, a preview is shown.
The provider can edit or delete the uploaded document as well. The options of edit and delete appear when the provider hovers over the preview image.
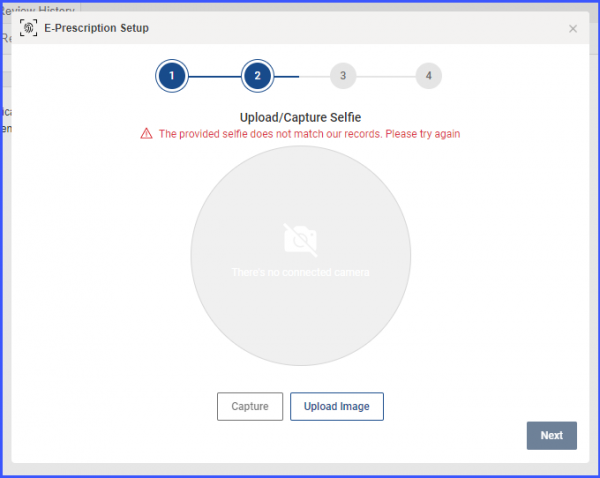
To proceed, click on the ‘Next’ button. This displays the ‘Upload/Capture Selfie’ window.
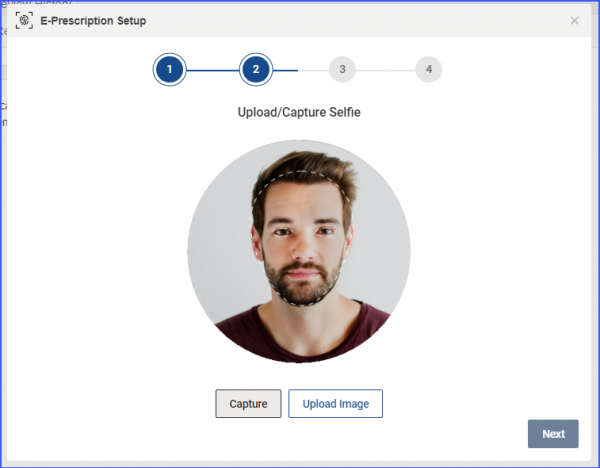
Once the provider uploads an image, it is displayed in an editor window.
If the selfie verification fails, the system displays an error message stating: ‘The provided selfie does not match our records. Please try again.’
Meanwhile, if the portrait is saved, it appears on the preview window.
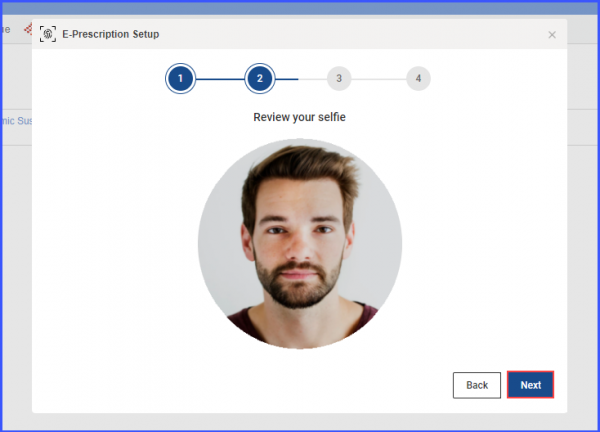
To proceed, click on the ‘Next’ button.
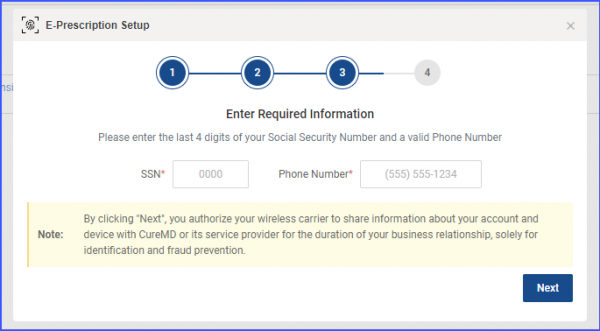
Once all the verification steps are complete, the provider is asked to enter the last 4 digits of their (Social Security Number) SSN and a valid phone number. After typing-in the details, click on the ‘Next’ button to receive an OTP.
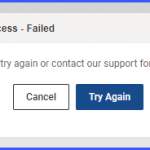
If the SSN cannot be verified, an error popup appears on the screen stating: ‘Invalid SSN. Please try again or contact our support for further assistance’.
Similarly, if the mobile number cannot be verified, an error popup appears on the screen stating: ‘Unfortunately, we couldn’t verify your mobile number. Try using a number that is registered on your name. If you need any help, please contact our support’.
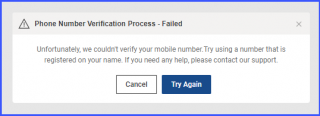
Click on the ‘Try Again’ button and add a valid SSN and Mobile Number to proceed.
To complete the verification process, input the 4-digit OTP that is received. Then, click on the ‘Verify’ button.
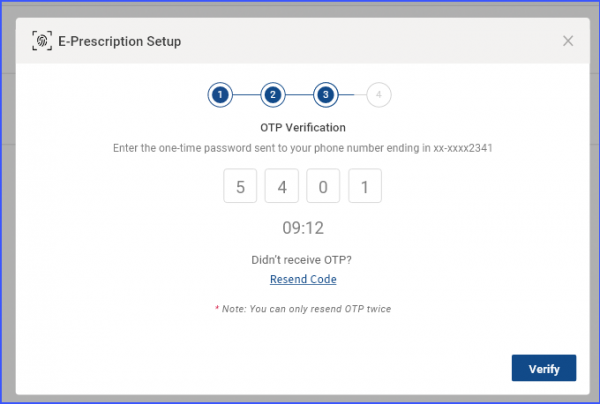
The provider is allowed to resend an OTP code twice only. Clicking on the ‘Resend Code’ hyperlink third time displays an error popup stating: ‘Oops! You’ve reached OTP limit. Please restart the identity proofing process.’
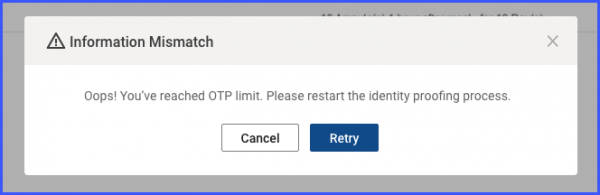
Click on the ‘Retry’ button to restart the identity proofing process.
Meanwhile, if the OTP verification is successful, the system presents a feedback tag confirming the verification. Then, the provider can proceed with e-prescribing.

A single provider is given a maximum of 10 attempts to complete the process of identity verification. If all of these attempts are exhausted, the system displays a feedback toaster indicating that the verification process cannot be restarted.

Similarly, the authorized users can electronically prescribe a medication as well on a provider’s behalf only if the necessary identity verification process has been completed by the provider.
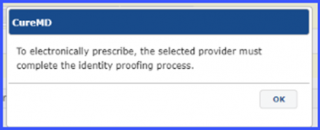
If the provider has not been verified, the following prompt is displayed: ‘To electronically prescribe, the selected provider must complete the identity proofing process.’
A similar enhancement has been made in the ‘Treatment Plan’ node. To view the change, click here.
New providers without an existing State License Number (SLN) in their profiles can add State and SLN information directly through E-prescription wizard.![]()
The ‘State License Number (SLN)’ field appears as editable, while a new field for ‘State’ has been added in the ‘E-Prescription Setup’ popup window.