How to Search for Appointments?
Follow the workflow mentioned above to land on the ‘Today’s Patient’ page.
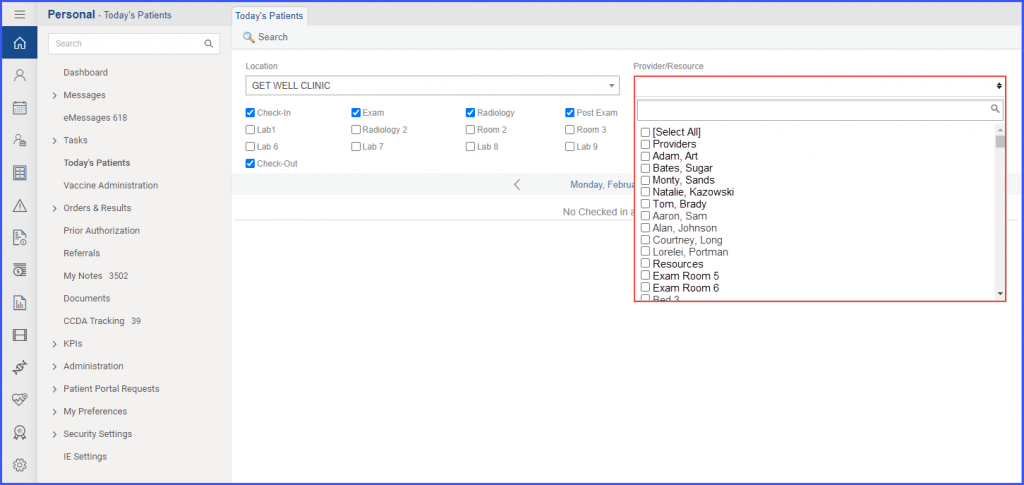
From the Location and Provider/Resource drop-down menu user can select the location and provider.

After that, enable the required checkboxes from the list of options under the dropdowns. Once all the required options are enabled, click ‘Search’ to view the appointments in the list appearing under the date. Users are required to enable at least one option from this list before searching.
Inactive providers and resources are displayed at the end of their respective lists in grey text.
This ensures that users can clearly distinguish inactive providers and resources from active ones.
When the user clicks on the ‘Provide/Resource’ dropdown, the system displays the inactive entities at the end of the list in grey text.
A similar enhancement has been made in the ‘Provider Note’ section of the ‘Patient’ module, click here to view.
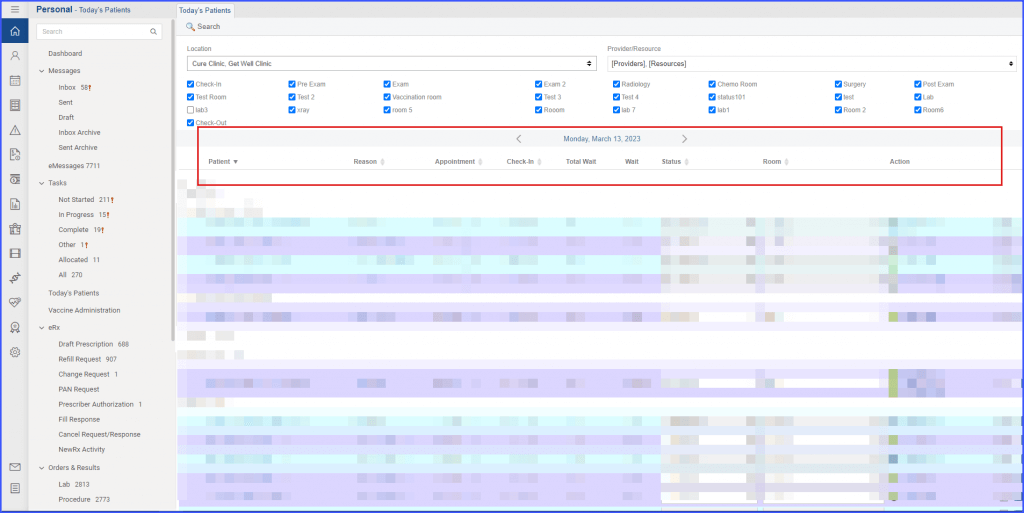
Appointments of multiple locations can be searched and viewed on Today’s patient page. ![]()
When the user clicks on the ‘Location’ dropdown, the system displays checkboxes with each location in the popup list.
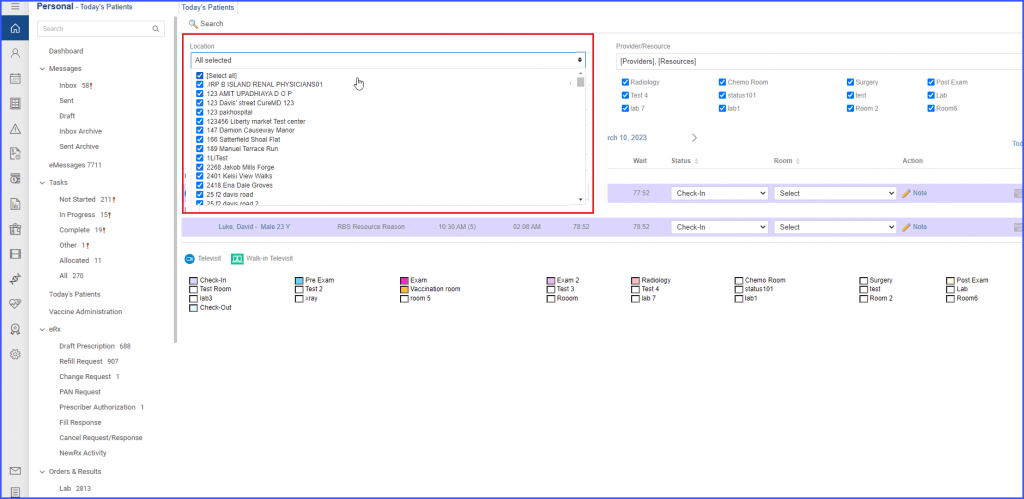
Users can select one or multiple locations from the list to view appointments in the listing.
After selecting the locations and providers/resources, click on the ‘Search’ tab. The system segregates and displays all appointments under their respective locations.
By default, all locations are selected under ‘Location’ dropdown.
