How to Add Vaccine and Lot From Settings?
Vaccine:
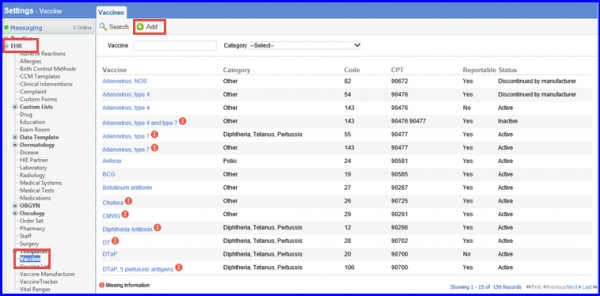
Follow the workflow above to land on the ‘Vaccine’ page.
All the vaccines existing in the library are displayed here.
Click ‘+Add’ button.

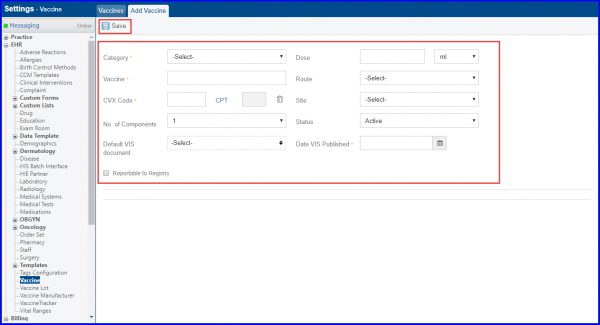
Doing so displays the ‘Add Vaccine’ screen.
Here, users can provide following details of a vaccine, which are auto populated when a vaccine is administered:
- Category
- Dose
- Vaccine
- Route
- CVX Code
- CPT
- Site
- of Components
- Status
- VIS Documentation
- Date VIS Published and Reportable to Registry
When Done, click ‘Save’ button.

Workflow: Settings > EHR > Vaccine Lot
Vaccine Lot:
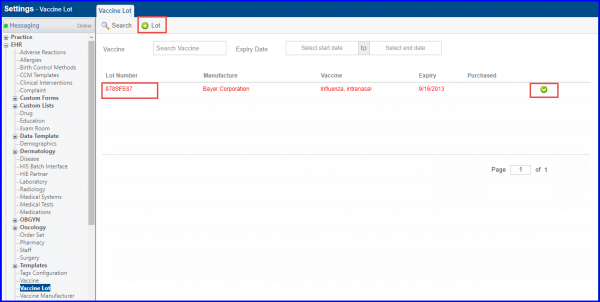
Follow the workflow above to land on the ‘Vaccine Lot’ screen.
All the vaccine lots existing in the library are displayed here.
The ![]() icon against records infers that the lot is in active state.
icon against records infers that the lot is in active state.
Users can edit a lot by clicking on the lot number.
To add a lot, click ‘+Lot’ button.

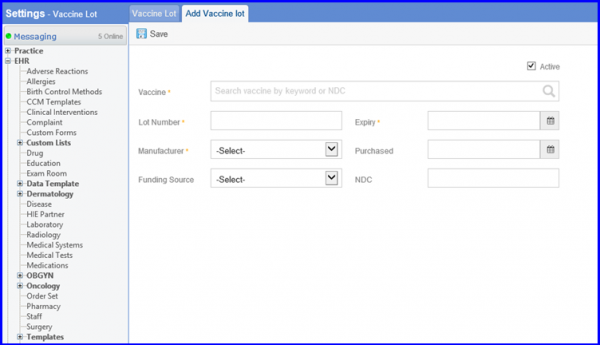
On ‘Add Vaccine Lot’ screen, users can enter following details:
- Vaccine
- Lot Number
- Expiry
- Manufacturer
- Purchased
- Funding Source
- NDC
When done, click ‘Save’.

