How to Add Insurance?
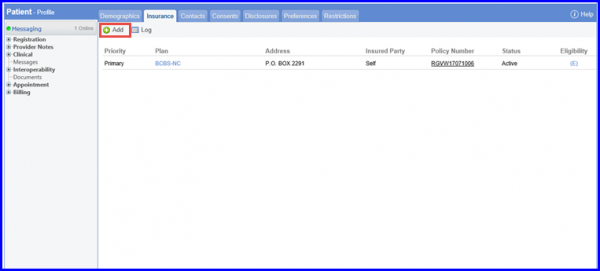
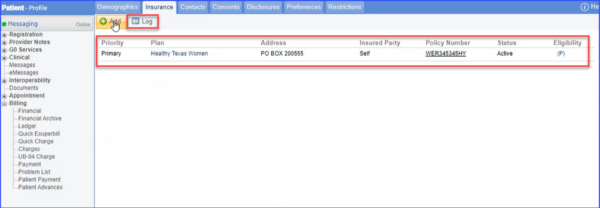
In order to add an insurance, follow the workflow above and click on Add.
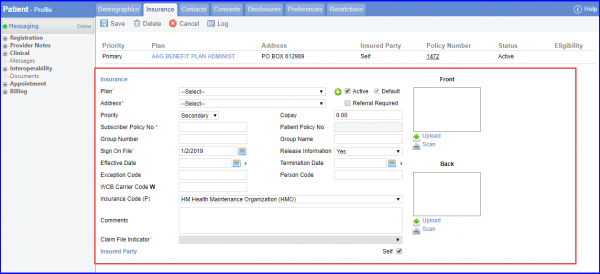
Fill the details for the insurance in given fields.
If the Claim Filling Indicator value is updated from the setting’s ‘Plan’ page, the updated value is displayed in the ‘Insurance’ tab.
The previous value is displayed in a grayed-out text in the dropdown.

For multiple possible values, the dropdown shows all the options. The value selected from settings is highlighted.
User can select another value for the Claim Filing Indicator from the same dropdown.
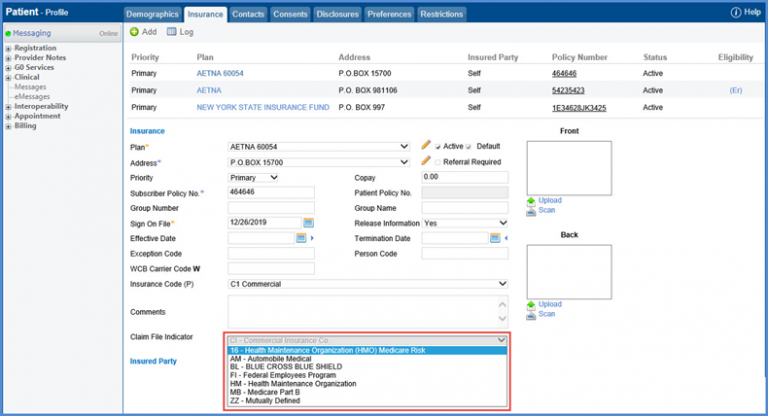
If user selects another option from this dropdown, that value is displayed for the Claim Filing Indicator.
If user selects previous (grayed out) value, a pop-up prompts the user to choose a valid option.
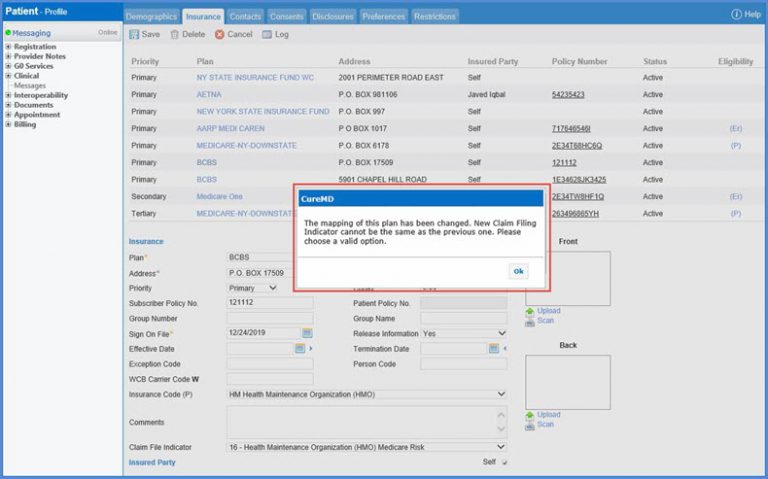
To set Claim Filing Indicator, please click here.
Practice Administrator can allow/restrict a user from adding or editing a patient’s insurance.
To view how to change permissions for a practice user, click here.
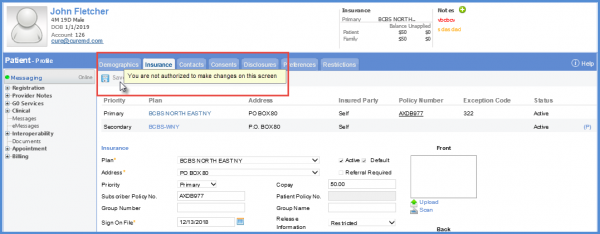
If a user is restricted from adding or editing a patient’s insurance, the ‘Insurance’ tab is disabled for that user and a tooltip is displayed with a message.
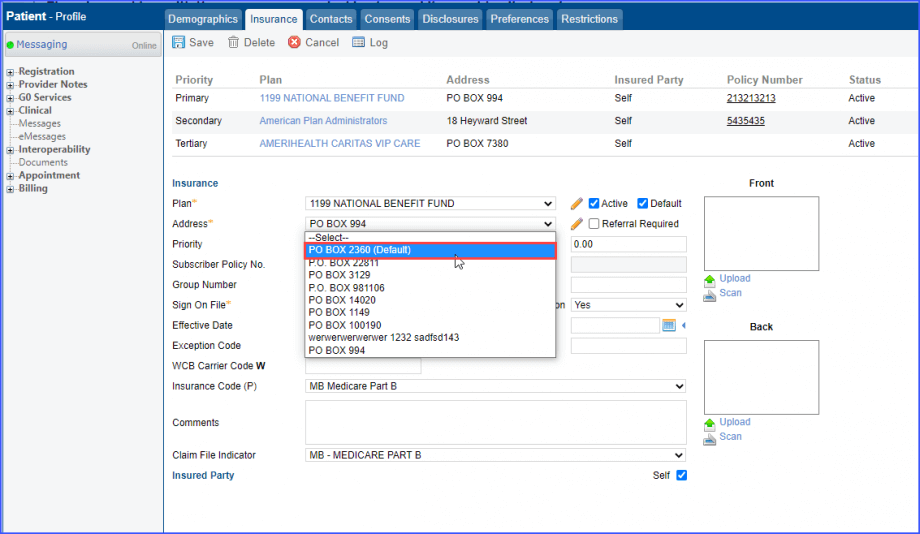
Users have the option to select a plan address as the default billing address for the claims.
This ensures that insurance claims are sent to the accurate plan address.
When the user clicks on the ‘Address’ dropdown, the system displays a ‘Default’ text label next to the address that is marked as default in the insurance plan settings.
If any change has been made in the insurance status at client level, the TestSmarter API updates the status accordingly at 10g plan level, and vice versa.![]()
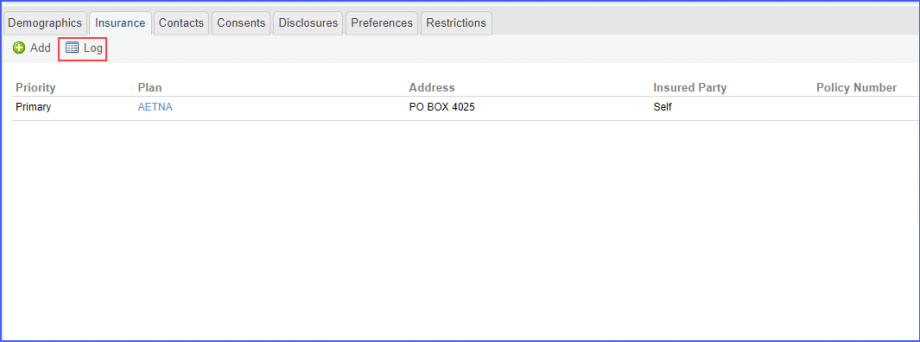
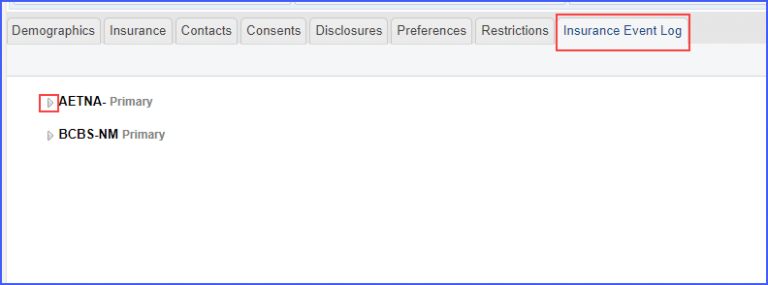
For every status change, a log is created in the ‘Insurance Event Log’ page. To access the event log screen, click on the log icon next to ‘Add’ button on ‘Insurance’ page.
After navigating to the event log page, expand the log details of an insurance by clicking on the designated carrot button.
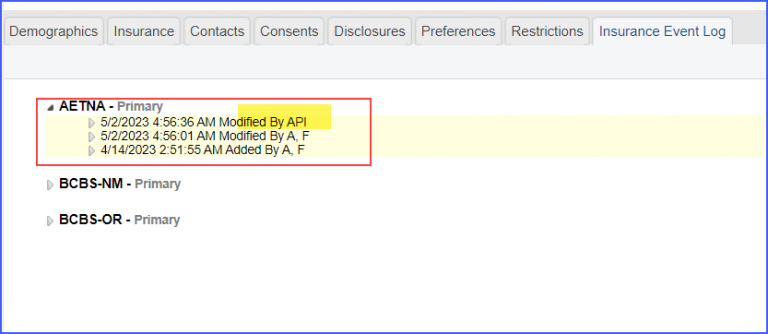
The log of the updates made through API are displayed with the text ‘Modified BY API’.
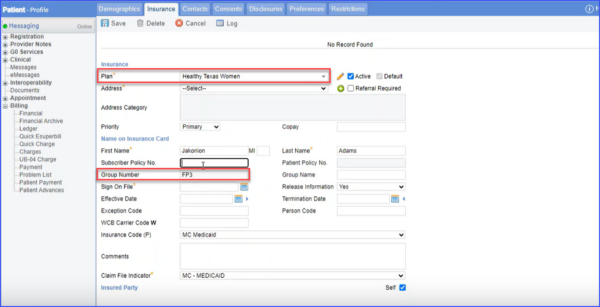
When adding or editing a patient’s demographics, the user selects the plan name from the insurance section in Patient Module.
If the user selects the plan name “Healthy Texas Women,” the ‘group number’ field is automatically populated with ‘FP3’ and is greyed out, making it non-editable. This prevents the user from accidentally modifying the group number.
If a different plan name is selected, the group number field remains editable. The other fields related to the insurance plan, such as policy number, remain fully editable regardless of the selected plan.
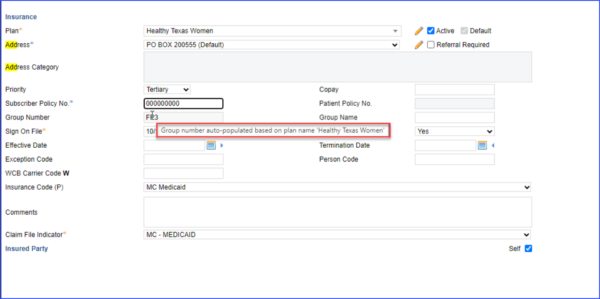
Additionally, the system provides a tooltip next to the group number field informing the user that the group number is auto-populated based on the selected plan name.
Any changes made to the plan name or interactions with the group number field are logged in the audit trail for compliance purposes.
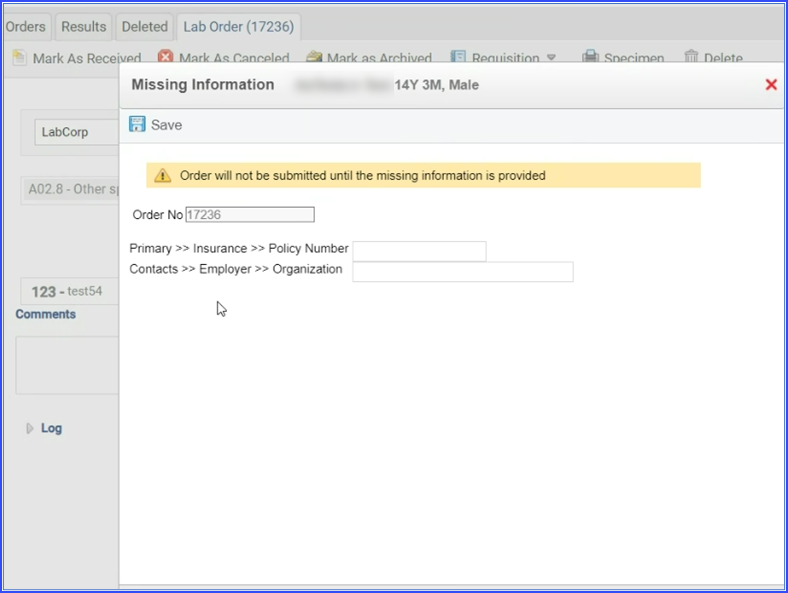
When adding insurance details in the Patient Demographics, if the Claim File Indicator is set to “Worker’s Compensation” and the billing dropdown in the LabCorp lab order is set to “Insurance,” the system verifies the presence of employer information. ![]()
If the employer organization name is missing when signing the lab order, the application prompts the user to enter this information before proceeding. The user can then provide the employer details and continue to submit the order. This feature supports the compliance needs for Worker’s Compensation claims.
