How to add Radiology Order?
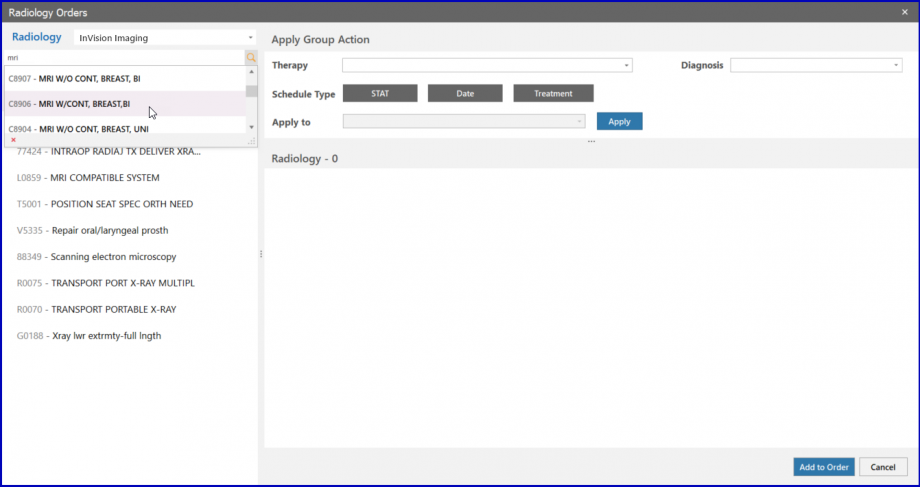
The user can make, edit or delete radiology orders. Click on the ‘Rad Order’ button in the Navigation bar to open the ‘Radiology Orders’ window.
The user has the option to search for a specific radiology test or select one from the radiology test listing to order it.
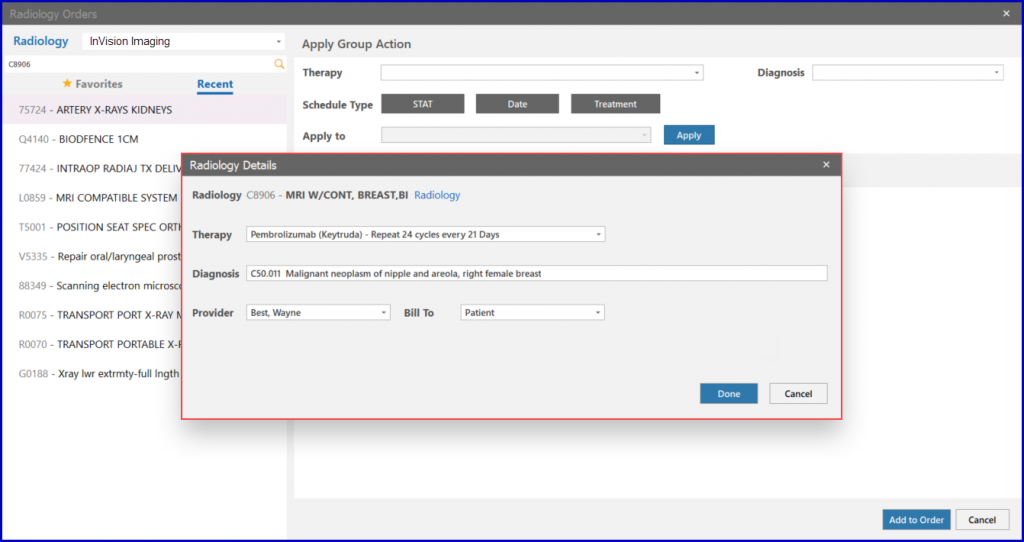
Add a lab from the ‘Radiology’ dropdown and search for the required order. Select the required radiology order to access the ‘Radiology Details’ window.
Users have to fill necessary information about ‘Therapy’, ‘Diagnosis’, ‘provider’ and ‘Bill to’ on radiology details window. After adding a schedule for the radiology order, click on ‘Add to Order’ button.
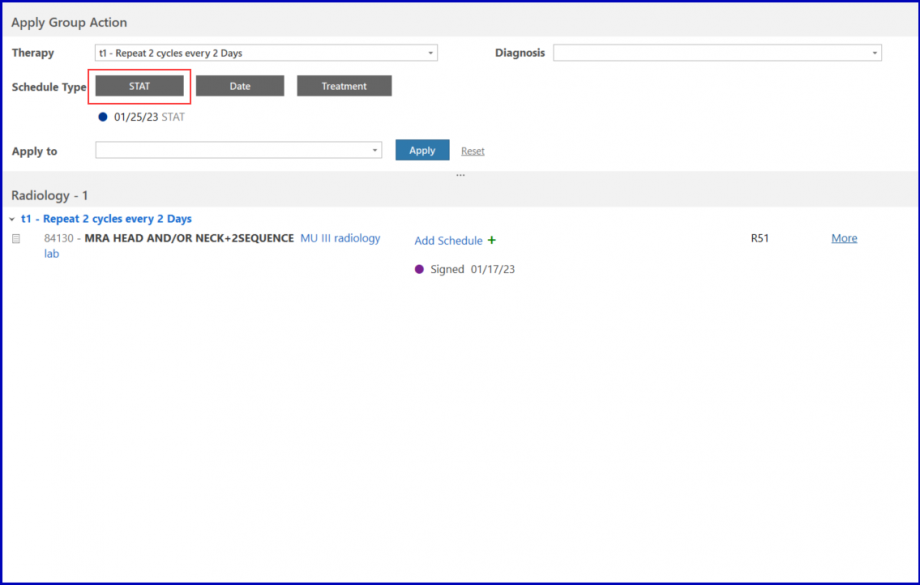
Multiple Lab Orders can be placed at once by applying schedule in a group action.
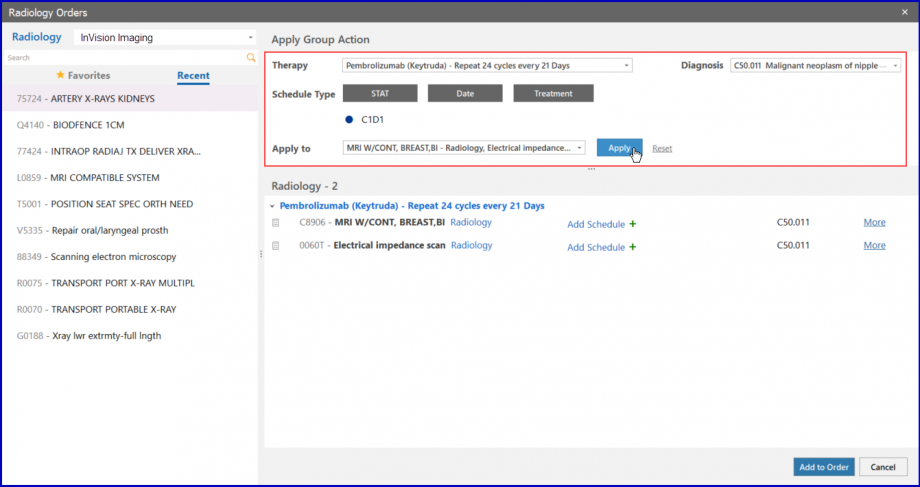
Click the ‘STAT’ button to place the order immediately.
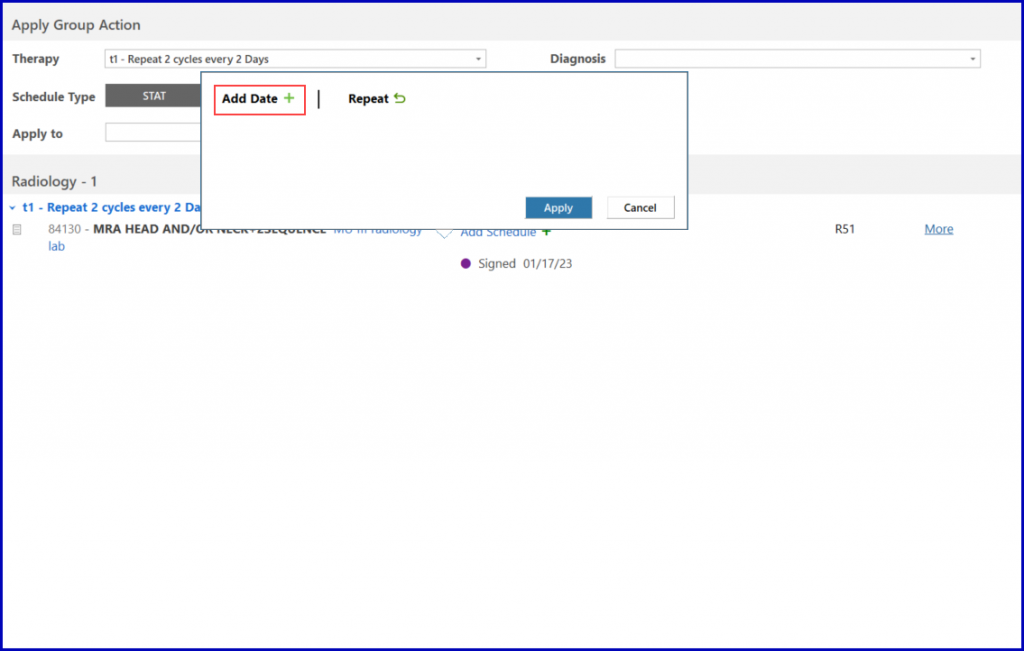
Click the ‘Date’ button to place the order after selecting a date. Click on the ‘Add Date’ button.

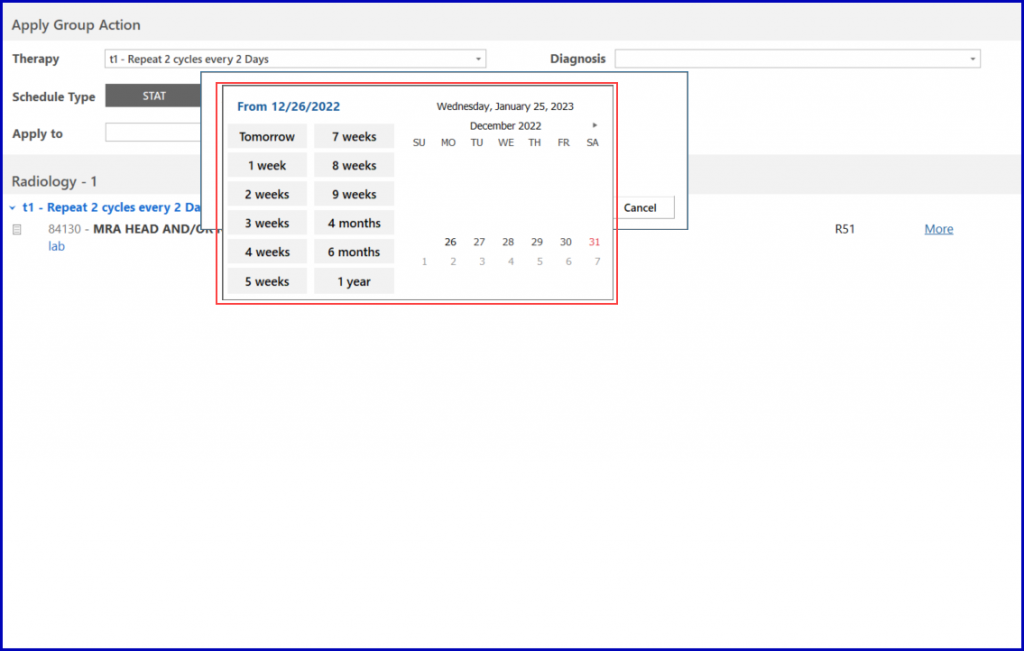
A tile is displayed where the user can either select a date that comes after a period in the ‘From now’ list, or select a date from the Calendar.
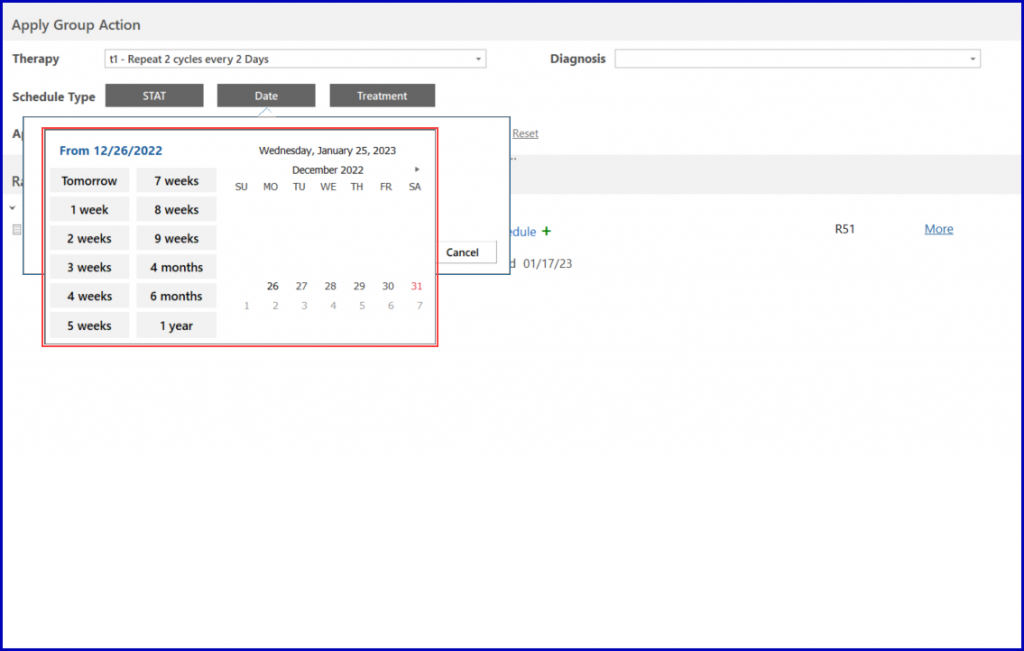
The user can also click on the ‘Repeat’ button to specify a Start date from a ‘From Now’ list or a Calendar. In the ‘Repeat Every’ dropdown, select a number and specify if this number corresponds to days, weeks or months. In the ‘For’ dropdown, specify for how long the order is to be repeated by selecting a number and a corresponding unit of time.
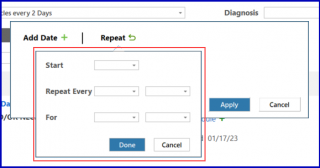
Click the ‘Apply’ button to confirm the selected date.
Alternatively, click the ‘Treatment’ button to place the order after selecting a therapy Cycle.
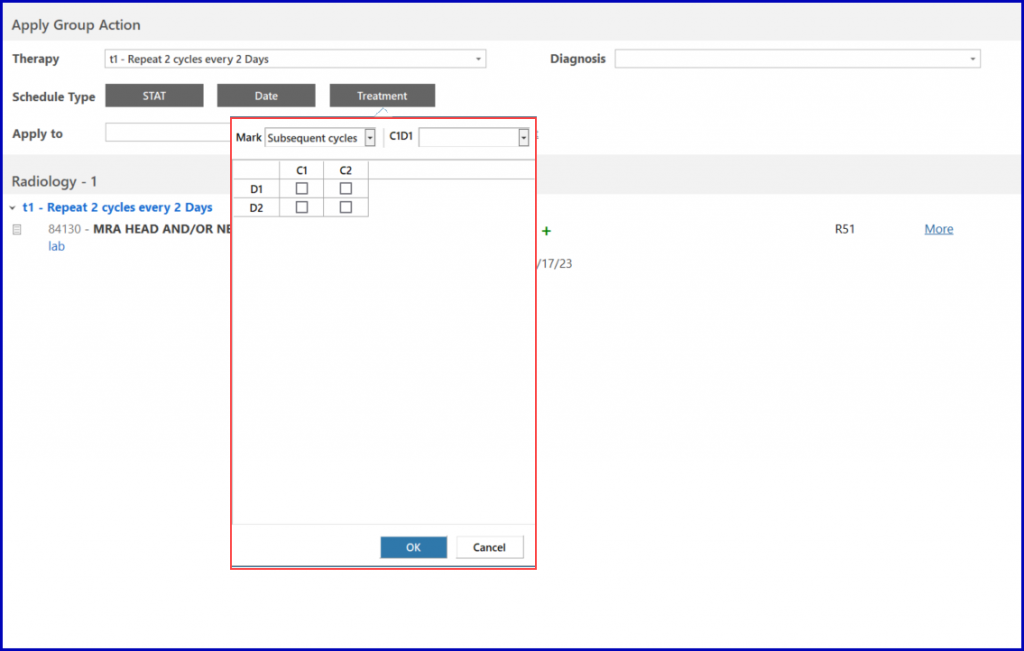
Mark the checkboxes for the cycles selected. Click on the ‘Ok’ button to proceed.
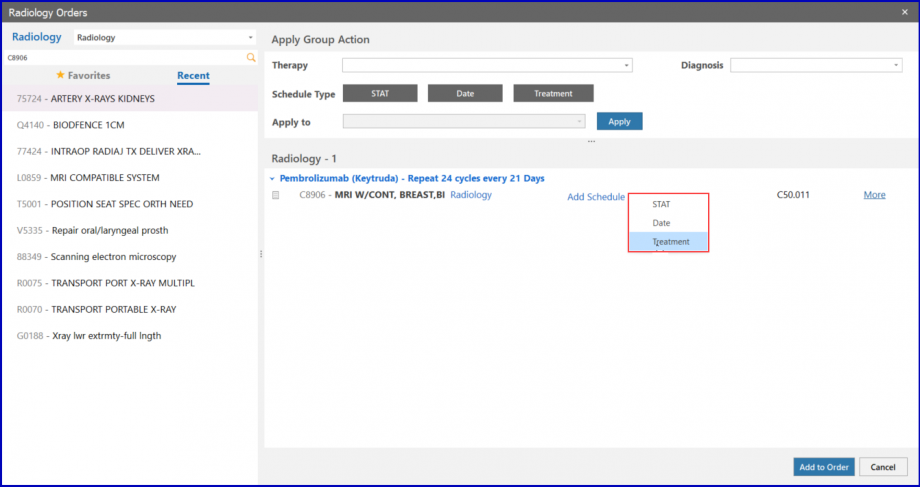
To schedule a radiology order individually, click on the ‘Add Schedule’ hyperlink and select one of the following options:
- STAT
- Date
- Treatment
Click the ‘STAT’ button to place the order immediately.
Click the ‘Date’ button to place the order after selecting a date. Click on the ‘Add Date’ button.
A tile is displayed where the user can either select a date that comes after a period in the ‘From now’ list, or select a date from the Calendar.
The user can also click on the ‘Repeat’ button to specify a Start date from a ‘From Now’ list or a Calendar. In the ‘Repeat Every’ dropdown, select a number and specify if this number corresponds to days, weeks or months. In the ‘For’ dropdown, specify for how long the order is to be repeated by selecting a number and a corresponding unit of time.

Specify a date and click the ‘Apply’ button.
Click the ‘Treatment’ button to place the order after selecting a therapy Cycle.
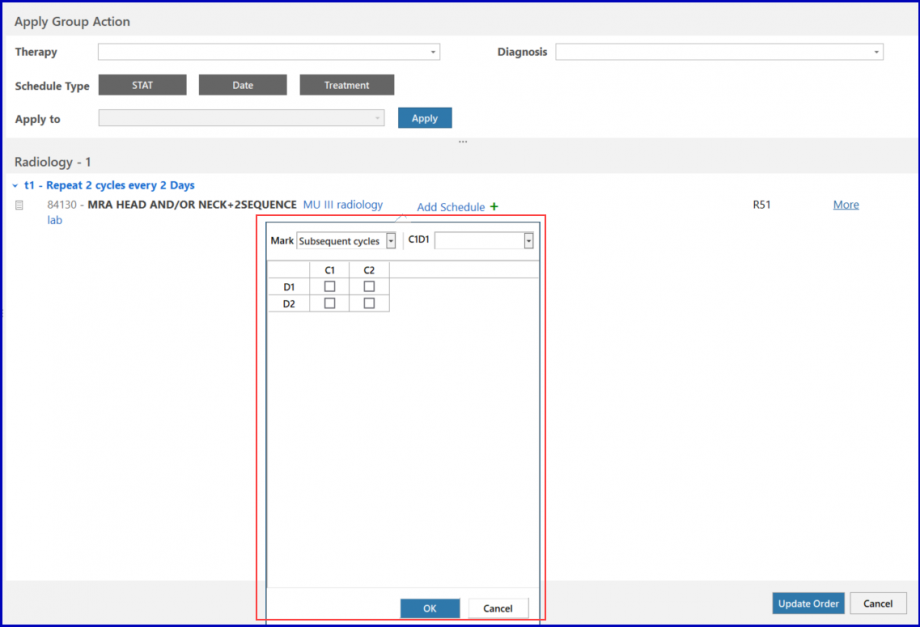
Select therapy cycles and click on the ‘Ok’ button to proceed.
Users can edit radiology orders that are in the draft state. The ‘schedule’, ‘location’, ‘diagnosis’, ‘provider’ and ‘bill to’ information in a radiology order can be edited. The user cannot edit ‘Therapy’ information.
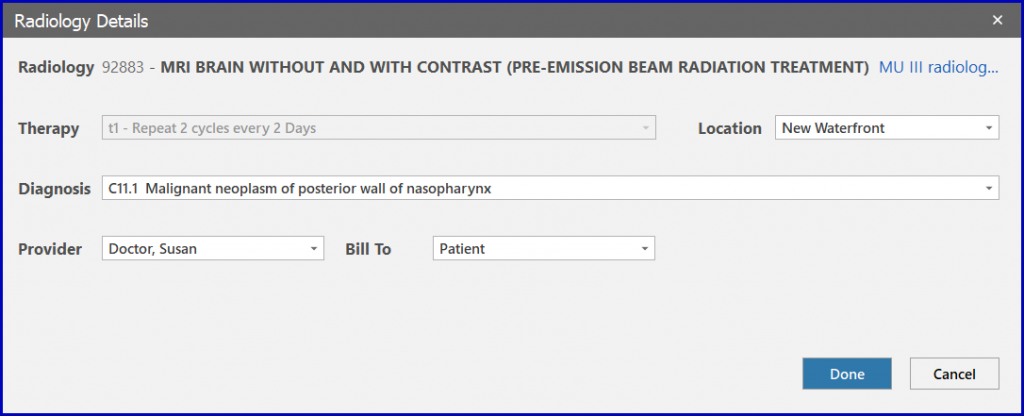
Click the ‘Done’ button to update the radiology order details.
Users have the ability to delete drafts and signed radiology orders if a signed result is not acknowledged yet.
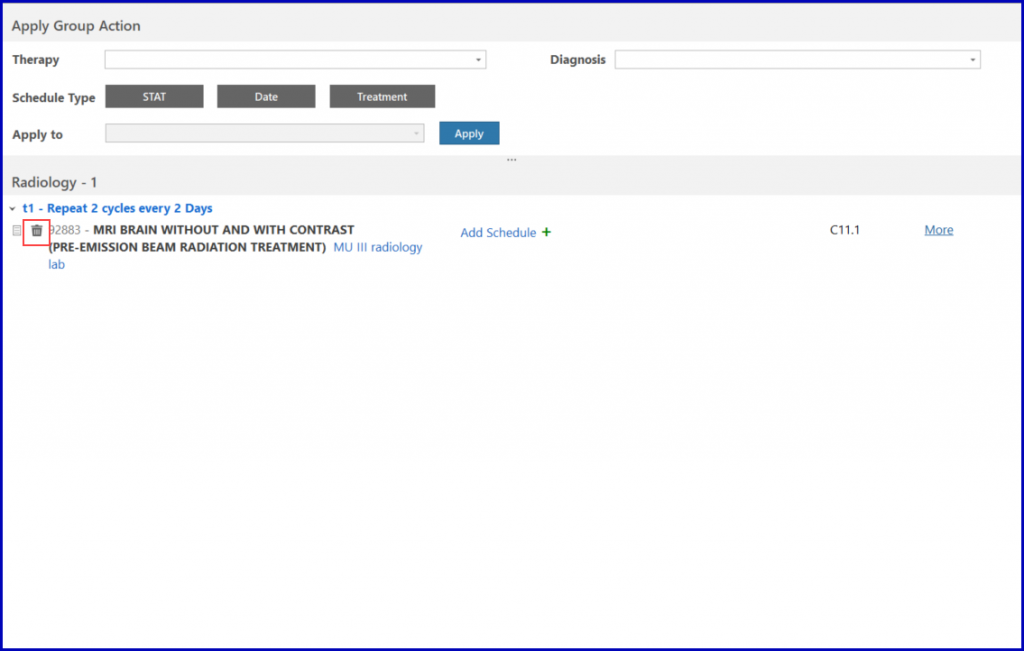
Click on the ‘Delete’ icon to delete a radiology order. This displays a confirmation window.

Click the ‘Yes’ button to delete the order.
User are not able to delete a radiology order if
- The radiology order has been consumed
- A note associated with radiology activity exists
- The radiology visit has been charged
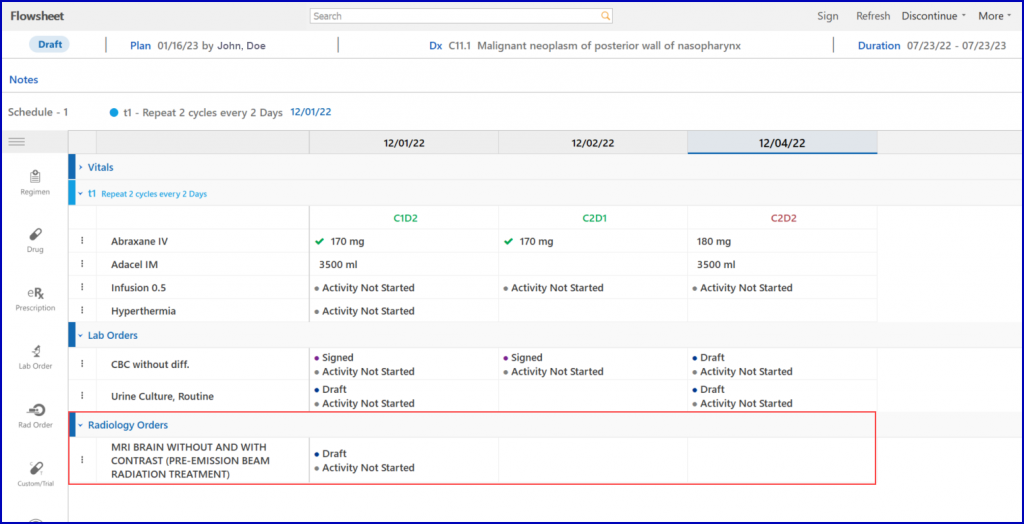
Whenever users add radiology orders to a patient’s treatment, an automated activity to perform ordered radiology test is created.
For the radiology order listed as ‘Draft’ on the flowsheet, click on the associated cell under the required date. This allows the user to associate notes and comments with the activity.