How to Add Drugs to a Regimen?
Users can add drugs via the Regimen Library as well. Click on the ‘Drugs’ button to access the ‘drugs’ window.

The user can add and edit details for drugs here.
Select a drug from the listing or search for a drug from the search bar at the top left corner. Once a drug is selected, the information fields for that drug appear in the right pane.

Add the details in the required fields and click the ‘Done’ button to add the drug to the patients’ treatment.
To replace a drug, click on the ‘Replace’ button that appears after clicking on the three-dotted icon next to the ordered drug.

A popup appears with alternatives listed for the selected drug(s).

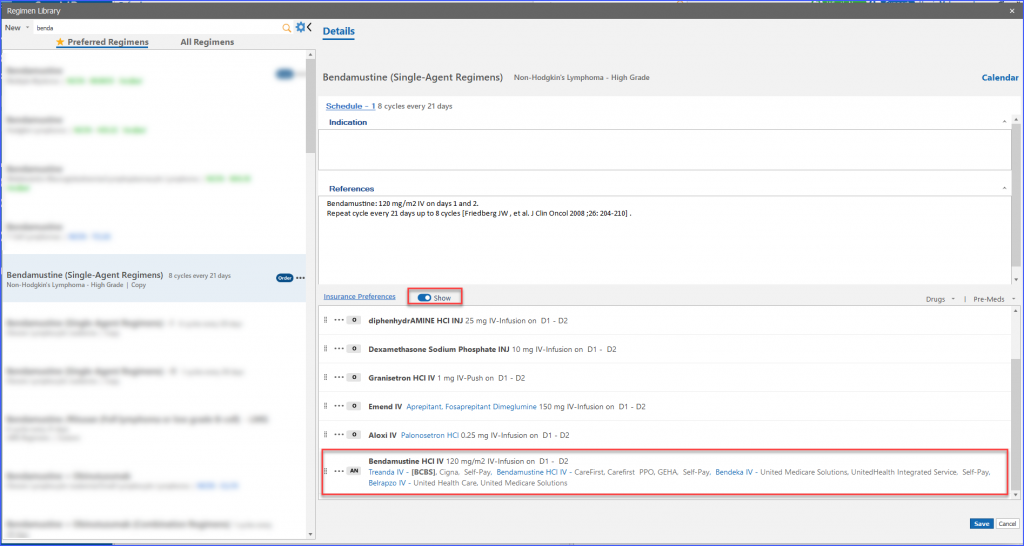
For any regimen that includes a drug with insurance preference alternates, users can view these alternatives by toggling the ‘Show’ button. This feature is available both when creating a custom regimen and when applying a regimen to a patient’s chemotherapy plan.![]()
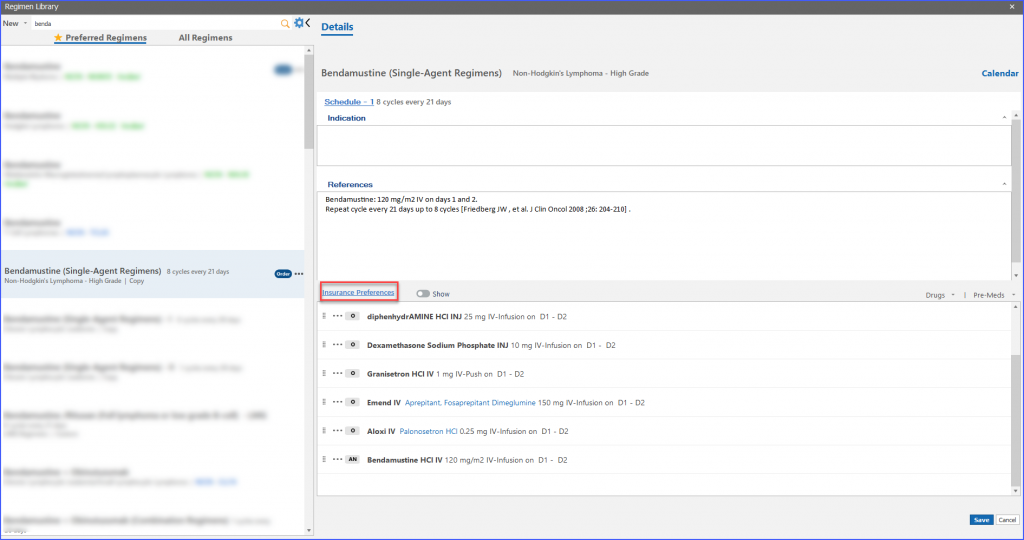
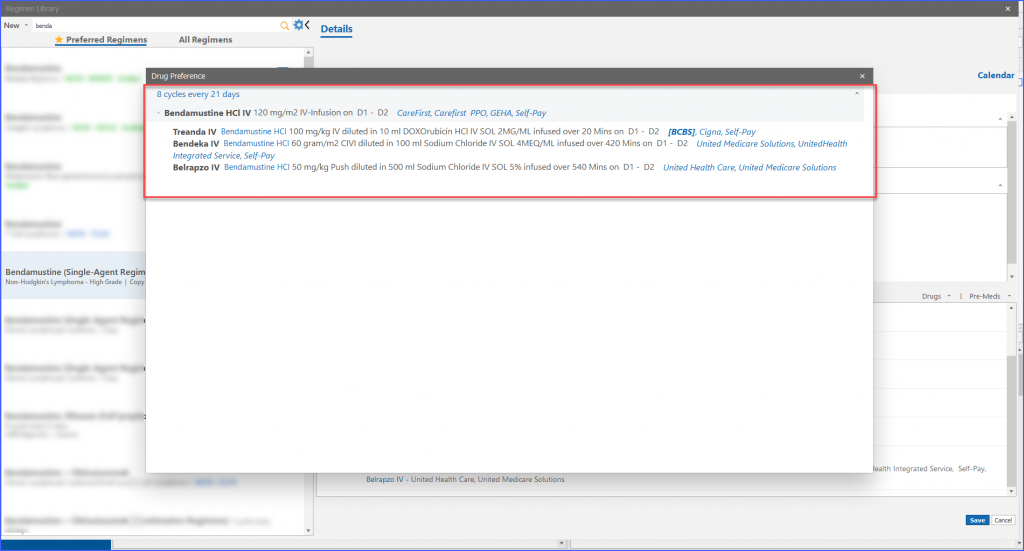
Furthermore, detailed views of insurance preferences are accessible via the ‘Insurance Preferences’ hyperlink, providing information about drug alternatives and insurance coverage.
Moreover, when applying a regimen to a patient, the system prompts for replacement options based on insurance preferences. Drugs within the regimen are tagged as ‘Planned’, while insurance preferred alternatives are marked as ‘Preferred by [Insurance name]’.
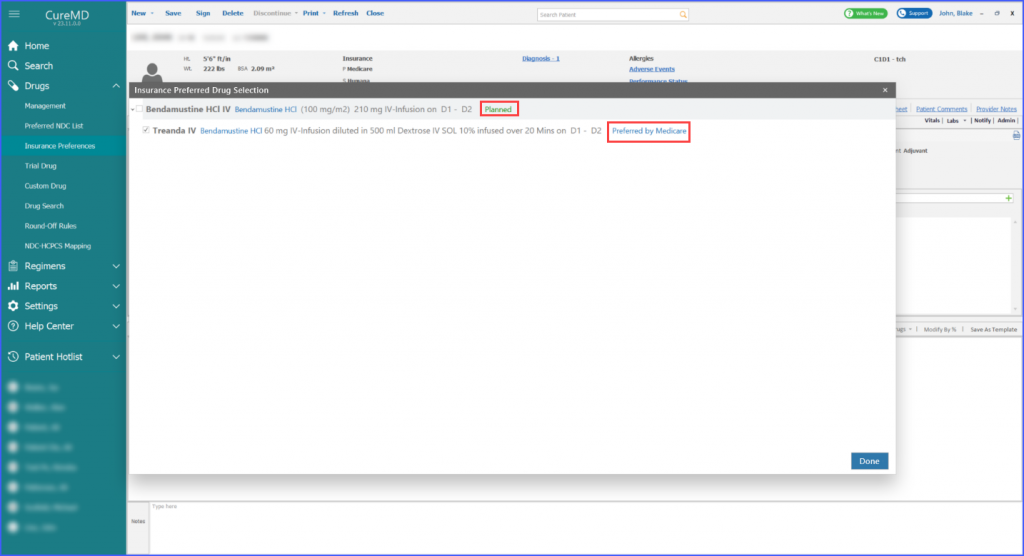
Replaced drugs receive an ‘Insurance Preferred’ tag through the insurance preferences workflow, which is then also reflected on the chemo plan report and the patient’s flowsheet.
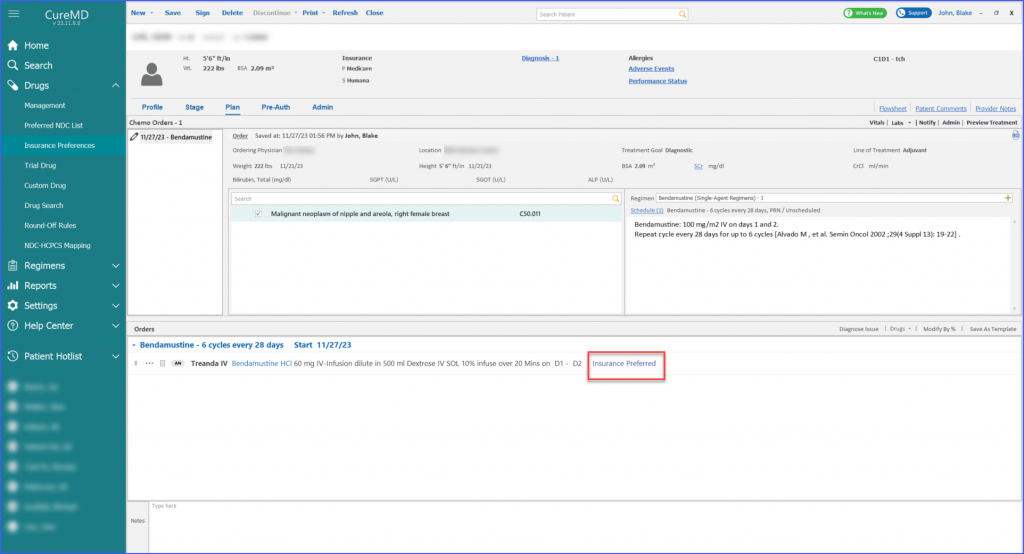
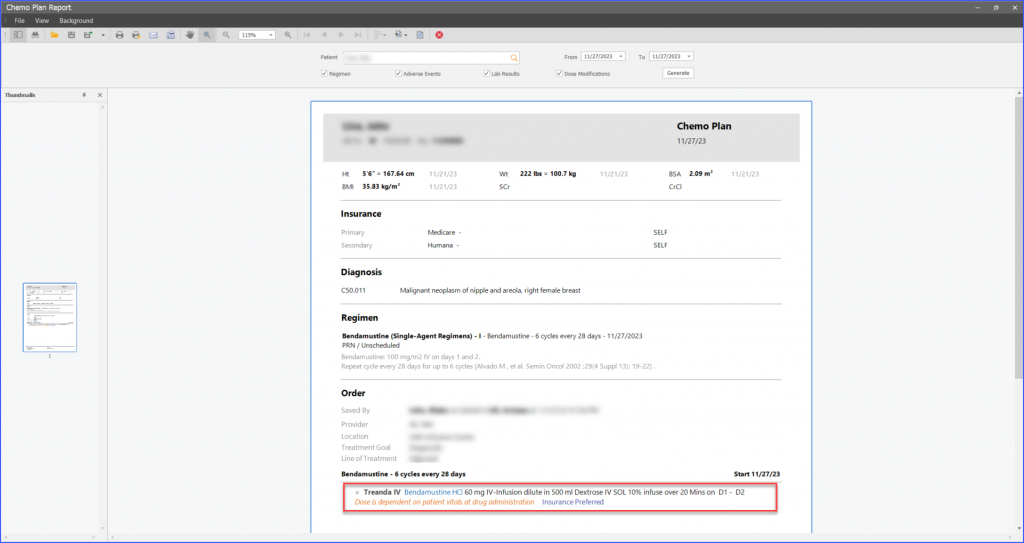
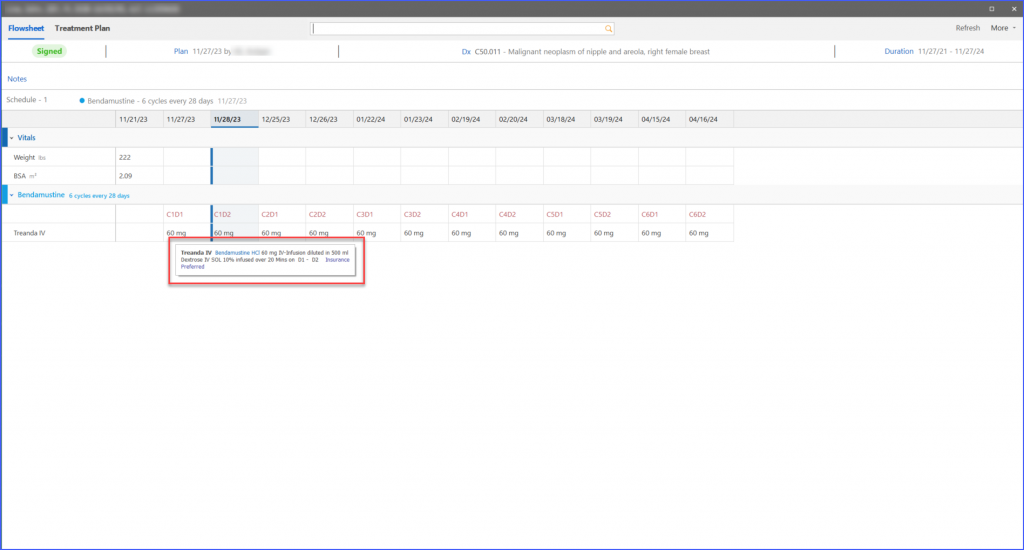
This tagging helps maintain clear documentation, although it’s important to note that these tags do not carry over to subsequent plans, ensuring each plan’s accuracy and relevance to current insurance preferences.
