How to Add a Vaccine Administration Code?
The vaccine administration codes are defined by specifying Plan, Primary CPT code, Additional CPT code, Age, and the route of administration.
Follow the above mentioned workflow to land on ‘Vaccines Administration Codes’ screen.
Click ‘+ Add’ button to add a Vaccine Administration Code (VAC).
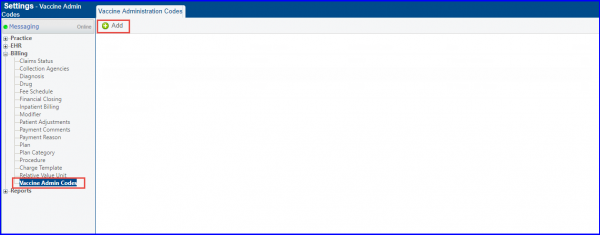
Doing so, takes the user to ‘Add’ VAC page.
Here, specify Plan, Primary CPT code, Additional CPT code, age range, route of the VAC, and select ‘Group By’ option.
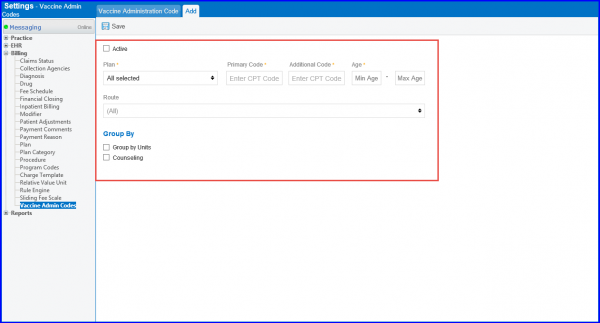
User can add multiple insurance plans to single set of VACs.
From the multi-select ‘Plan’ drop-down, user can search and select multiple plans by marking their respective check boxes. User can also select all of the plans by marking ‘Select all’ checkbox.
User can add Vaccine Administration Codes (VACs) for self-pay (uninsured) patients too.
For self-pay (uninsured) patients, user has to mark ‘None’ checkbox.
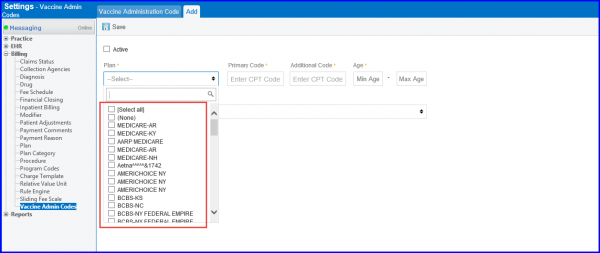
Both, ‘Route’ and ‘Plan’ displays names up to 3 selected options, respectively.
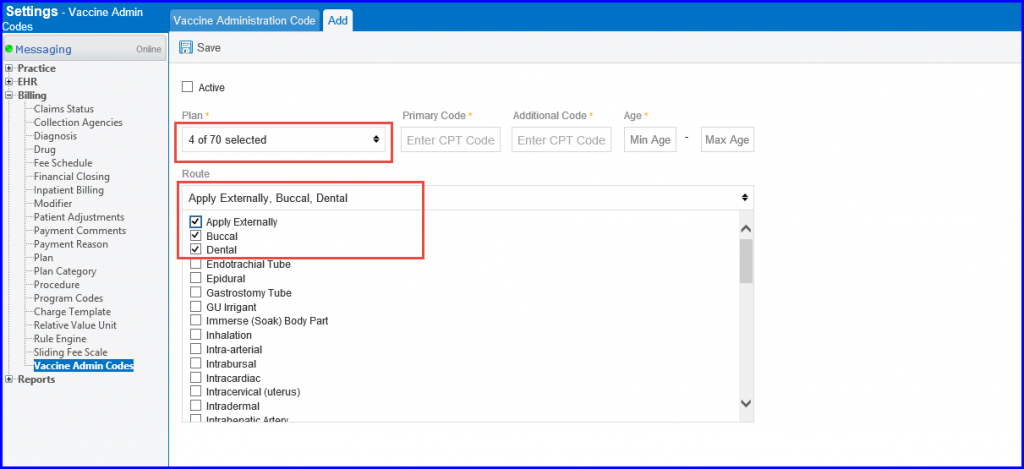
After providing all the required information, click ‘Save’ button. Saved VAC gets added to the library.
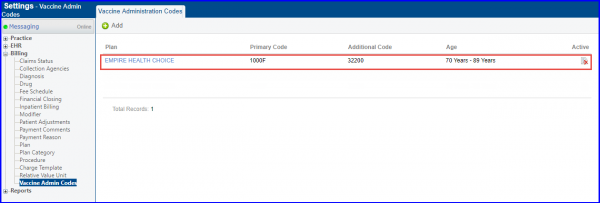
Added set of VAC is displayed on the ‘Vaccine Administration Codes’ page.
User can edit the added VAC by clicking its Plan name.
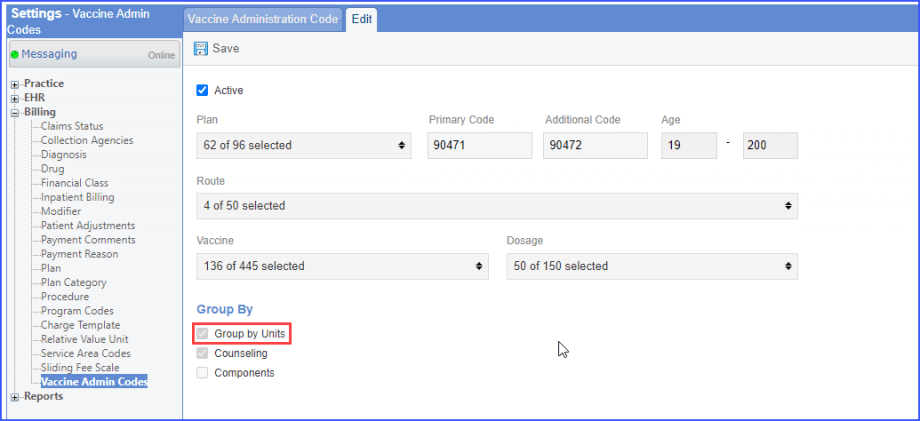
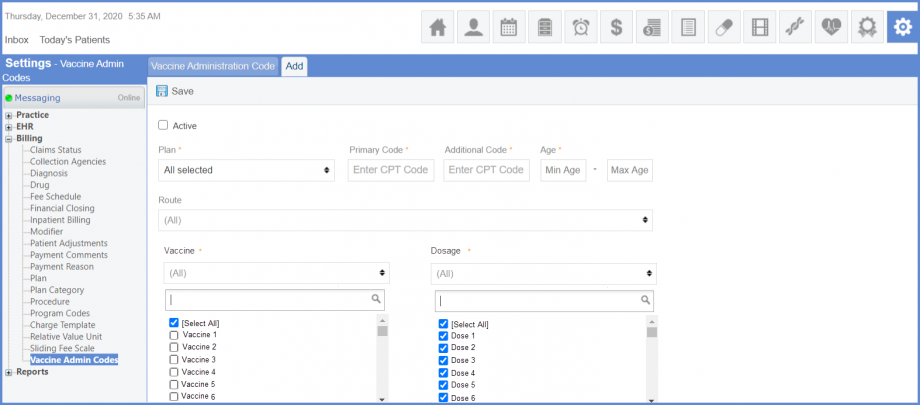
Users can also select a Vaccine and a Dosage while adding a Vaccine Administration Code.
Select a Vaccine from the mandatory Vaccine drop down. Then proceed to select a Dosage from the mandatory Dosage drop down.
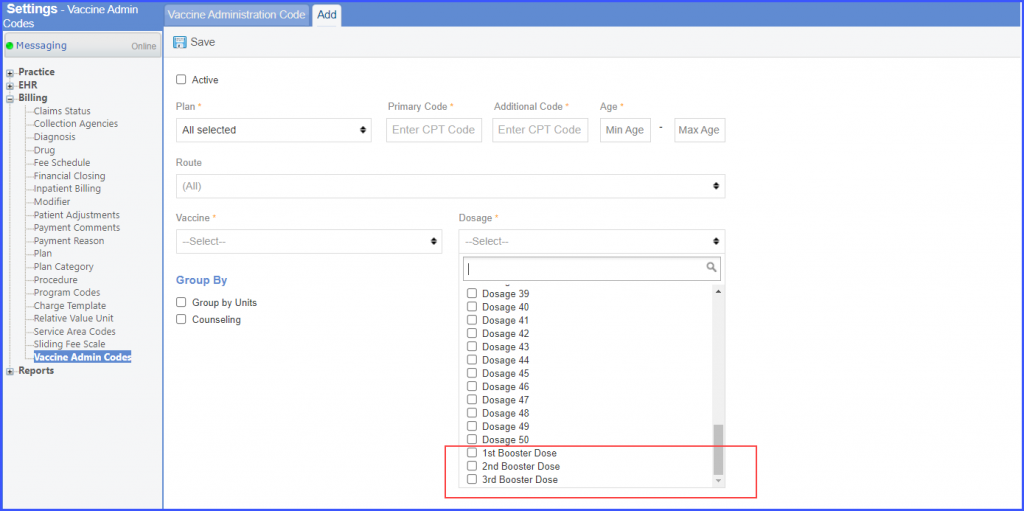
Users can specify vaccine administration codes for booster doses.
This ensures that each booster dose has a specific vaccine administration code.
To select booster dosage, select ‘1st Booster Dose’, ‘2nd Booster Dose’, or ‘3rd Booster Dose’ from the ‘Dosage’ dropdown.
An additional code needs to be specified for a vaccine in the vaccine admin codes settings. This ensures that the vaccines are billed correctly.
Enter the additional code in the ‘Additional Code’ textbox. Then click ‘Save’.
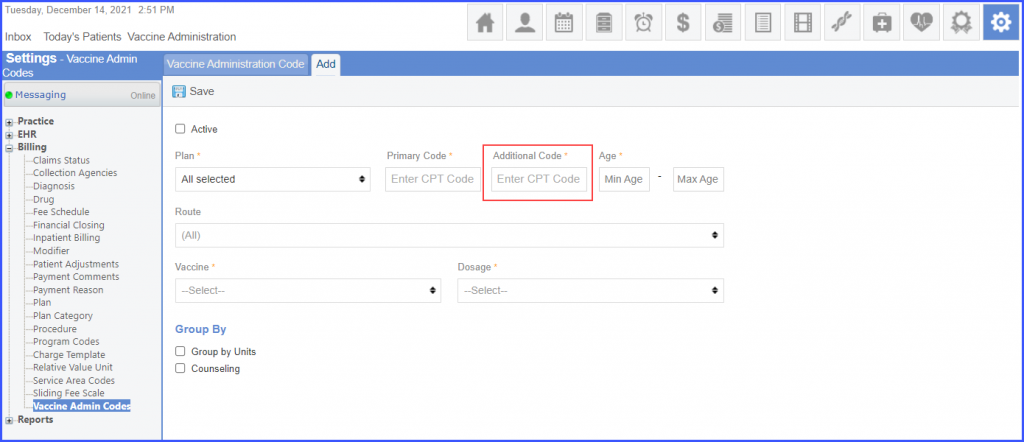
The additional code is populated on the eSuperbill if a vaccine has more than one component. The number of times additional code is populated on the eSuperbill is equal to the number of vaccine components minus 1.
Vaccine admin codes can be configured for all vaccines. ![]()
This ensures that the eSuperbill is generated accurately.
To mark all codes active or inactive, click on the checkbox next to ‘Plan(s)’. The system displays a prompt window.
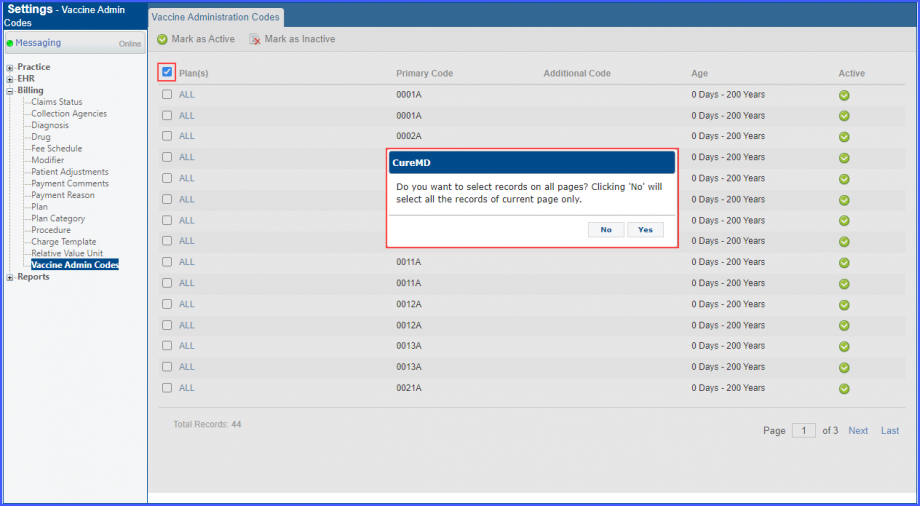
If the user selects ‘Yes’ and clicks on ‘Mark as Active’, then codes on all pages are selected and marked active.
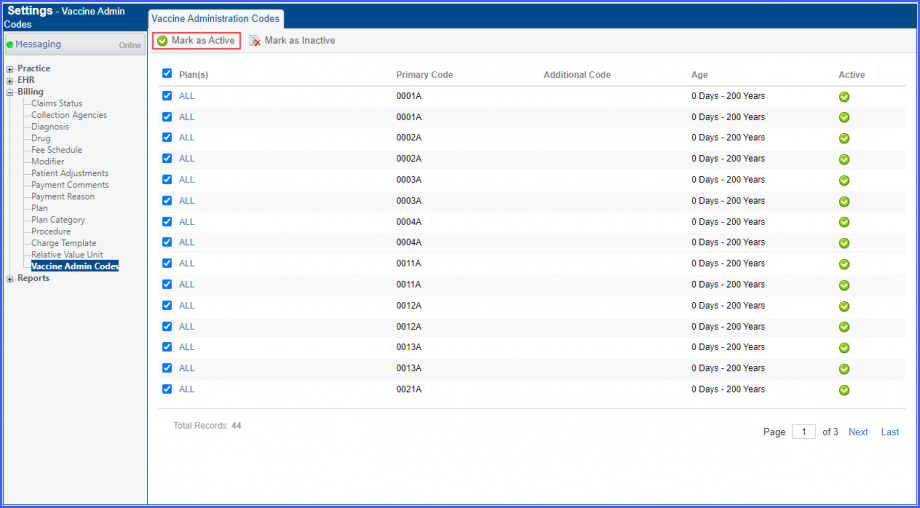
Similarly, by clicking ‘Mark as Inactive’, codes on all pages are selected and marked inactive.
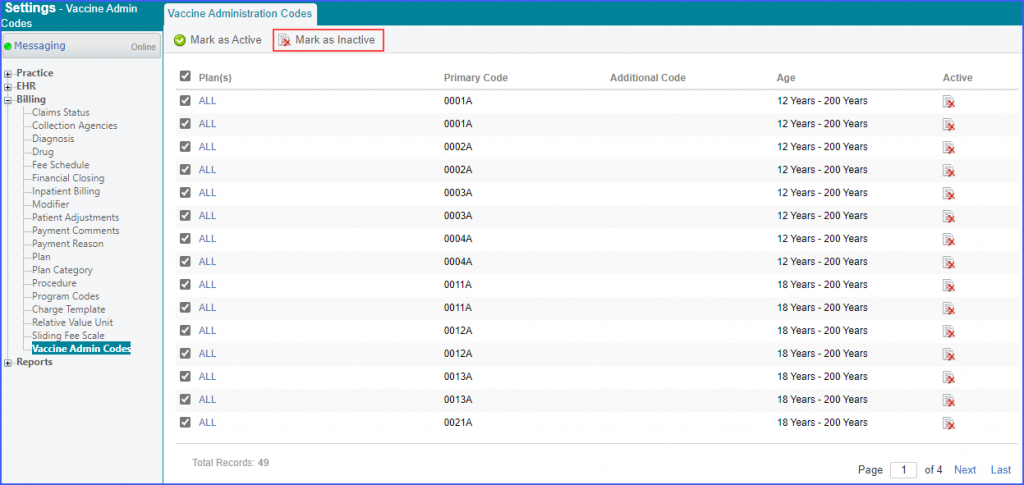
Alternatively, if the user selects ‘No’ and clicks ‘Mark as Active’ or ‘Mark as Inactive’, only the codes present on the current page are selected and marked as active or inactive, respectively.
Users can also mark selected codes as active or inactive. In order to do that, mark the checkboxes next to the desired codes and click ‘Mark as Active’ or ‘Mark as Inactive’.
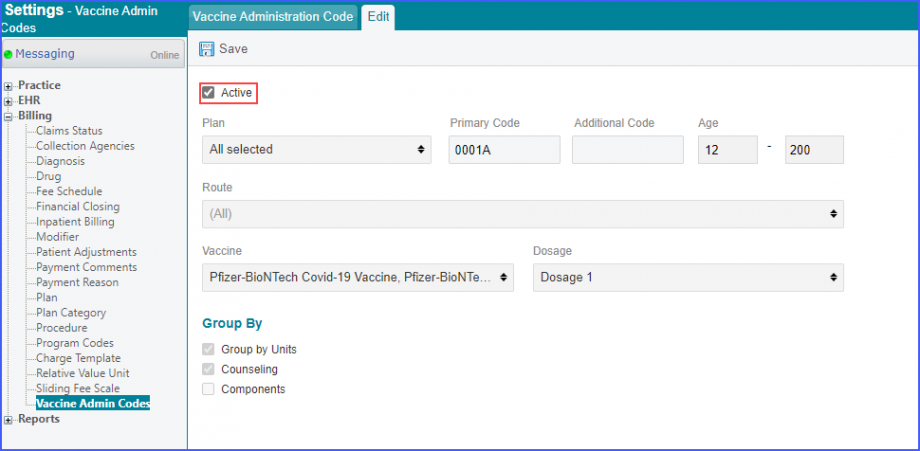
Individual codes can also be marked as active or inactive. Click on the plan hyperlink of a code. The user is navigated to the ‘Edit’ tab where the checkbox next to ‘Active’ can be marked or unmarked as desired. Then click ‘Save’.
All additional codes are displayed only once in the eSuperbill with their total number mentioned in the quantity.
This ensures that the additional codes are displayed properly without repetition.
To do that, enable the ‘Group by Units’ checkbox on the ‘Add’ VAC screen and click ‘Save’.
