How to Add a Customized Template in a Custom Form?
Users can add a customized template in a custom form.
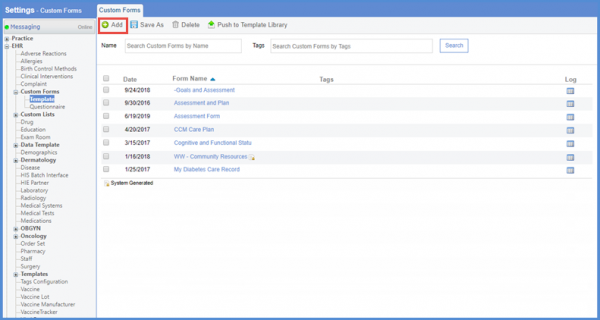
Follow the workflow above to land on the ‘Custom Forms’ screen.
On the “Custom Forms” screen, click the ‘+Add’ button from the action bar.
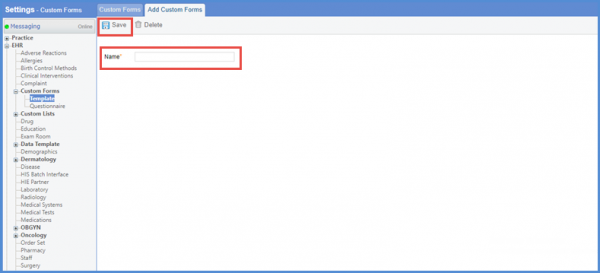
User is navigated to “Add Custom Forms” screen. Here, add a new form. Enter the name of the form in the ‘Name’ field and click the ‘Save’ button from the action bar.
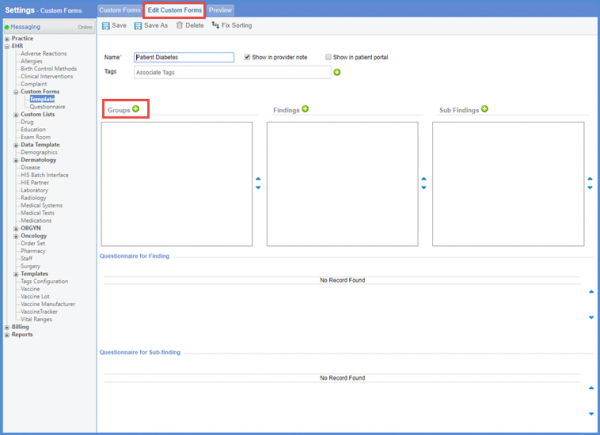
User is navigated to the “Edit Custom Forms” screen. Here, click the ‘Groups +” button to add a group.
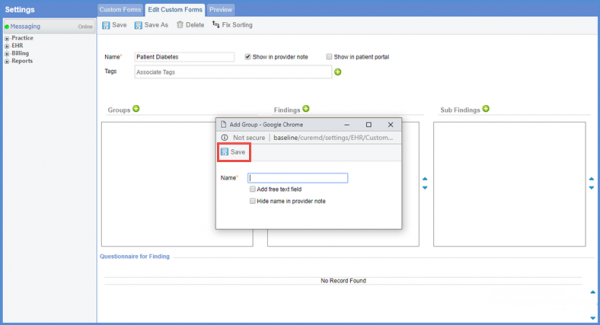
On the “Add Group” popup screen, enter the name of the group and click the ‘Save’ button. Multiple groups can be added.
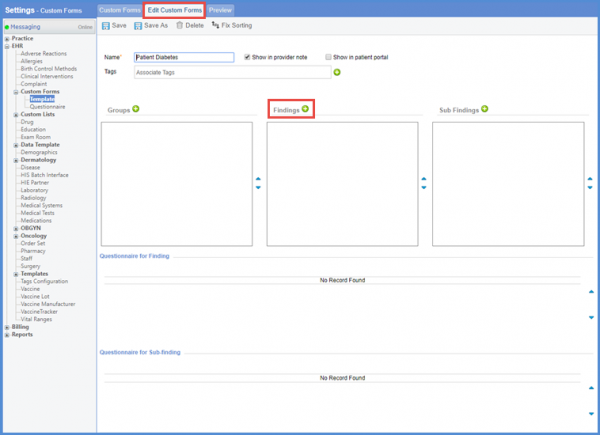
User can add the findings in the form. Click ‘Findings +’ to add a finding.
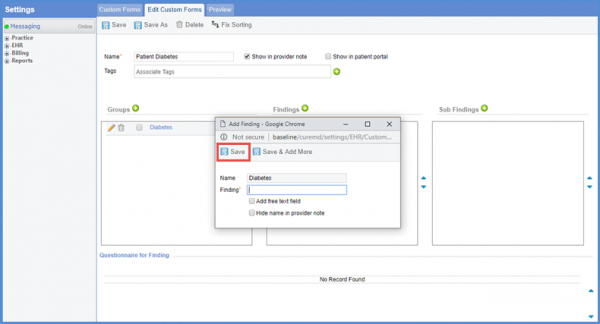
Name the finding and click the ‘Save’ button. Multiple findings can be added.
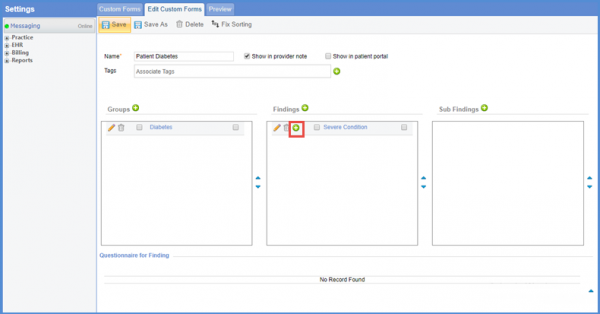
User can add the characteristics for findings. To add the characteristics under findings, click on ‘+’ icon with the name of the finding.
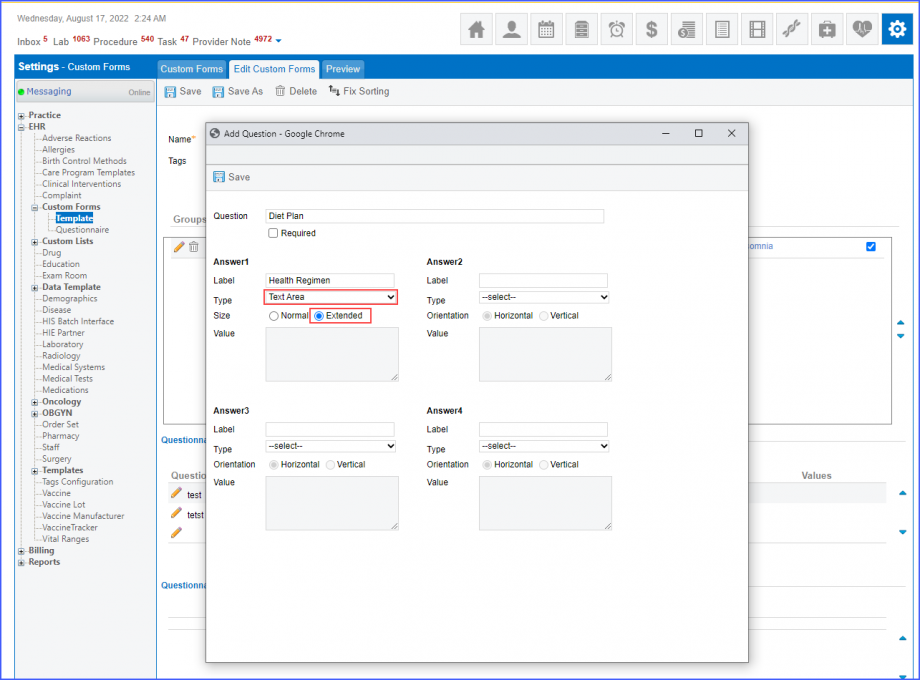
User is navigated to the “Add Question” screen. Here, user can select the fields and can add the question to the template.
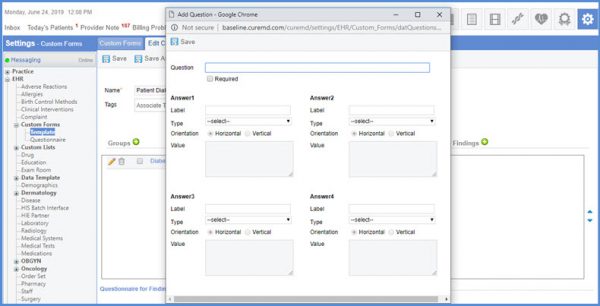
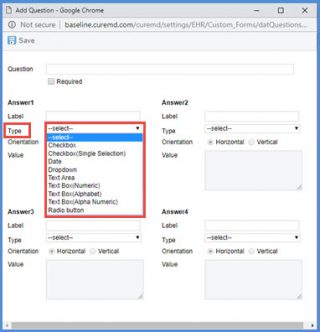
From the Type drop-down, select the type and click the ‘Save’ button.
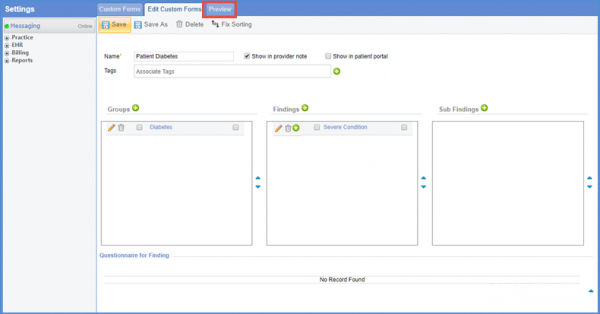
User can preview the custom form. Click the ‘Preview’ tab to preview the added form.
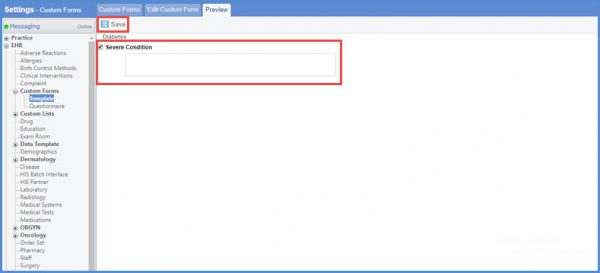
On the “Preview” screen, user can see the name of the form and the fields added to the form. Fill the fields of the form and click ‘Save’.
On the “Edit Custom Forms” screen, user can see the checkbox with ‘Show in KIOSK’ option. Mark the checkbox to enable the option to view custom forms in KIOSK.
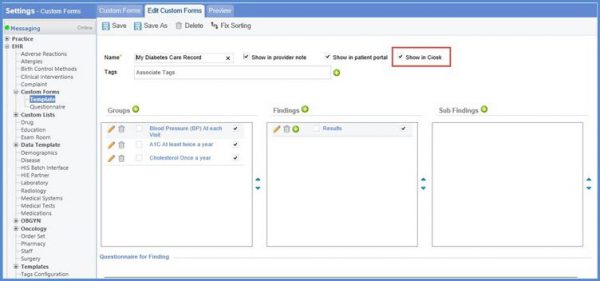
To know how to add custom forms in KIOSK, click here.
The character limit of ‘Extended’ free text field has been increased.![]()
Users get extended space to consolidate and reconcile the required information.
Select the ‘Text Area’ from Type dropdown and ‘Extended’ in Size.
