How to Add a Billing Provider Group?
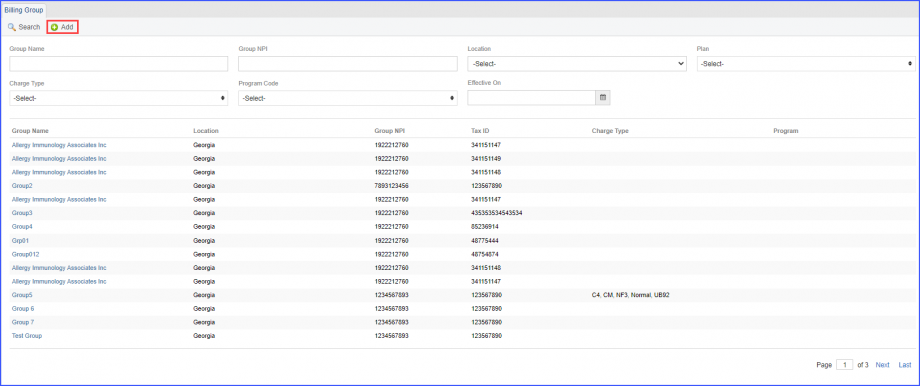
Follow the above-mentioned workflow to land on the Billing Group page.
Click on the ‘Add Group’ button to add a billing provider group.

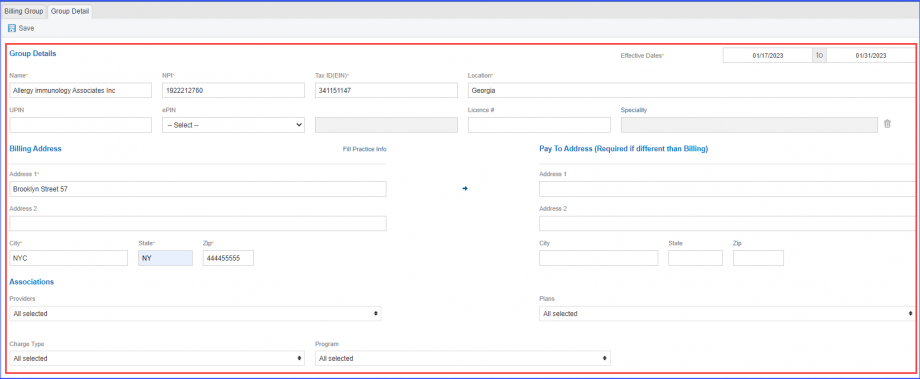
Once clicked, a new page is displayed that contains details which are to be filled in for the new billing group.

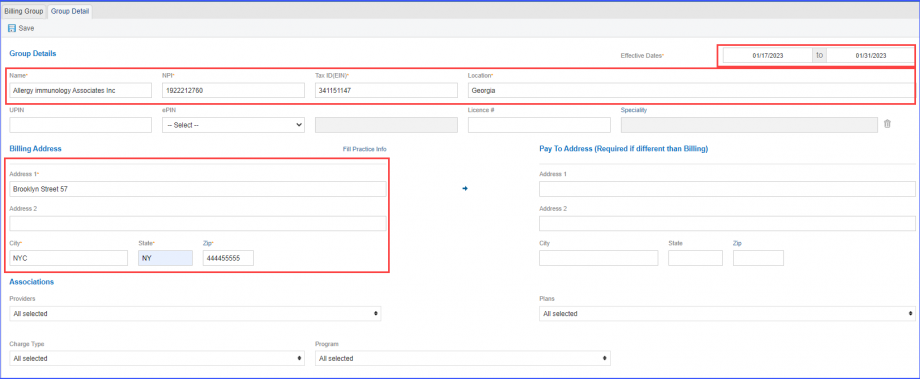
User has to fill-in the following mandatory information fields:
- Name
- NPI
- Tax ID(EIN)
- Effective Date
- Location
- Billing Address
- City
- State
- Zip
Then click on ‘Save’ to add the new provider group to the ‘Billing Group’ page.

User cannot enter the same details of an existing billing group while creating a new billing group.
The user needs to have at least one unique value in the following fields to add the new billing group:
- NPI
- TaxID
- Location
- Effective Dates
- ePIN
When the user tries to add a billing group having the same mentioned information as another existing billing group, then a prompt is displayed that states:
“A billing group with selected NPI, Tax ID, Location, Overlapping Effective Dates, and ePIN already exists.”

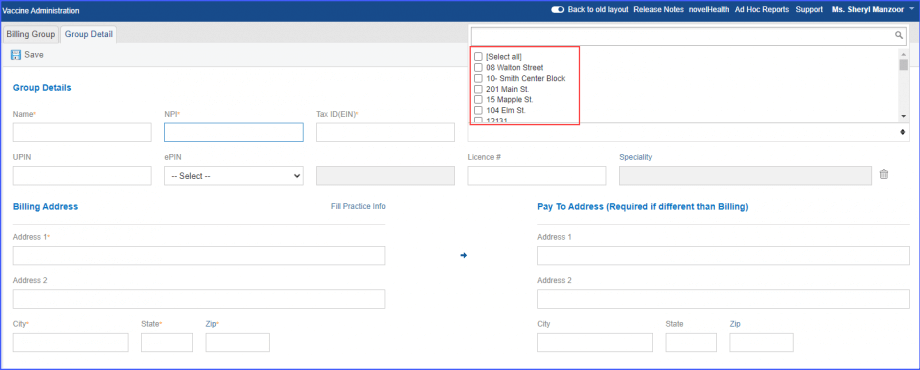
Multiple locations can be selected while creating a billing provider group.
When the user clicks on the ‘Location’ field, a list of locations appears on the screen displaying checkboxes with each entity.
Users can select multiple locations or all locations to be associated with the provider group.

The selected locations appear together in the ‘Location’ field separated by commas.

The ePIN value gets auto-populated on EDI file based on the selection made from the two options including State License Number or UPIN Number.![]()
Once an option is selected from ePIN dropdown, it appears in the greyed-out ePIN qualifier text field, which then gets auto-populated in the EDI file.
When the user clicks on the ‘ePIN’ dropdown field, two options appears in the dropdown, including:
- 0B. State License Number
- 1G. Provider UPIN Number

ePIN Dropdown
