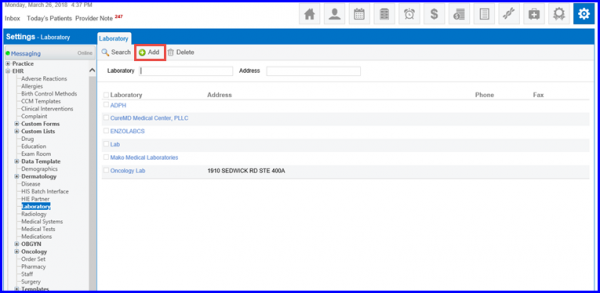
How to Add a Laboratory?
Follow the workflow mentioned above to land on the ‘Laboratory’ screen.
Click ‘+Add’ icon.
The user is navigated to the ‘Lab Profile’ screen.
Users can enter the demographic details of the lab such as Name, Address, City etc.
The ‘Type’ field is mandatory.
From this drop-down, users can select various labs configured with the application.
A lab type for Lab Corp Dianon Laboratory has been added in this drop-down.
When the users select the lab type, template in ‘Orders and Results’ section is auto selected.
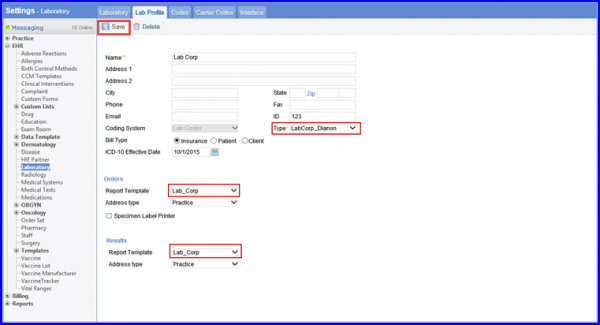
Once the Lab Type is specified, system configurations for the selected lab are pre-defined.
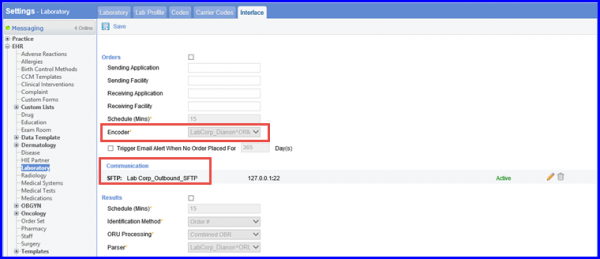
Users can observe these changes by navigating to the ‘Interface’ tab.
Users can view the fax number and address of a lab order on the lab requisition report by selecting ‘Standard’ report template and ‘Location’ as Address Type.
To see where the address appears, click here.
Moreover, users can view a patient’s race and ethnicity information on the printed lab requisition by selecting ‘LabSunriseRequisition’ template.
To see where the race and ethnicity information appears, click here.
The system prevents users from saving an electronic lab without adding any client.
This ensures that the user’s clinical workflow is not interrupted.
Add a new lab profile and select ‘Lab Codes’ from the ‘Coding System’ dropdown. Then navigate to the ‘Interface’ tab.
When the user has enabled ‘Orders’ or ‘Results’ interface and clicks ‘Save’ without adding any client, the system displays the following error message:
‘Please add at least one client’
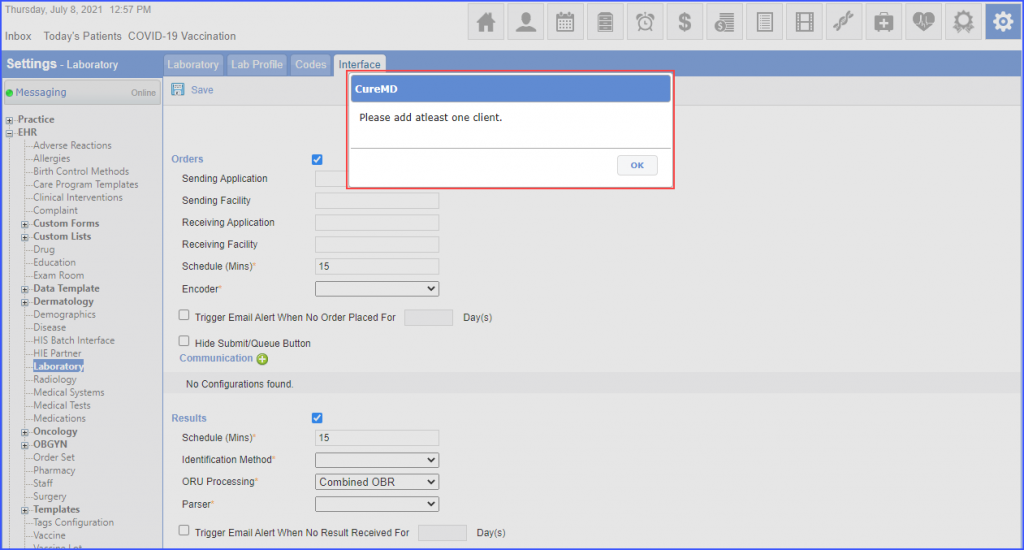
However, when the user saves the lab profile without enabling ‘Order’ or ‘Results’ interface, the system successfully saves the lab profile. Moreover, the system does not display an error message for the missing electronic interface configurations when the user saves/signs a lab order.
Similar enhancement has been made in the ‘Radiology section. In order to view the change, click here.
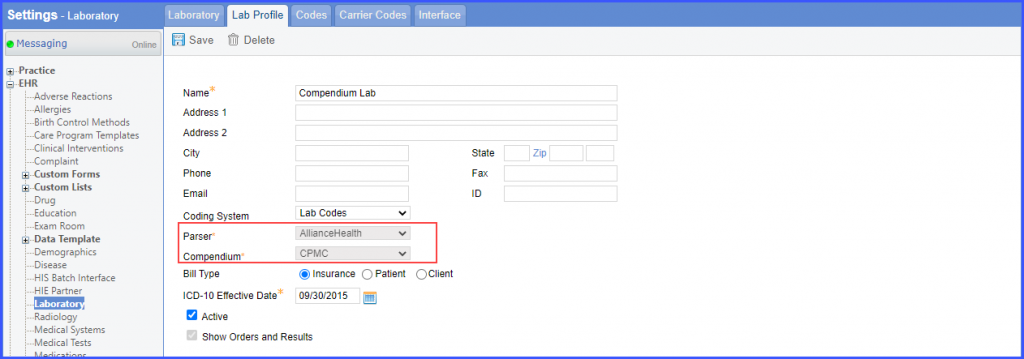
Users have the option to add a ‘Parser’ and a ‘Compendium’ to a lab profile.
The ‘Coding System’ must be ‘Lab Codes’ for the lab profile.
Select a parser from the ‘Parser’ dropdown and a compendium from the ‘Compendium’ dropdown.

The parser specifies the HL7 message specifications and the compendium determines the lab type. The parser and compendium fields are greyed out once the electronic laboratory profile is saved. They cannot be changed.
In order to see how to add codes for the selected compendium, click here.
The coding system is displayed on the laboratory listing page.![]()
Users do not have to open each lab individually to view its coding system.
When the users navigate to the laboratory listing page, the coding system of each lab is displayed in the ‘Coding System’ column.
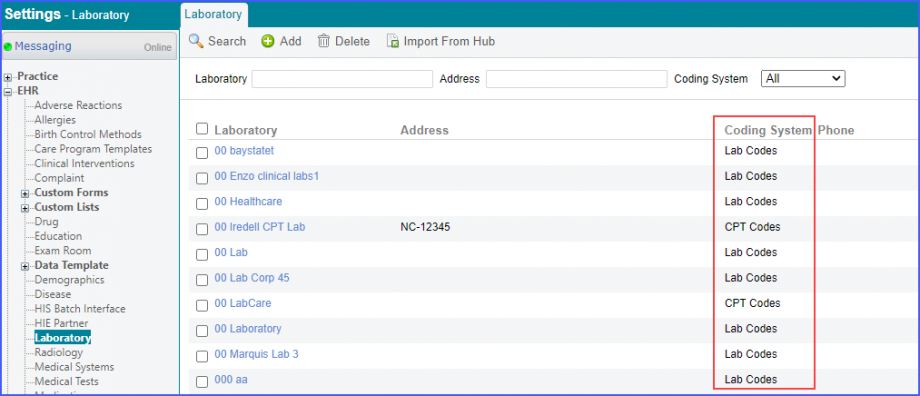
Furthermore, users can filter the labs based on the coding system. Select an option from the ‘Coding System’ dropdown and click ‘Search’. The search results include all the labs with the desired coding system.

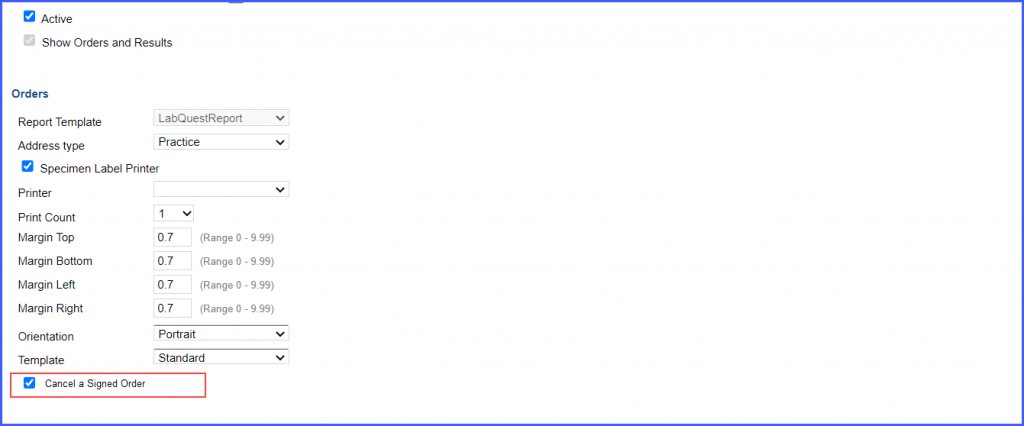
Signed orders can be canceled on the treatment plan. This allows users to cancel nonessential orders.
Enable the ‘Cancel a Signed Order’ checkbox under the ‘Order’ section and click ‘Save’.
The users can select specific preferences for lab orders.![]()
Mark the ‘One Test Per Order’ and ‘Disable Specimen Collection on Future Dates’ checkbox and save the settings.