How to Enable Settings to Add Chemo Components on Provider Notes?
Users can create ‘Provider Notes’ for the following Chemo components:
- ‘Cancer Stage’
- ‘Chemo Order’
- ‘Chemo Admin’
Templates for ‘Chemo Order’ can also be created.
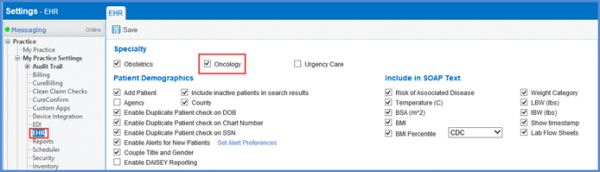
To display the ‘Chemo Order’, ‘Chemo Admin’ and ‘Cancer Stage’ components in the left tree menu, follow the above mentioned workflow and land on the EHR tab.
Go to the ‘Specialty’ section, and enable the ‘Oncology’ checkbox.
Click on the ‘Save’ button.
’Chemo Order’, ‘Chemo Admin’ and ‘Cancer Stage’ components can also be enabled for a specific ‘Role’.
Follow the following workflow to land on the ‘Roles’ screen.
Settings > Practice > Role
The ‘Roles’ screen will be displayed.
Search for a role or click the required hyperlink to select a role.
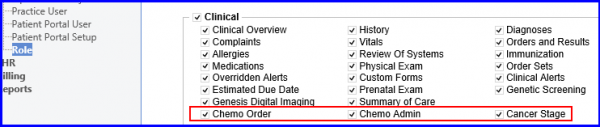
Go to the ‘Clinical’ section and enable the ‘Chemo Order’, ‘Chemo Admin’ and ‘Cancer Stage’ checkboxes as required.
Click ‘Save’ to apply changes.
After enabling the checkboxes, the components are displayed in the ‘Clinical’ section of patient’s ‘Provider Notes’.
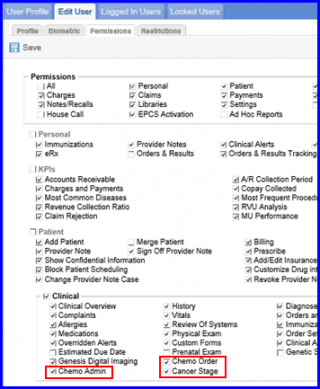
The same checkboxes are present in the ‘User Permissions’.
Select the required user by clicking the appropriate hyperlink name.
The ‘Edit User’ screen will be displayed.
Click on ‘Permissions’ tab and enable the required chemo checkboxes.
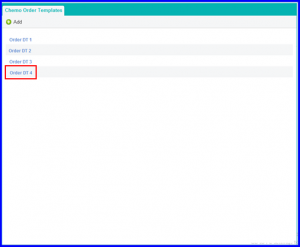
Users can add the ‘Chemo Order’ template. Follow the below mentioned workflow to land on the ‘Chemo Order Template’ screen.
Settings > EHR > Templates > Chemo Order
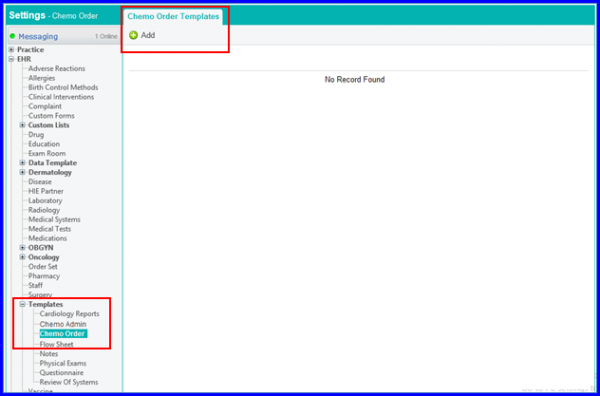
Click ‘+Add’ to open the ‘Add Chemo Order Template’ tab.
Fill the required details and click ‘Save’ when finished.
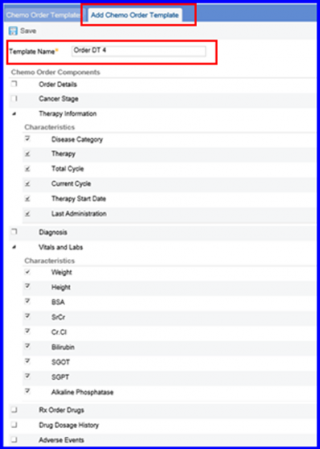
The order gets populated in the chemo order list.