Collection Agency Workflow
✅ 1. Enabling Collection Agency Automation
To configure the system for automatic patient balance transfers to collection agencies:
- Navigate to:
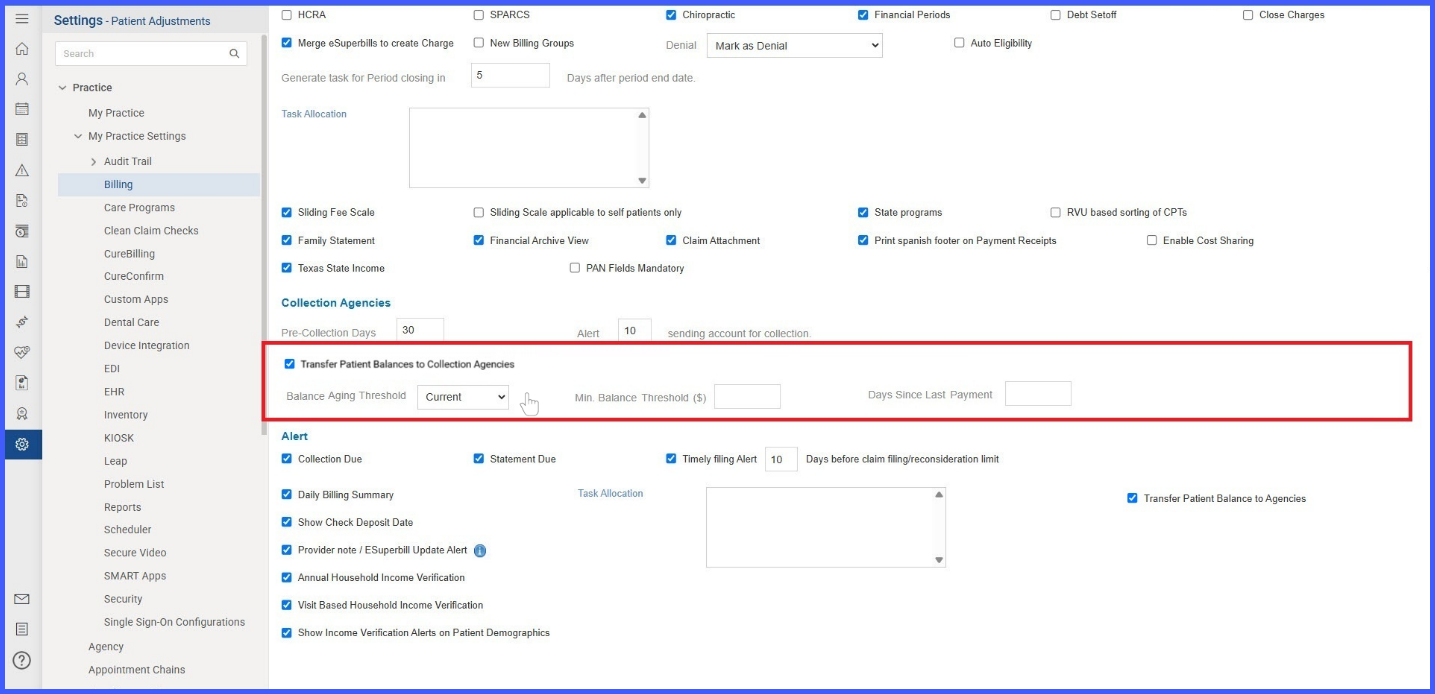
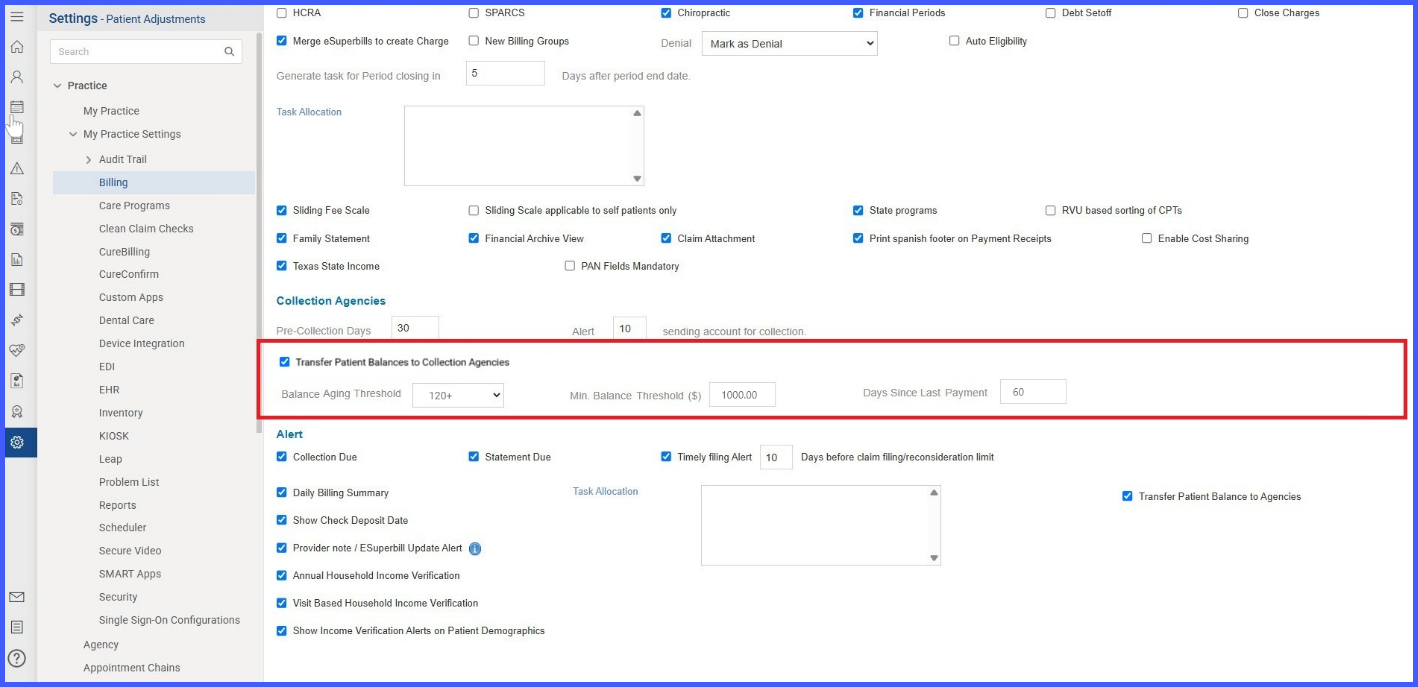
Settings >Practice>My Practice> Billing > Collection Agencies - Enable:
Transfer Patient Balances to Collection Agencies - Configure the following fields:
- Balance Aging Threshold: Defines how old the balance must be (e.g., Current, 120+ days).
- Minimum Balance Threshold ($): Set the minimum dollar amount for balances eligible for transfer.
- Days Since Last Payment: Define the number of days since the patient’s last payment before triggering a transfer.
The system uses these settings to determine which balances qualify for transfer.
✅ 2. Collection Eligibility Indicators
When a patient’s balance meets the configured criteria, CureMD displays a collection agency eligibility icon in the following locations:
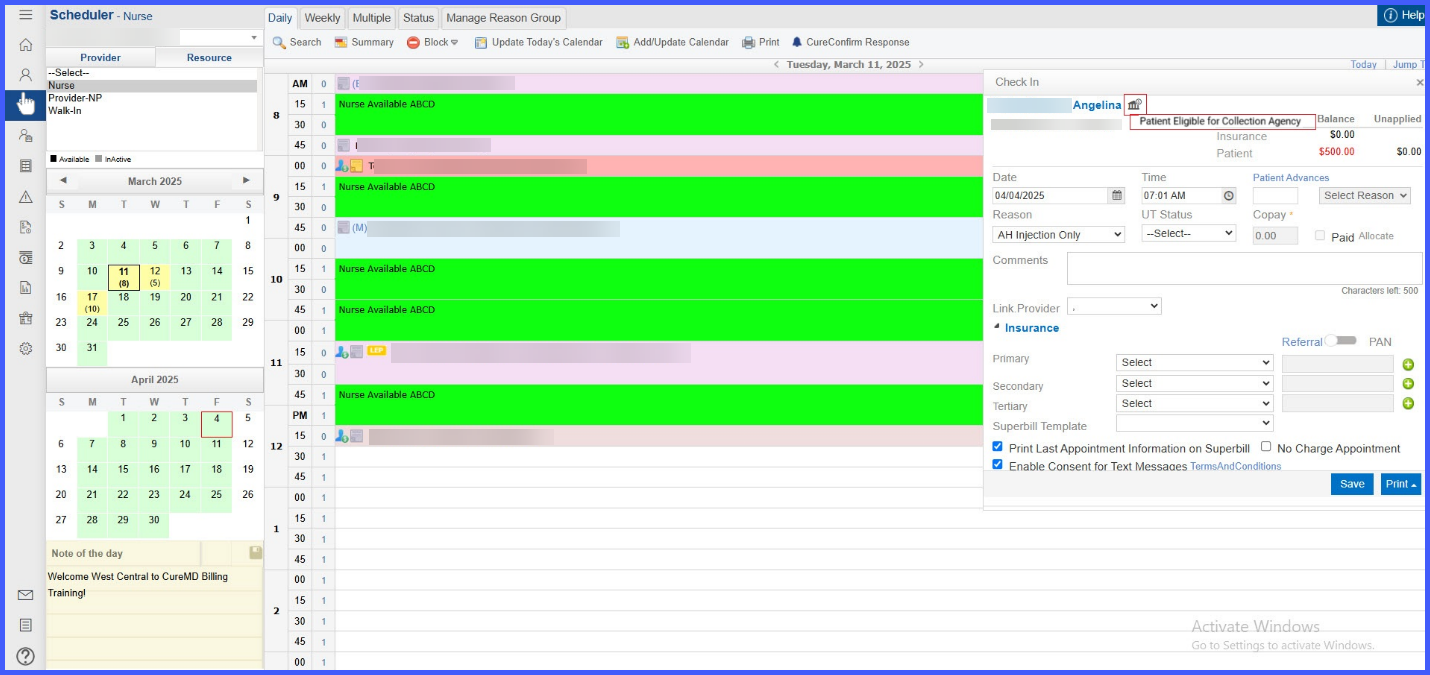
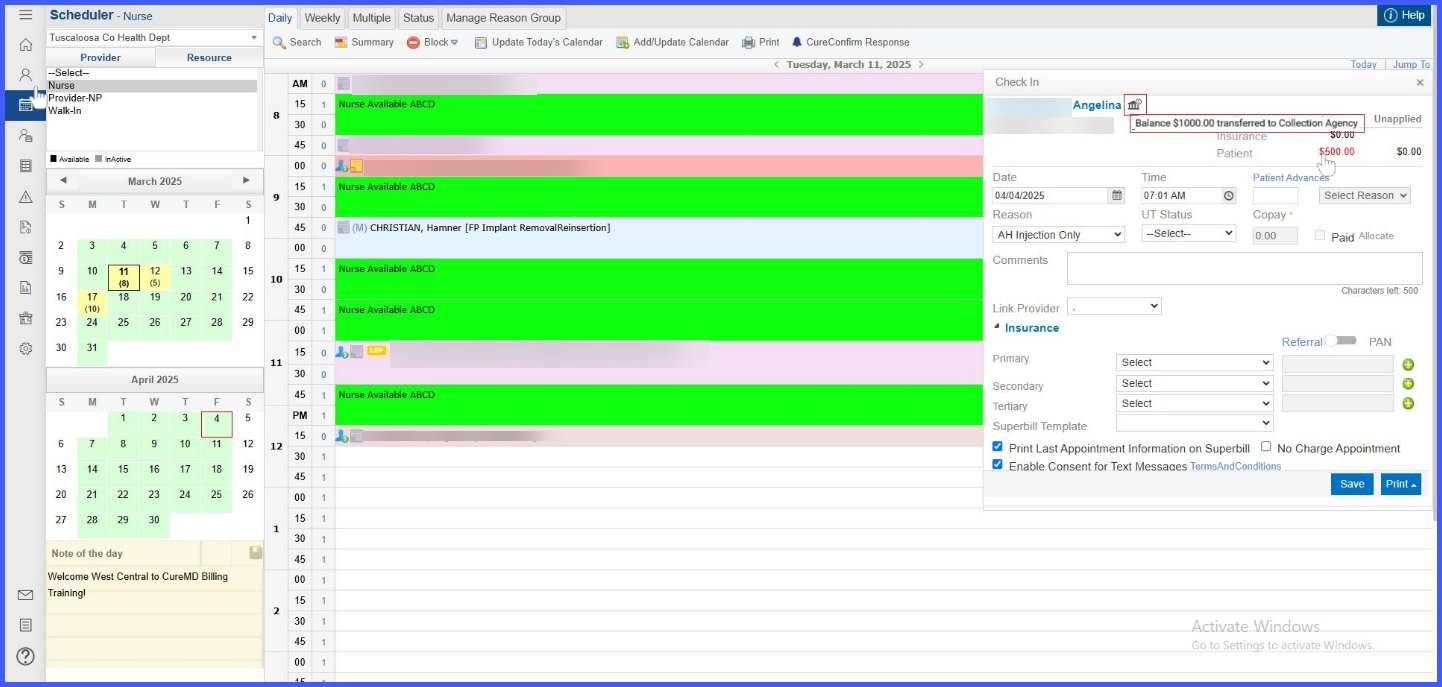
- Scheduler – Check-In Panel
A small icon next to the patient name indicates eligibility. Hovering shows the tooltip: “Patient Eligible for Collection Agency”.
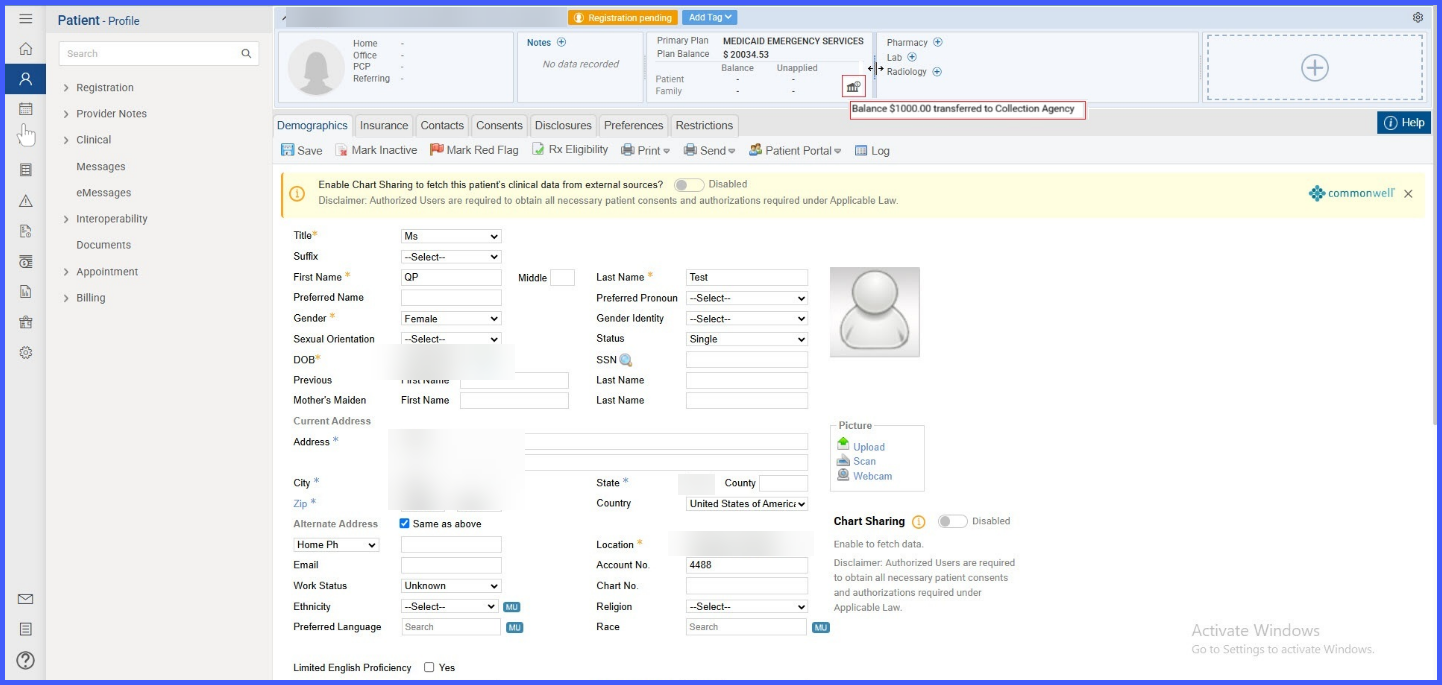
- Patient Demographics Screen
Displays the same icon in the header section with a tooltip showing eligibility or the transferred amount, e.g., “Balance $1000.00 transferred to Collection Agency.”
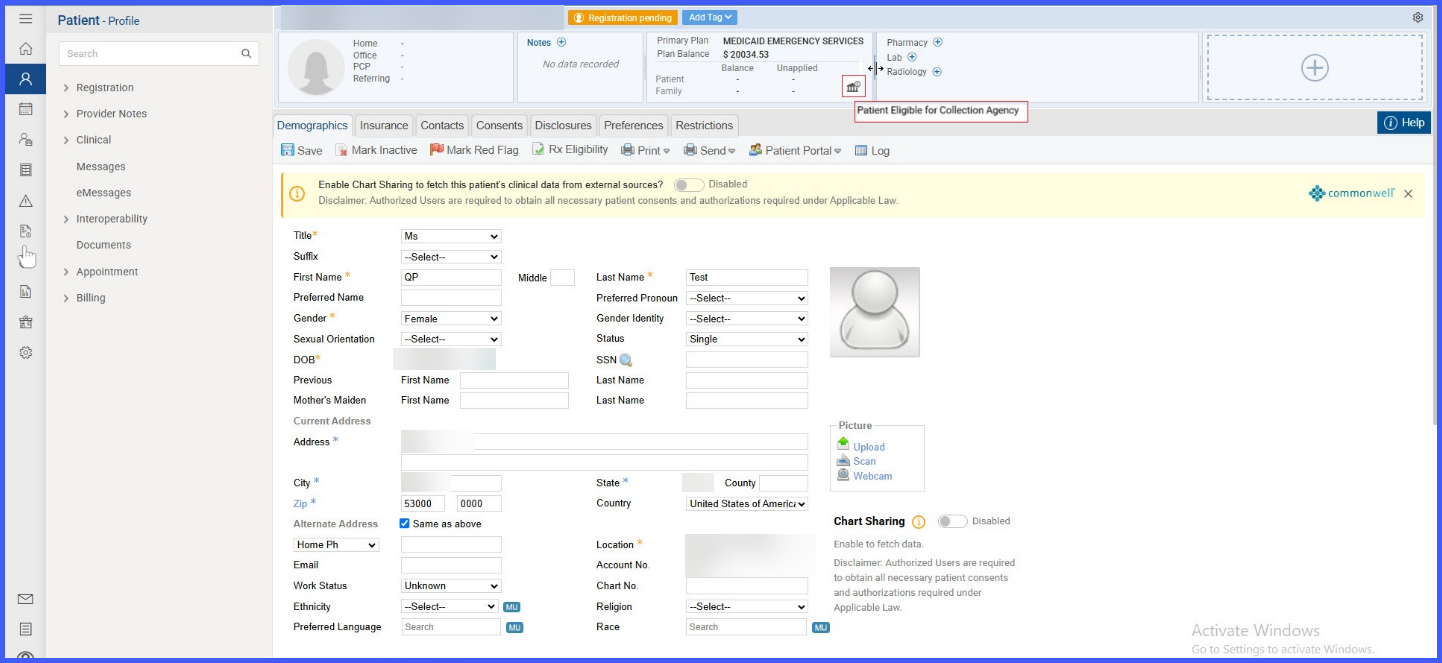
These indicators help staff identify collection-eligible patients at the point of scheduling or patient review.
✅ 3. Patient Balances – Actionable Insights
Navigate to:
Billing> Alerts > Patient Balances (New Screen)
This module shows balances broken down by aging buckets and highlights the Collections Eligible total. Users can: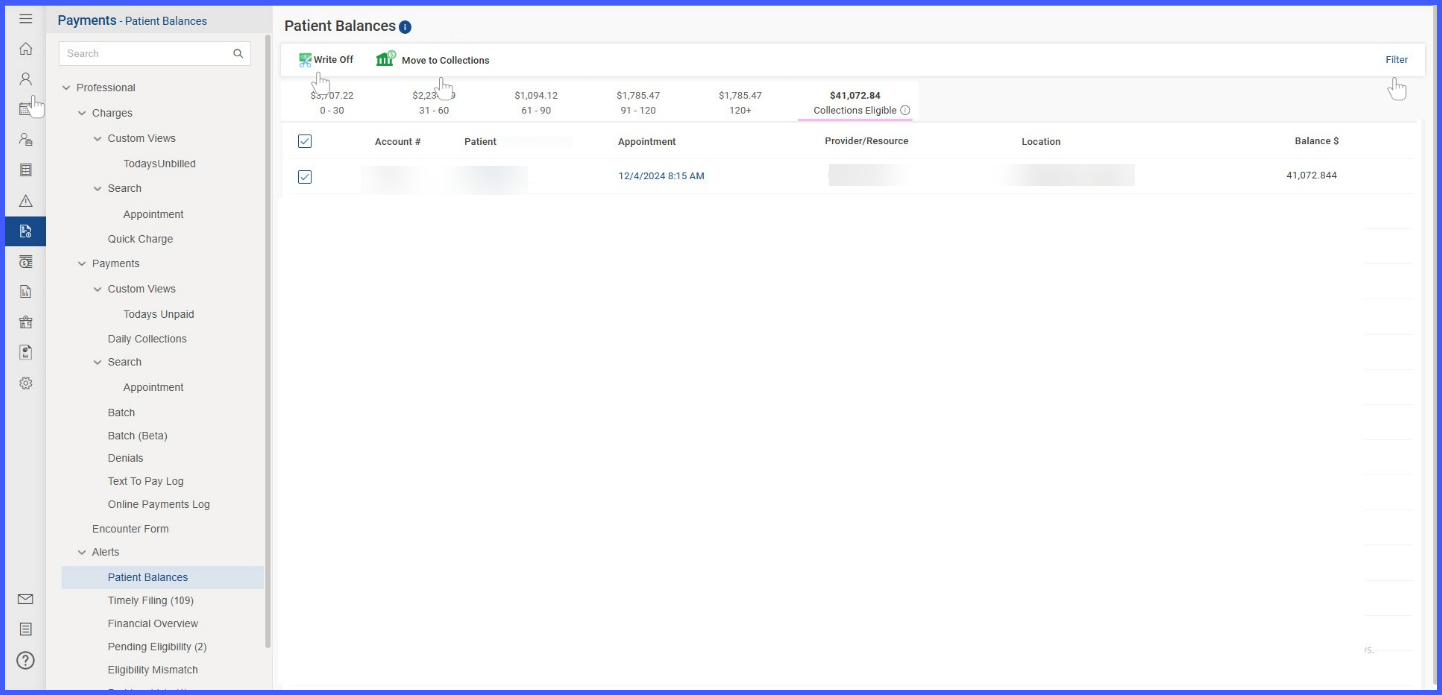
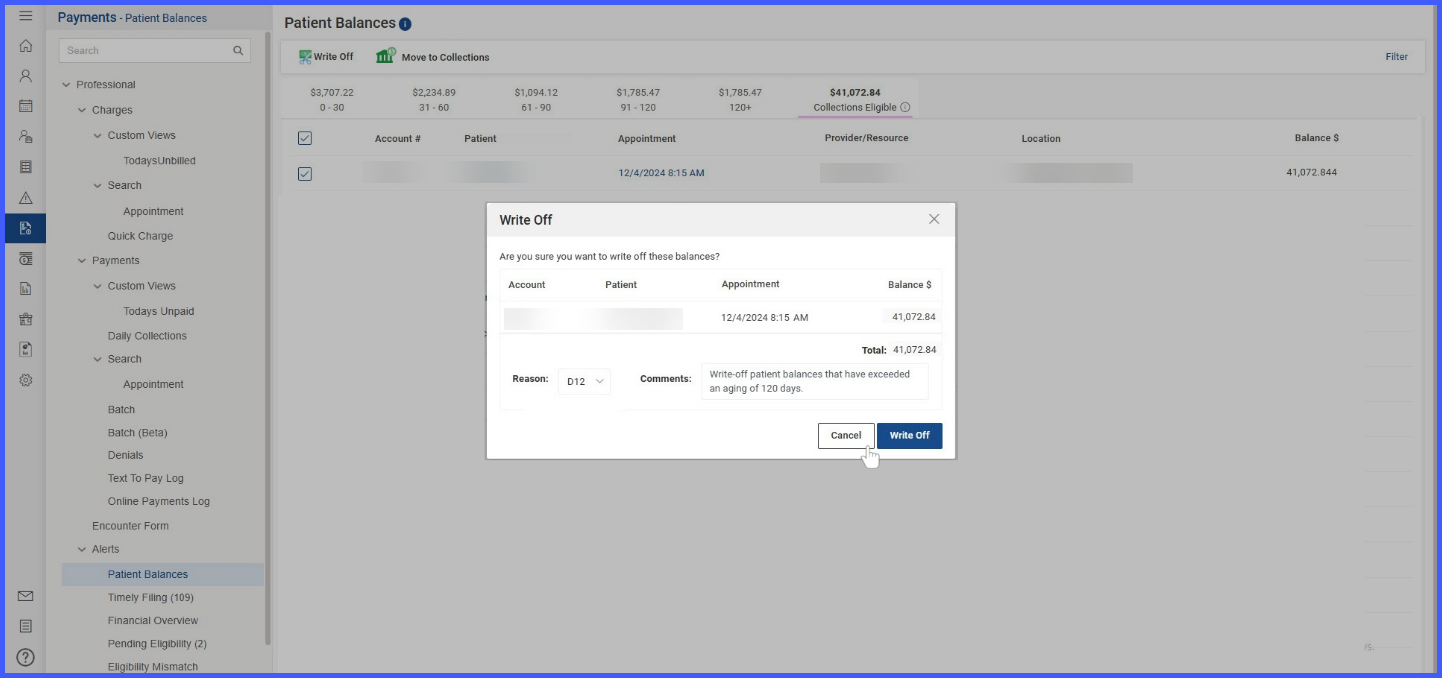
- Write Off:
- Select the account and click Write Off.
- Provide a reason and comments.
- Confirm by clicking Write Off again.
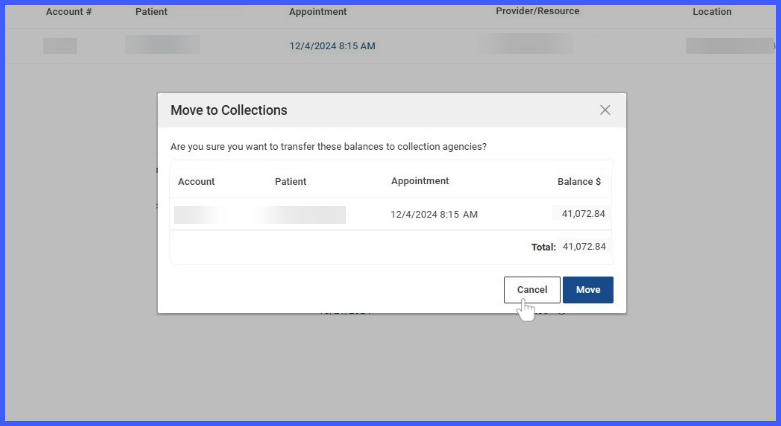
- Move to Collections:
- Select the eligible account.
- Click Move to Collections.
- Review the details and click Move to finalize the transfer.
The patient balance is immediately updated, and a collection agency flag appears across the system.
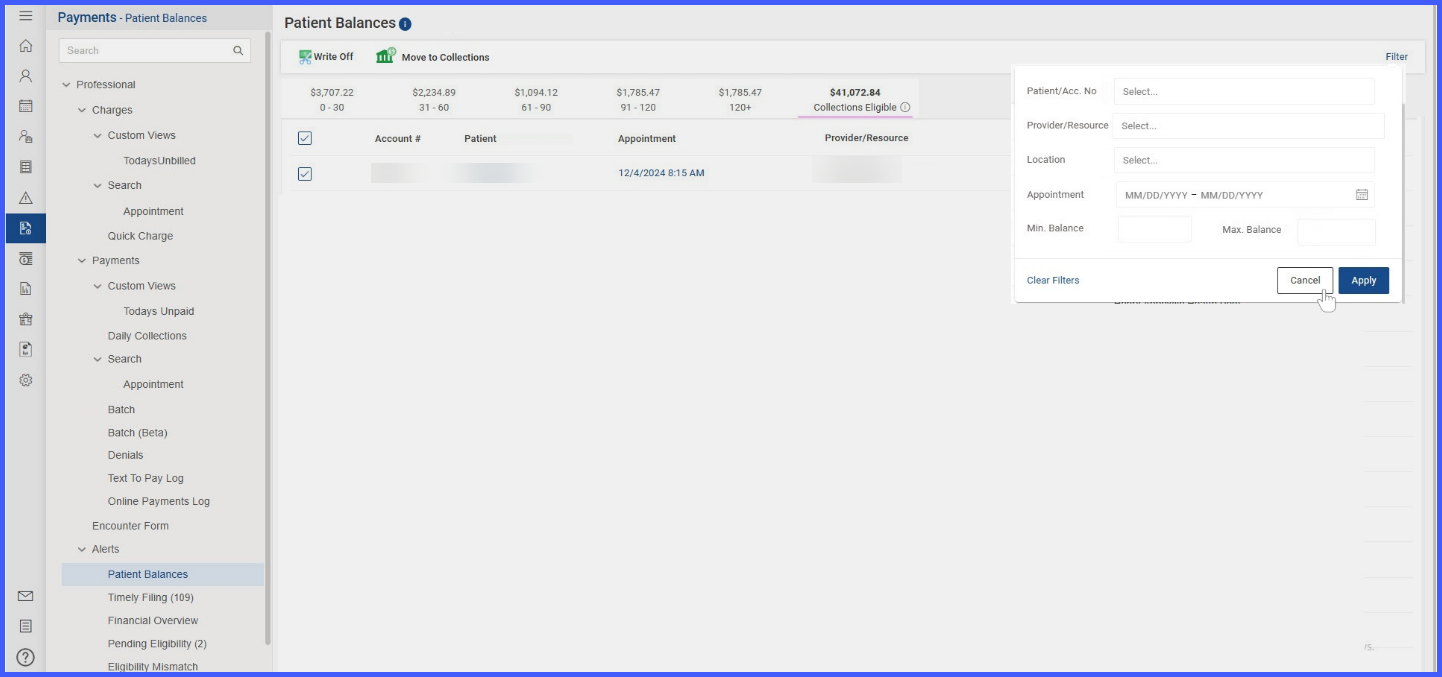
✅ 4. Filtering Patient Balances
Users can apply filters based on:
- Patient/Account Number
- Provider or Location
- Appointment date range
- Balance range (Min/Max)
Click Apply to filter or Clear Filters to reset.
✅ 5. Viewing Transferred Balances in Payment Screens
In the Patient Payment module, the system clearly separates:
- Outstanding Balances – Due but not in collections
- Patient Balances in Collections – Already transferred based on criteria
Users can:
- View Transfer Date, Provider, Location, and Balance
- Record new payments using Cash, Check, or other methods
- Allocate or leave the amount unapplied as needed
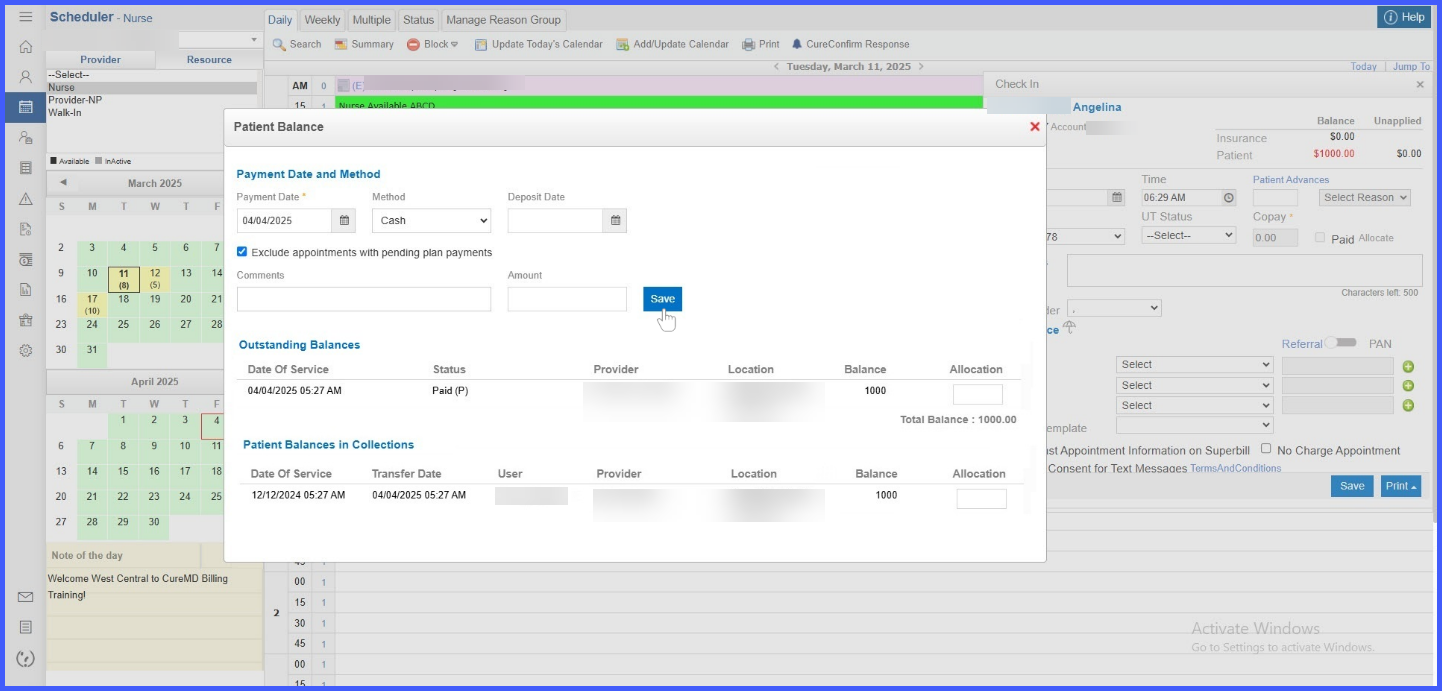
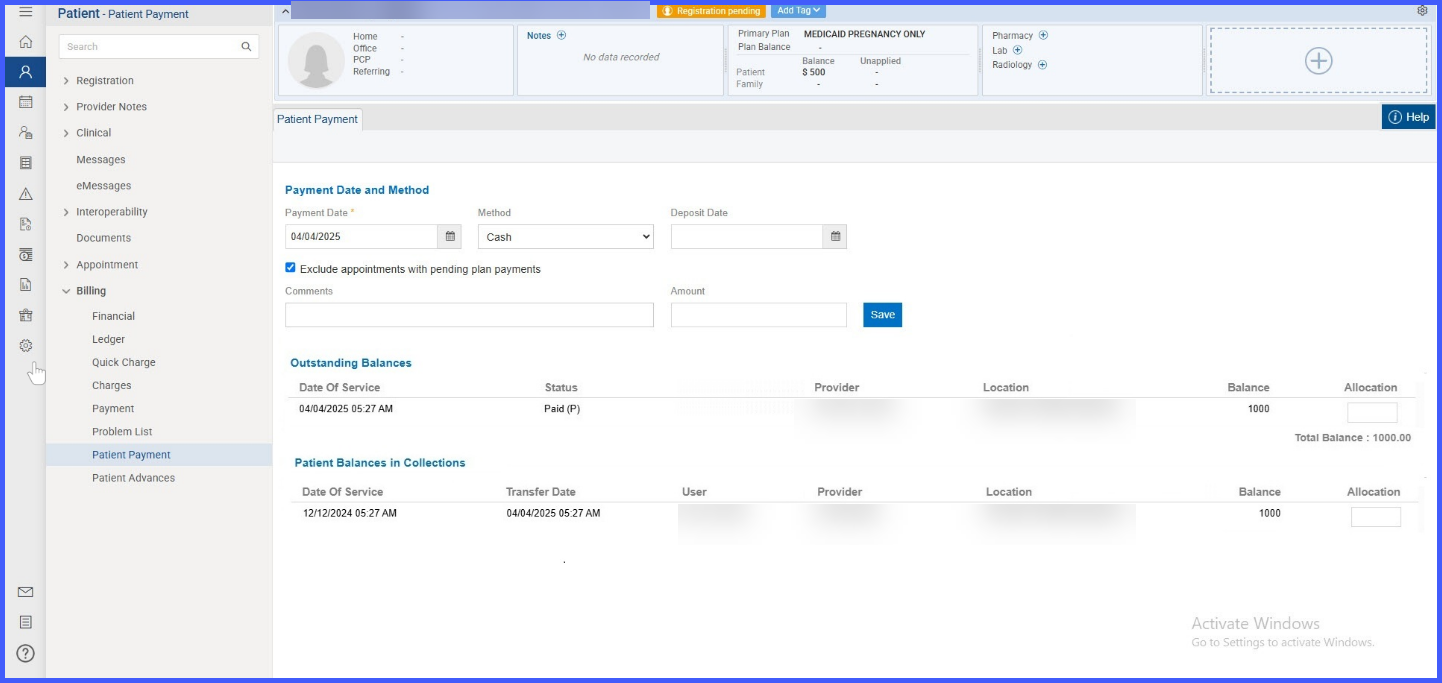
These views appear consistently in both the Patient Payment screen and Scheduler-based payment model.
💡 Best Practices
- Set aging and balance thresholds based on organizational policy.
- Regularly monitor Patient Balances for transfers or manual actions.
- Educate staff to recognize collection icons and act accordingly during scheduling or check-in.
- Use filters to manage and review balances efficiently.
