How to Enable Charge Master?
Follow the above-mentioned workflow to land on the ‘Billing’ settings page.
Users can create a Charge Master and set up multiple customized contract rates against it.
User can further specify the Plan, Location, Provider and the contract prices for the relevant contract.
The user does not have to specify the end date in the ‘Effective’ section.
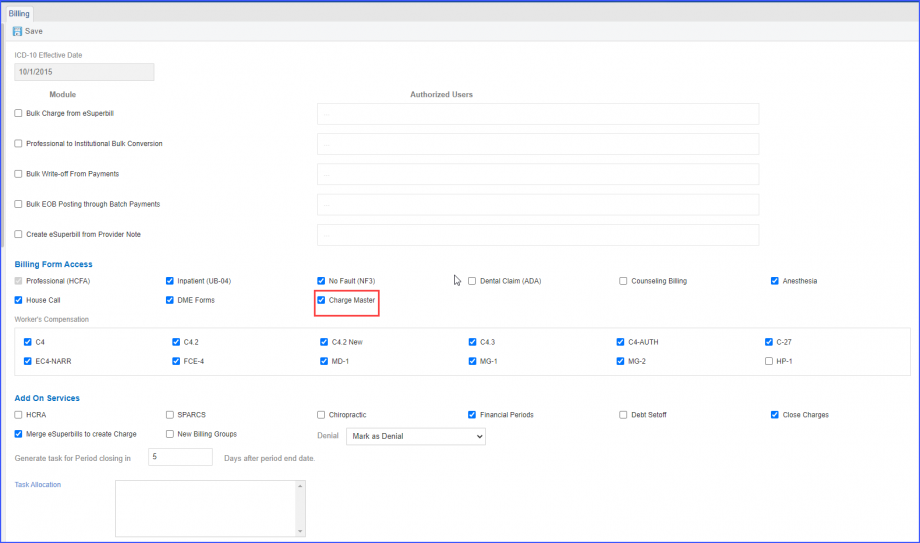
Navigate to the ‘Billing Forms Access’ section.
Mark the ‘Charge Master’ checkbox and click ‘Save’ to enable the ‘Charge Master’ for the practice.

Meanwhile, users can unmark the same marked checkbox to disable the Charge Master for the practice.
Unmarking the ‘Charge Master’ checkbox displays a prompt that states:
“On disabling the Charge Master, all charge masters and contract rates will be converted into fee schedules”.

Click ‘Save’ to remove charge master settings from Billing.
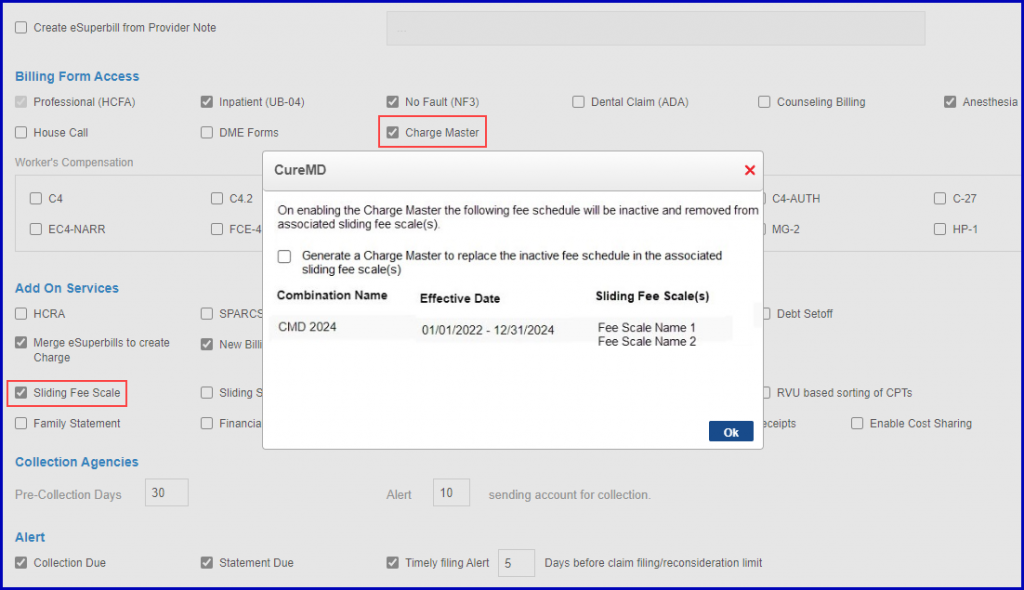
A prompt is displayed upon enabling charge master along with Sliding fee Scales, which allows the user to select whether they want to create a system-generated charge master to replace inactive fee schedules in the respective sliding fee scales.![]()
This enhances the overall user experience in managing charge master and fee schedules.
The user has enabled the ‘Charge Master’ checkbox, but the “Sliding Fee Scale’ checkbox is turned off. Then the system displays a prompt with the names of fee schedules that are going to be inactive.

However, if the checkbox of charge master is enabled with the ‘Sliding Fee Scale’, then the displayed prompt shows the names of the fee schedules that are going to be inactive along with the names of the sliding fee scales from which those inactive fee schedules are going to be removed.
Moreover, a checkbox also appears on the popup with the text stating ‘Generate a Charge Master to replace the inactive fee schedule in the associated sliding fee scales(s)’.

With this checkbox, users have the option to replace the inactive fee schedules in the mentioned sliding fee scales with a system-generated charge master. If the user enables the checkbox and clicks ‘Ok’, the system creates a charge master with the name ‘FS Replacement’ in the charge master section followed by the date and time. This charge master is automatically linked with the sliding fee scales mentioned in the prompt above.
