How to Add an Appointment Chain?
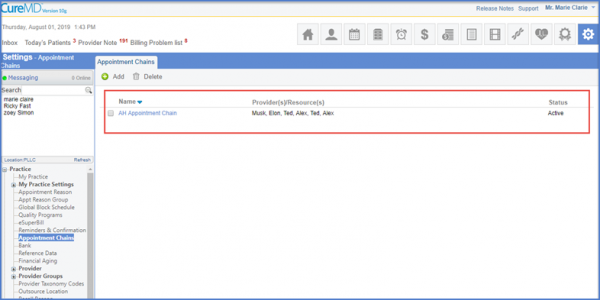
Following the workflow, the user lands on the ‘Appointment Chains’ page.
Click on the ‘Add’ button to insert required fields for an appointment.
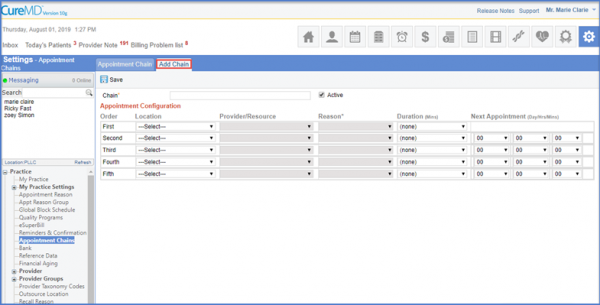
The user is able to view the Order, Location, Provider/ Resource, Reason, Duration and Next Appointment in a tabular form where all fields need to be filled in such a way as to create a sequence between the previous and the next appointment order.
The user must also fill in the Chain field with the required name.
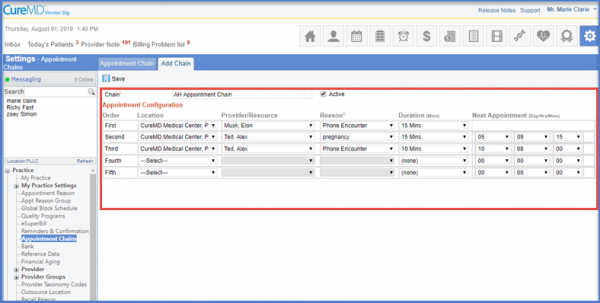
Once done, click the ‘Save’ button to ensure all records are saved.