How to Create an Appointment?
An appointment can be scheduled for a patient from the Provider’s or Resource’s calendar. All time slots are visible and the user does not need to search for an available time slot.
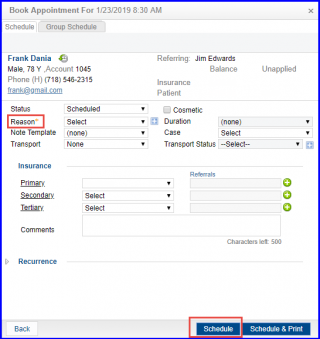
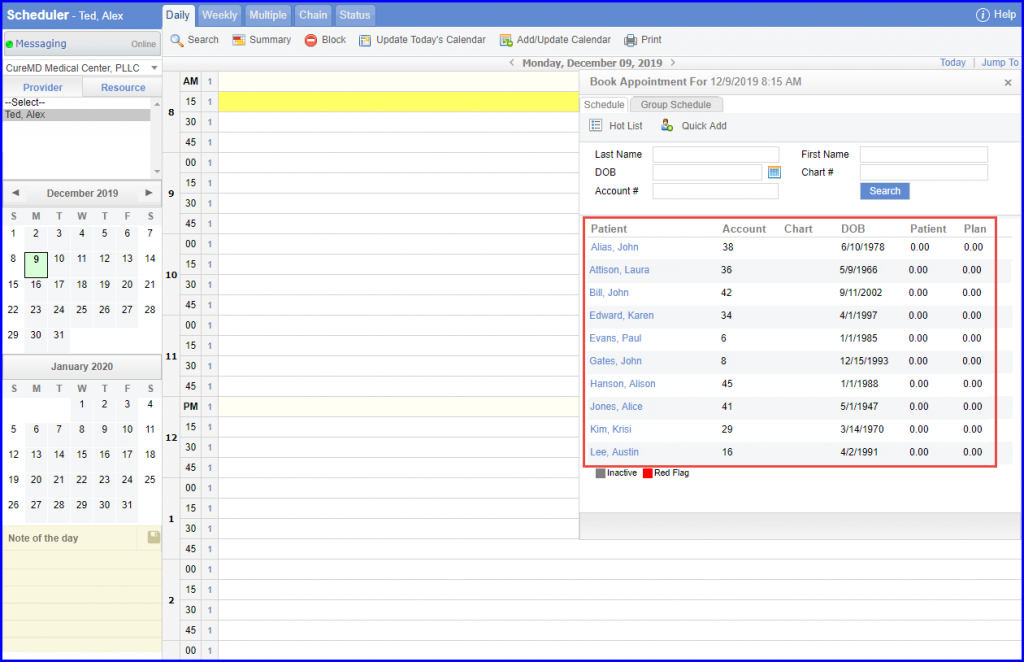
Follow the workflow provided above to land on the ‘Scheduler’ page. Click the desired empty time slot for the ‘Book Appointment’ window to pop-up.
On ‘Book Appointment’ window, search a patient or select a patient from Hot List.

Select the Appointment Reason and click ‘Schedule’ to create an appointment.
The ‘Hot List’ button can be used to view an alphabetically sorted list of most recently used patients.
To enable location based access for a patient, click here.
Users can only schedule appointments for patients whose allowed locations are similar to the user’s locations.
If any other patient is selected to access or schedule an appointment, a prompt will be displayed on screen.
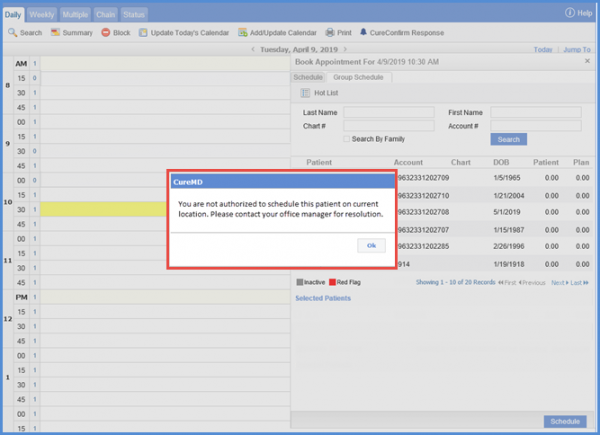
The name of the selected patient is grayed out after the prompt is displayed on the screen.
If the user selects the patient that is either blocked or belongs to another location, user can see the prompt on the screen.
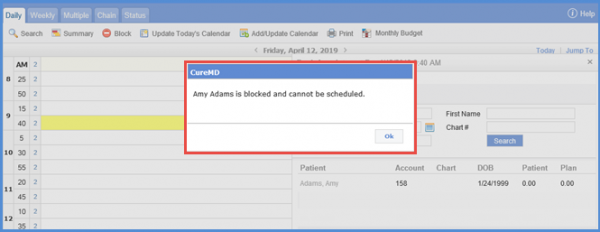
Users also see the prompt on patient demographics screen. For further information, click here.
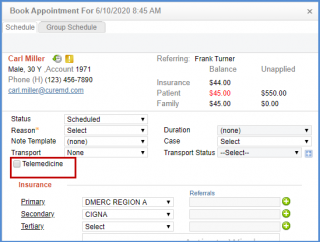
Users can add participants while scheduling a patient for a Telemedicine appointment via Scheduler. A Telemedicine checkbox has been introduced for this purpose.
Enable ‘Telemedicine’ checkbox to view the ‘Add Participants’ icon.
User clicks the icon to view the ‘Add Participants’ pop up.
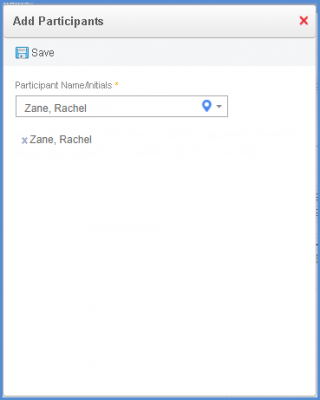
Search a participant within the practice and click to select it. The participant will be displayed in the form of a tag. This added participant can attend the ‘Telemedicine’ session for that appointment.
A pregnant tag is displayed on the patient banner of pregnant patients while booking an appointment.

When the user hovers over the ‘Pregnant’ tag, the EDD, trimester, and gestation information is displayed in the tooltip. The duration of pregnancy is also displayed next to the ‘Pregnant’ tag in weeks and days.
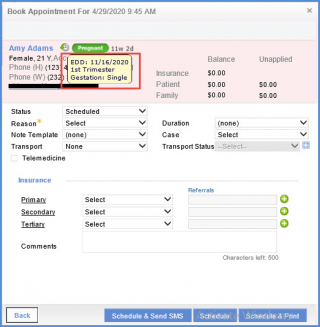
Similar changes have been made in the Scheduler tooltip. To see more, click here.
Similar changes have been made in the patient banner while checking in a patient. To see more, click here.
To see how to enable these settings for pregnant patients, click here.
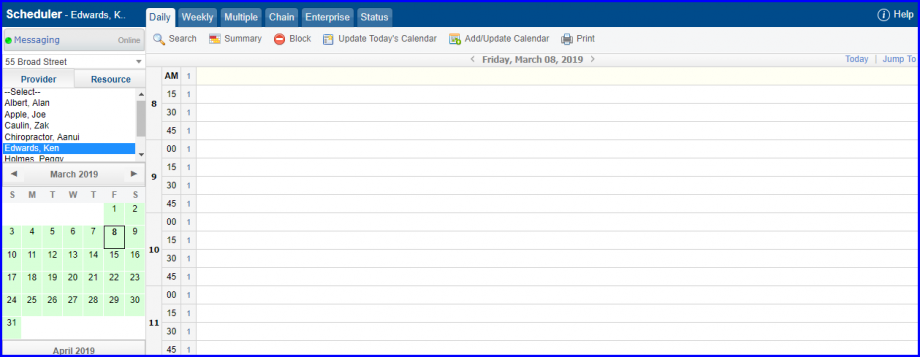
Note: A provider can schedule Daily, Weekly, Multiple and Chain Appointments. Patient appointments can also be scheduled through the ‘Scheduler’ using the following workflow: Scheduler > Provider > Daily
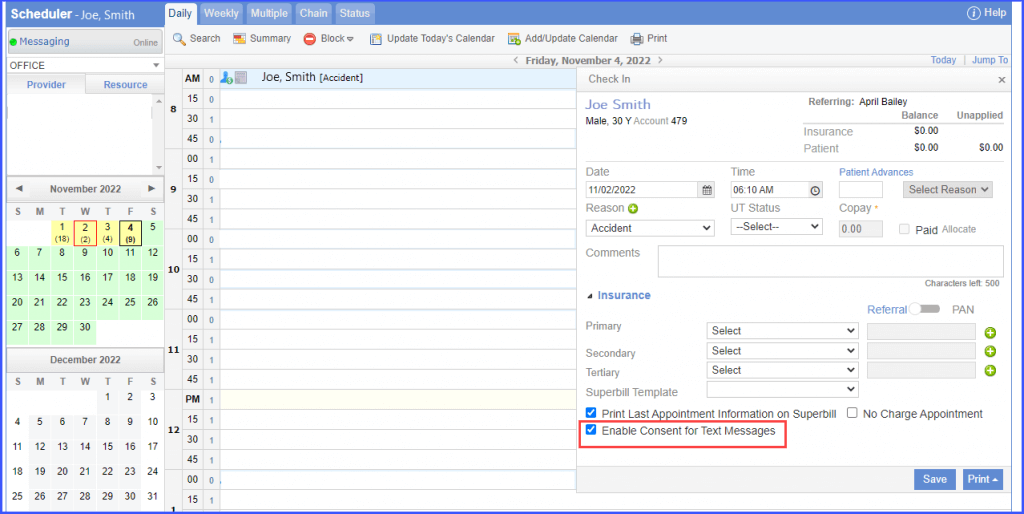
Patients’ consent for receiving messages via short codes can be enabled while checking in the appointment.
Getting Patient’s prior consent ensures that receives all the messages from Practice.
The consent for receiving messages by short codes can be enabled by marking the ‘Enable Consent for Text Messages’ checkbox.
The weekly scheduler view selects the provider/resource name by default, if there is only one option available in the dropdown list.
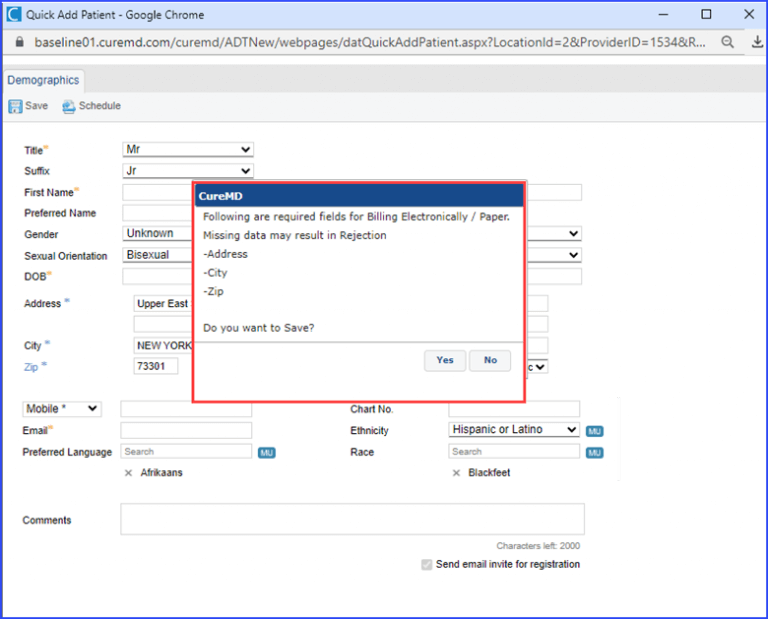
Complete address information of a patient can be added from the quick add patient window in Scheduler module.
On the ‘Book Appointment’ window, click on the ‘Quick Add’ button next to hot list to access the ‘Quick Add Patient’ popup.
Here, users are able to enter the following information regarding a patient:![]()
- Address
- City
- State
- ZIP code
- County
- Country
without the need to navigate away to the patient demographics section.
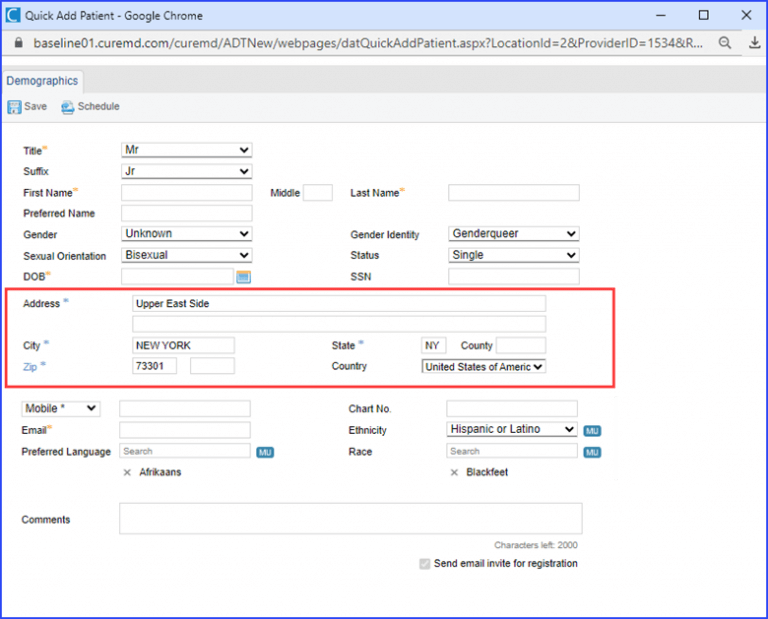
If the address fields are not filled in, a prompt is displayed when attempting to save the new patient information. This prompt serves as a reminder to fill in the recommended fields. Users have the option to confirm their choice to proceed with a ‘Yes’ or return to the entry form with a ‘No’.