How to Check Out a Patient for an Appointment ?
Once a scheduled session has been completed, the patient can be checked-out by relevant staff members. Doing this automatically enters the date and time of patient’s visit. Users can also note instruction for patients.
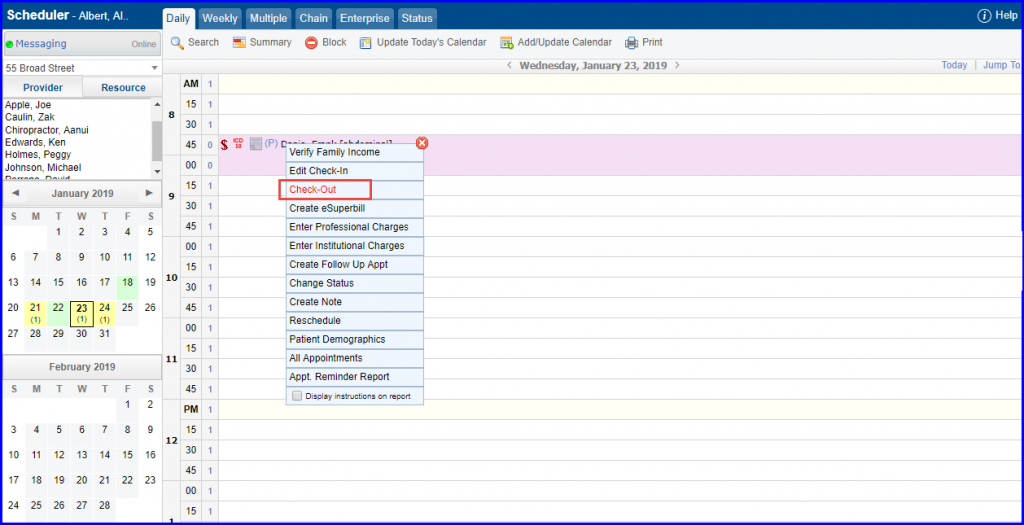
Follow the workflow above to land on the ‘Scheduler’ module screen. Click on the relevant appointment. From the drop-down menu, click ‘Check-out’. The ‘Check-out’ window will pop-up.
From the “Check Out” window, user can save the check out or print a receipt by clicking their respective buttons..
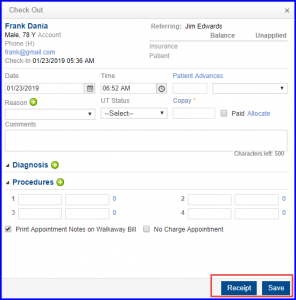
Follow-up information can be viewed at the time of checking out.
However, this feature needs to be enabled from settings. To see how that is done, click here.
Saving the appointment on Checkout opens the ‘Follow Up’ window.
‘Follow up’ window displays all documented information of follow ups added on the same date on which the appointment is checked out.
Clicking date hyperlink opens the ‘Edit Note’ window.

Here, details of a follow-up can be edited and appointments can also be scheduled.

Clicking the ‘Schedule Appointment’ hyperlink opens a window displaying relevant location and provider name.
Available appointment slots can be filtered on the basis of date, or the number of days in which patients/users want to schedule a follow-up appointment.

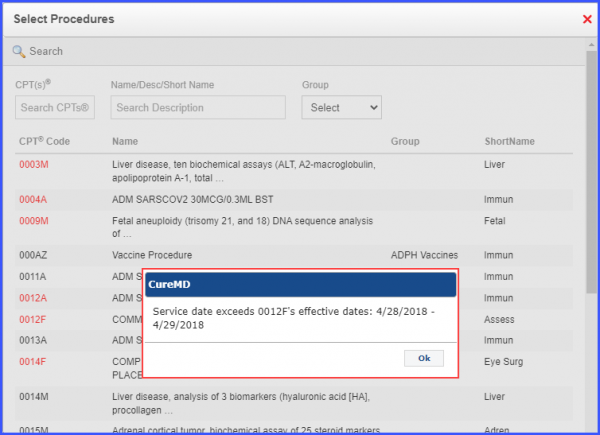
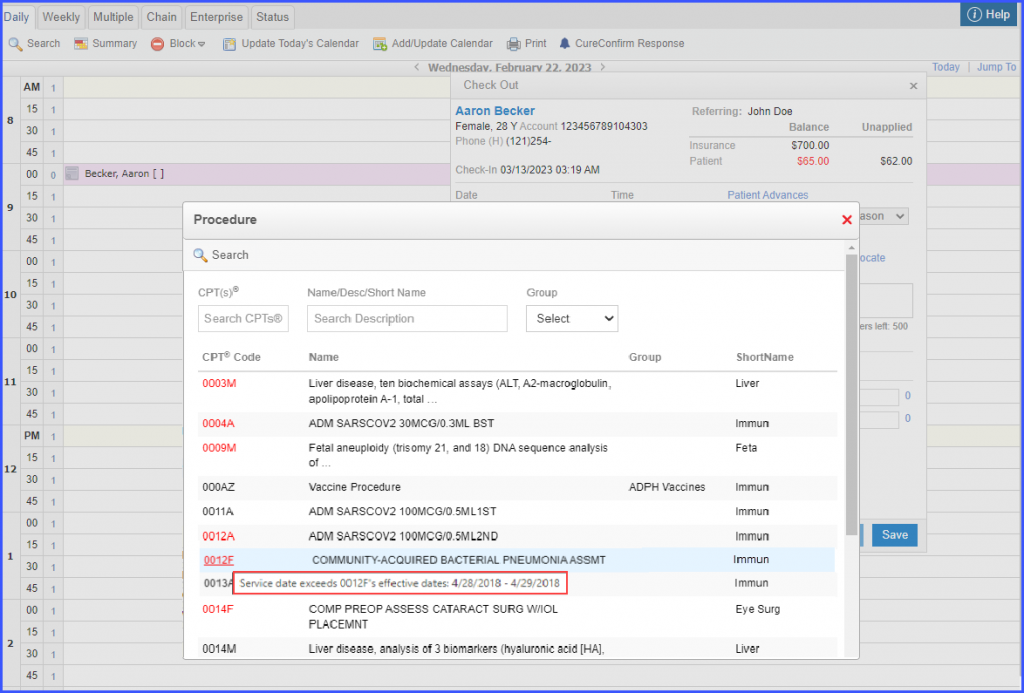
A prompt is displayed when the user selects a CPT code whose effective date is invalid on the service date.![]()
This ensures that the claims do not get rejected.
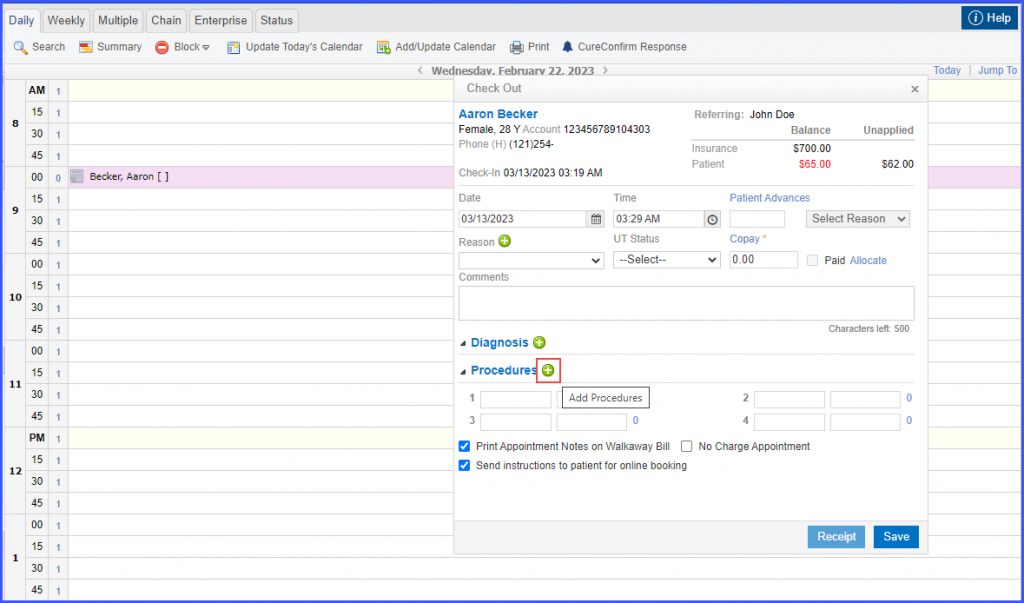
To add CPT codes, click on the ‘+’ button next to Procedures.
On the ‘Procedures’ window, all inactive CPT codes are displayed in red text. Clicking on those codes displays a prompt popup stating:
‘Service date exceeds [CPT Code] effective dates: [Date].’
Similarly, hovering over an inactive code displays a tooltip that states: ‘Service date exceeds [CPT Code] effective dates: [Date].’
If the user manually inputs the inactive CPT code into the ‘Procedures – CPTs’ field, a prompt is displayed with the following message:
‘Inactive code, Service date exceeds [CPT Code] effective dates: [Dates].’
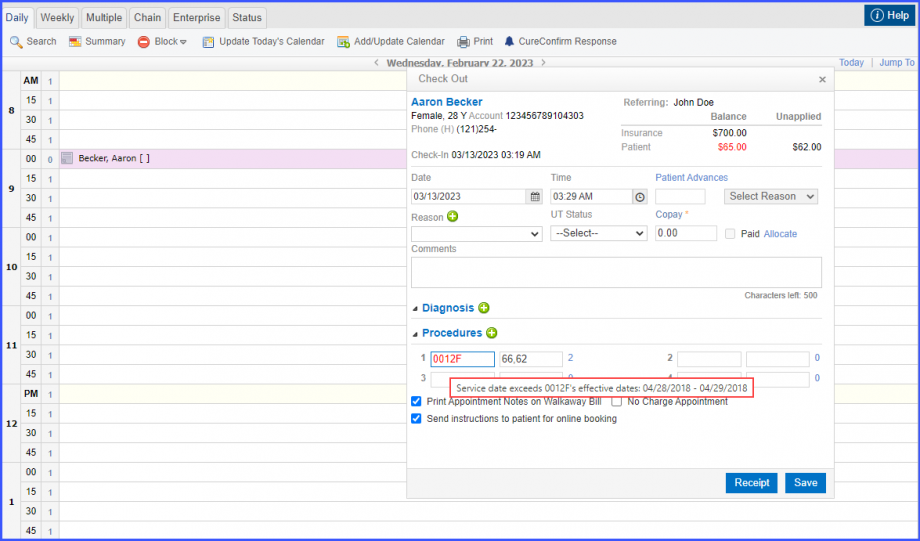
When the user clicks on the ‘Save’ button, the check-out window closes.
If the user clicks on the ‘Edit Check-Out’ option from the list, the ‘Check-Out’ window is displayed without the previously selected inactive code populating the ‘Procedures’ field.
