How to Create a Reason Based Calendar?
In order to create a ‘Reason based Calendar’, a regular calendar first needs to be created and a reason group is then added to the calendar. To view how a regular calendar can be created, click here.
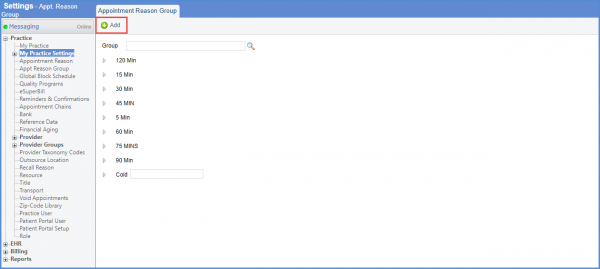
To add an appointment reason group, follow the workflow above to land on the “Appointment Reason Group” page and click ‘+Add’.
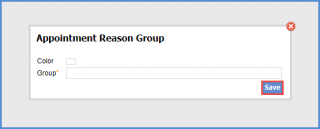
From the “Appointment Reason Group” pop-up, select a color to assign to the group and enter the group name. Click ‘Save’ when done.
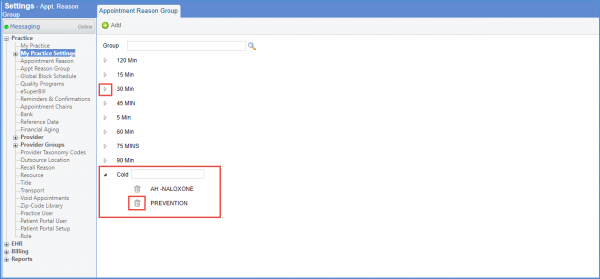
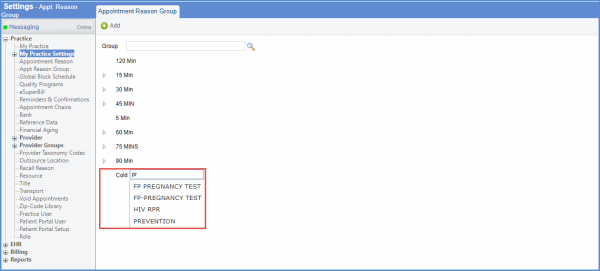
As a user adds a group, they can specify the appointment reason components for the group as well. Hover on the added reason group and in the text-box, type and select reason from the list of options that match.
Also, to delete a reason group, click the ‘Delete’ (![]() ) icon.
) icon.