How to Create a Calendar?
There are two workflows to create a calendar as following:
- Workflow for Provider/Resource:
Scheduler > Select View (Daily/Weekly/Multiple/Chain) > Add/Update Calendar
- Workflow for Provider:
Settings > Practice > Provider > Practice Provider > Select/Search Provider > Schedule > +Add
Regardless of the workflow, the process of creating a calendar remains the same.
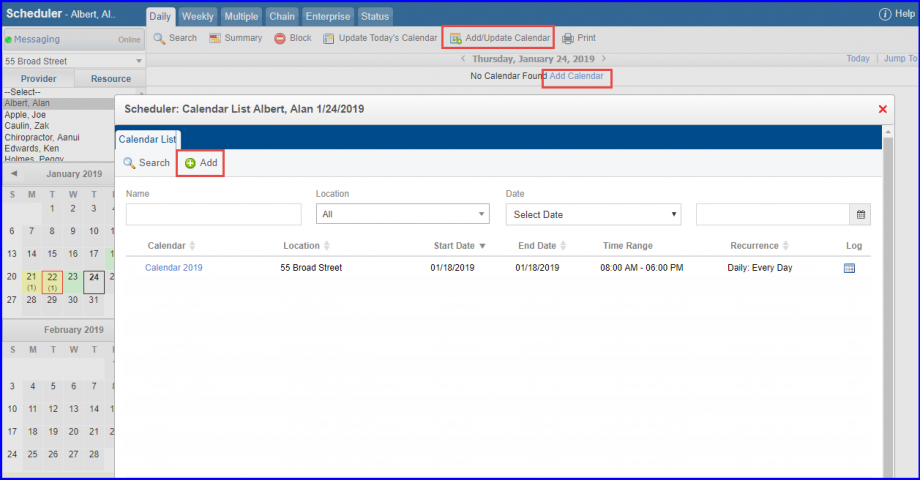
User can either click ‘Add Calendar’ text or ‘Add/Update Calendar’ button from the Scheduler view. Doing so, “Calendar List” for the specific provider/resource pops-up. Here, user can click ‘+Add’ to add a calendar.
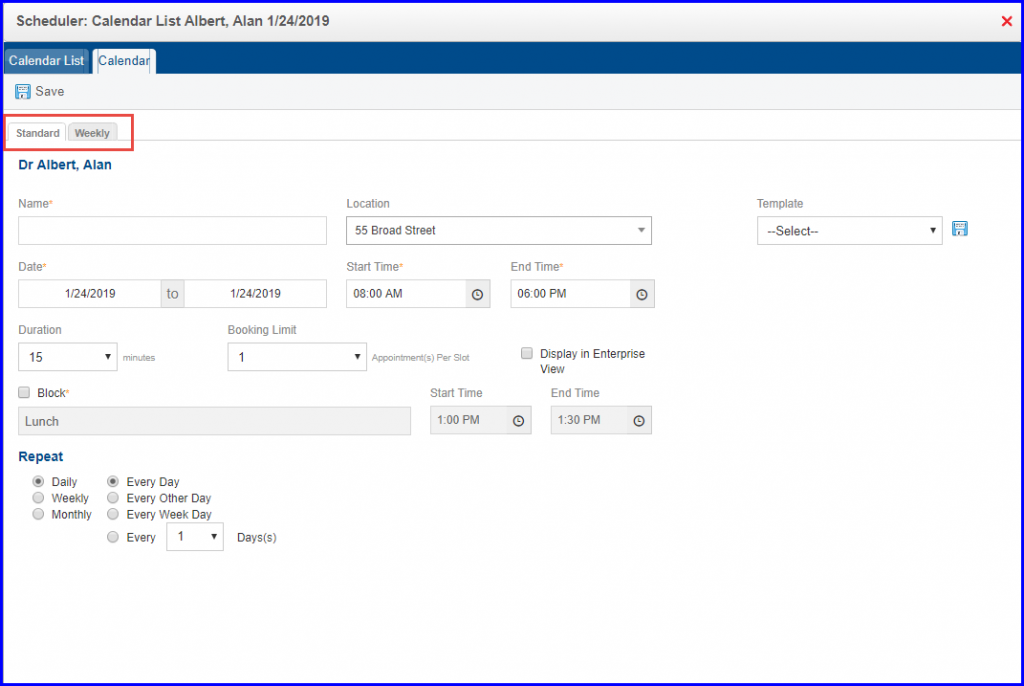
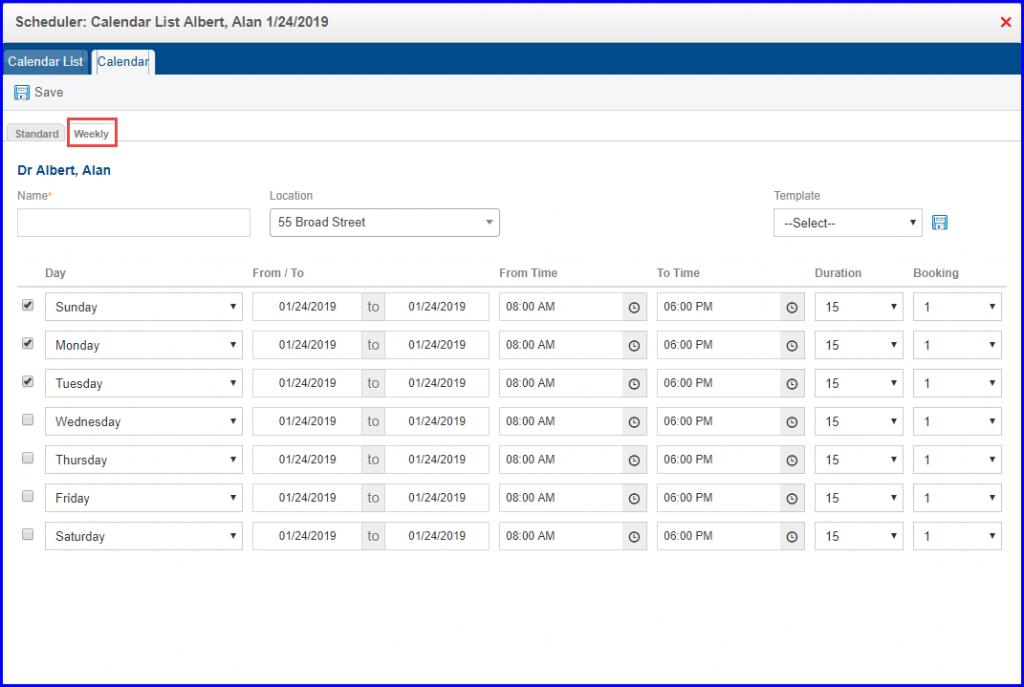
When adding a calendar, user can either create a ‘Standard’ calendar, which is highly customizable or ‘Weekly’ calendar, which is a simple way of creating a schedule for each day of the week.
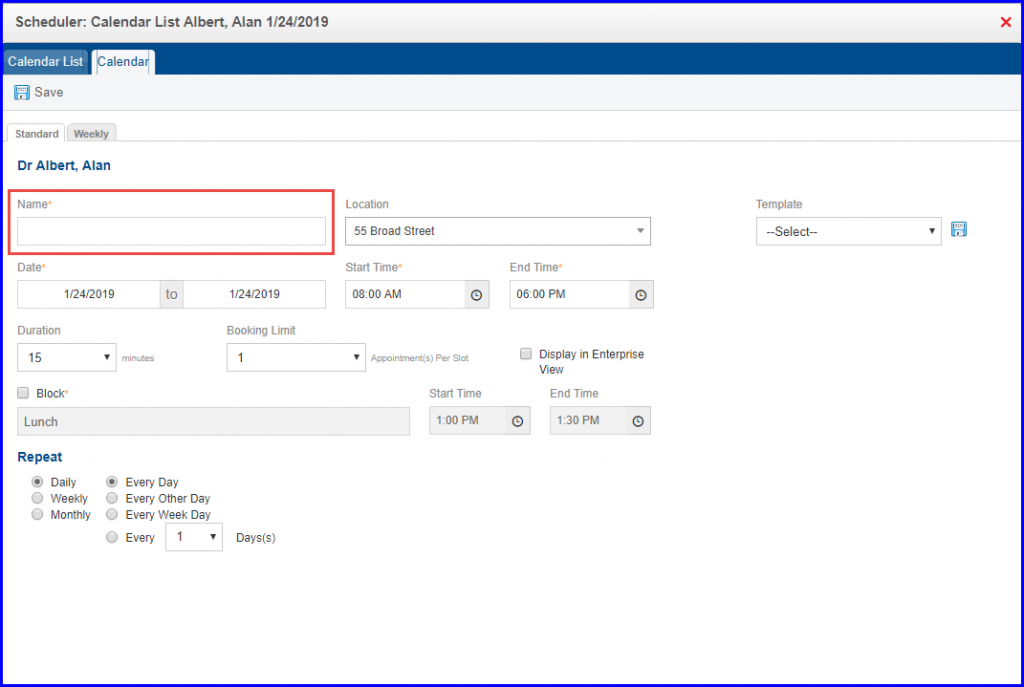
‘Name’ of the calendar refers to the name of the schedule that is being created so that user can differentiate it from other schedules.
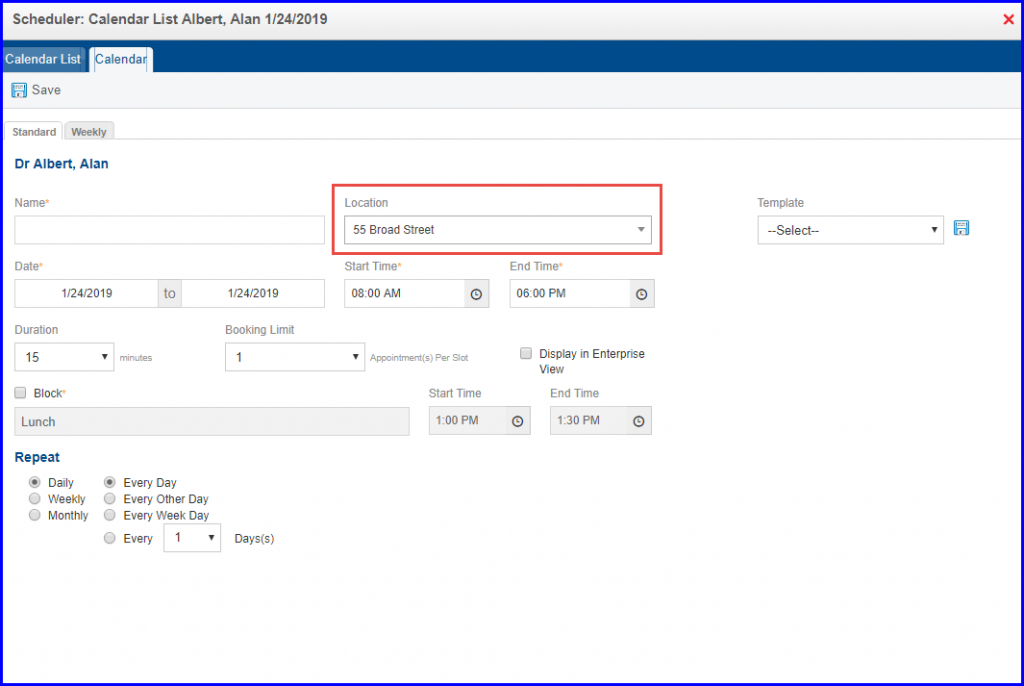
Since calendars are location specific, user needs to select a location.
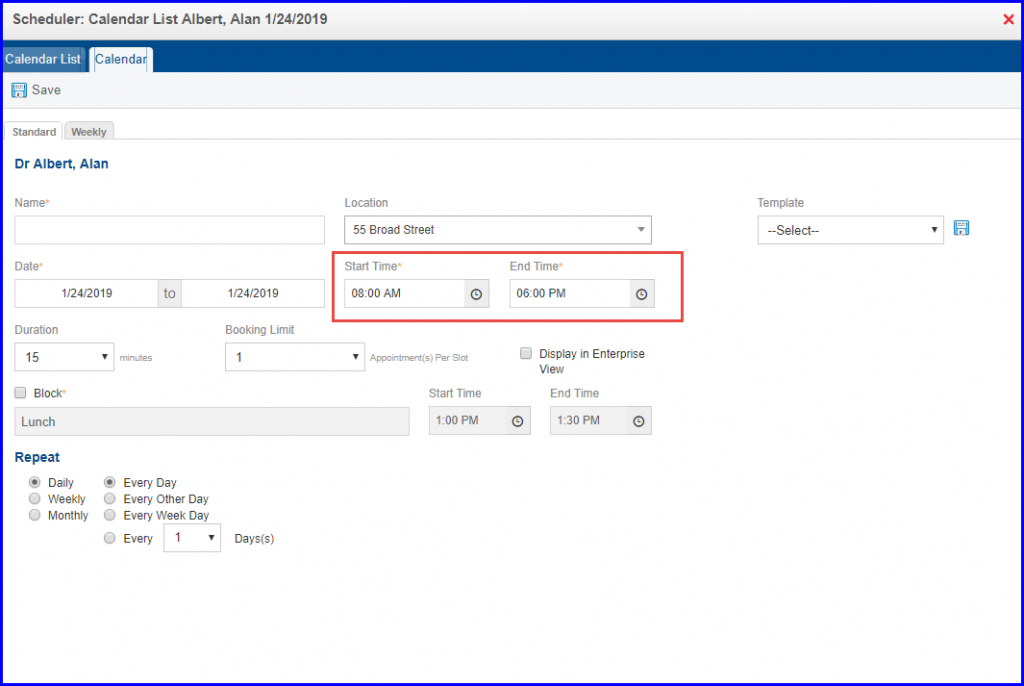
Start and end date need to be inserted in order to create a calendar.

A start and end time indicates the number of working hours during a scheduled day. Time can be set between 12:00 am and 11:59 pm.
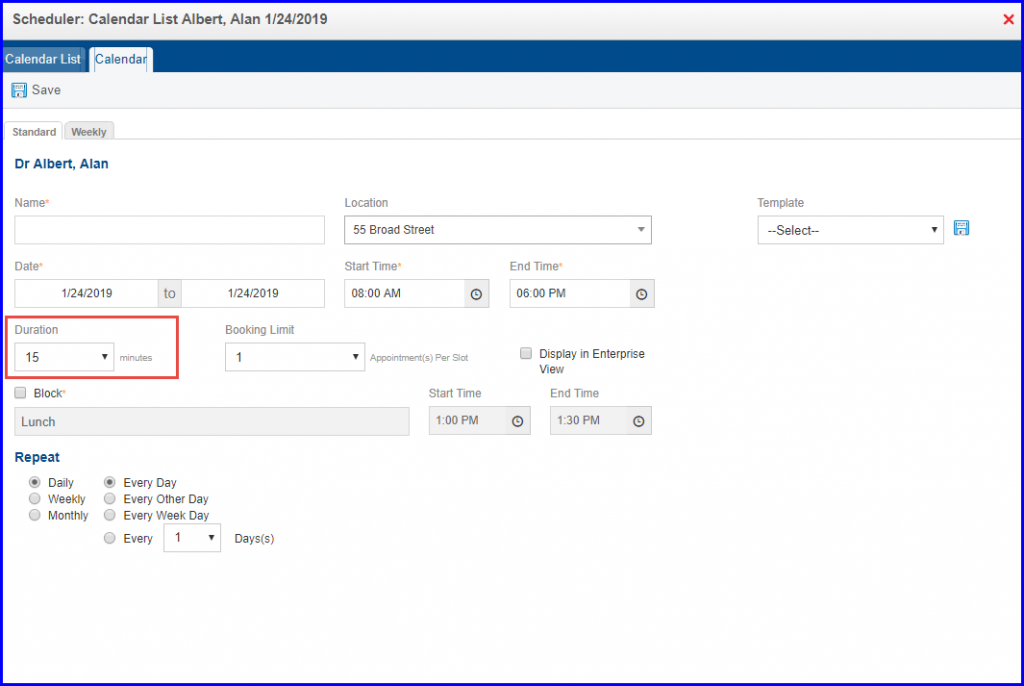
User can define duration of an appointment slot by putting in the number of minutes expected for the average visit. This breaks the working hours into time-slots according to the intervals set.
The number of appointments that a user can schedule per slot must be defined but cannot exceed 10. (This is applicable if users do not have ‘Force Book’ rights).
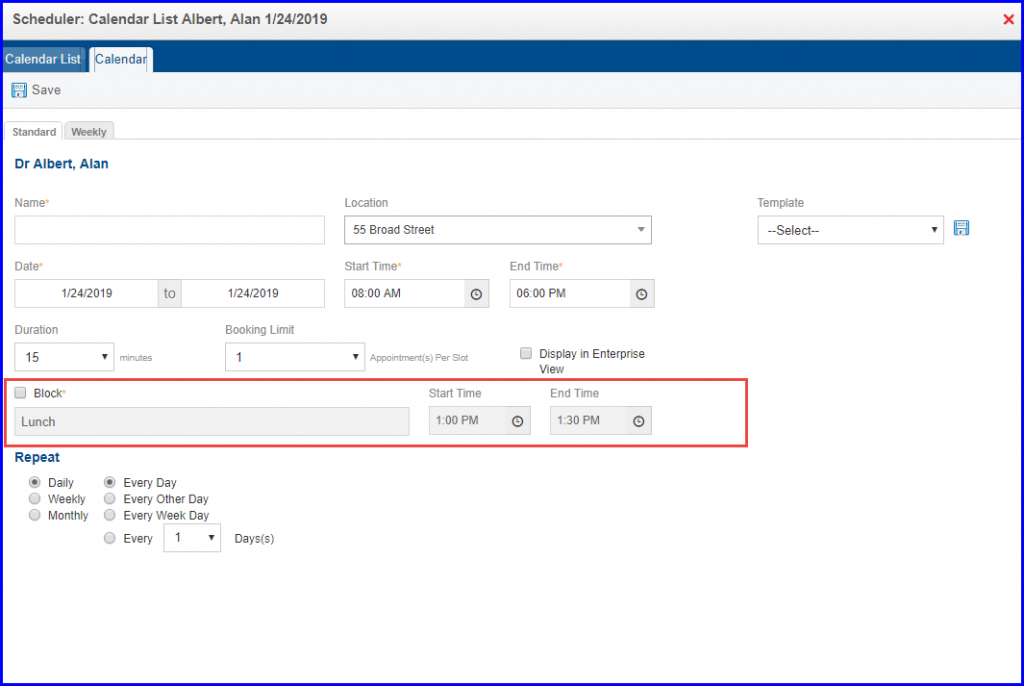
When creating a calendar, user can block time-slots by specifying a reason and the time frame of the block. This restricts appointments from being scheduled during those blocked times. A block can be valid for the parameters set during setup of the block: start and end date, time range of the scheduled block and the recurrence.
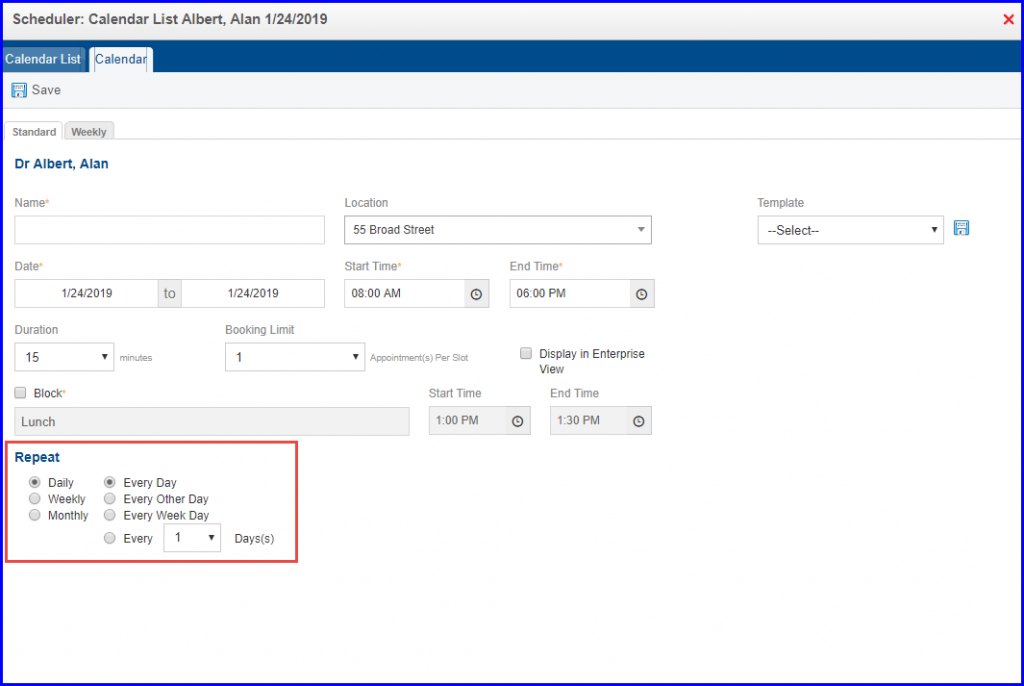
User can also select to repeat a calendar. The recurrence is set by the criteria, and start and end date of the calendar. User can repeat a calendar by choosing one of the daily, weekly, monthly or yearly options.
Similarly, user can add a weekly calendar by providing Name and Location for the calendar. User also needs to select Day, Date, Time, Duration, and Booking for which the user wants to create a calendar.
When the ‘Display Providers/Resources Alphabetic Sorting Across Categories’ checkbox is disabled from the ‘Settings’ module, the providers get alphabetically arranged within their color-coded categories. These categories are created w.r.t the providers’ availability in Scheduler. ![]()
To learn how to enable or disable this setting, click here.
When viewing the list of providers, those who are available and have calendars created for the selected date are displayed in black. This indicates that these providers are available for appointments on the selected day.

Providers who are active but have no calendars created for the selected date are highlighted in red. This color indicates that these providers may still be active in the system but have no calendars created for that specific date.
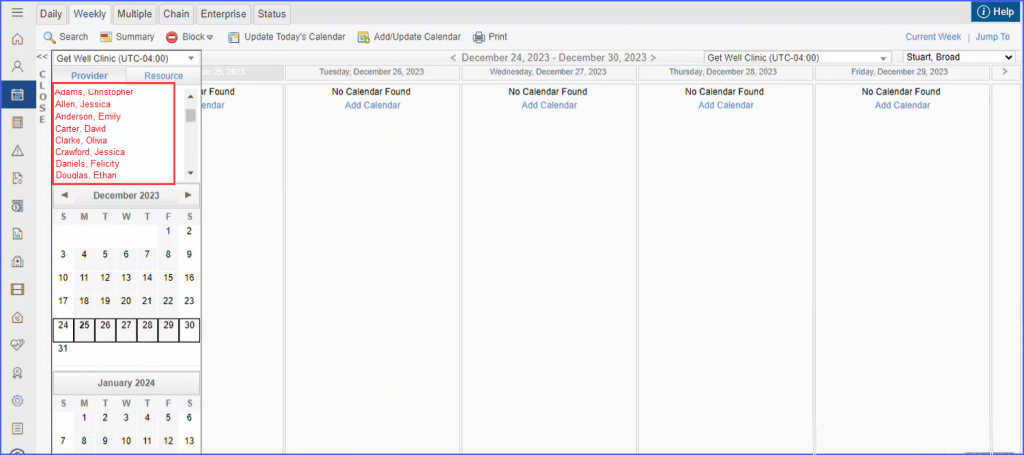
Meanwhile, inactive providers are displayed in grey.
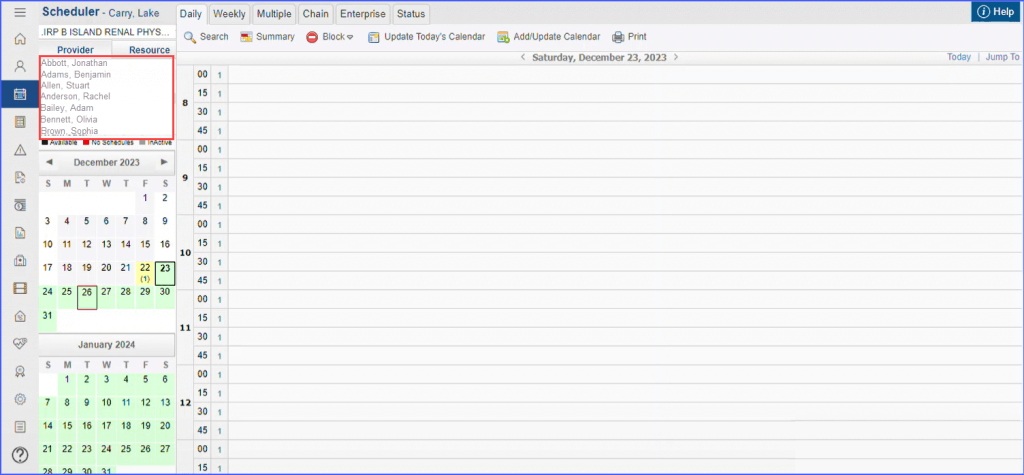
When the checkbox is enabled, all providers/resources, regardless of the categories they fall under, are arranged alphabetically.
