How to Add Patient Advances through Scheduler?
Patients can make upfront payments which are added as ‘Patient Advances’ at the time of Check-in. These payments are posted when the patient checks-in or checks-out.
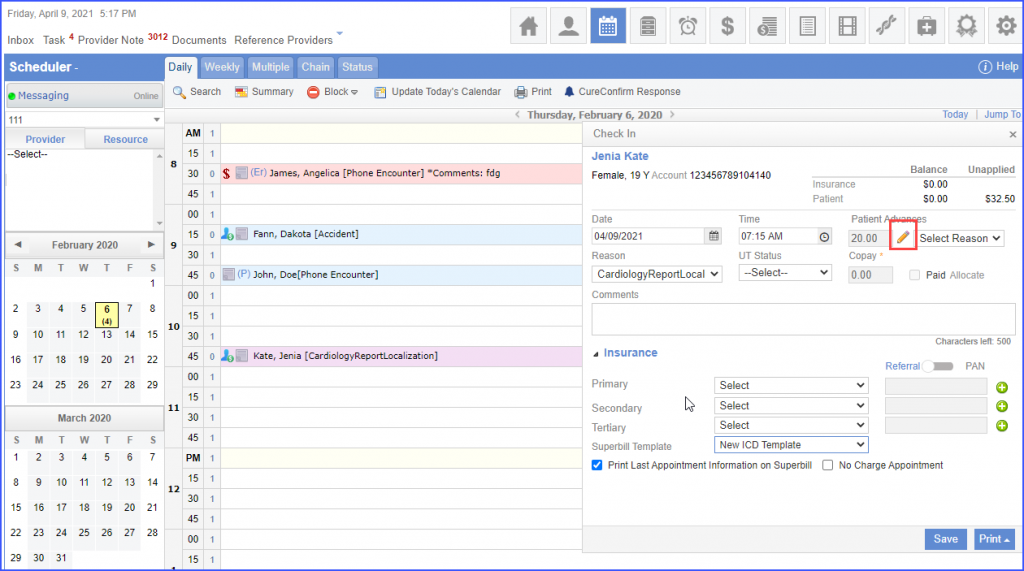
Click an ‘Appointment’ and select ‘Check-In’ to display “Check-In” pop-up.

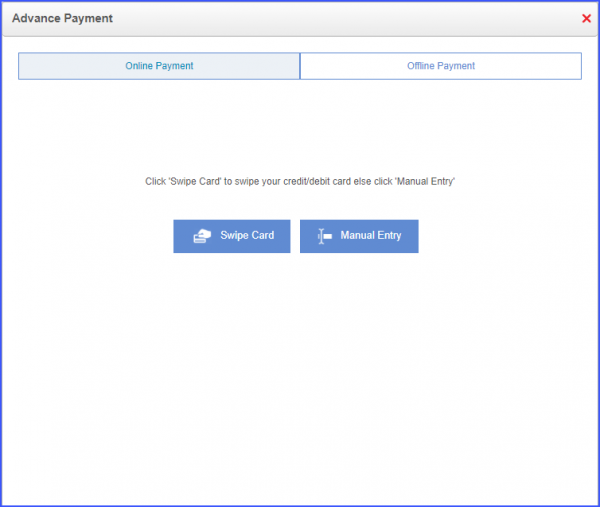
Click ‘Advance Payment’ to display “Advance Payment” pop-up.
Here, User can select between ‘Online Payment’ or ‘Offline Payment’ modes.
Patient Advances that have been collected offline can be edited after they have been added and saved by the user.
Enter an advance amount in the ‘Patient Advances’ text box and click ‘Save’.
An edit icon is displayed next to the ‘Patient Advances’ text box.
User can click the edit icon and change the advance amount. The previously entered advance amount is voided and the system maintains a log for it on the ‘Patient Advances’ page. In order to view the log, click here.
Clicking the edit icon and saving the charge without entering any advance amount, voids the previously entered advance amount. To view the log for the voided payment, click here.
If the patient advance amount has been partially refunded from the ‘Patient Advances’ page, then refund icon is displayed next to the ‘Patient Advances’ text box.

Moreover, if the patient advance amount has been fully refunded from the ‘Patient Advances’ page, then edit icon is displayed next to the ‘Reason’ drop-down.
Similar changes are made on the ‘Quick Charges’ page. To view, click here.
Support users cannot void or refund an online payment.
For support users, ‘Patient Advances’ field is greyed out and the edit icon is not displayed.
However, offline payments can be voided/refunded by the support users.
Similar enhancement has been made on the ‘Charges’ page. To view the change, click here.
The ‘Copay’ and ‘Advance’ payment screens have been enhanced for global payment gateway users. ![]()
Improved UI contributes to a positive user experience.
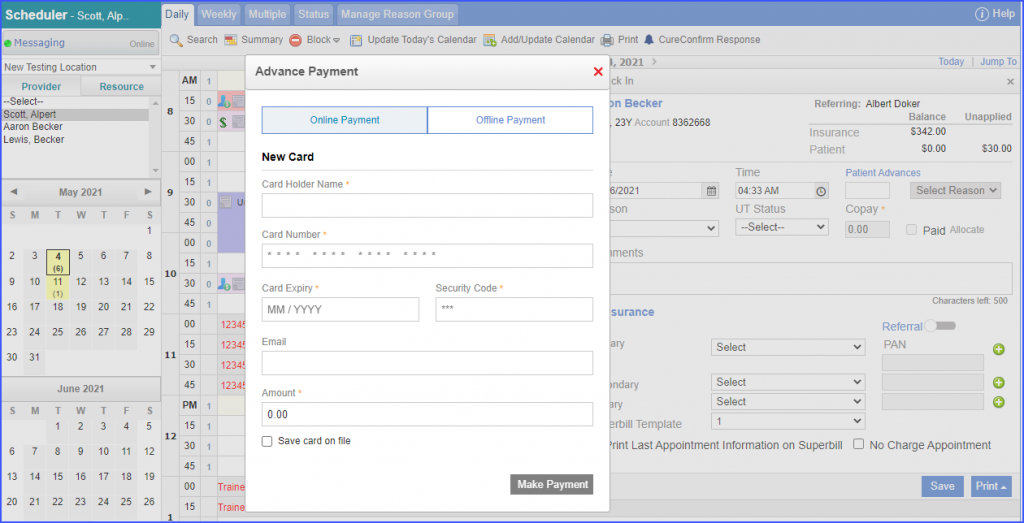
Click ‘Patient Advances’ and the system displays the ‘Advance Payment’ pop-up. To make an online payment, enter the ‘New Card’ details and an advance amount. Then click the ‘Make Payment’ button.
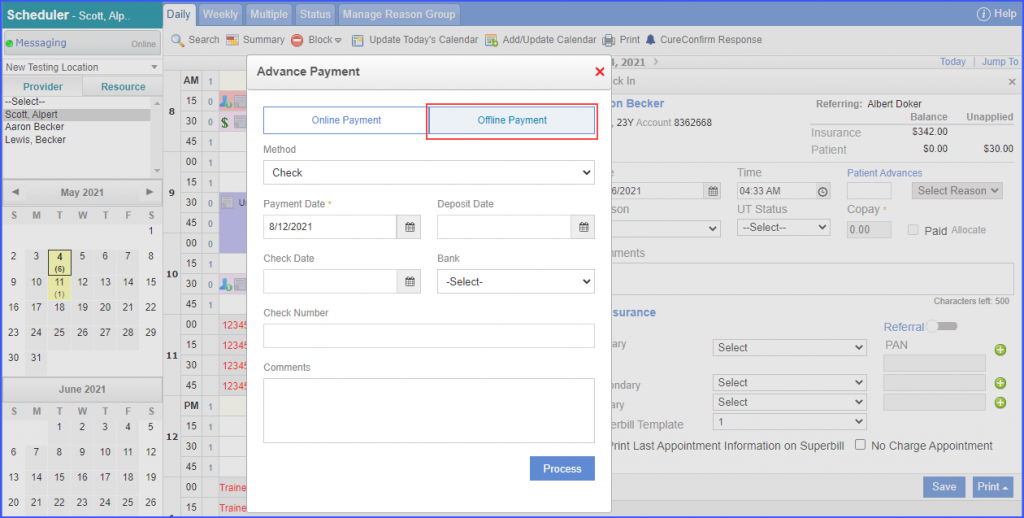
To make an offline patient advance payment, open the ‘Offline Payment’ tab. Complete the payment details, then click ‘Process’.
Users can similarly make online and offline co-payments for patient appointments in the Scheduler module.
