How to Schedule Appointment from Follow Up?
Users can schedule an appointment from Follow Up/Recall.
From any of the ‘Scheduler’ views, click on the ‘Appointment Notes’ (![]() ) button. The ‘Appointment Notes’ screen will pop-up. Select a ‘Follow Up Note’ from the ‘Appointment Notes’ by clicking on the Date of Service (DOS) link.
) button. The ‘Appointment Notes’ screen will pop-up. Select a ‘Follow Up Note’ from the ‘Appointment Notes’ by clicking on the Date of Service (DOS) link.

Click the ‘Schedule Appointment’ link. A ‘Schedule Appointment’ light box is displayed.
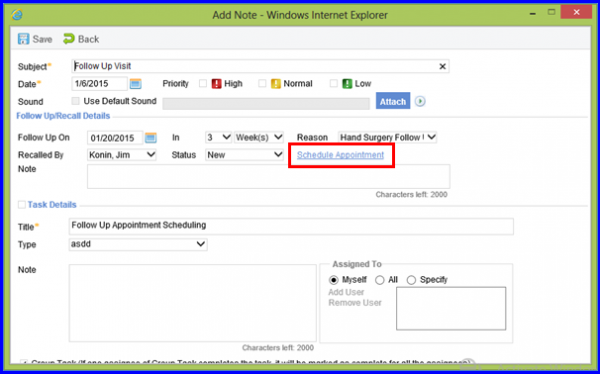
Here, user can search slots for a provider and select the required, available slot.
Inactive providers and resources are displayed at the end of their respective lists in grey text.![]()
This ensures that users can clearly distinguish inactive providers and resources from active ones.
Click here to view how to configure settings for the display of inactive providers/resources.
When the user clicks on the ‘Provider/Resource’ dropdown, the system displays the inactive entities at the end of the list in grey text.
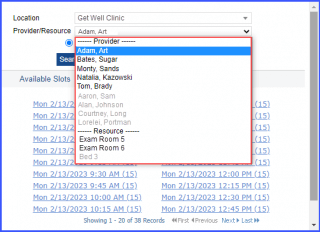
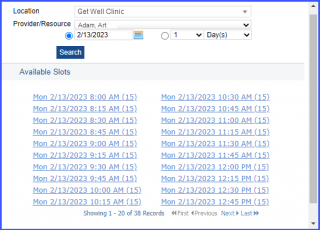
The active Providers and Resources are listed at the top under their respective headings. The user can select an active provider and view available slots against them.
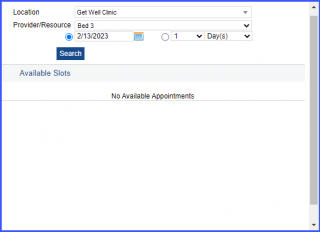
For an inactive provider or resource, calendars cannot be created. If an inactive entity is selected, the system displays the ‘No available appointments’ text in ‘Available Slots’ section.
A similar enhancement has been made in the ‘Search’ Appointments feature in the ‘Scheduler’ module, click here to view.
Clicking the available slot takes the user to the ‘Schedule Appointment’ page. Here, an appointment can be scheduled by providing a ‘Reason’ and clicking the ‘Schedule’ button.
When users provide a visit reason to schedule a follow-up appointment, the system automatically selects the note template associated with the provided visit reason.
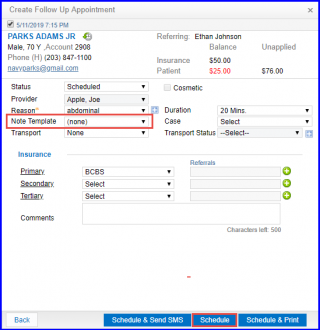
Follow-Up appointments can be created from ‘Provider Notes’ in a similar manner.
Once done click on the ‘Schedule’ button at the bottom of the screen.
