How to Manage Appointment Requests?
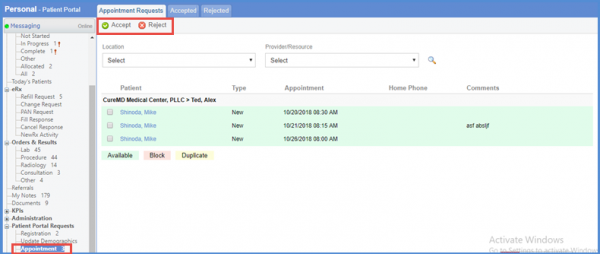
When a user requests an appointment via ‘Patient Portal’, the request is logged in this section for approval or rejection. User can either accept or reject this pending request by clicking the checkbox next to the desired patient’s name.
Once user clicks ‘Accept’, the request moves from ‘Pending’ to the ‘Accepted’ state. However, if ‘Reject’ is clicked, the request moves from ‘Pending’ to ‘Rejected’ state.
‘Available’ appointments are displayed in green, ‘Blocked’ appointments in pink and the ‘Duplicate’ appointments in yellow.

Users can accept appointment requests coming from patient portal.![]()
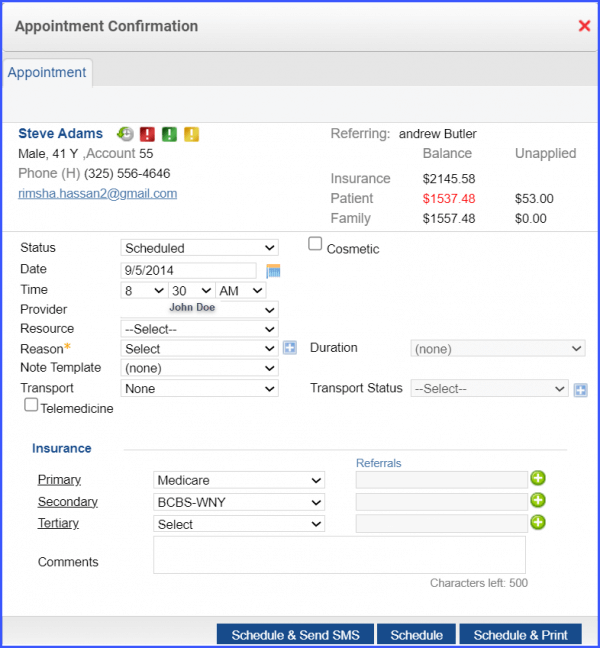
Upon clicking the ‘Accept’ button, the system displays ‘Appointment confirmation’ popup. Users can select relevant information from this popup and confirm the appointment.

