How to View Received Results?
This page lists all lab results received are yet to be acknowledged by a user. To view the lab result, click the “+” sign next to the date of the result.
While viewing the result, a user can enter and save their review comments, acknowledge the result, or assign this result to another user. A result can be moved to the Acknowledged section anytime by clicking “Mark as Acknowledged”. Legend on the Received Results consists of the following items:
‘Abnormal’, ‘Advisory Messages’, ‘Duplicate Result’, ‘Reviewed’ and ‘Lab’.
The result can be printed by selecting Print option from Result drop-down menu. User can also email a result by clicking Email button.
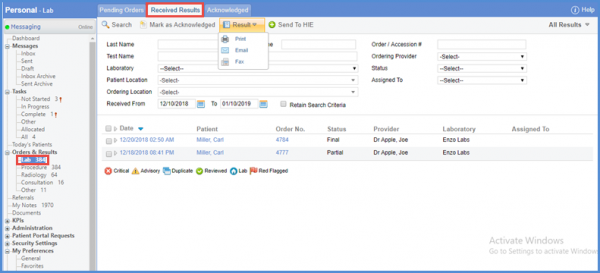
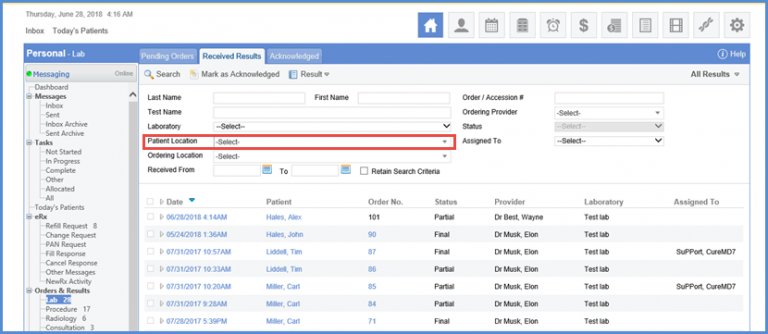
In addition, the Location dropdown has been renamed to “Patient Location”.
Status filter drop-down for search has been enabled. A user can search received results on the basis of partial, final, correction, and cancelled status.
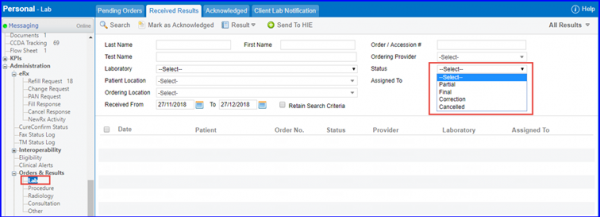
The status filter is available on the ‘Acknowledged’ and ‘Assigned to me’ tabs as well.
The Status filter drop-down has also been enabled for Procedure, Radiology, Consultation, and Other components.
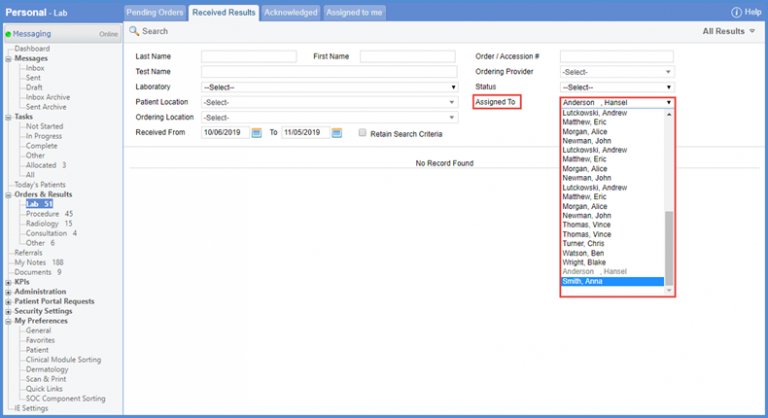
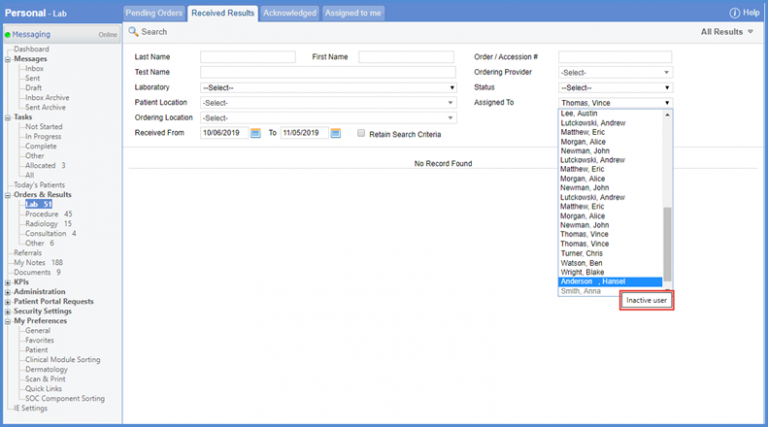
User can distinguish which practice users are inactive from the ‘Assigned to’ dropdown. Inactive users are grayed out in the dropdown and can be selected to see their associated lab results if needed.
Follow the above mentioned workflow to land on the ‘Lab’ page. Navigate to ‘Received Results’ or ‘Acknowledged’ tab to view the search criteria.
Clicking ‘Assigned to’ dropdown shows users list.
Inactive users are shown at the bottom of the list.
Hovering over a grayed out user displays a tooltip with message ‘Inactive User’.
Additionally, similar changes have been made to the ‘Assigned to’ dropdown in ‘Received Results’ and ‘Acknowledged’ tab of ‘Lab’, ‘Procedure’, ‘Radiology’, ‘Consultation’ and ‘Other’ under ‘Orders and Results’ main page and for the same headings under ‘Administration’.
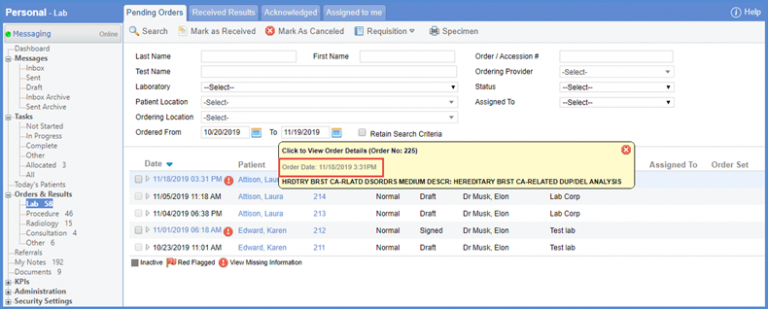
‘Order date’ is displayed in the tooltip while hovering over ‘Order No’.![]()
User can choose to display ‘Result Date’ or ‘Specimen Collection Date’ here. To view how to configure it, click here.