How to Compose Message/Email?

Personal > Messages > Inbox

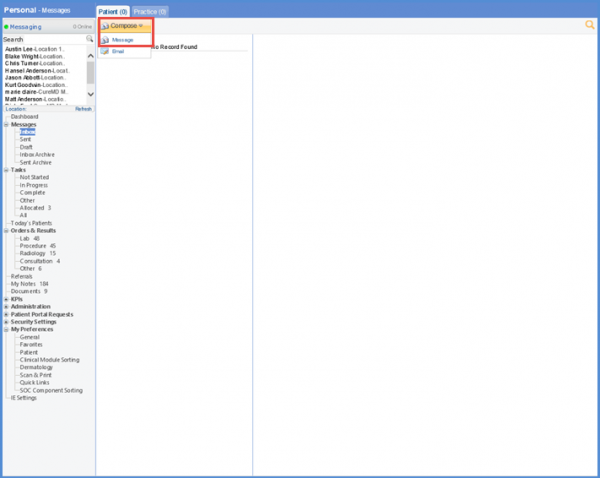
Follow the above mentioned workflow to land on ‘Patient’ tab. Any messages from the patient are displayed on this screen.

By using the ‘Message’ option, user can communicate with the patient through the patient portal and with the practice users through the application.

To send a message to a patient, hover over the ‘Compose’ button. Select the ‘Message’ option to create a message.

Compose Message/Email

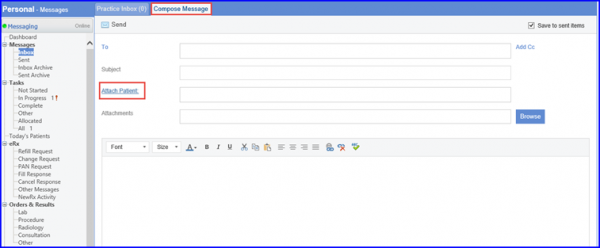
Doing so opens the ‘Compose Message’ tab. Here, user can add recipients by clicking ‘To’ hyperlink.

Click ‘Attach Patient’ hyperlink to attach patient details.

Attach a Patient

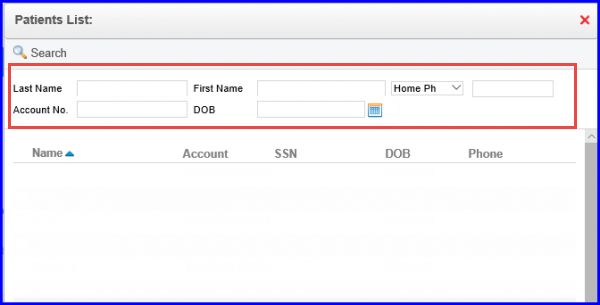
This opens the ‘Patient List’ lightbox. Here, a patient can be searched for using their ‘Last Name’, ‘First Name’, ‘Contact Number’, ‘Account No.’, and ‘DOB’.

Patient List

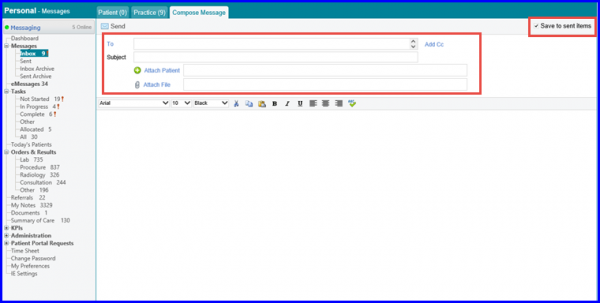
On the top right corner, there is a checkbox named ‘Save to Sent Items.’ The user can mark this checkbox in order to save the messages. When done, click ‘Send.’

Compose Message

If the user selects the ‘Email’ option, ‘Compose Email’ tab opens. The email option enables user to send an email to patient’s email address.

Compose Email

Instead of displaying all the users of the practice, only those users are displayed in the messenger that have the same location of the logged in user.

If the logged in user wants to search a user of another location, they can search the name of the user in the search bar. The system searches for the specified user across all the locations and displays the location name which matches the search criteria.

Search Location

Clicking the ‘Location’ hyperlink, opens a new window listing all practice users and their locations.

User can then move on by selecting the required location, upon which all users belonging to that location are populated in the messaging pane.

Location Selection Screen

User can also communicate with the patient through the ‘Patient’ module’s messaging option. To know how it is done, click here.

Users have the option to select default message recipient(s).

Mark the ‘Retain recipient(s)’ checkbox before saving the message as draft or sending it.

‘Retain recipient(s)’ Checkbox

Next time, when the user composes a message, the recipient(s) are auto-populated.

The implementation is for the ‘To’ and ‘CC’ fields. Additionally, the recipient(s) can be retained in both ‘Patient’ and ‘Practice’ tabs.

Similar enhancement has been made in the ‘Patient’ module. Click here, to view the change.

Users can enable the automatic replies feature when they are unavailable to respond to messages.

This ensures that patients are aware of providers’ absence from the office.

On the ‘Inbox’ page, the system displays ‘Out of Office’ button to the left of the search icon.

‘Out of Office’ Button

Clicking on the “Out of Office” button displays a pop-up containing the ‘Turn on automatic replies’ checkbox.

‘Out of Office’ Popup

Marking the ‘Turn on automatic replies’ checkbox displays ‘Automatic Reply’ text box. Here, users can add the automatic message and click ‘Save’.

‘Out of Office’ Popup

When the user clicks save, the system displays the text ‘Out of Office: Enabled’ next to ‘Out of Office’ icon.

‘Out of Office: Enabled’

Click here, to see how the automatic reply appears as a notification on the patient portal.

NOTE: User cannot select more than one location at a time.
If location search result exceeds 30 character length then it is truncated and can be seen on tooltip by hovering the mouse over the result.