What Options are Available in the Provider Note Toolbar?
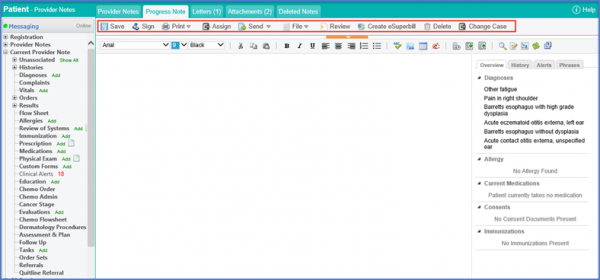
Different options in the provider notes toolbar are grouped in drop down menus.
Follow the above mentioned workflow to land on the ‘Provider Notes’ page.
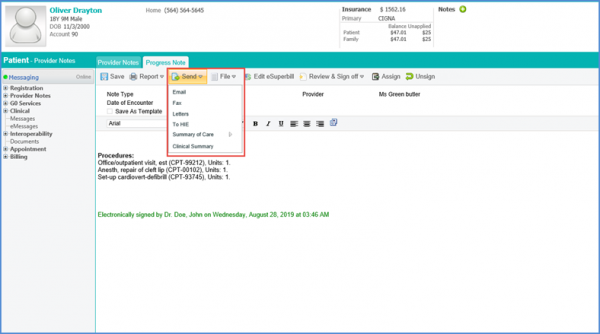
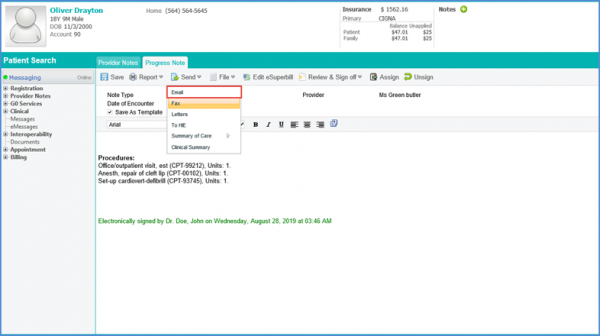
Hovering over the ‘Send’ button, a drop down menu is displayed listing the sending options.
User can hover over the ‘Review’ button to review, sign off, or append text to a provider note.
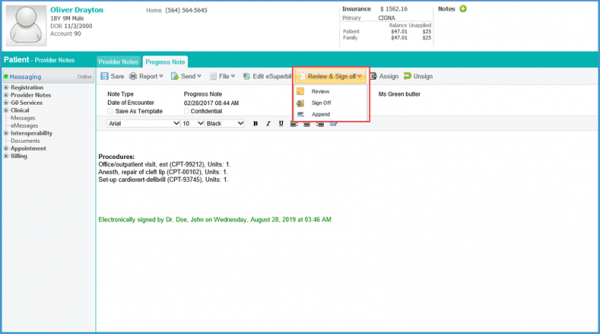
In case of Append, insert the Addendum, click the ‘Append’ button once done.
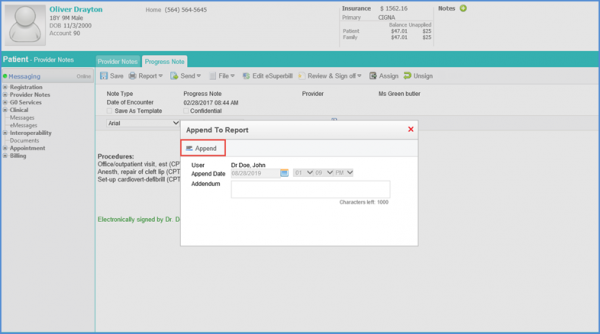
Once the provider note is completed, click the ‘Sign’ button to sign the provider note. System displays physician’s signature for a signed provider note, at the bottom of the provider note.
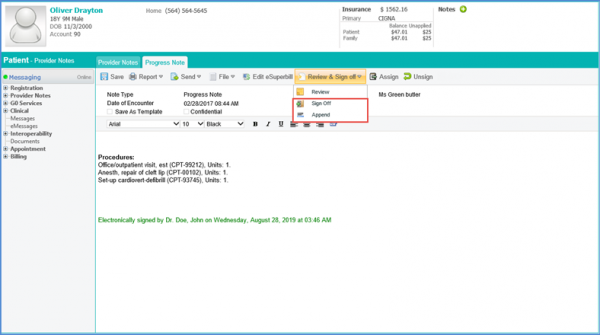
A signed provider note can not be edited. User can update a signed provider note by adding an addendum. User can click ‘Sign Off’ or ‘Append’ to add an addendum to provider note.
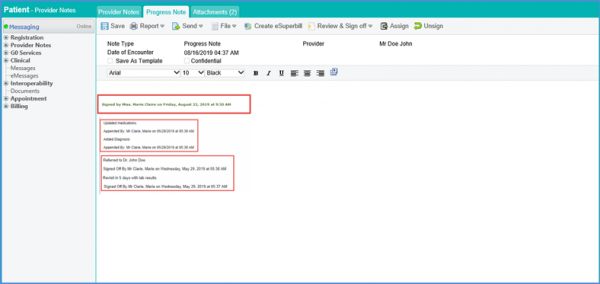
Electronic signatures are displayed for signing or signing off a provider note, along with the provided comments.
Users can sign a note only when they have the permissions to do so. Click on the ‘Sign’ button from the toolbar to sign the provider note.

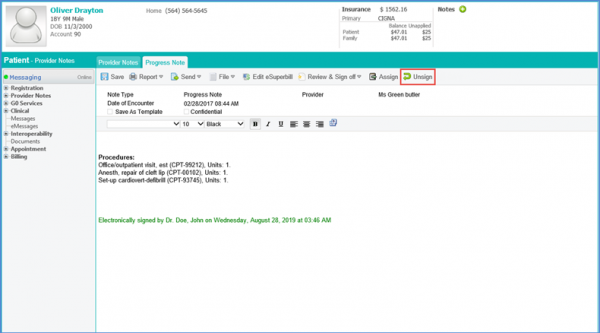
A signed provider note can also be unsigned by clicking ‘Unsign’ button to make modifications.
Users can only un-sign Provider Notes for the providers that are associated with their user profile. If a user opens a Provider Note that is not associated with their profile, the Unsign button is not visible to them.
If user tries to delete a Provider Note whose eSuperbill is in problem List, the user gets an alert that the Provider Note can not be deleted.
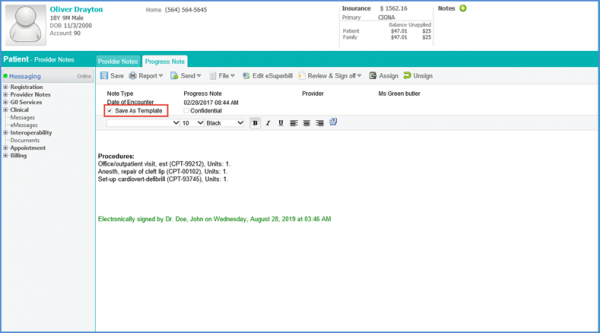
User can also save a provider note as template. For this, create a provider note, sign the provider note, check the ‘Save as Template’ checkbox, and save the note again.
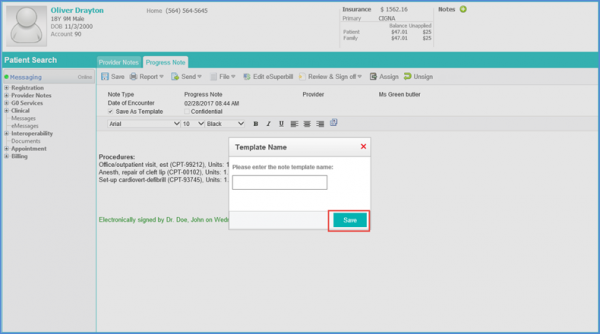
Doing so opens “Template Name” pop-up. Here, user can add the note template name and click ‘Save’.
The template is saved and is displayed in the Note template drop down menu.
Once the provider note is signed, it can be sent to different practice users with the help of Fax option.
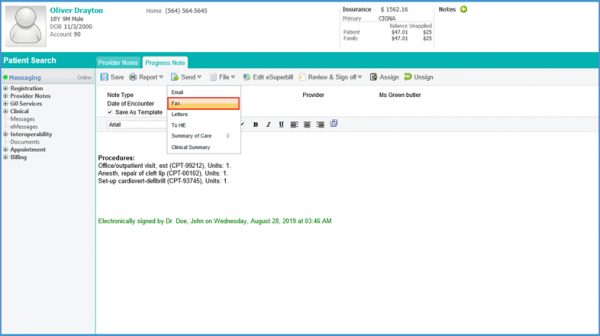
Clicking on the Fax option opens up a Print Options tab. The contents can be customized by attaching documents, labels and lab results to the final print.
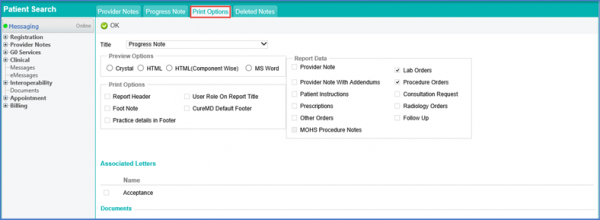
Certain sections of the report can be excluded if needed.
To send the provider note as an email hover over the “Send” button. Select the Email option from the drop down menu.
Clicking ‘Print’ option opens “Print Options” tab. Here, select between different preview and print options.

The provider note is attached to the email in the form of a PDF document.
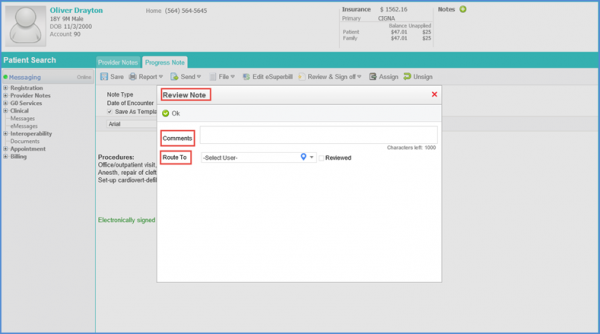
Clicking on ‘Review Note’ the “Review History” popup is displayed. Here, users can review the provider notes assigned to them.
The provider note can be assigned to another user from the practice to review. In the ‘Comment’ box, additional information can be added for the reviewer.
