How to Record Implantable Devices on Provider Notes?
Implantable devices can be recorded on a provider note.
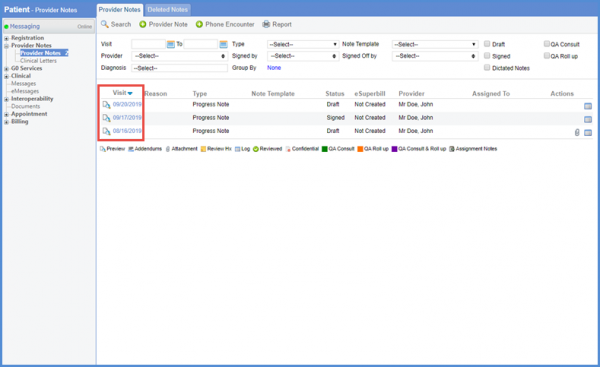
Follow the above mentioned workflow to land on ‘Provider Notes’ tab.
Click the visit date to open a provider note.
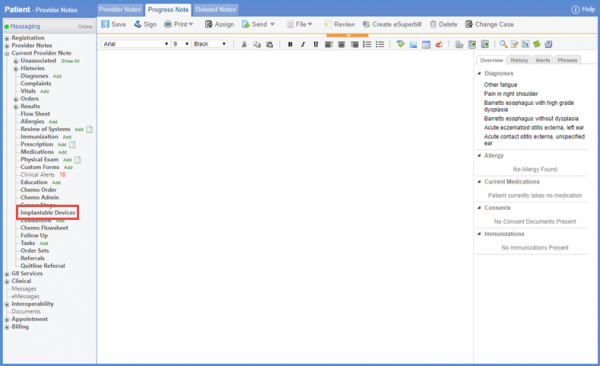
From the left tree menu, click ‘Implantable Devices.’
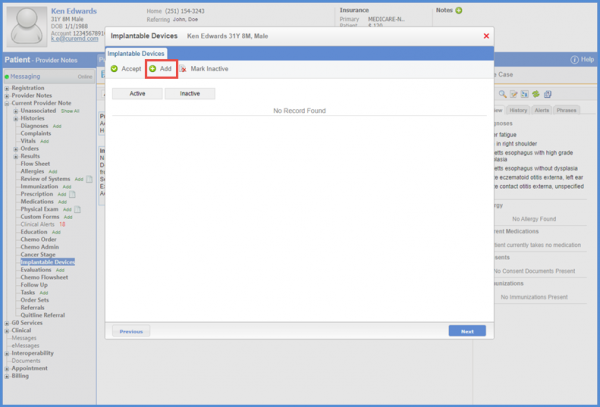
Doing so takes the user to the ‘Implantable Devices’ screen. To add an implantable device, click ‘Add’.
From the ‘Add’ tab, enter the Unique Device Identifier (UDI) of the implantable device and click ‘Validate.’

Doing so fetches device details such as Device Name, Device Identifier, Issuing Agency, Lot Number, Serial Number, Expiration Date, etc.

Furthermore, procedures ordered for the patient can also be associated with implantable devices.
To do that, click the ‘Procedure’ dropdown. A list of all CPTs ordered for that particular patient is displayed. Here, the required CPT can also be searched using either the procedure code or description.
Once a procedure is associated, click ‘Save.’

The list of saved devices is displayed on the ‘Implantable Devices’ screen. User can select any device from this list by marking the check box next to it.
Once a device is selected, click ‘Accept.’

The user can enable auto-population of ‘Implantable Device’ component on provider note. To know more about this, click here.
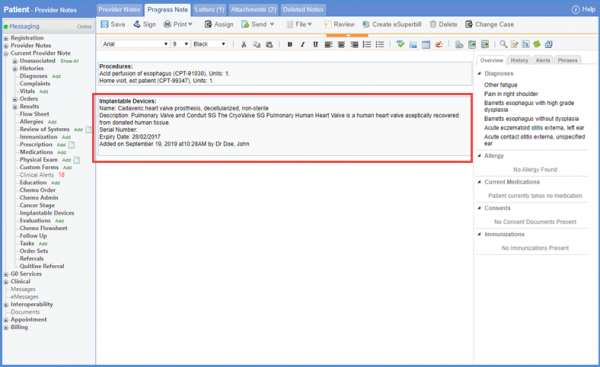
The implantable device details are populated on the provider note.
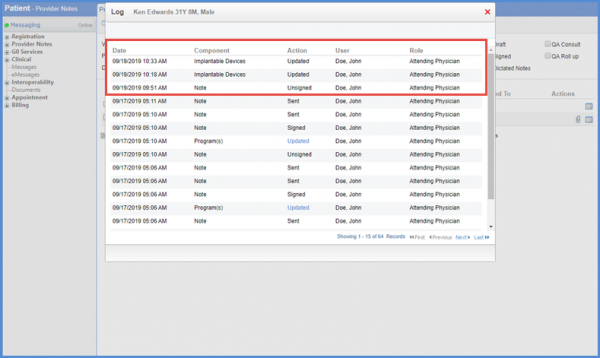
A log is maintained to record actions for implantable devices. These actions are listed under the ‘Actions’ column.
In case user adds an implantable device, action is recorded as ‘Taken’.
If the implantable device is uploaded as an attachment, action is recorded as ‘Attached.’
Also, if the implantable device is marked as Active/Inactive and attached to a Provider Note, action is recorded as ‘Updated.’
The user can add a flag for implantable devices. To know more about it, click here.
