How to Insert an Image on Provider Note?
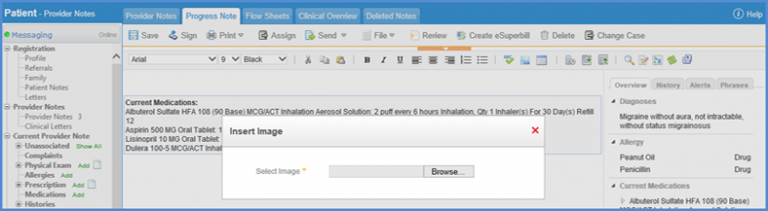
To add an image in a provider note, open the required provider note and click ‘Insert Image’ button.

This opens up the Insert Image pop-up. Users can browse the image and upload it to the provider note.
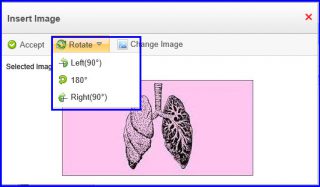
When user selects an image from the browser, system displays the image preview. Rotate option is visible on top of the image preview on the Insert Image popup. User can rotate the image by selecting the desired option from the Rotate dropdown.
Users can rotate the image as required, by choosing the desired option from the Rotate dropdown.
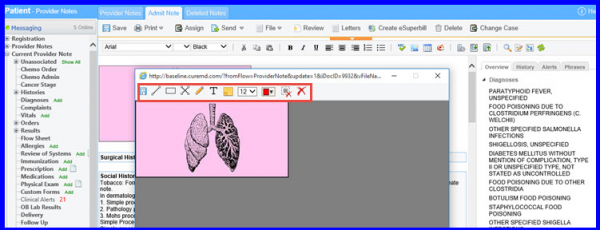
Click Accept to insert the selected image to the note.
Once the image is uploaded, double click on the image to open the edit image toolbar. This editor allows the user to draw, erase, add text and add note to the image.
To replace an image on provider note.
Navigate to Provider Note and click on “Insert Image”. Once an image is uploaded and the user wants to replace it with another one, click on “Change Image”. This lets the user to select another image. When done, click on “Accept”.
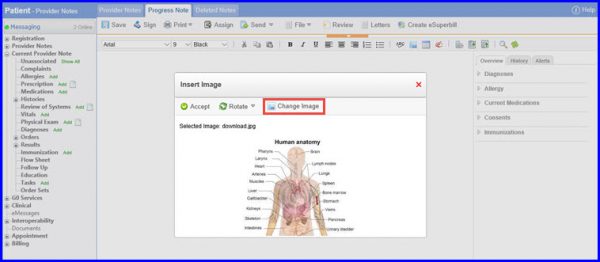
Change Image
Users can provide feedback about their experience in the provider note. 
This helps CureMD improve provider notes user experience.
To provide feedback, click on the ‘Feedback’ button.
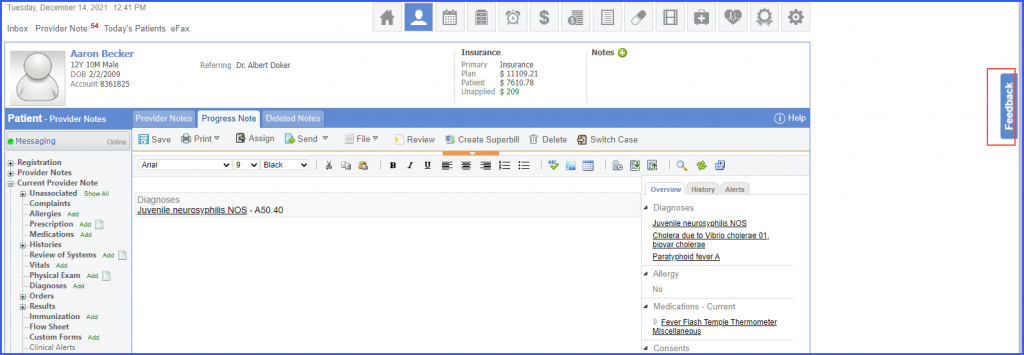
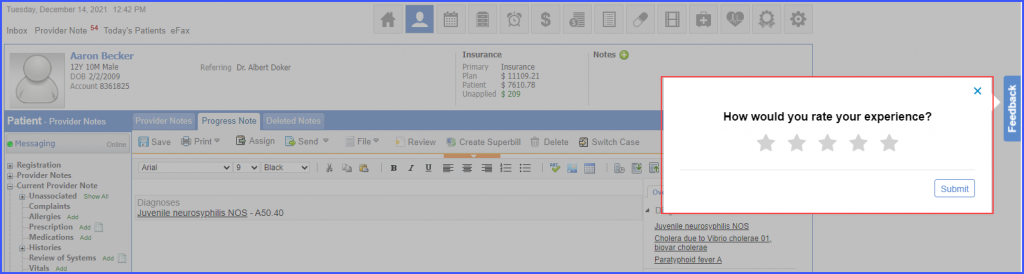
Once the ‘Feedback’ button is clicked, a feedback overlay is displayed. Users can rate their experience by clicking on the desired star.
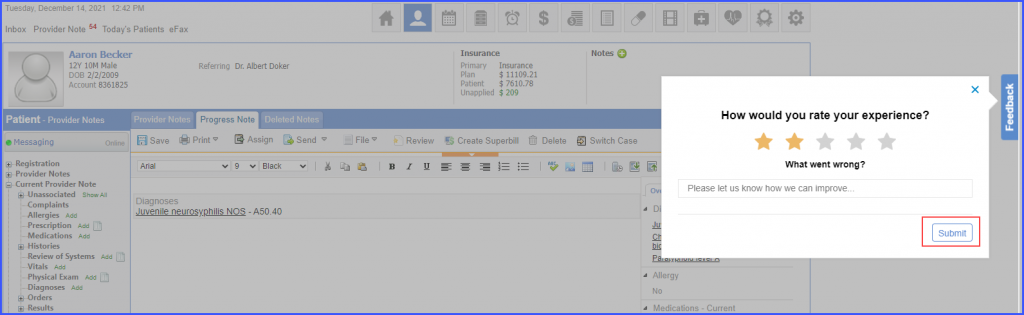
After a star is clicked, further feedback options appear. Click ‘Submit’ to submit the feedback.
To view a similar enhancement made in the ‘Diagnoses’ section, click here.
