What is lab Order Revamp?
The revamp has made the Lab Orders component efficient and automated. Fields are populated automatically and sequentially.
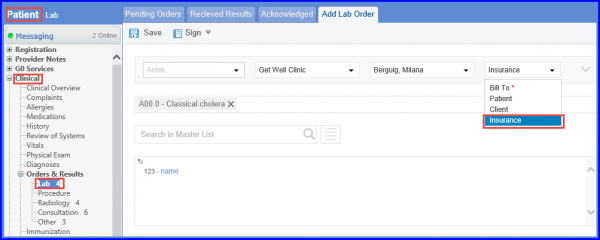
First of all, the system prompts user to select a laboratory and then fill these three fields: Location (visible only if it exists in the Settings module. This option doesn’t appear for in-house labs),Name of the ordering provider and Billing type.
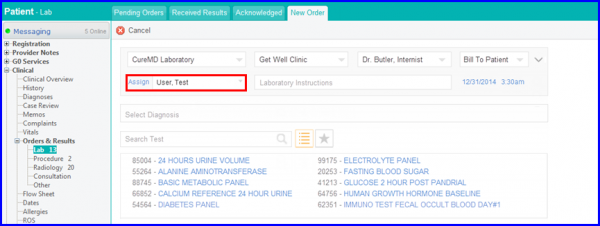
User can assign the order to different users by clicking on the assign link.
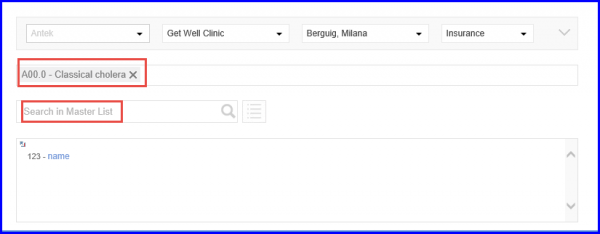
Simpler and faster way to attach patient’s diagnosis codes with the lab order is introduced.
The diagnosis selected here is attached to each of the tests automatically. When user clicks on the Diagnosis Search tab, the patient’s current list of diagnosis shows up in the lightbox for selection.
To add a diagnosis, type it in the search bar and the New Dx Button appears in the drop down menu.
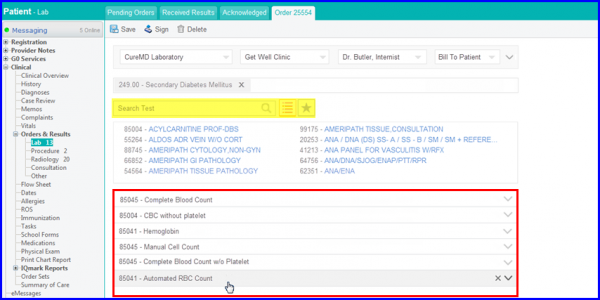
Faster, more user friendly GUI is introduced to add Test Codes.
Click on the search bar and type in the Name of the test or code. A list of codes appears with results that have been narrowed down according to the search criteria.
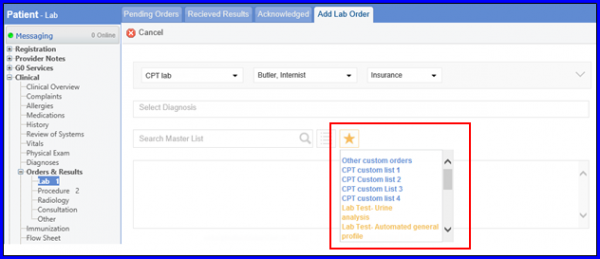
If a practice has a custom list, a Favorites icon is displayed. When user clicks on it, they can select the desired lab test. In case of more than one custom lists, a drop down menu appears listing all of them.
When user hovers the mouse pointer over the Favorites icon, a drop down containing lists appears. In this drop down the User Defined Custom lists appear in blue color, while the System Default Custom Lists appear in orange color.
Select any number of tests to include in the order.
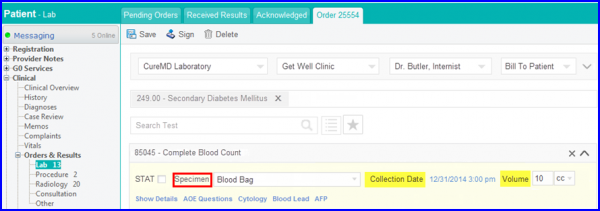
User can click on any of the test code tabs to expand it and view additional details.
Upon selecting a Specimen, its details are displayed on the screen including specimen collection date and volume. To see further details, click on the show details link. If it’s an urgent test, user can enable the STAT check box to set urgency.
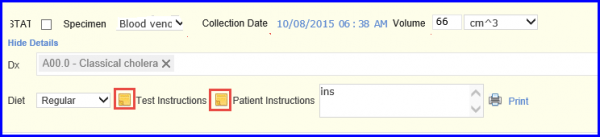
Test and Patient Instructions fields appear as pop-up notes icons and user can click on them to type in the appropriate instructions. Once user save the instructions, the color of the respective icon changes from grey to yellow to indicate activity.
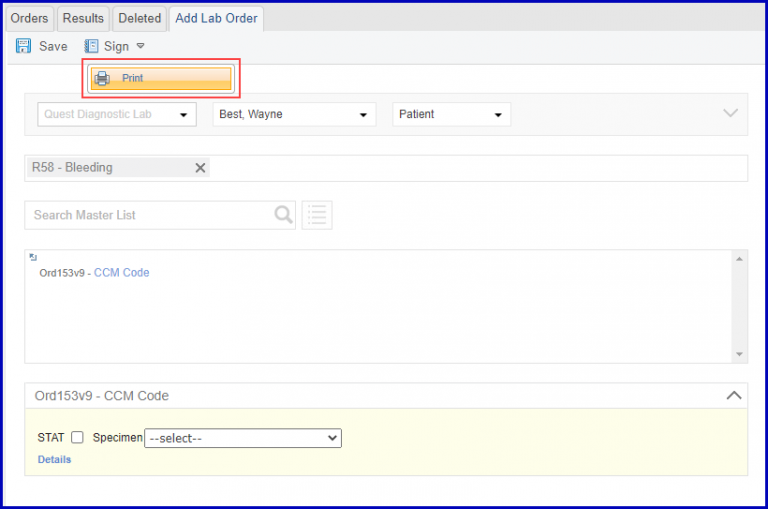
When user clicks on “Print”, it implies that they are selecting the “Sign” and “Print” option. When user clicks on Yes, the print preview of the lab order opens in a separate tab.

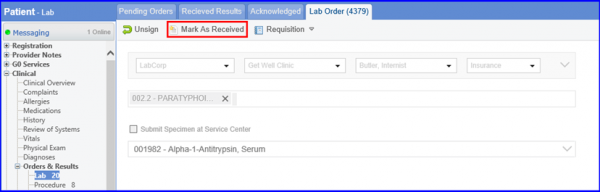
Signed Order is automatically moved to the Pending Order bucket.
By default, a signed lab order is considered as a pending order. At the top of the screen, user can see the “Mark as Received button; when it is clicked, the result is added against this pending order.
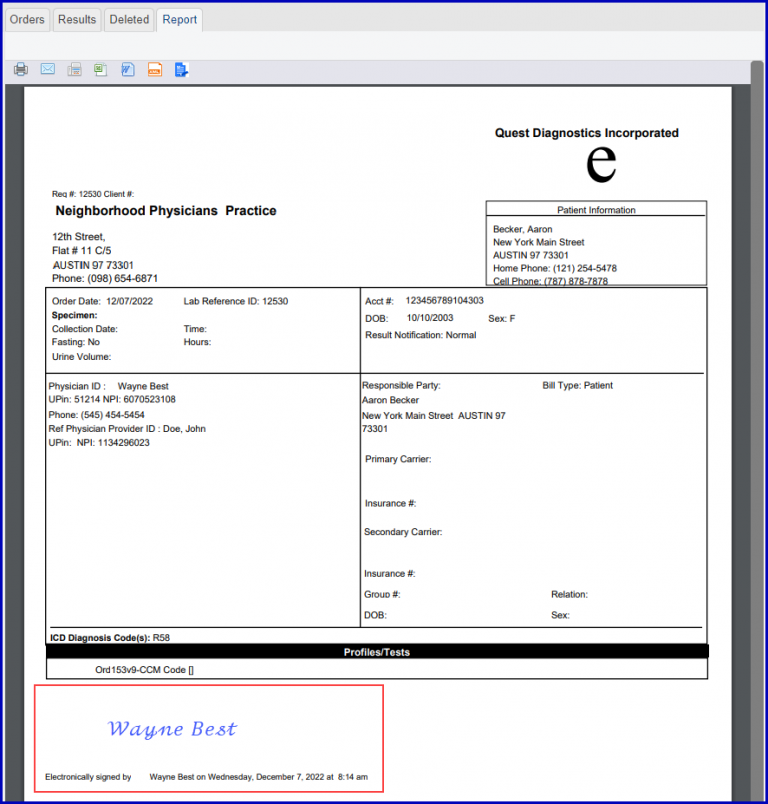
The providers’ signature populates on the order requisition irrespective of whoever signed the order.![]()
This ensures that Medicaid billing claims get accepted without any issues.
Add a new order for ‘Quest Diagnostics’ Lab with the report template ‘QuestCustom’.
After filling in the relevant information, hover over the ‘Sign’ button and select ‘Print’.
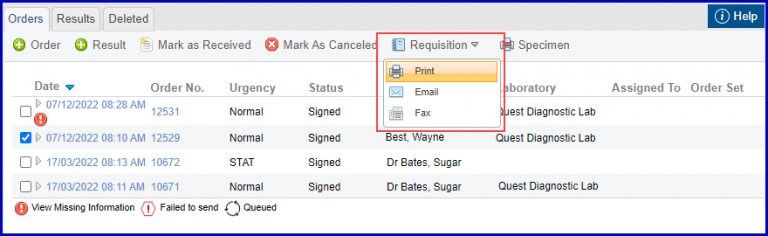
Alternatively, the user can select the relevant order checkbox and select ‘Print’ by hovering the cursor over ‘Requisitions’.
This opens the printable Report, where the ordering provider’s signature is auto populated. Therefore, any user can sign an Order Requisition with the ordering provider’s signature.
Click here, to view a similar enhancement made in the provider note section of the ‘Patient’ module.
