What are Claim Attachments?
Claim attachments is a Add-on service that is designed to help the application users to attach required documentation with the claim directly in electronic form. The documentation may be in the form of Provider Note, Patient Documents from the application or external documents such as lab results.
CureMD application transmits the attached documents via a secure FTP channel to a third party application that then transmits it to the payer.
With this service, users won’t have to print HCFA forms to submit the required documentation to the payers by post or go through the tedious process of printing on paper and waiting.
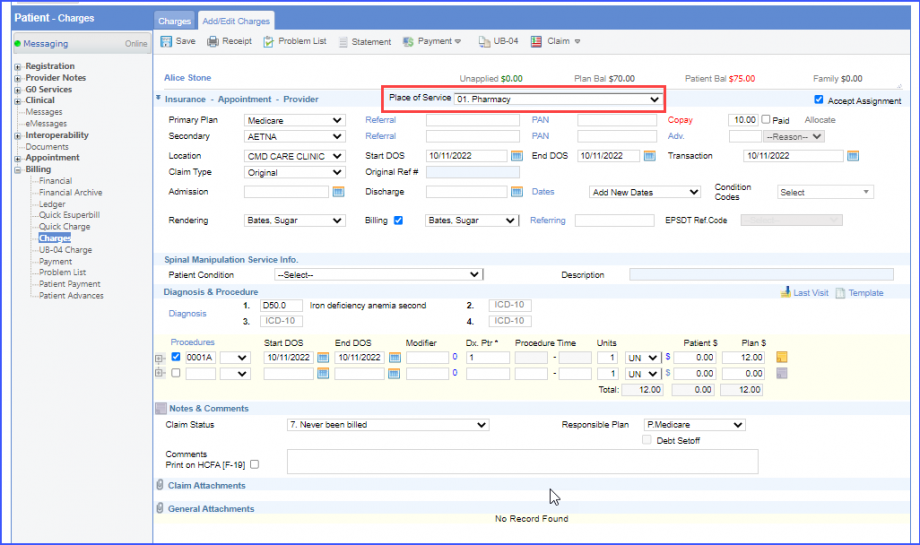
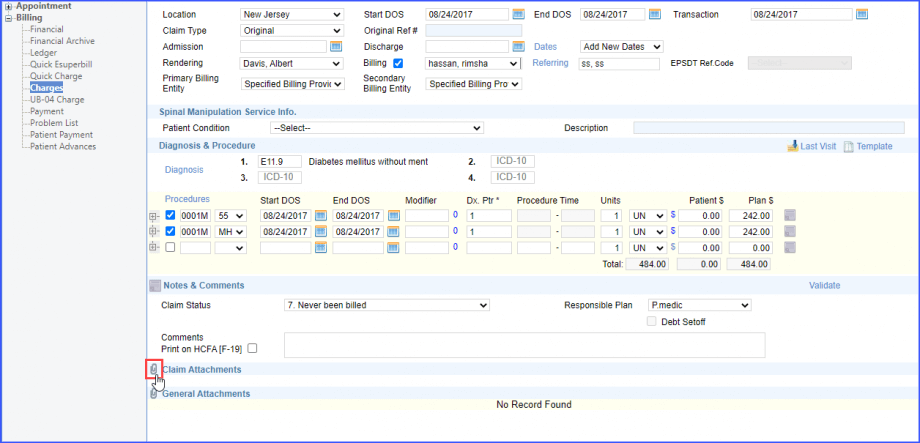
To view the claim attachments option, open a claim associated with any patient encounter. Go to the ‘Attachments’ section at the bottom of the screen. Here user can locate link for ‘Claim Attachments.’
The option of Tele-Health Services has been added to ‘Place of Service.’
It refers to the location where health services and health related services are provided or received, through a telecommunication system.
If the user clicks on the paper clip icon on ‘Claim Attachments’, a pop-up window appears. Three options are presented to attach claims are upload a new file, attach a file from existing patient attachments or attach a Provider Note associated with the appointment.
User also has an option to attach documents from within the application database or browse through local machine directory.
Once files are attached files user can change the precedence of the files by using the ‘rearrange’ icon. User can attach up to 10 files with a claim. Click ‘Save’ to save changes. All the documents can be reviewed in the ‘Attachments Section.’
Claim attachments can be sent either by ‘File Transfer’, ‘Mail’, ‘Fax’, ‘Email’, or have it be ‘Available on Request’.
This allows the insurance company to view the transmission type for the claim attachments through its identification number.
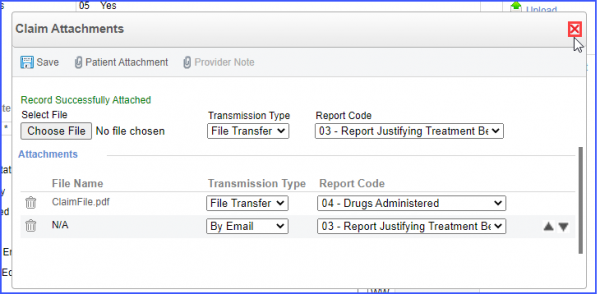
On the claim attachment pop-up window, the user can either upload a file by clicking on the ‘Choose File’ button and click ‘Save’, or click on ‘Save’ without uploading a file.
When the user uploads a file, the system displays the file name next to the ‘Choose File’ button.
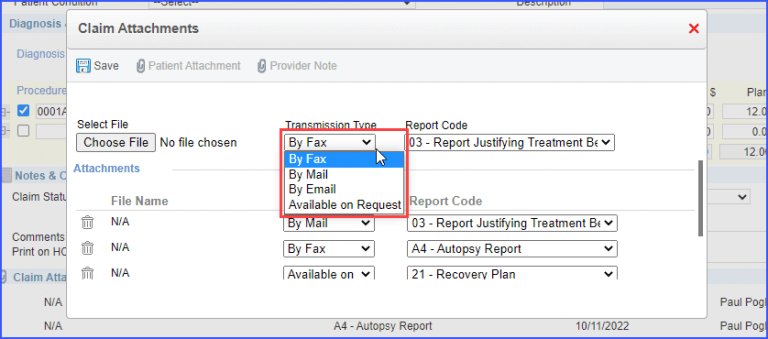
The system displays four options in the ‘Transmission Type’ dropdown which include:
- By Fax
- By Mail
- By Email
- Available on Request
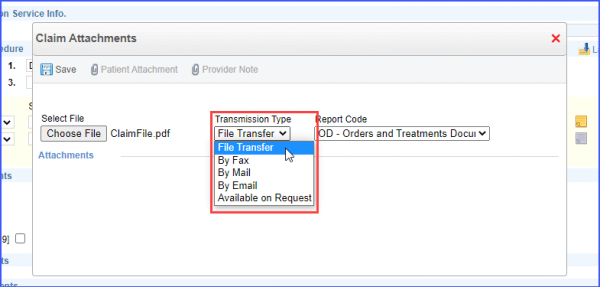
Meanwhile the ‘File Transfer’ transmission type option is a paid service that is displayed when the settings are enabled.
Once enabled, the system displays five options in the ‘Transmission Type’ dropdown, which include:
- File Transfer
- By Fax
- By Mail
- By Email
- Available on Request
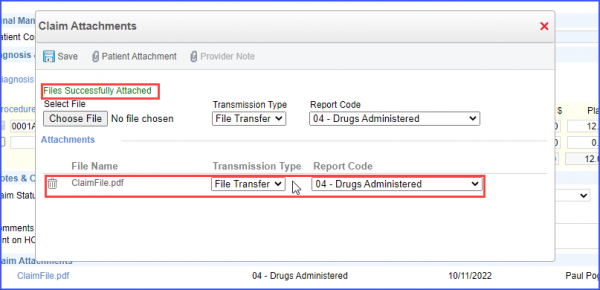
Upon saving a record with an attached file, a message is displayed that states:
“File Successfully Attached”.
The system creates an entry under the ‘Attachments’ heading and displays the name of the uploaded file under the ‘File Name’ column along with the selected ‘Transmission Type’ and ‘Report Code’.
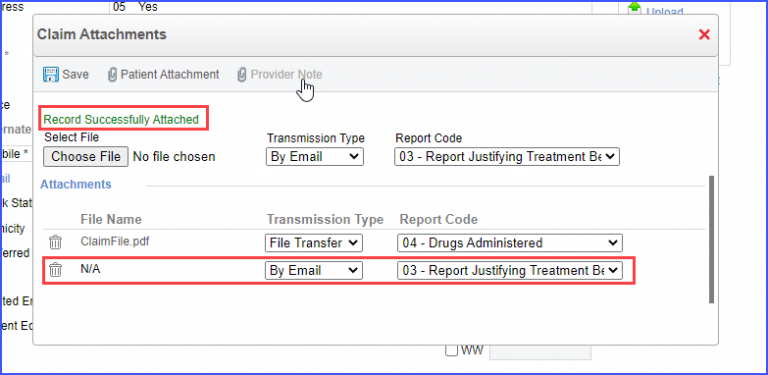
Meanwhile, if the claim is saved without an attachment, a message is displayed that states:
“Record Successfully Attached”
The system creates a placeholder with the file name ‘N/A’ is created under the attachments.
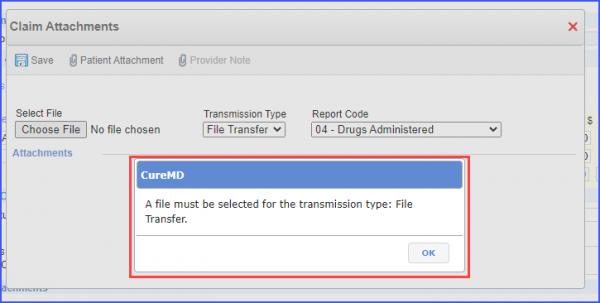
If the user selects ‘File Transfer’ as a ‘Transmission Type’ and saves without attaching a file, a prompt is displayed that states:
“A file must be selected for the transmission type: File Transfer”
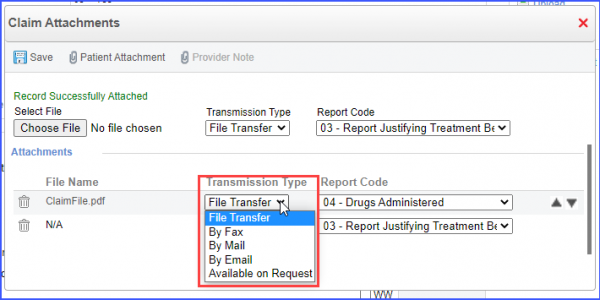
Users also have the option to change the ‘Transmission Type’ from the ‘Attachments’ section.
To do that, click on the dropdown adjacent to the ‘File Name’ to change the ‘Transmission Type’.
After making the required changes, click on the cross icon to close the pop-up window.
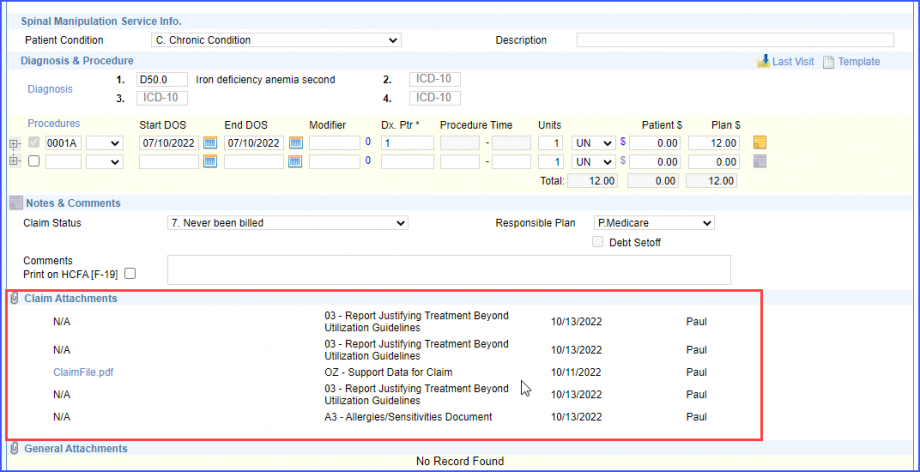
The system displays the attachment details under the ‘Claim Attachments’ section.
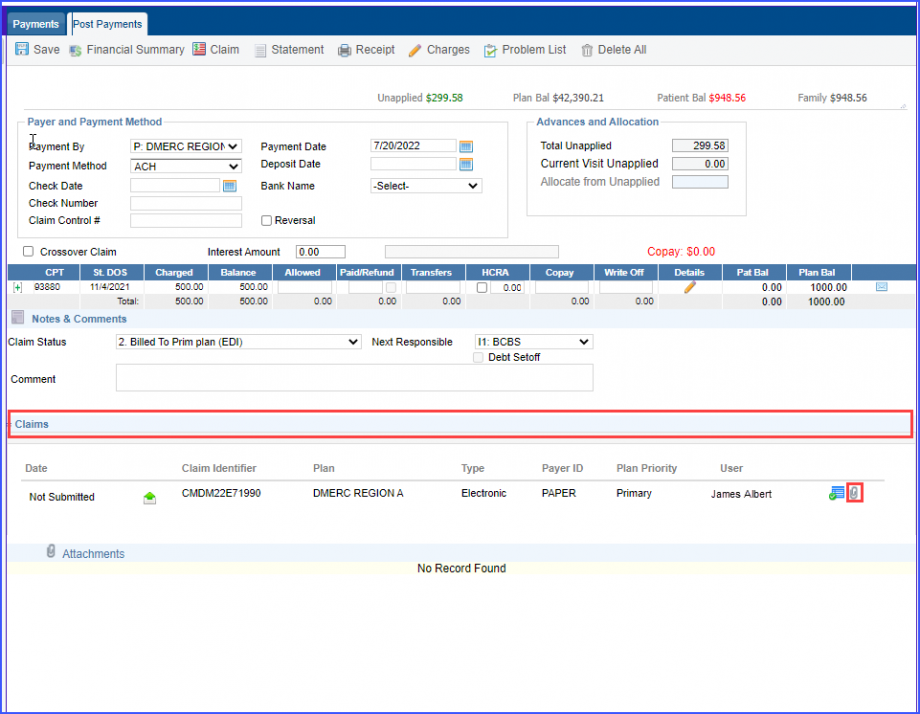
The record of the claim attachments can be viewed from the ‘Payments’ screen of an appointment.
Note: User needs to generate the EDI claim file for the charge before adding its payment.
To view the records added in the claim attachments section, the user can navigate to the payments of that appointment.
To do that, hover over the ‘Payments’ dropdown button present at the top of the screen, and click on ‘+ Payment’ option.

Once clicked, the user lands on the payment page for that appointment. Here, navigate to the ‘Claims’ section and click on the ‘Paper Clip’ icon present next to a claim.
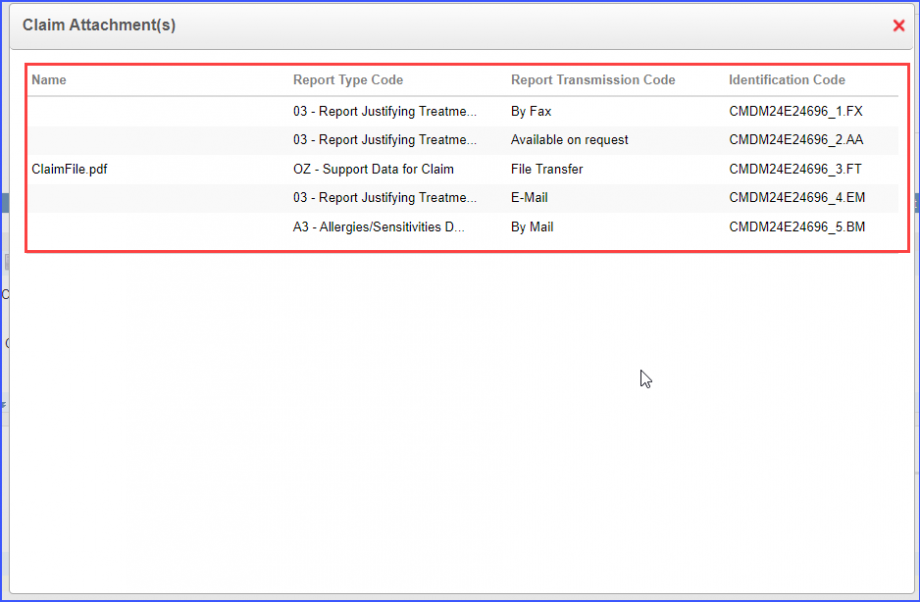
Once the icon is clicked, a ‘Claim Attachment(s)’ popup is displayed where the user can review the following details:
- Name
- Report Type Code
- Report Transmission Code
- Identification Code
The ‘Identification Code’ is a unique identifier generated for the claim attachment.
A segment indicator is mentioned in the identification code, based on the selected transmission type.
The ‘Identification Code’ is a unique identifier generated for the claim attachment.
A segment indicator is mentioned in the identification code, based on the selected transmission type.
‘FT’ indicator is attached when the transmission type is a ‘File Transfer’.
‘FX’ indicator is attached when the transition type is ‘By Fax’.
‘BM’ indicator is attached when the transition type is ‘By Mail’.
‘EM’ indicator is attached when the transition type is ‘By Email’.
‘AA’ indicator is attached when the transition type is ‘Available on Request’.
The claim status icon is disabled for plans that do not offer real time claim status inquiry.![]()
This ensures that incorrect real time claim status requests are not submitted.
To view the post-payment details, click on the Date and Time hyperlink in the ‘Appointment’ column.
The ‘Verify Claim Status’ button remains enabled if the insurance plan allows for Real Time Claim Status Inquiry.

On the other hand, if the insurance plan does not offer real time claim status inquiry, the button for the claim status verification remains disabled.

When the user hovers over the disabled button, a tooltip is displayed which states ‘Plan does not support real time claim status’.
A similar enhancement has been made in the Billing Module. To view the change, click here.
