How to post individual payment?
CureMD allows user to record Co-Pay and Advance payments against a checked-in appointment. In order to record any other type of payment, user must first create a charge.
An Individual Payment can be posted against a charge using any of the following workflows:
From the Patient Module:
Follow the above mentioned workflow to navigate to “Payments” page.
On the “Payments” screen user can view all the dates of services for which payments can be posted.
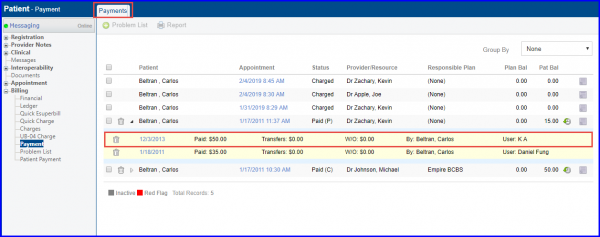
Simply locate the required date of service and click on ‘Appointment date’ to reach the respective “Post Payments” page.
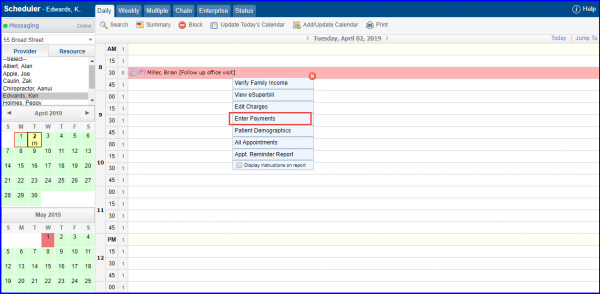
From an Existing Appointment:
Navigate to the “Appointments” page, following the above mentioned workflow.
Once there, click the ‘Appointment’ for which is created. Click ‘Enter Payments’ from the menu that appears, to reach “Post Payments” screen.
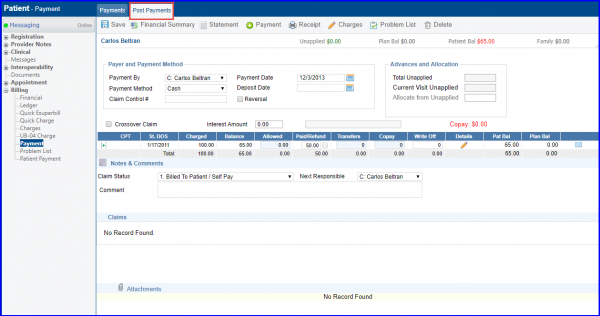
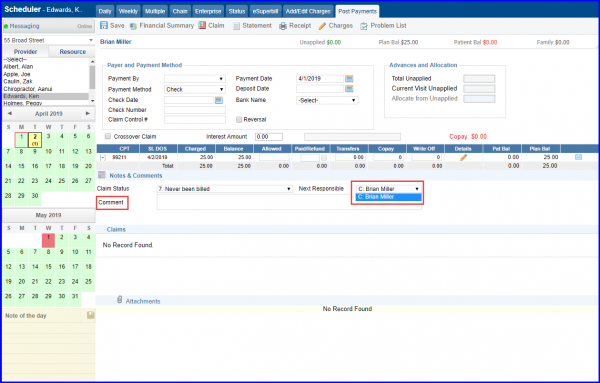
On the “Post Payments” page, user can provide Payer and Payment Method Information, Advances and Allocations, line level for payment details, and set Claim Status.
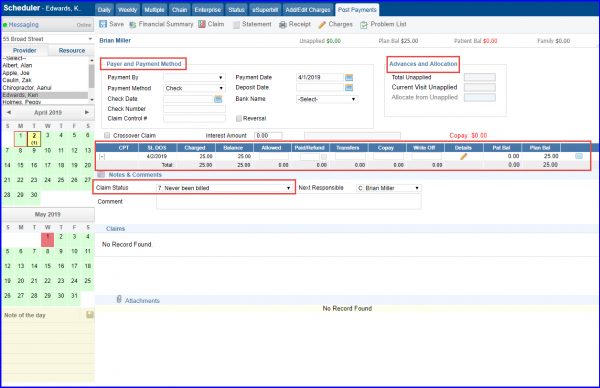
In the ‘Payer and Payment Method’ section, provide payment details by selecting Plan, Payment Method, Check Number, Check Date, Claim Control Number and Bank information.

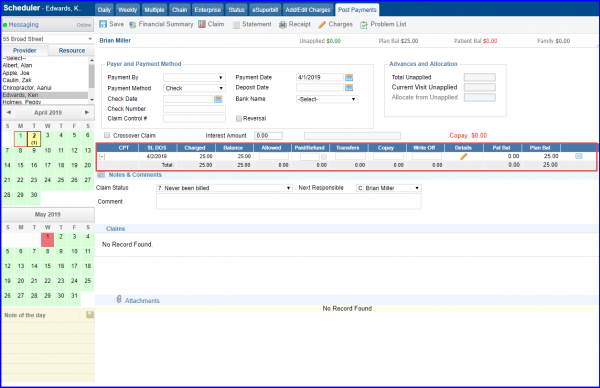
To post the payment for each procedure, enter allowable amount from the insurance in the ‘Allowed Amount’ column. If there is a difference between the billed and approved amounts, it will be automatically displayed in the ‘Write Off’ field.
Also, enter details such as Paid Amount , Transfers and Copay.
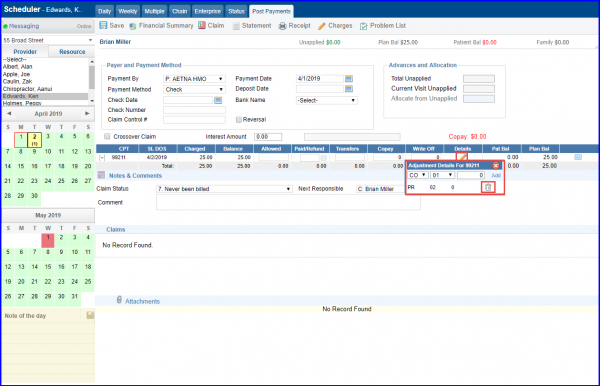
Click on the ‘Details’ pencil icon to view the reason codes for transfers and write offs.
User can also update claim’s status at ‘Claim Status’ field.
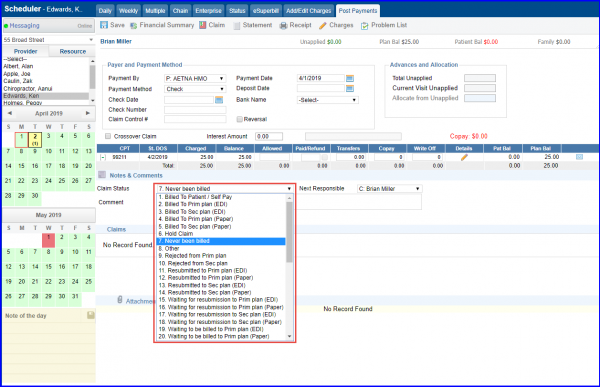
‘Next Responsible’ shows the party who will be responsible for the amount entered in the Transfers column. The system auto selects the party based on the expected progression of primary payment, secondary payment if there is a secondary plan and finally patient payment.
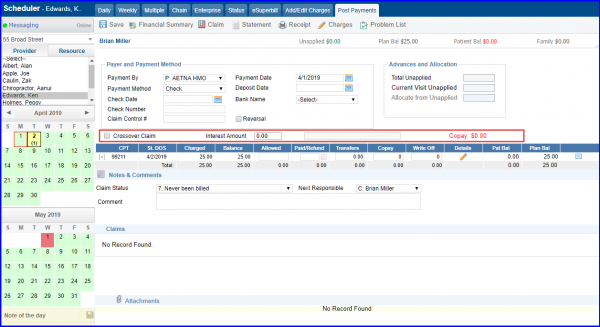
Select the Crossover Claim box to indicate that the current payer has sent remaining balance to the next responsible party.
The ‘Interest Amount’ field can be used to store interest payments from insurance companies. The Transaction Balance field tracks whether the payments on the currently selected procedure line are posted correctly, if the amount in this field is 0 then the posted payment is valid. Click Save to post the payment.
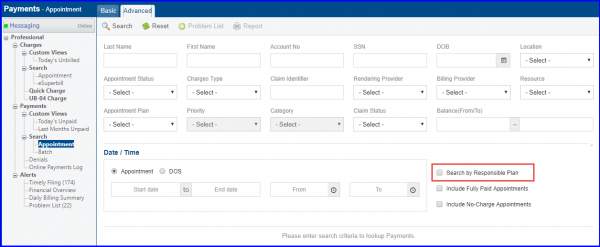
From the Billing Module:
Navigate to Appointments “Search” page, by following the above mentioned workflow.
Here, search for appointments using basic or advanced search criteria.
Click on the appropriate tab, select or enter search criteria and click on ‘Search’ icon to view the results. Once required appointment is there, click on the Appointment date to reach the “Post Payments” screen.
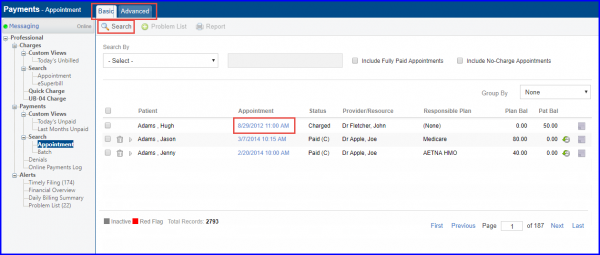
Users can also use the ‘Advanced Search’ tab to search by ‘Responsible Plan’.
In case ‘Search by Responsible Plan’ checkbox is checked, ‘Appointment Plan’ is renamed to ‘Responsible Plan’. Hence, the user can filter appointments in accordance with Responsible Plan.