What is the Use of Batch Posting?
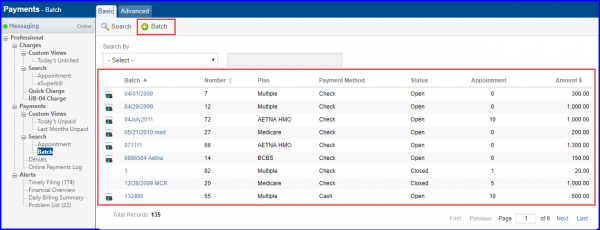
Batch Posting is used to post payments manually for an entire check. Navigate to Batch “Search” page by following the above mentioned workflow.
On Batch “Search” page, if batch is already created, user can search for it using Batch Name, Batch Number, Batch Date or Check Number. In case, the batch is not created, click on ‘Add Batch’ button.
Clicking ‘Add Batch’ button takes the user to “Add Batch” page. Here, user can enter check details, store notes and comments regarding batches that are being created, by using the ‘Comments’ box.
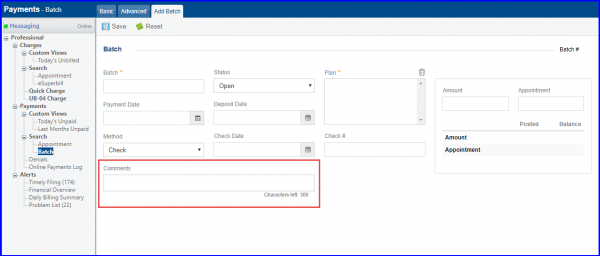
Batch – User can add Batch name here. It is recommended to choose the combination of Plan name and Check number while creating the Batch name as it helps user in searching for the batch in future.
Batch # – Batch number auto generates once user saves the Batch.
Payment Date – Payment date represents the date user made payment on. User can also choose today’s date here.
Plan – Click the Plan link to choose insurance plan(s) issuing the check.
Status – Status shows whether the batch is still open or closed, while creating a batch user should always leave it to Open.
Payment Method – Payment method is the mode of payment used by the insurance, in most of the cases it is checked. As soon as the Check option is selected,additional fields appear to allow entry of Check details. Enter the Check number, Check date, and Check amount. Enter total amount of the Check. User can also enter the number of appointments that are covered in this Check.
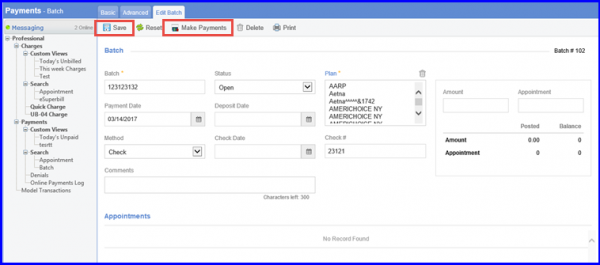
Once user enters all the required information, click Save. Doing so, displays Make Payments option.
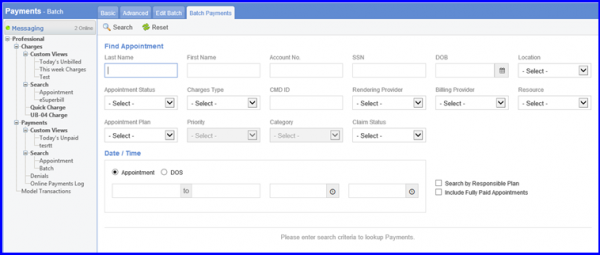
Clicking ‘Make Payments’ on this option takes user to “Search Appointment” screen.
Here, user can easily search for appointments using patient or appointment information. As user clicks ‘Search’, a list of appointments matching the search criteria appear.
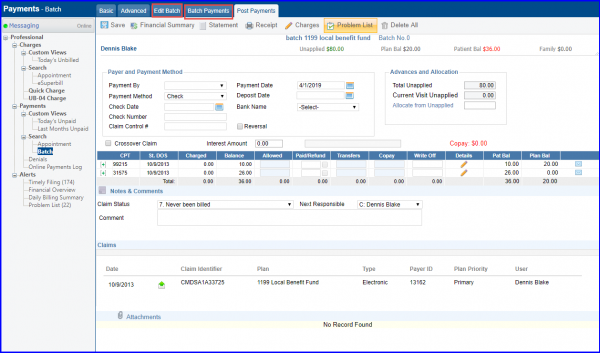
Click an appointment takes user to “Post Payments” page. Check information is automatically populated here, from the batch.

Once the payment is saved, click on the “Batch Payments” tab to return to search results. Users can also navigate to “Edit Batch” tab to view their progress.
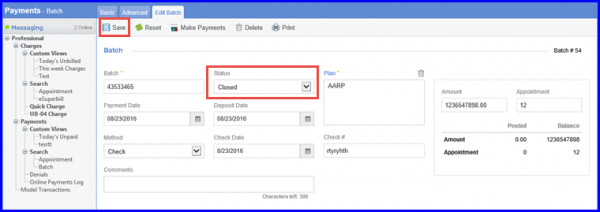
On Edit Batch tab, payments posted appear at the bottom. Posted and Balance amounts are also updated along with the remaining balance on the Check.
User can repeat this process until all the appointments on the Check are posted. Change the batch status to Close and click ‘Save’.
The claim status auto-updates to ’27. Cross over’ upon marking the ‘Crossover Claim’ checkbox. ![]()
This reduces errors that occur while posting manual payments.
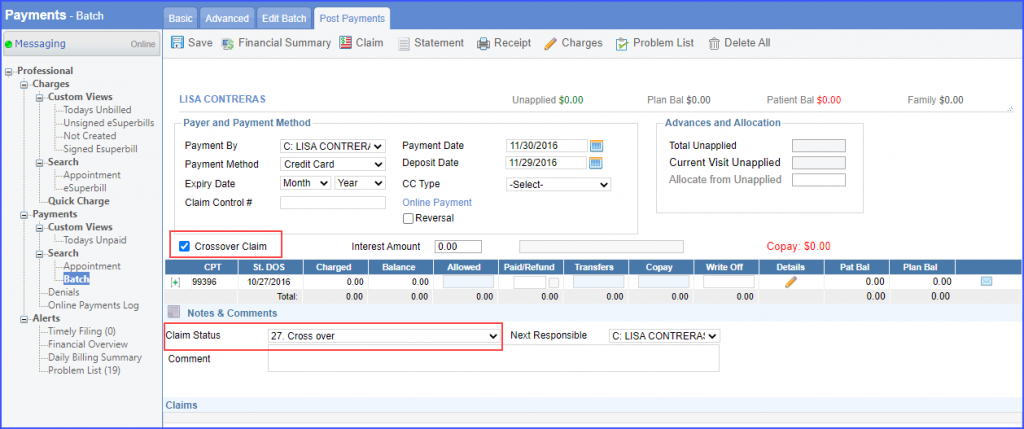
Similarly, ‘Crossover Claim’ checkbox is automatically marked when the user selects claim status ’27. Cross over’ from the ‘Claim Status’ dropdown.
Similar enhancement has been made in the ‘Appointment’ bucket as well. To view the change, click here.
