How to Add in a Fee Schedule?
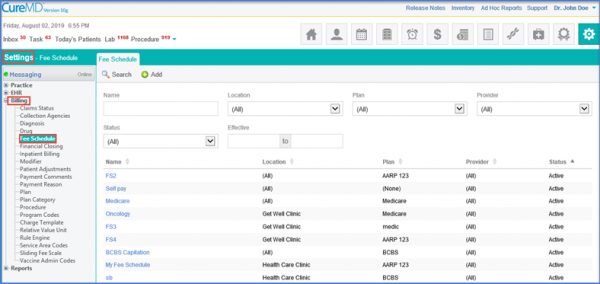
In order to insert a Fee Schedule, the user follows the workflow to land on the ‘Fee Schedule’ page.
Click the ‘Add’ button which displays the form.
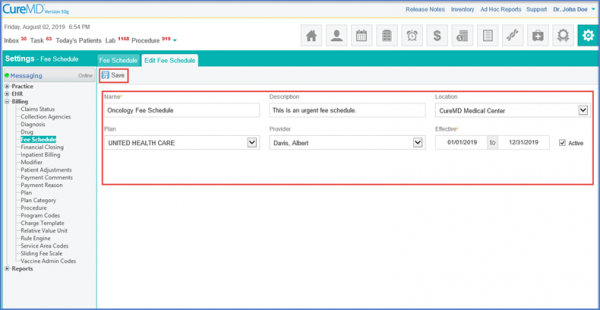
Once the fields are filled, click ‘Save’.
The Fee Schedule is saved.
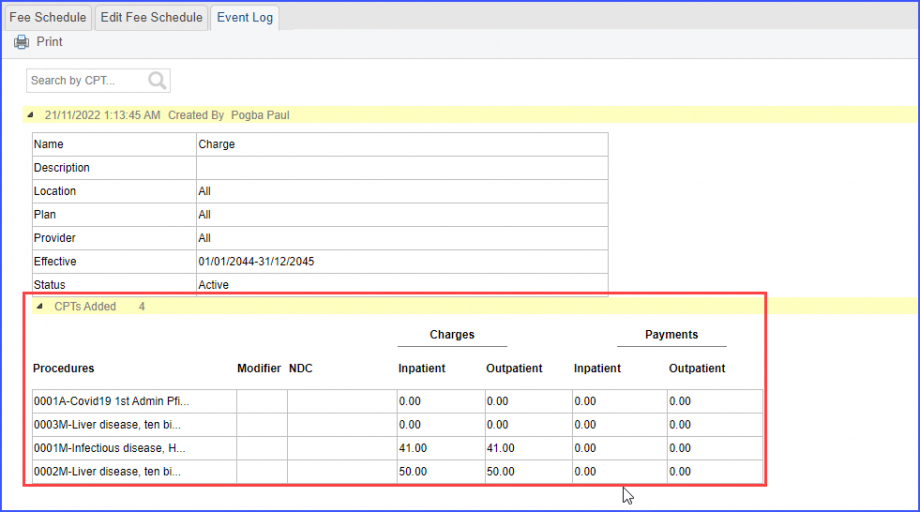
Changes made to the Fee Schedules can be logged.
This allows tracking of the users who have made the changes.
Click on the ‘Event Log’ button adjacent to the ‘Save’ button.

The logs display the following information:
- Date and Time of Change
- User who made the Change
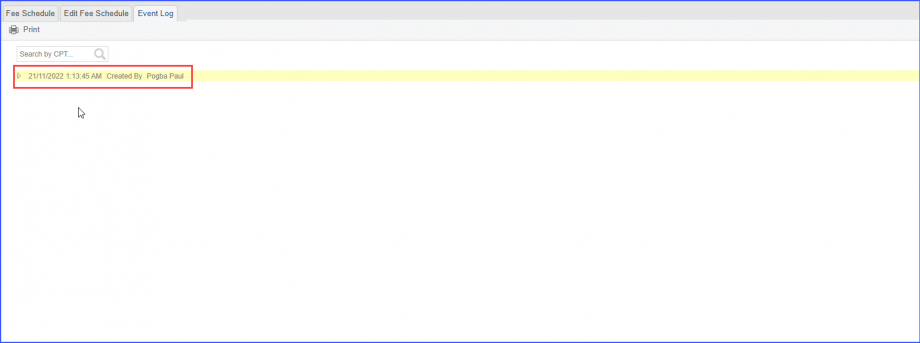
The log mentions ‘Modified’ when changes have been made and mentions ‘Created By’ when the Fee Schedule has been created.
Expand on the log by clicking on the arrow icon to view the Fee Schedule details.
The details include:
- Name
- Description
- Location
- Plan
- Provider
- Effective
- Status
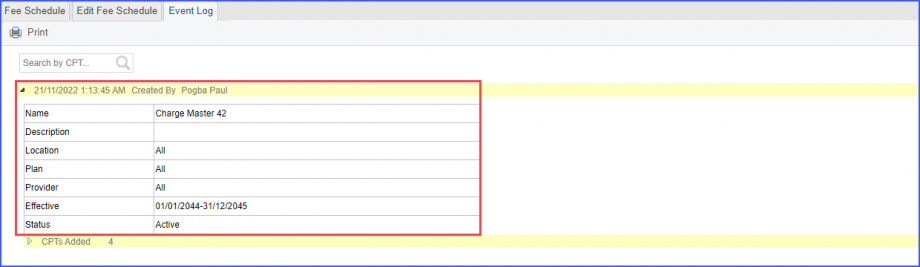
The number of CPT added for the Fee Schedule can be viewed beneath the expanded log details.
Users can further expand on ‘CPT’s Added’ to view the added CPTs details for the Fee Schedule.
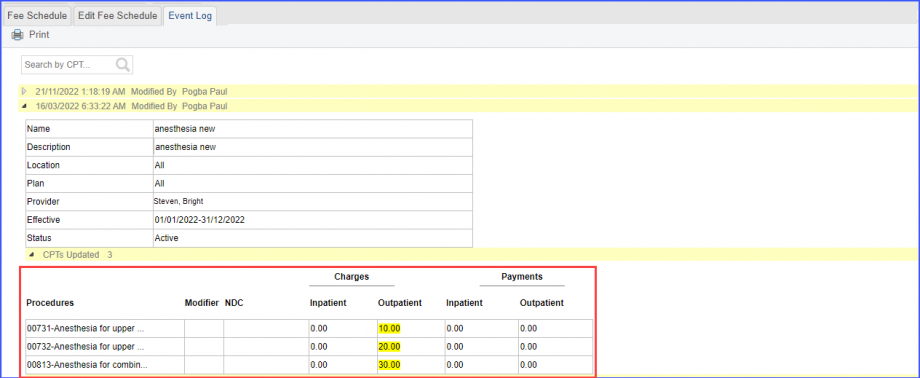
Similarly, user can view the logs for the updates made on the CPTs.
Click on the ‘CPTs Updated’ text to view the CPT information that has been updated.
The updated information is highlighted in yellow.
When creating a fee schedule, users can select combinations of locations, plans, or providers using the enhanced multi-select feature. The system allows flexible selection of multiple entities. ![]()
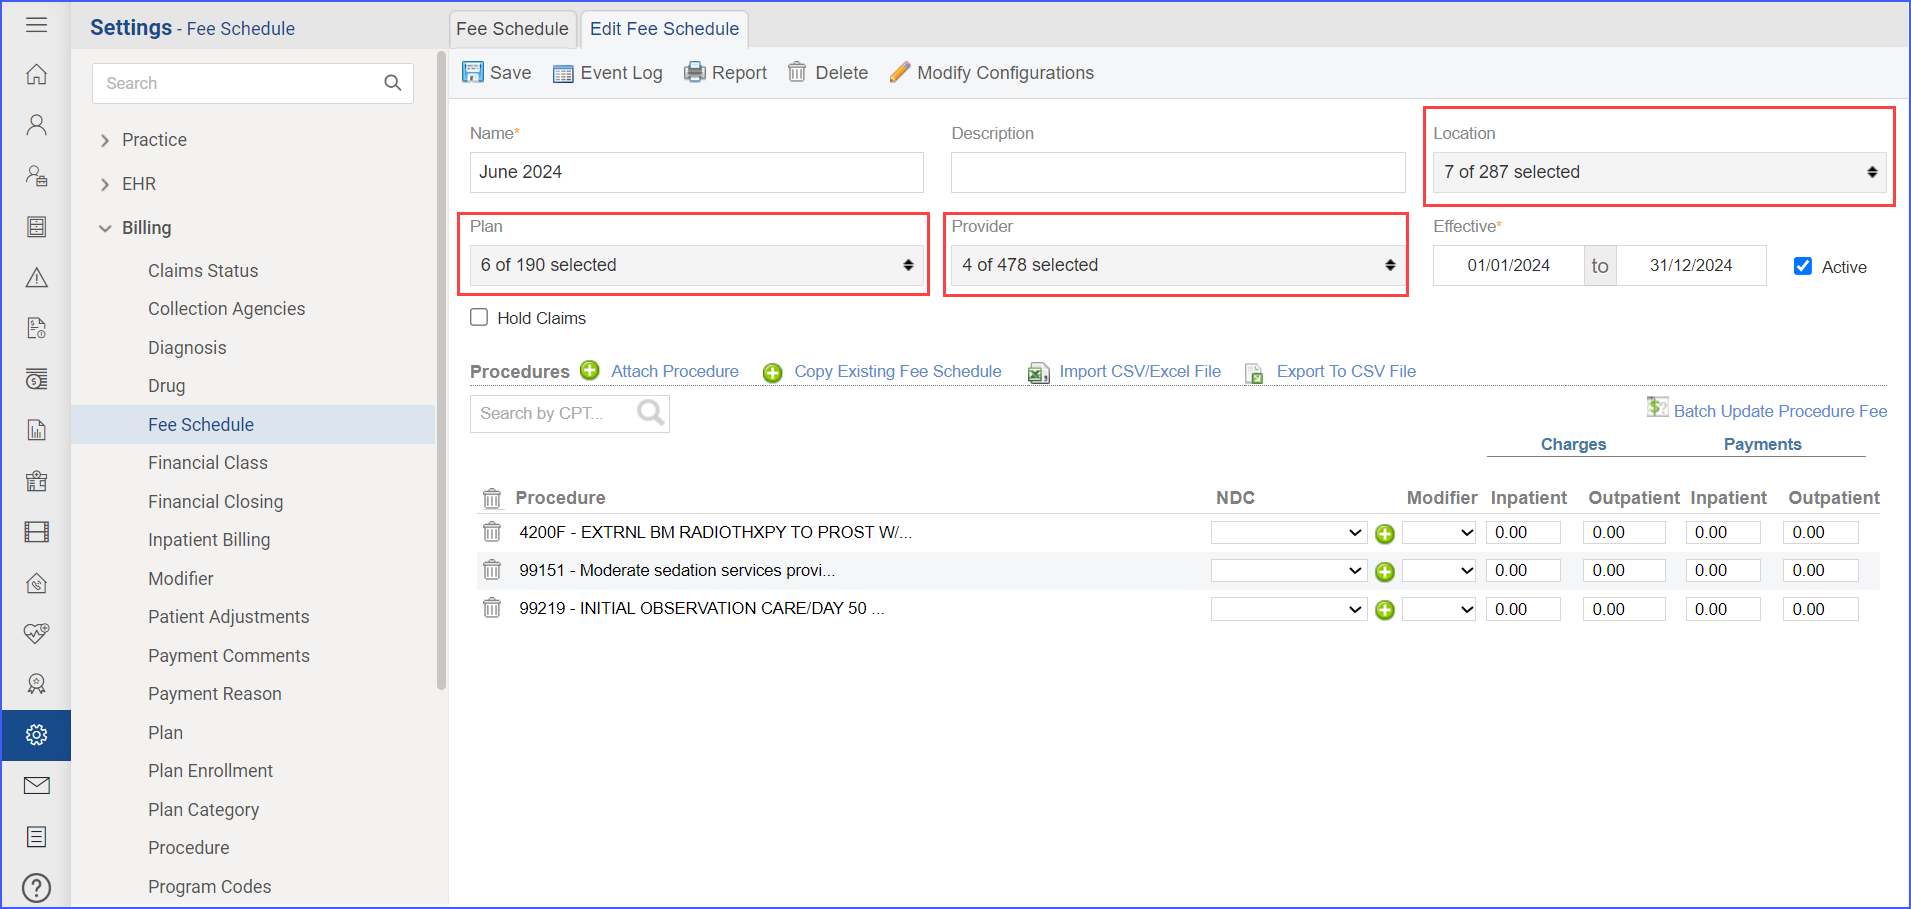
If the same combination of locations, plans, or providers is already used in another fee schedule, the system alerts the user and prevents the creation of a duplicate fee schedule for the same tenure.
