What is Clinical Trial Regimen?
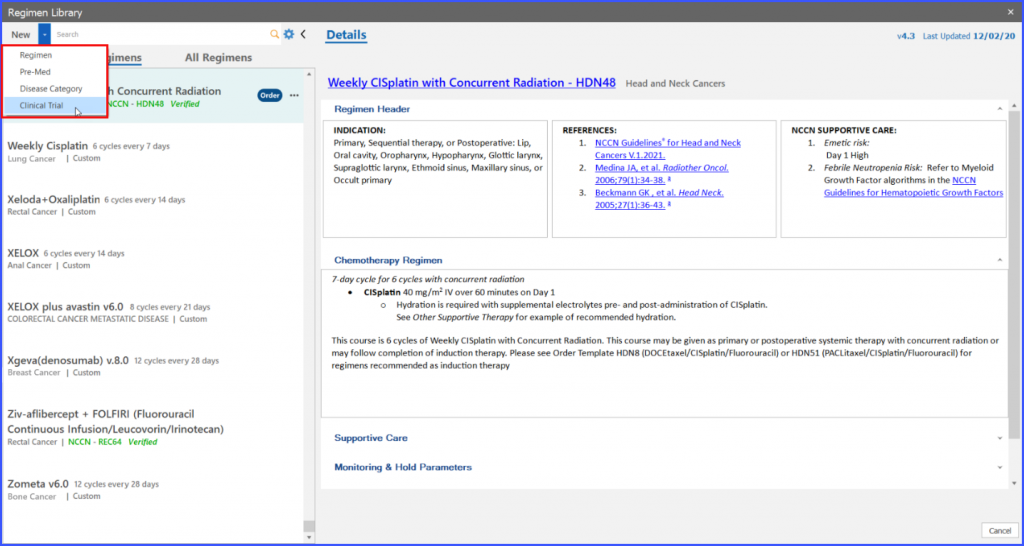
Users can create trial regimens within Clinical Management. This process begins with the user navigating to the regimen library accessible from the navigation bar in the Chemotherapy Manager.
Upon clicking the dropdown icon next to ‘New’ button, an option to construct a trial regimen named ‘Clinical Trial’ is displayed.
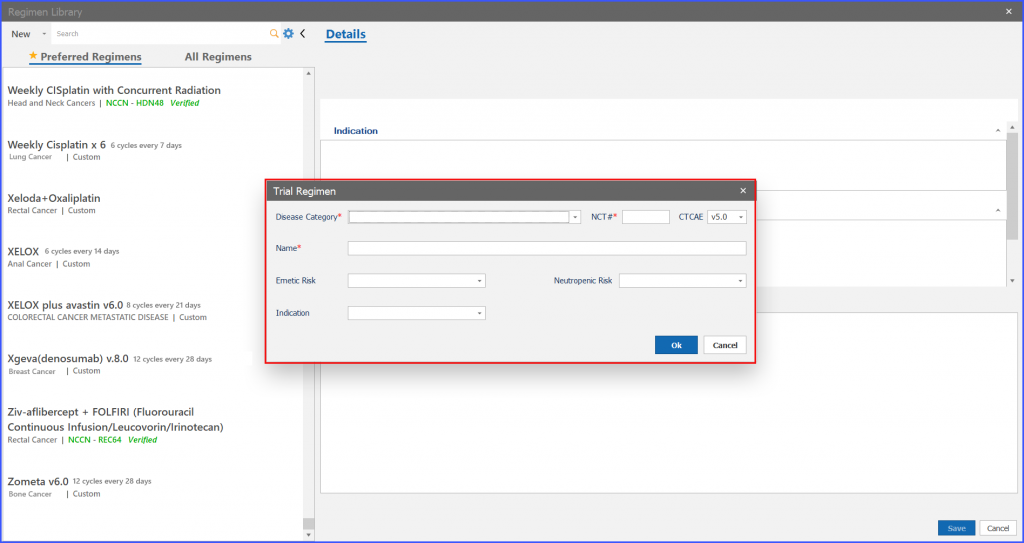
Selecting ‘Clinical Trial’ from the ‘New’ button triggers a pop-up named “Trial Regimen” to open.
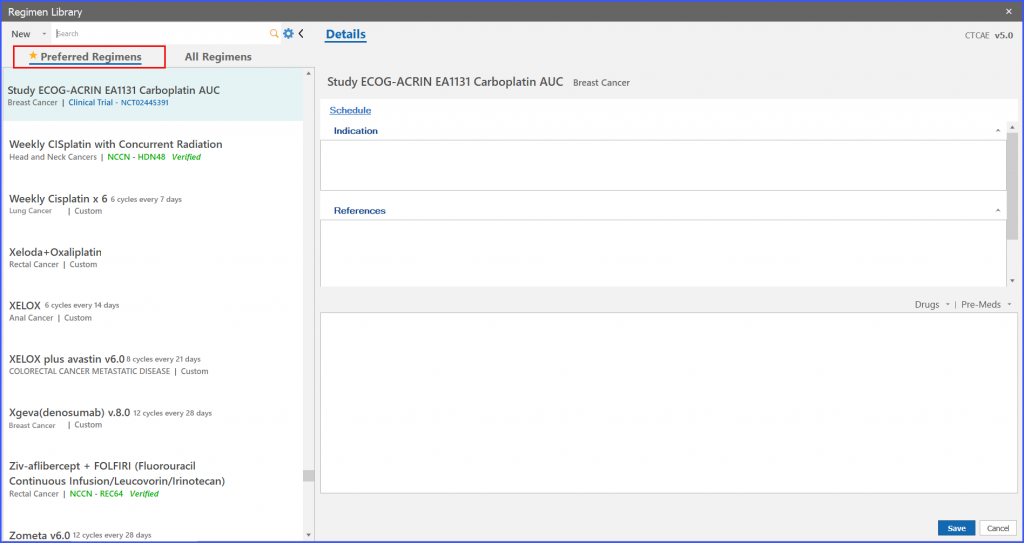
Clinical Trial Tagging also includes scheduling treatments and adding any necessary medications, making each unique trial easier to manage.
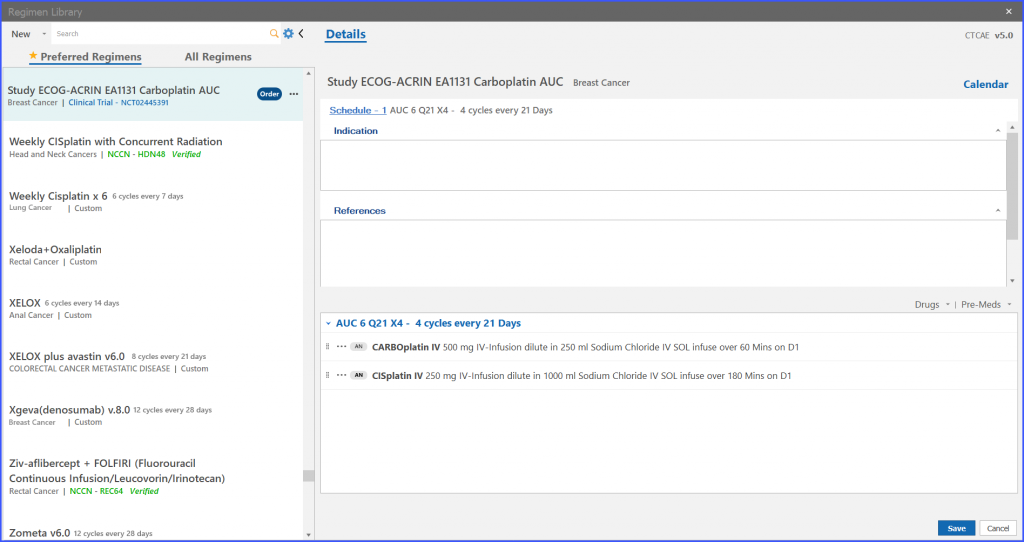
Edit Trial Regimen
Regimen Library (navigation bar) > Trial regimen > Menu options> Edit
Furthermore, the user also has the ability to edit trial regimens. For this the user clicks on the ellipses given on right adjacent to ‘Order’ and the following dropdown appears as shown below.
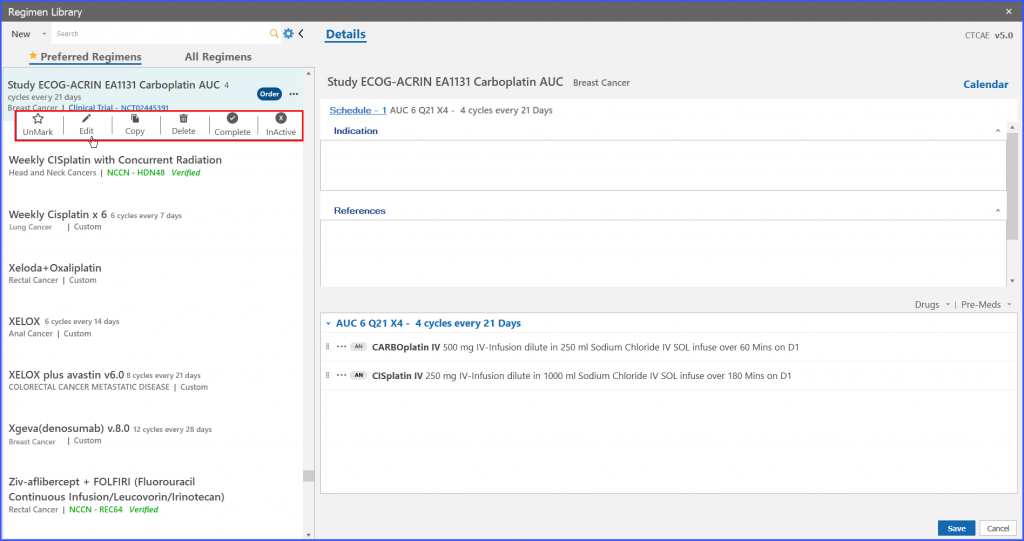
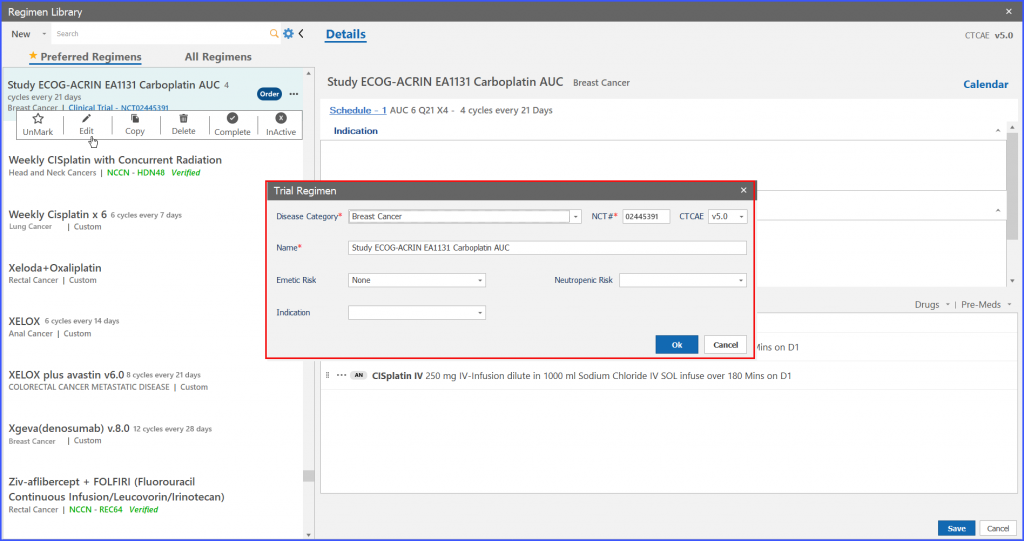
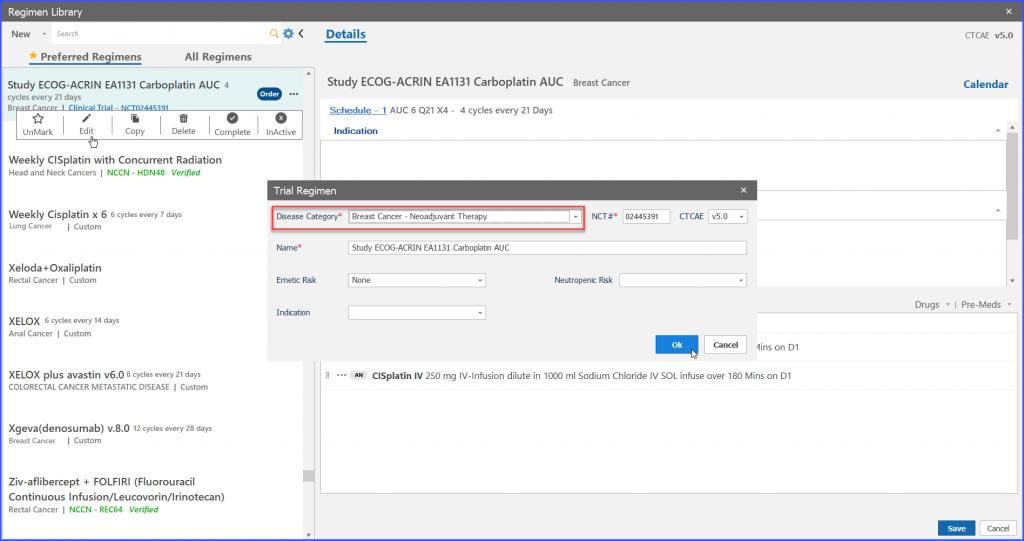
User can edit information on “Trial Regimen” screen and then click on ‘OK’ button to edit the information.
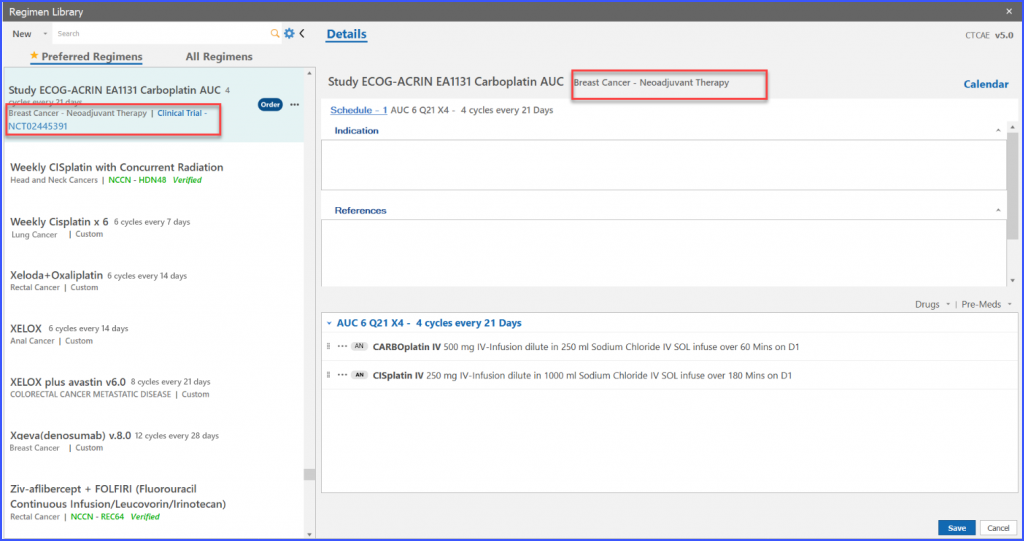
Trial Regimen – Copy creation
Regimen Library (navigation bar) > Trial regimen > Menu options> Copy
Users also have the ability to copy trial regimens.
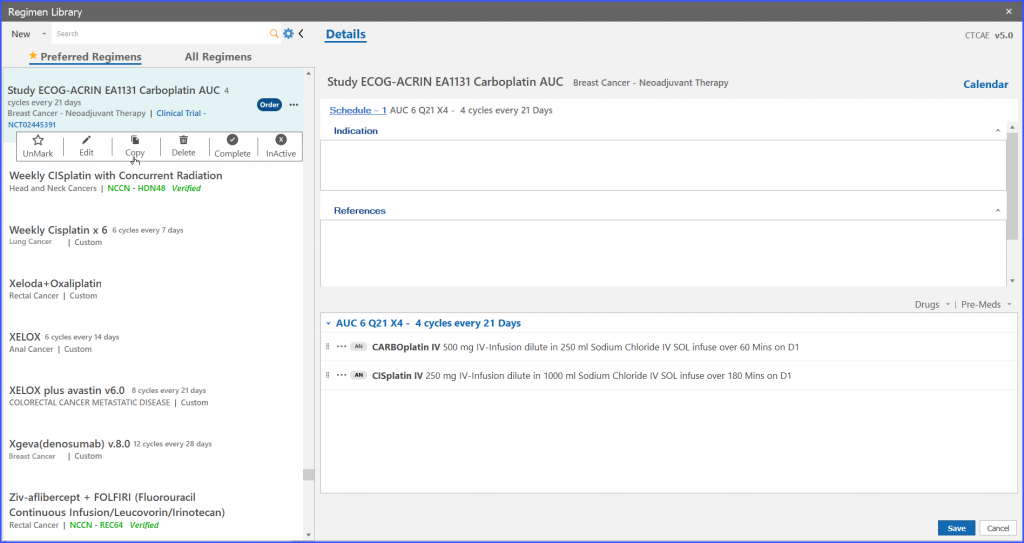
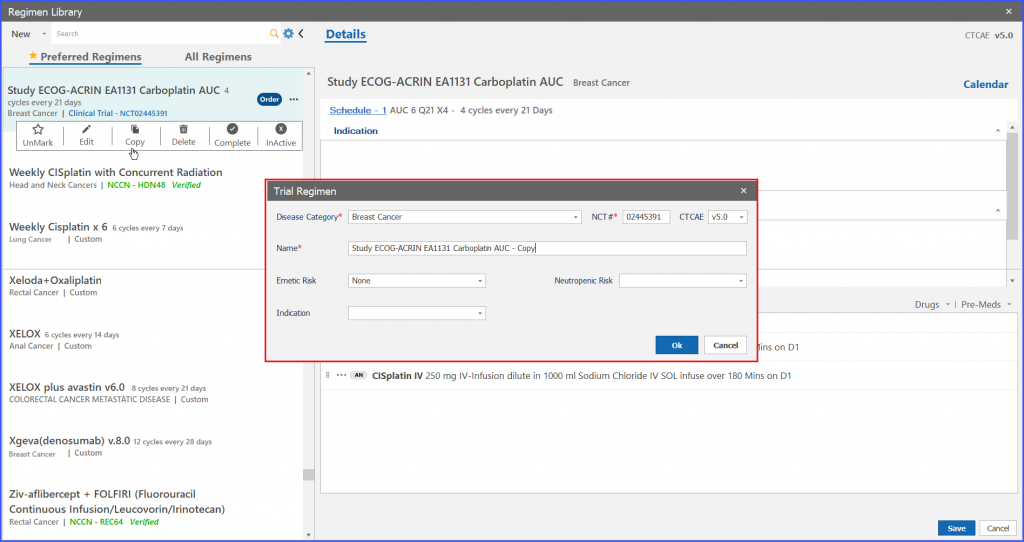
On click of ‘Ok’ button on “Trial regimen” a copy of study regimen is created.
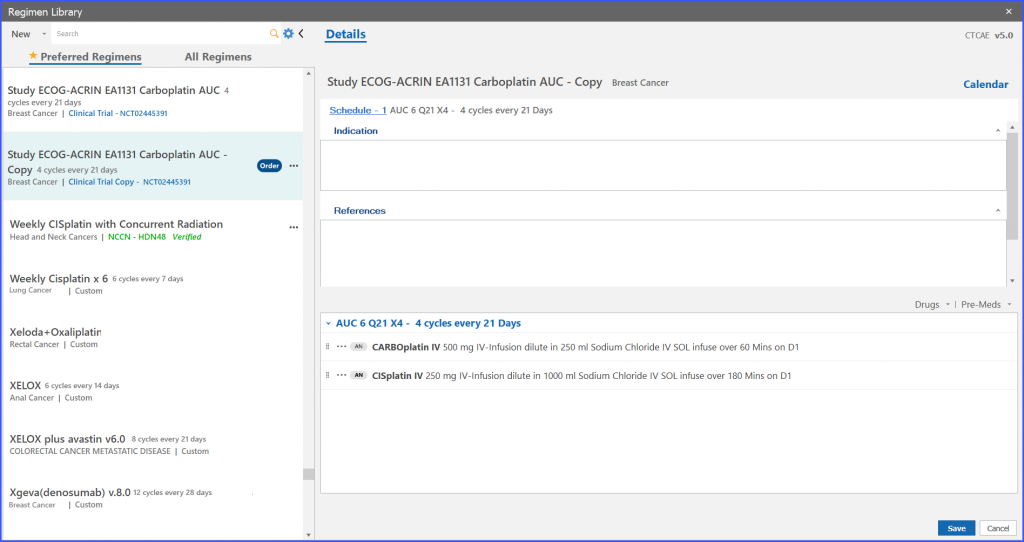
Copy regimen can be differentiated with the original one as the word ‘copy’ appears along the regimen and template name.
Deletion of Trial Regimen:
Regimen Library (navigation bar) > Trial regimen > Menu options> Delete
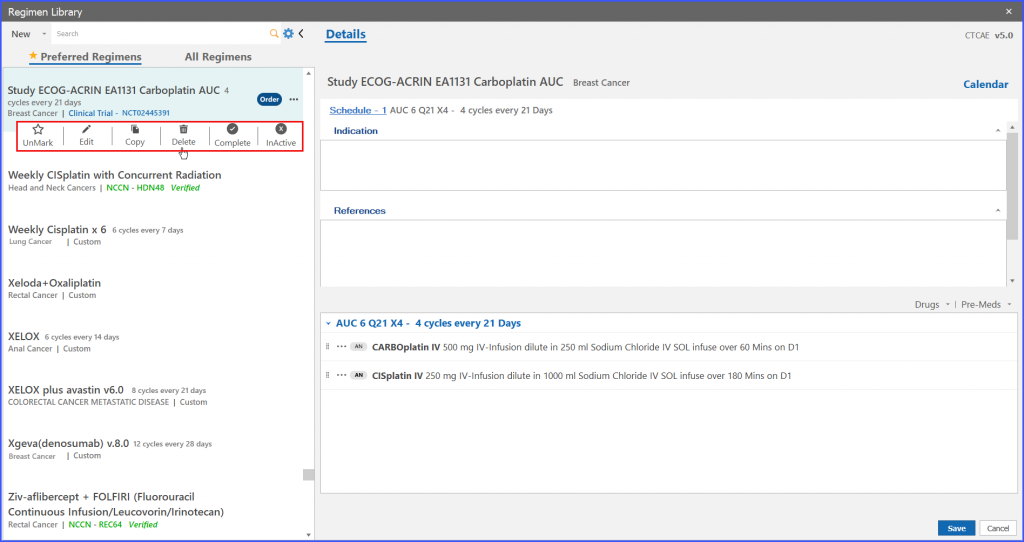
Users can delete a study regimen as well. For this the user clicks on the ellipses given on right adjacent to ‘Order’ and the following dropdown appears as shown below.
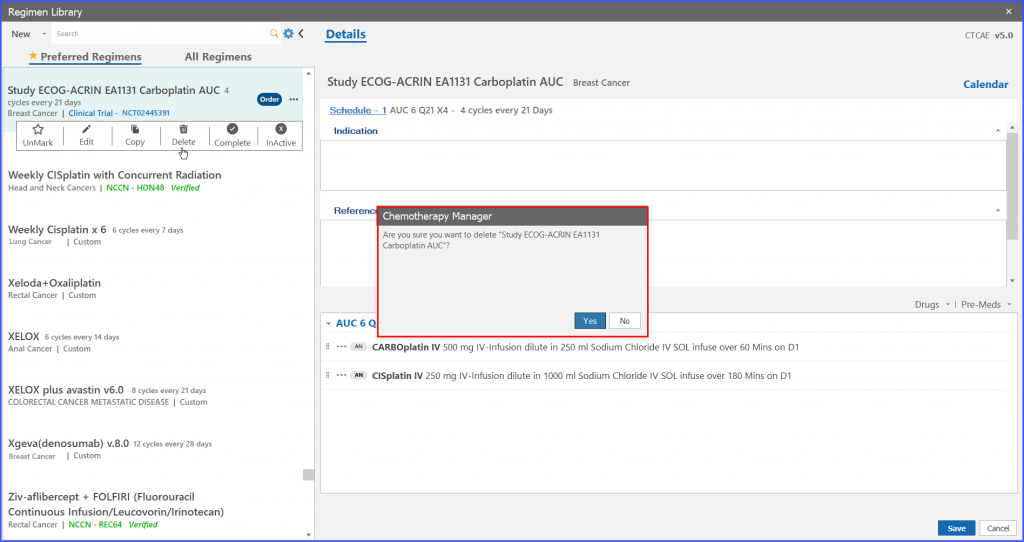
System shows a confirmation prompt after clicking on delete option from menu icons. If the user clicks ‘Yes’ button on confirmation prompt then the trial regimen is deleted.
Mark Trial Regimen as ‘Completed’
Workflow: Regimen Library (navigation bar) > Trial regimen > Menu options> Complete
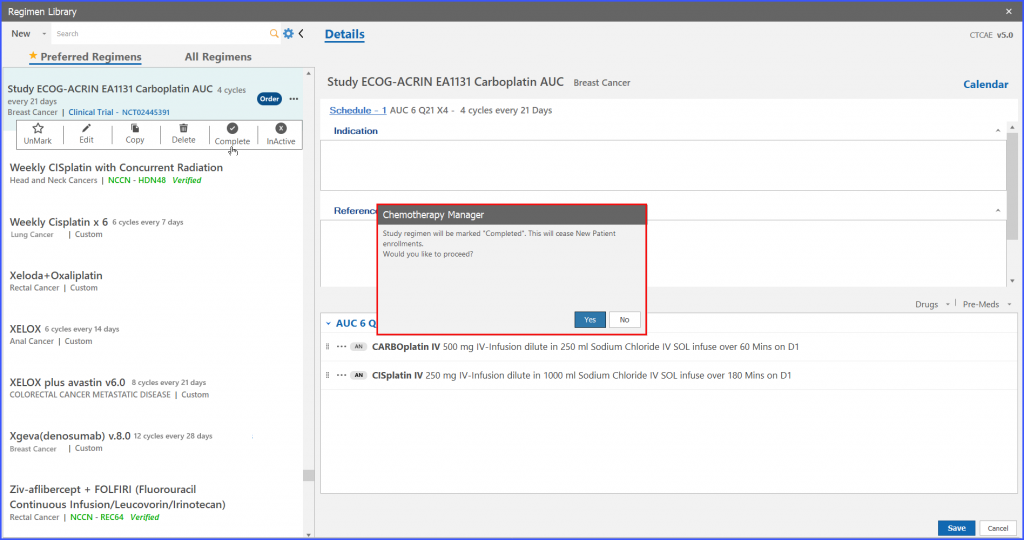
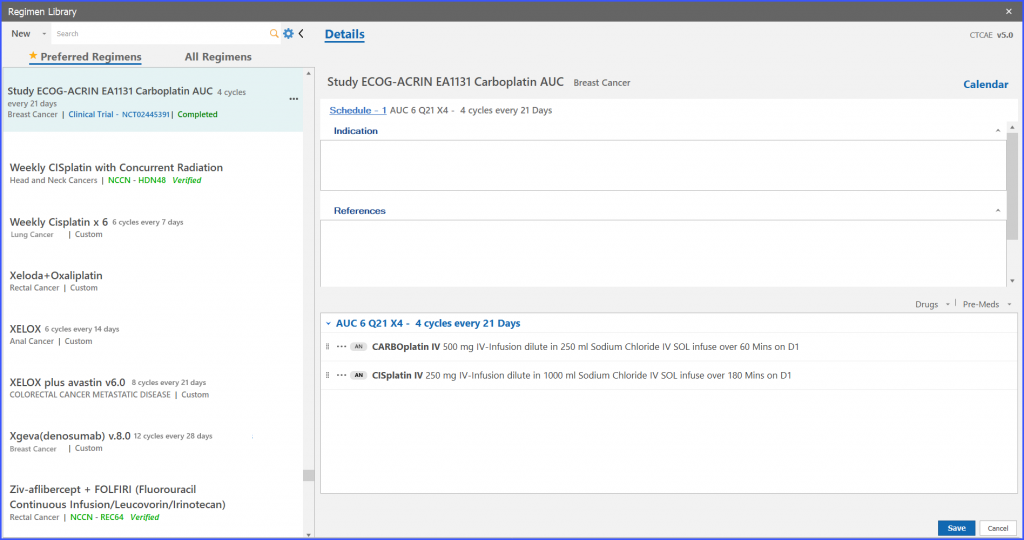
Users also have the ability to mark a study regimen as completed. After a trial regimen is marked as completed, it ceases new patient enrollments on that particular study regimen.
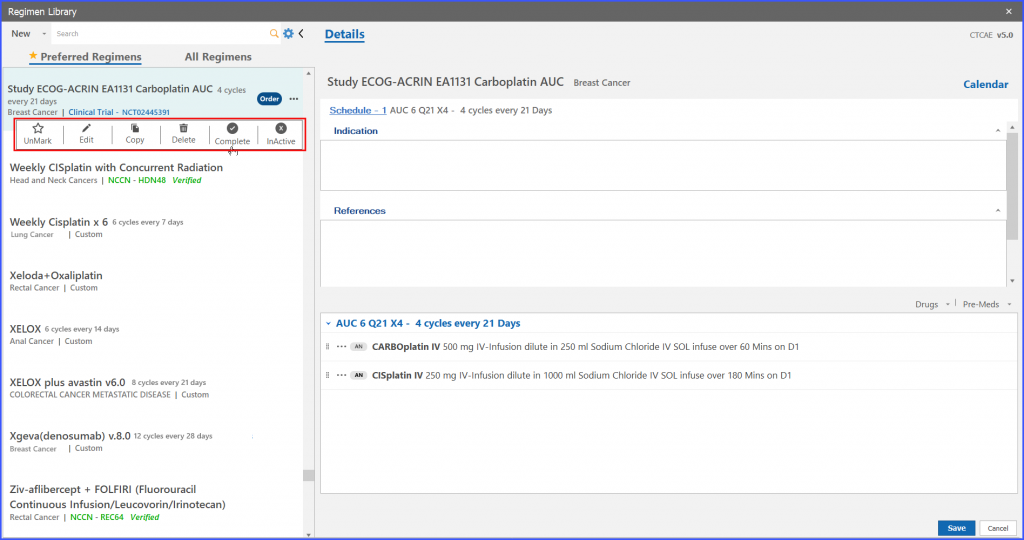
On clicking the ‘complete’ option from menu icons of the selected trial regimen, system shows a confirmation message. If the user assures the particular action, the system marks that trial regimen as ‘Completed’.
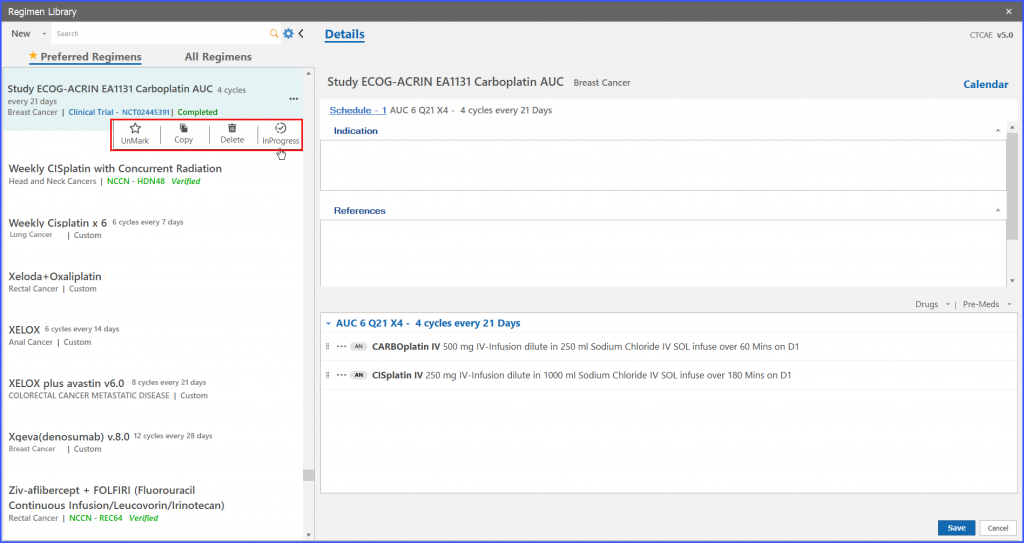
If a user wants to order such study regimen which has been marked as ‘Completed’, navigate to the ‘In Progress’ option from menu icon of particular trial regimen.
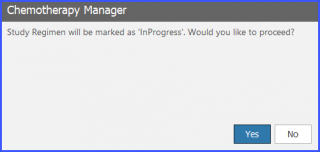
When the user clicks on ‘In Progress’, the system shows a prompt asking to label the Study Regimen as ‘In Progress’.
Mark Trial Regimen as ‘Inactive’
Regimen Library (navigation bar) > Trial regimen > Menu options> Inactive
Users also have the ability to mark a study regimen as Inactive. After a trial regimen is marked as Inactive, it ceases new patient enrollments on that particular study regimen.
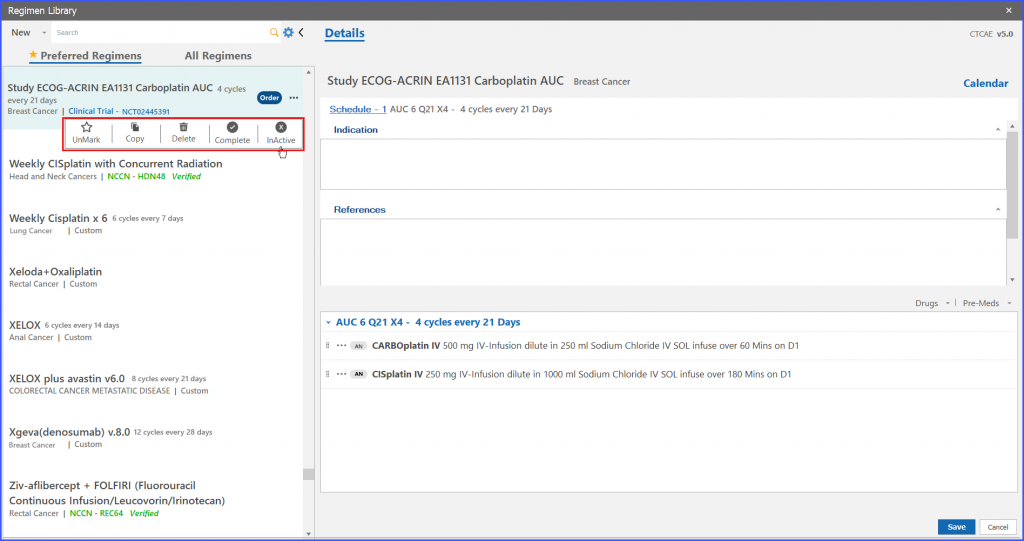
On clicking the ‘Inactive’ option from menu icons of selected trial regimen, system shows a confirmation message. If the user assures the particular action, system marks that trial regimen as ‘Inactive’.
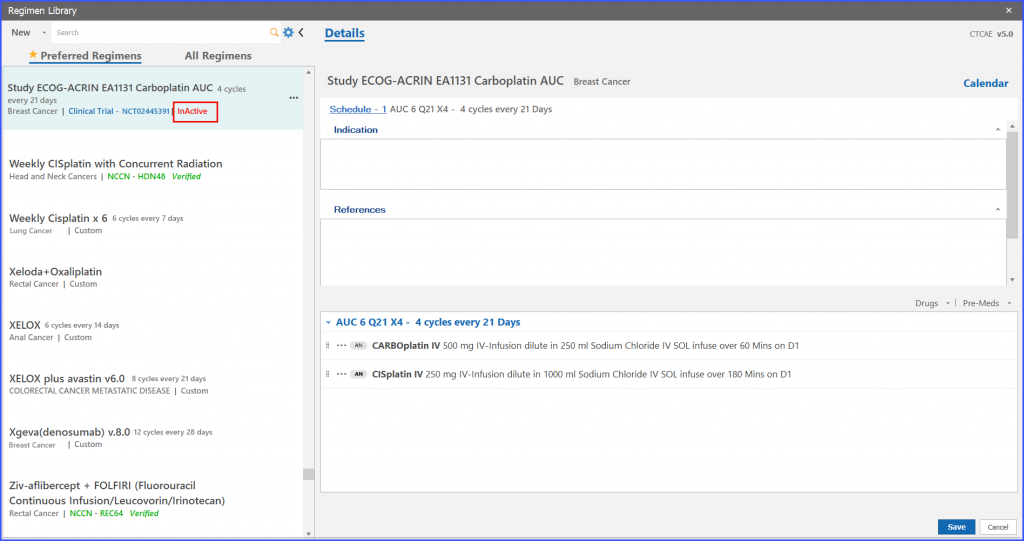
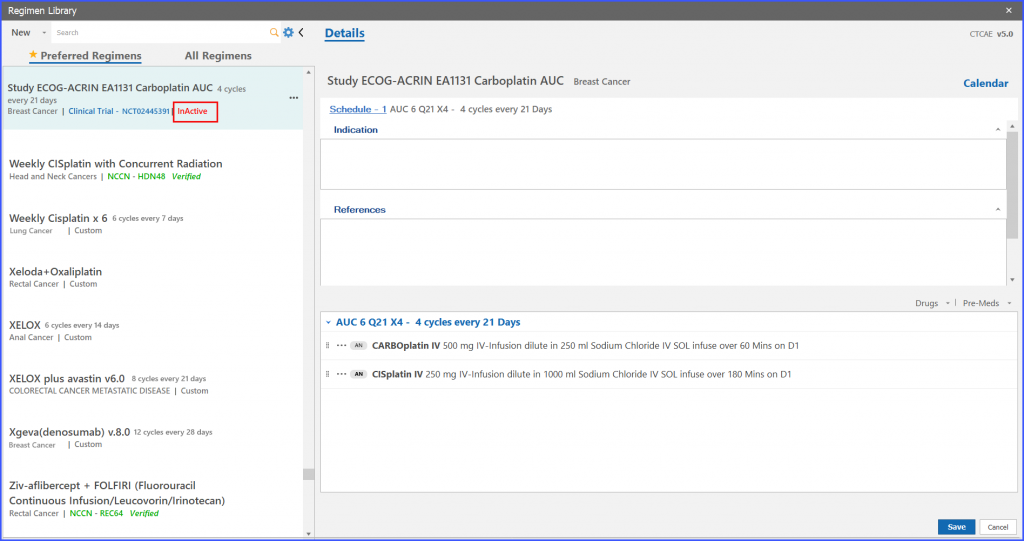
The ‘InActive’ red text appears on that particular regimen entry in the listing which has been marked inactive.
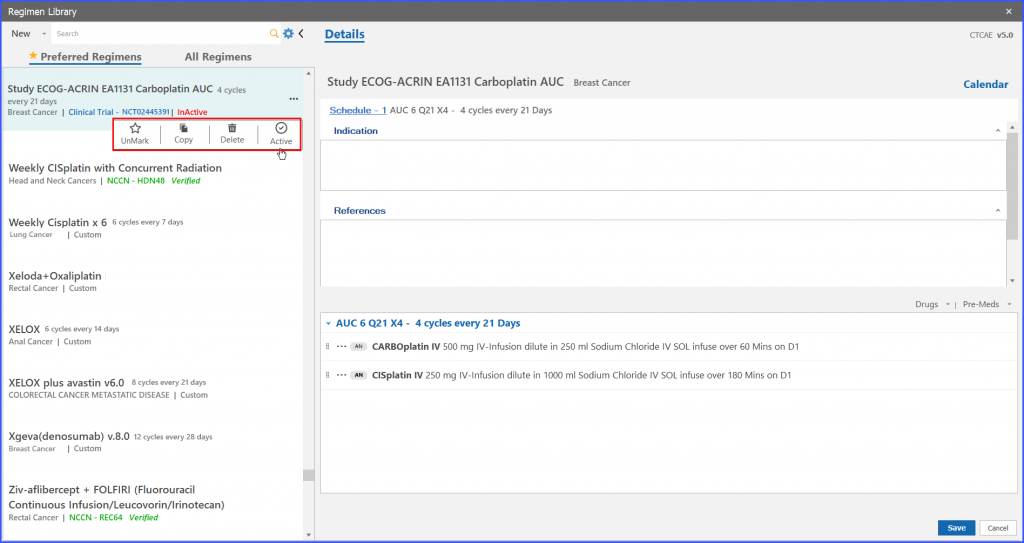
If a user wants to order such study regimen who has been marked as ‘Inactive’, then the user has to navigate to ‘Active’ option from menu icon of particular trial regimen.
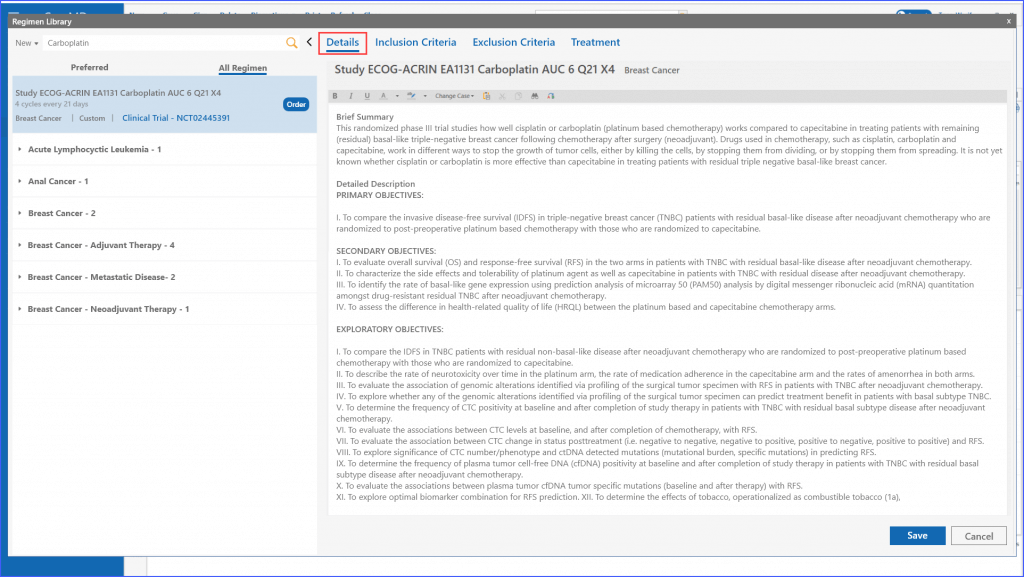
When creating a regimen for a patient, users can add comprehensive trial information under the Details tab, ensuring all critical information is easily accessible.
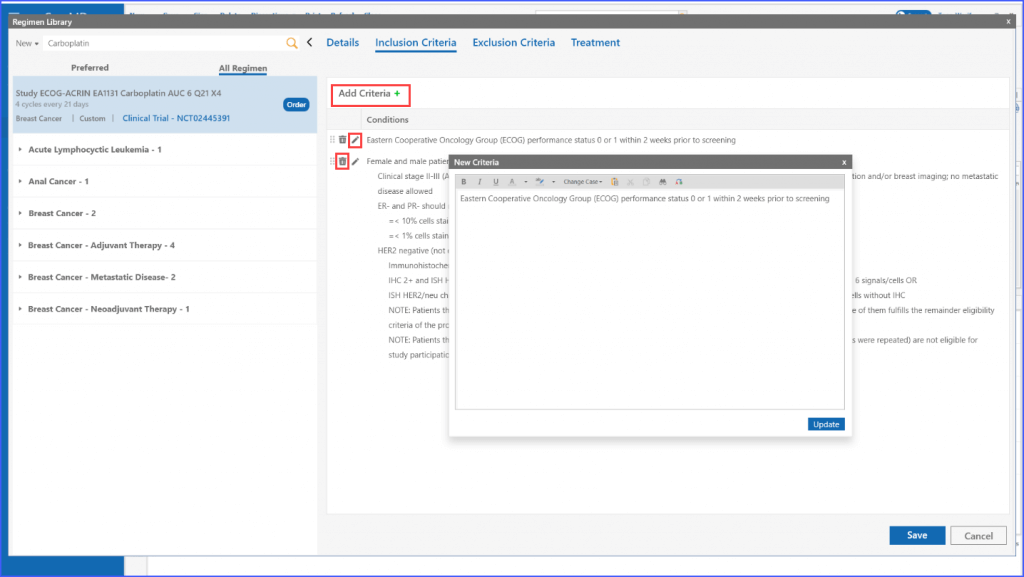
Users can add the inclusion criteria to a regimen under the relevant ‘Inclusion Criteria’ tab by clicking the ‘Add Criteria’ button. Once all information is entered, users have the option to edit or delete the criteria by clicking the respective pencil and discard icons next to each criterion.
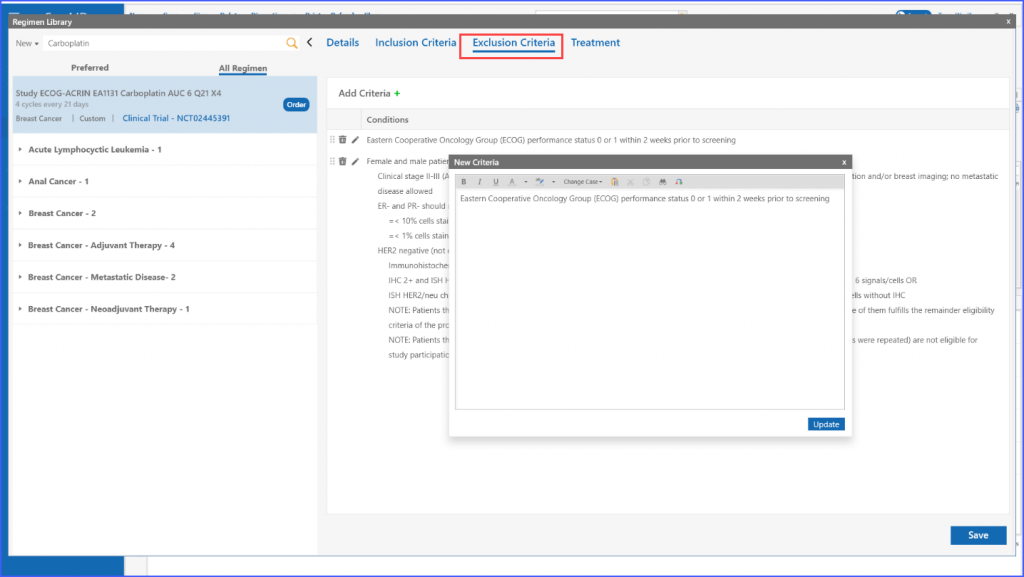
The same process applies to the ‘Exclusion Criteria’ tab, enabling users to tailor regimens to specific criteria for enrolling multiple patients.
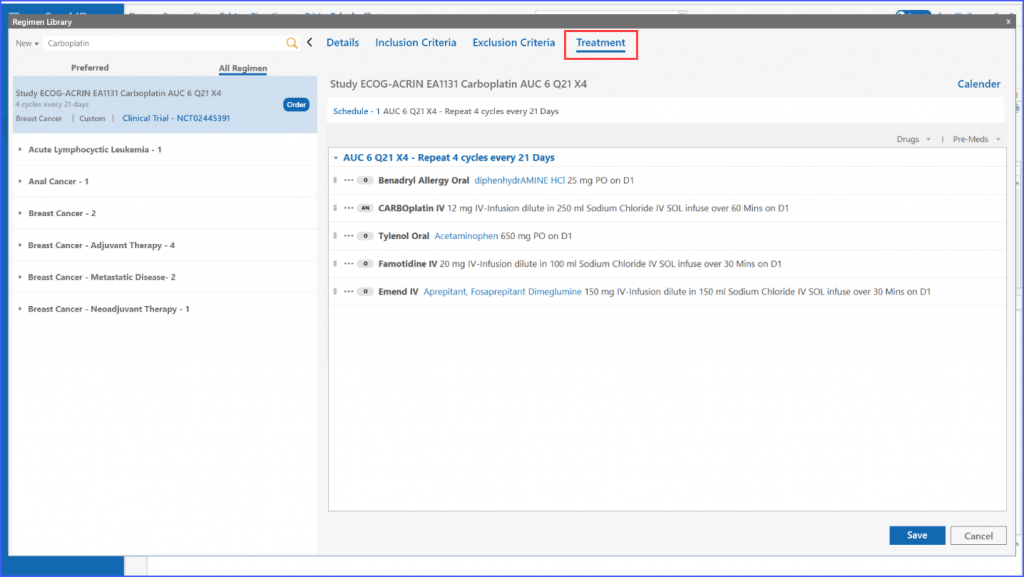
Moreover, the Treatment section is optimized to include drugs related to the trial, which are automatically added when a patient is enrolled in a specific regimen.
Patient enrollment for clinical trials has also been made more seamless. Users can enroll patients in trials by selecting a regimen from the library and ensuring all requirements such as inclusion criteria, exclusion criteria, patient consent, and enrollment date are met before proceeding.
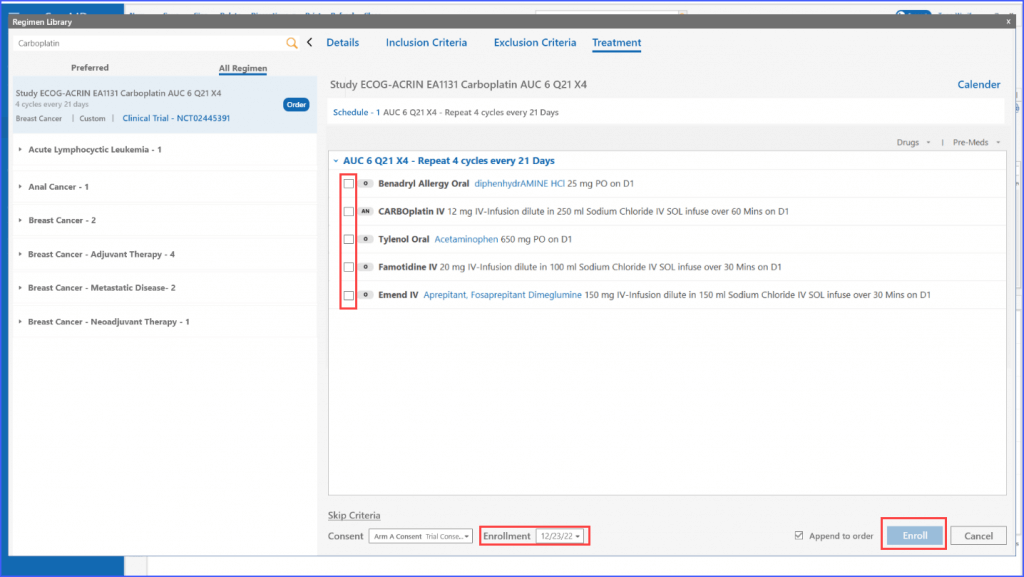
The system also allows for dynamic selection of inclusion and exclusion criteria befitting the needs of the user, which means multiple can be chosen at once.
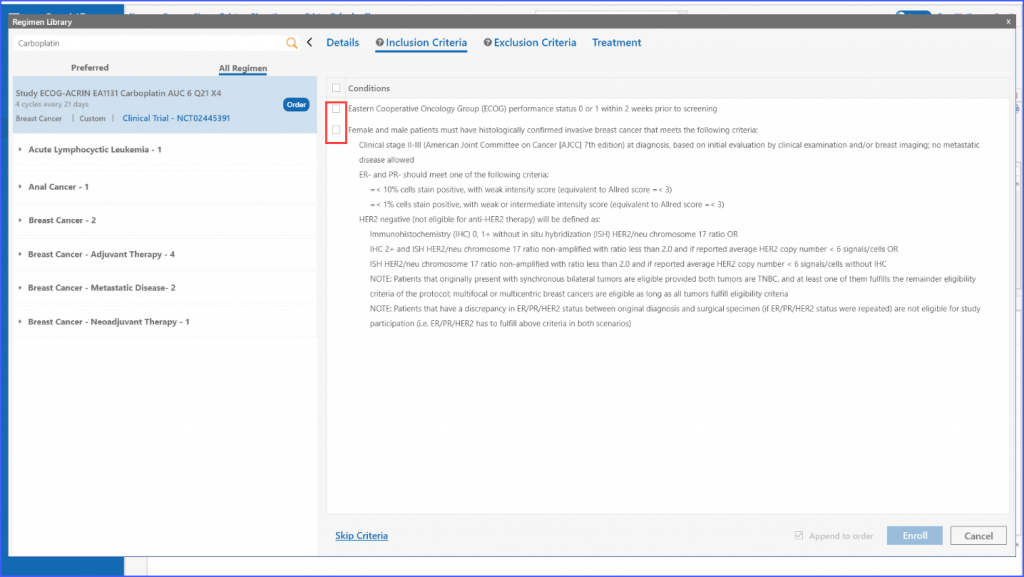
In case no exclusion criteria are applicable to the regimen, the user can select the following checkbox to proceed.
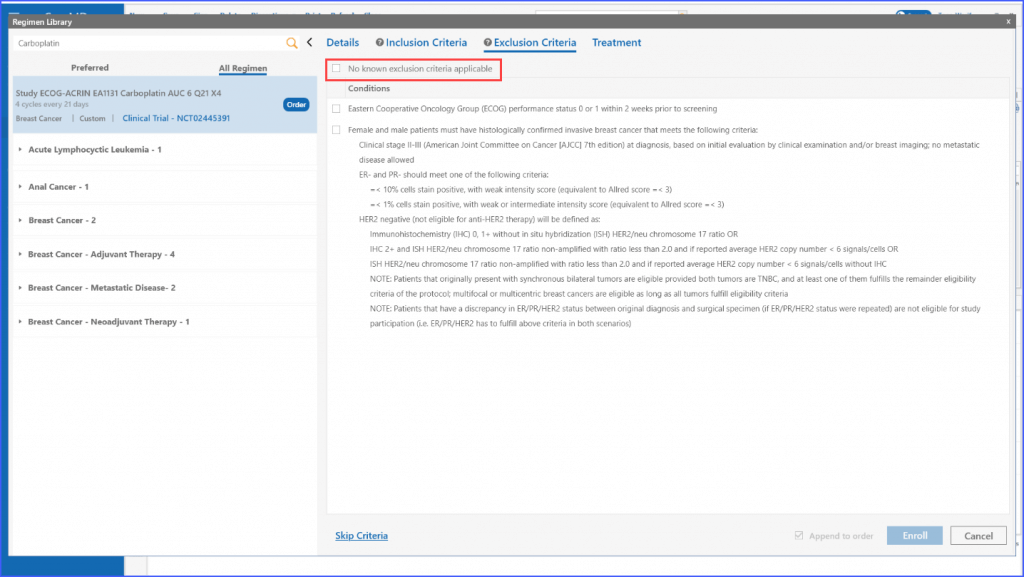
Furthermore, once applicable inclusion and exclusion criteria are selected, the system validates whether the patient is eligible for a trial or not by either displaying a green tick or a red cross in the respective tabs.
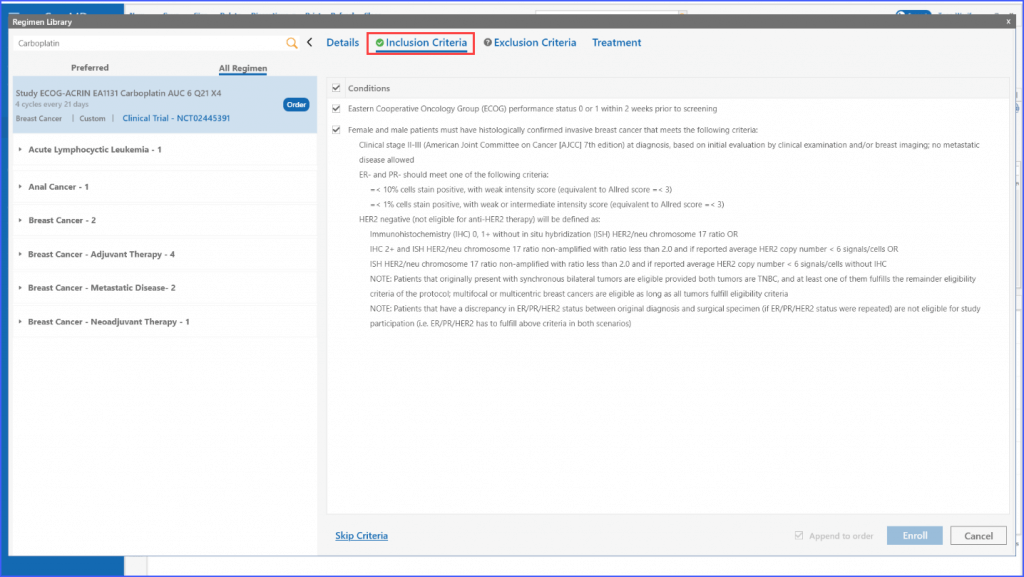
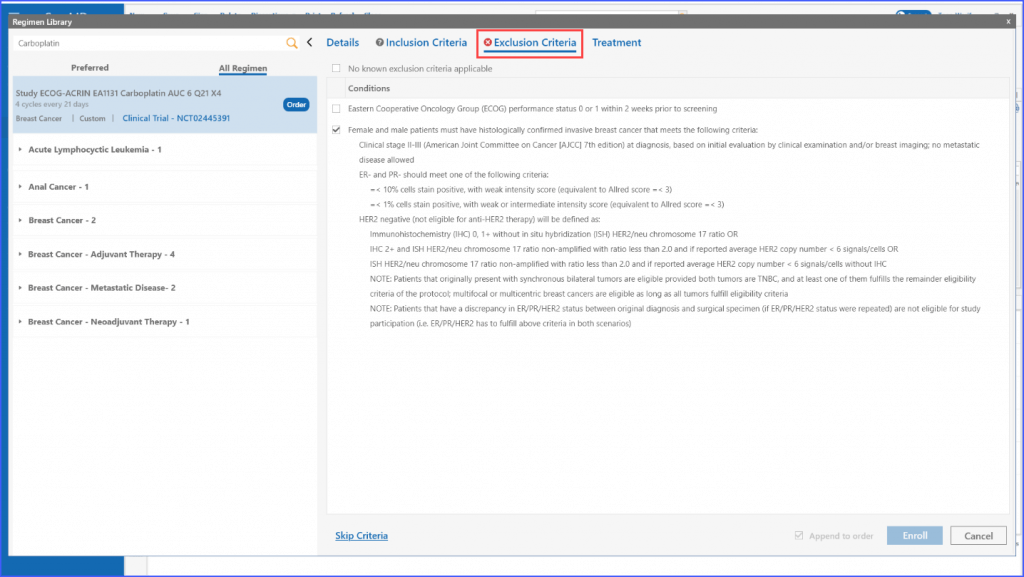
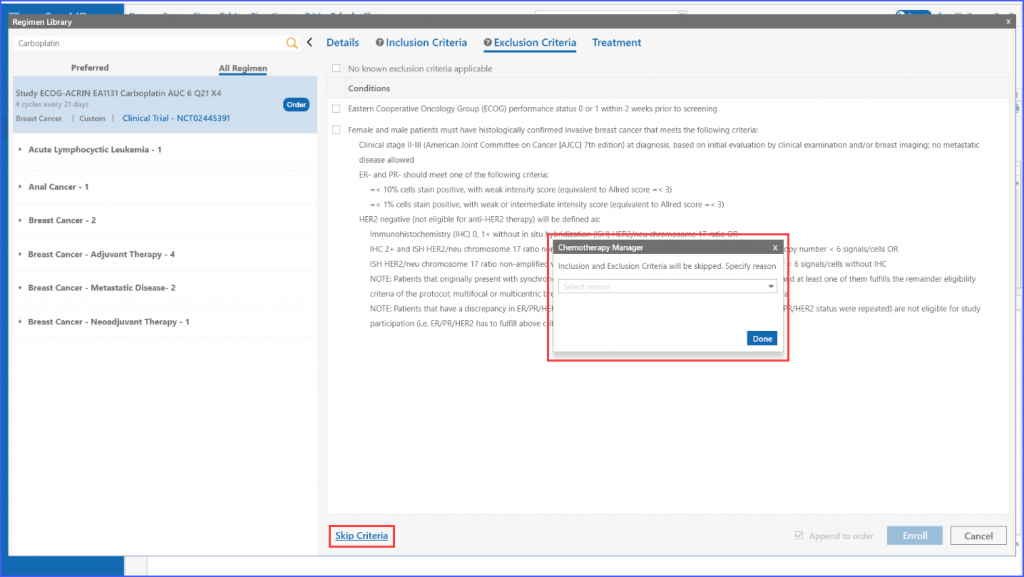
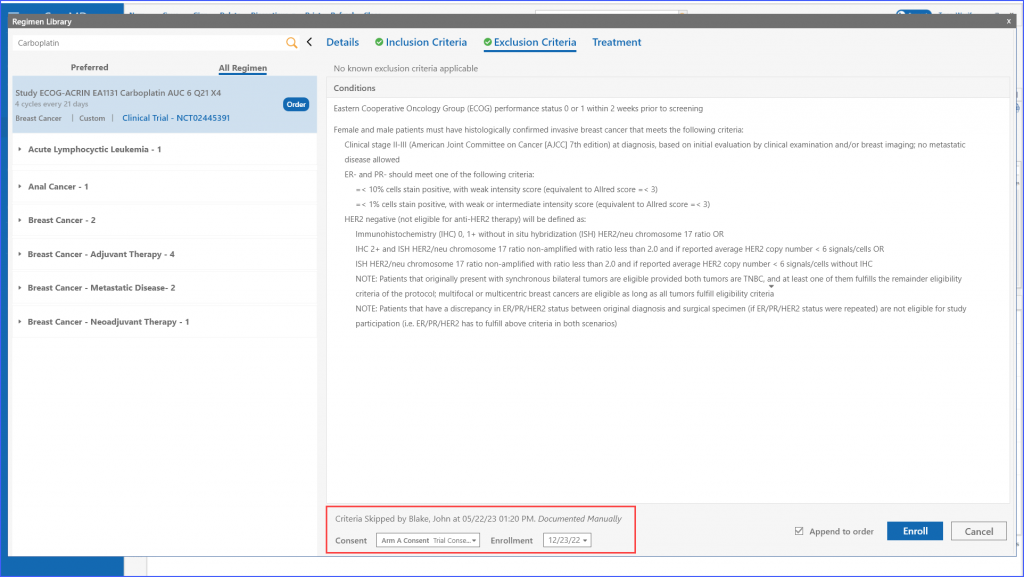
If the user chooses to enroll a patient manually regardless of ineligibility, they can use the “Skip Criteria” link. Upon clicking this, they need to specify a reason for skipping the criteria. Once done, patient can be enrolled using the ‘Enroll’ button. It should be noted that even if a user chooses to skip the criteria, details like consent and enrollment date are still required to move ahead.