How to Clean Claim Checks?
The application can automatically check electronic claims to make sure that they are not missing basic required information before allowing them to be sent. In order to configure settings for automatically checking electronic claims click here.
The user can access the ‘Clean’ tab by following the workflow.

When charges (ready to be billed electronically) are saved but not submitted, the application checks to ensure that all the mandatory claim elements are filled out. After that, these claims are placed in the Clean folder.
Two tabs ensure that the user does not accidentally generate a claim namely, Electronic Claim and Paper Claims.
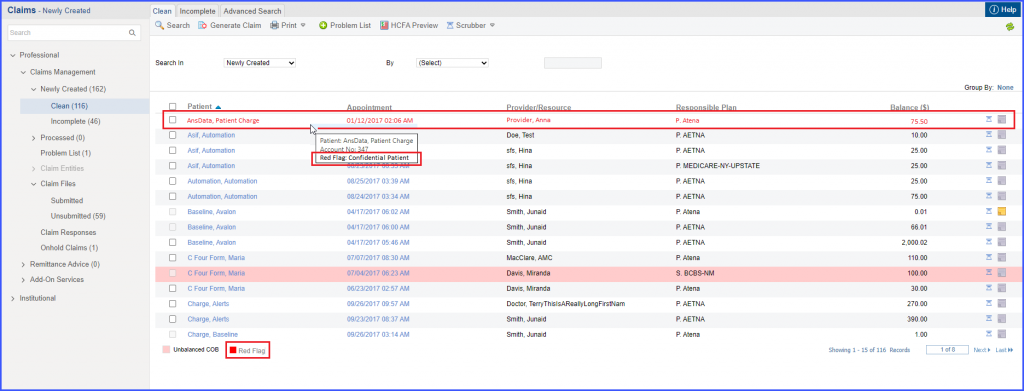
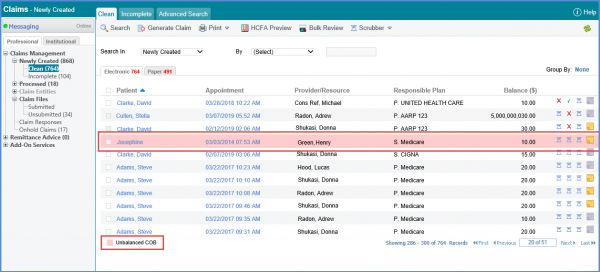
Usually, these claims are ready to be sent. But sometimes claims have an error, ‘Unbalanced COB’.
The Clean bucket excludes crossover claims that were denied by the secondary insurance from the clean claim bucket. Furthermore, it displays charges that were never submitted to the insurance. Hence, such claims are displayed in the crossover or denial bucket and not in the clean bucket.
Before generating claims, a pop-up is displayed to ensure that the user wants to generate claims.

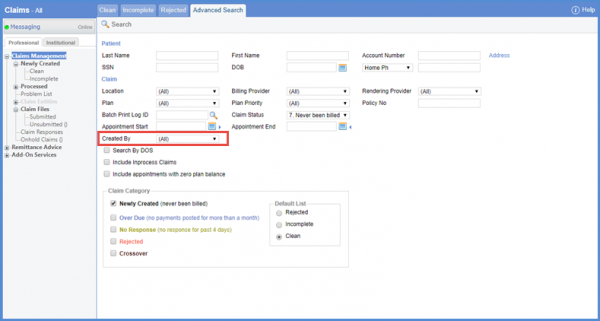
CureMD allows grouping of charges on the basis of the user who created the charge. When multiple Billers work at practice, this feature helps biller to see the charges created by them only. To fulfill the purpose an option ‘Created by’ is added in the ‘Group by’ dropdown.
Following the workflow user navigates to ‘Clean’ screen.
Here, user can click on ‘Group by’ option to see the dropdown menu. The ‘Created by’ option is added here to segregate the charges on the basis of user who created the charge.
User can select ‘Created by’ option to see the list of the claims created by them.

User can also search the charges created by a specific user.
Navigate to the ‘Advanced Search’ tab. Here, user can see the ‘Created by’ dropdown.
Select the practice user from the dropdown, and click the ‘Search’ button.
User can see the search result on the basis of the claims created by the particular user.
Users can view Red Flagged patients in red text in the listing of claims.
When the user hovers at the right side of the red-flagged patient’s name, following details are displayed:
- Patient’s name
- Patient’s account number
- Reason for being marked as ‘red-flagged’
Click here to view how to red flag a patient: