What is a Statement?
This report generates patient statements that are handed over to patients at the time of their appointment, or mailed at the end of monthly billing cycle.
It contains charges drawn against each CPT along with the total outstanding bill.
User can choose to find a Patient by the following fields:
- ‘Patient Name’
- ‘Statement Cycling’
- ‘Insured Party’
- ‘Batch Print Log’
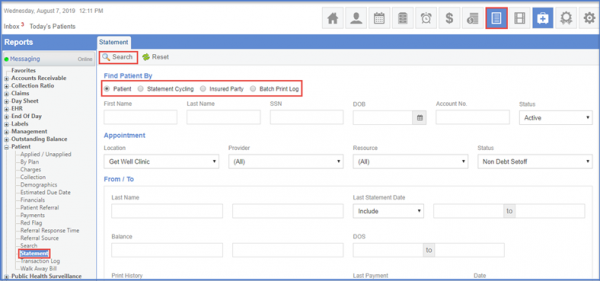
To search by ‘Patient’, users can enter information in the provided fields. All the fields are not required to be filled completely.
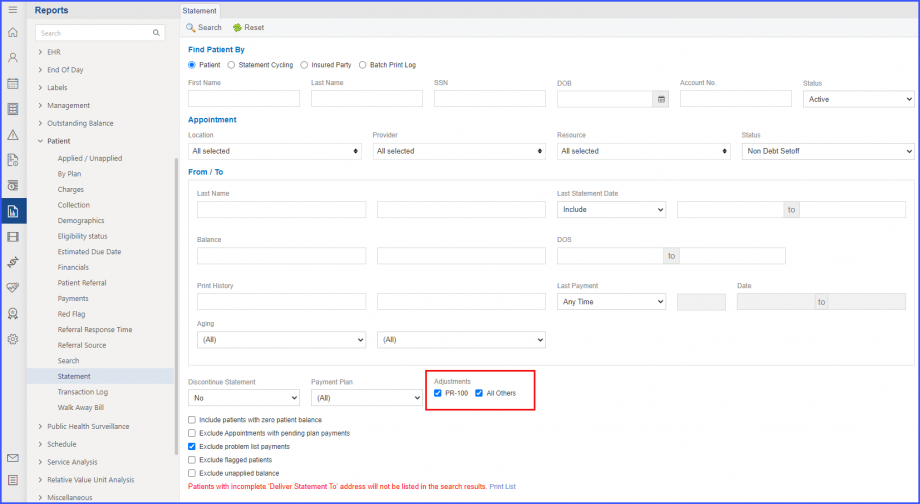
In ‘DOS’ field, users can specify a range or specific date to filter out results and avoid unwanted DOS statements. The ‘Last Payment Date’ filter allows users to send the statement of date since a particular patient last made any payment.
From ‘Patient History Range’ users can customize and filter patient statement based on statements print history.
User can also enable any of the following check boxes to customize their report.
- Exclude problem list payments
- Exclude flagged patients
- Exclude unapplied balance.

Together, ‘Last Submission Date (Include)’ and ‘Last Submission Date (Exclude)’ fields allow users to filter the search results based on the Last submission dates. Clicking the ‘Search’ button, patient statement report is generated.
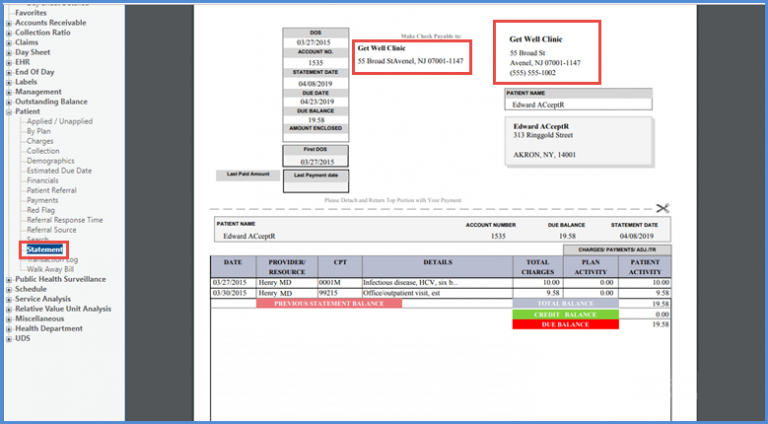
On the patient statement reports, user can see the appointment location as the Mailing Address and Pay-to Address.
To know how to set Appointment location as a mailing address and pay to address, click here.
Patients with PR-100 adjustments can be filtered out when generating statements.
This ensures that payments can also be received from patients who have open patient balances other than PR-100 adjustments.
Users have the option to enable or disable the ‘PR-100’ checkbox from the ‘Adjustments’ section. If PR-100 is disabled, patients with PR-100 adjustments are excluded while patients with All Other adjustments are included in the search results and vice versa.
Dedicated controls have been added to manually invoke the Text to Pay service.![]()
On the ‘Search Results’ screen, the system displays two tabs named ‘Send TextToPay to ALL’ and ‘Send TextToPay to Selected’ at the top bar of the screen.
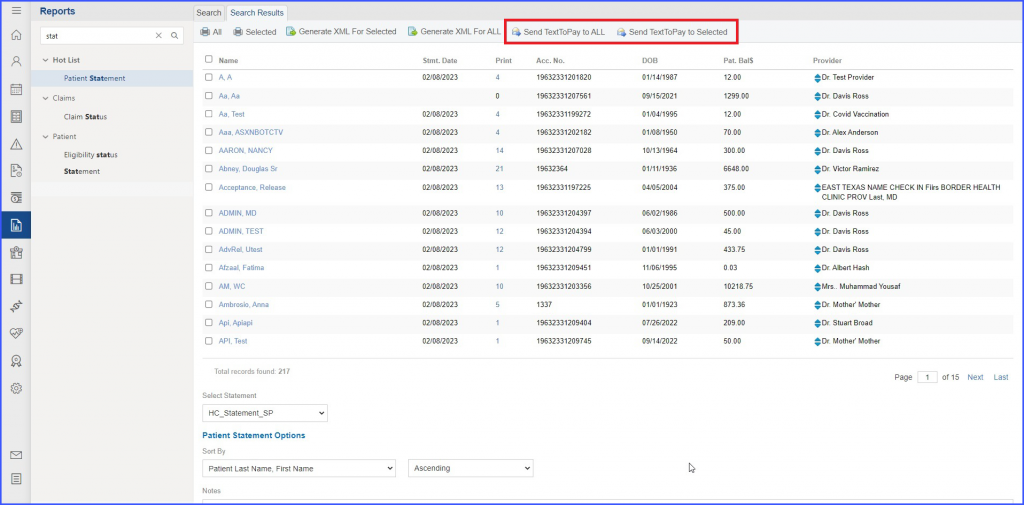
To send Text To Pay message to selected number of patients, enable the checkboxes of those patients from the listing and click on the ‘Send TextToPay to Selected’ tab.
The system displays a popup titled ‘TextToPay Patient Statements’ on which selected patients are displayed in the listing.
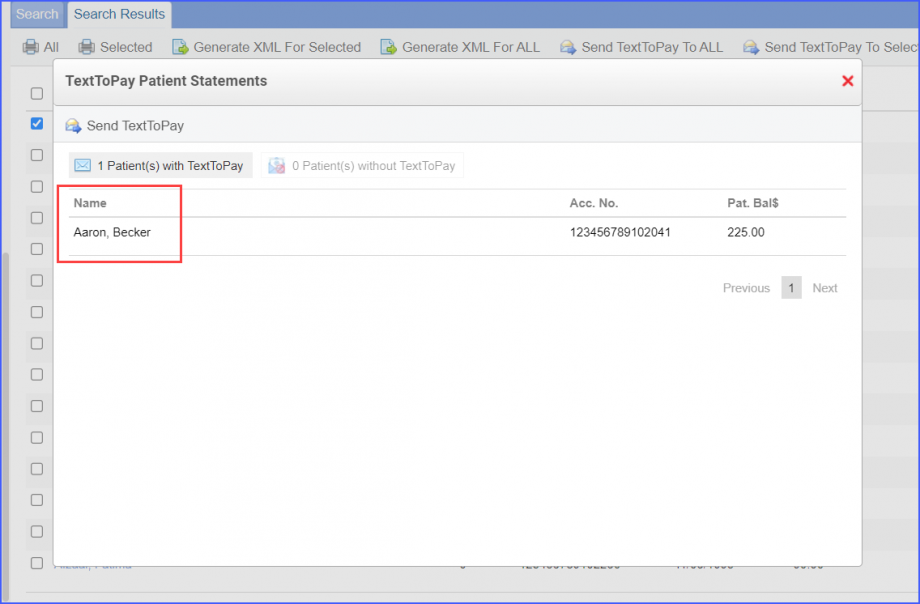
Users can click on the ‘Send TextToPay’ button to send message to the selected patients.
If the user has selected 10 patients from the listing, and out of those 10 patients, 8 do not have Text to Pay service enabled for them, then the ‘TextToPay Patient Statements’ popup segregates the selected patients into two lists, including:
- Patient(s) with TextToPay
- Patient(s) without TextToPay
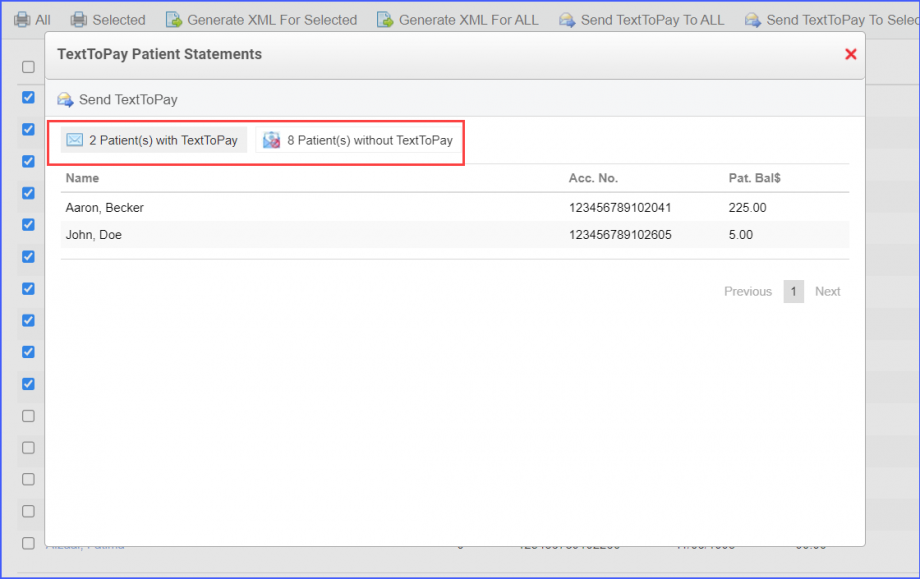
Users can view which patients do not have their service enabled by clicking on the 2nd tab. The ‘Send TextToPay’ button is disabled when the user is viewing the 2nd list.
Furthermore, to send Text To Pay message to all patients in the list, click on the ‘Send TextToPay To ALL’ and the system displays the same popup again with patients segregated into two list as mentioned above.
