Web Payment Portal Customization and Branding Controls
Configure Web Payment Portal
Update Portal Branding
Configure Patient Search
Configure Default Landing Tab
Update Practice Contact Information
What’s New
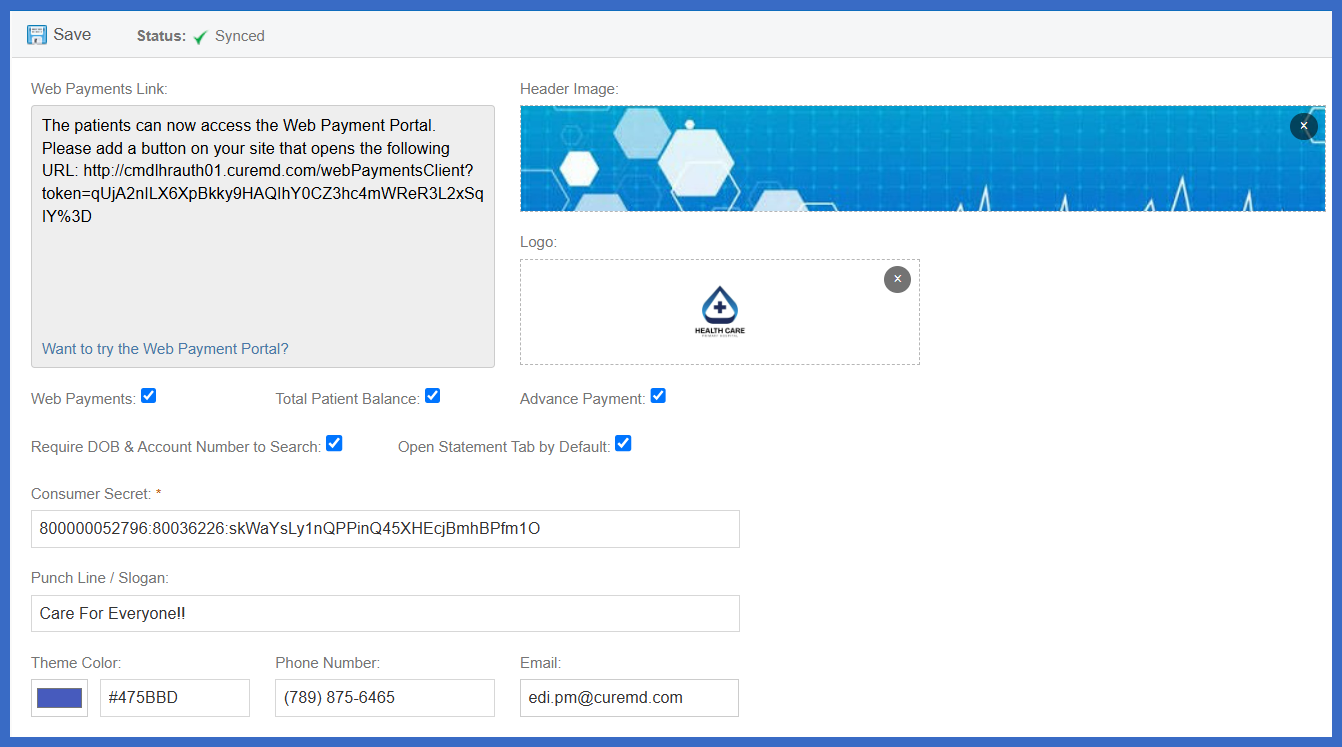
- Renamed Portal Background Image to Header Image, with support for uploading, previewing, removing, and saving images.
- Renamed Portal Image to Logo, with the same upload, preview, removal, and persistence functionality.
- Added new branding and contact fields:
- Punch Line / Slogan
- Theme Color
- Phone Number
- Email
- Added Require DOB & Account Number to Search, allowing practices to require both fields when patients search for their records.
- Added Open Statement Tab by Default, allowing practices to control which tab appears when patients access the portal.
- Added a Theme Color picker with a corresponding hexadecimal color field.
- Header Image and Logo can be configured independently.
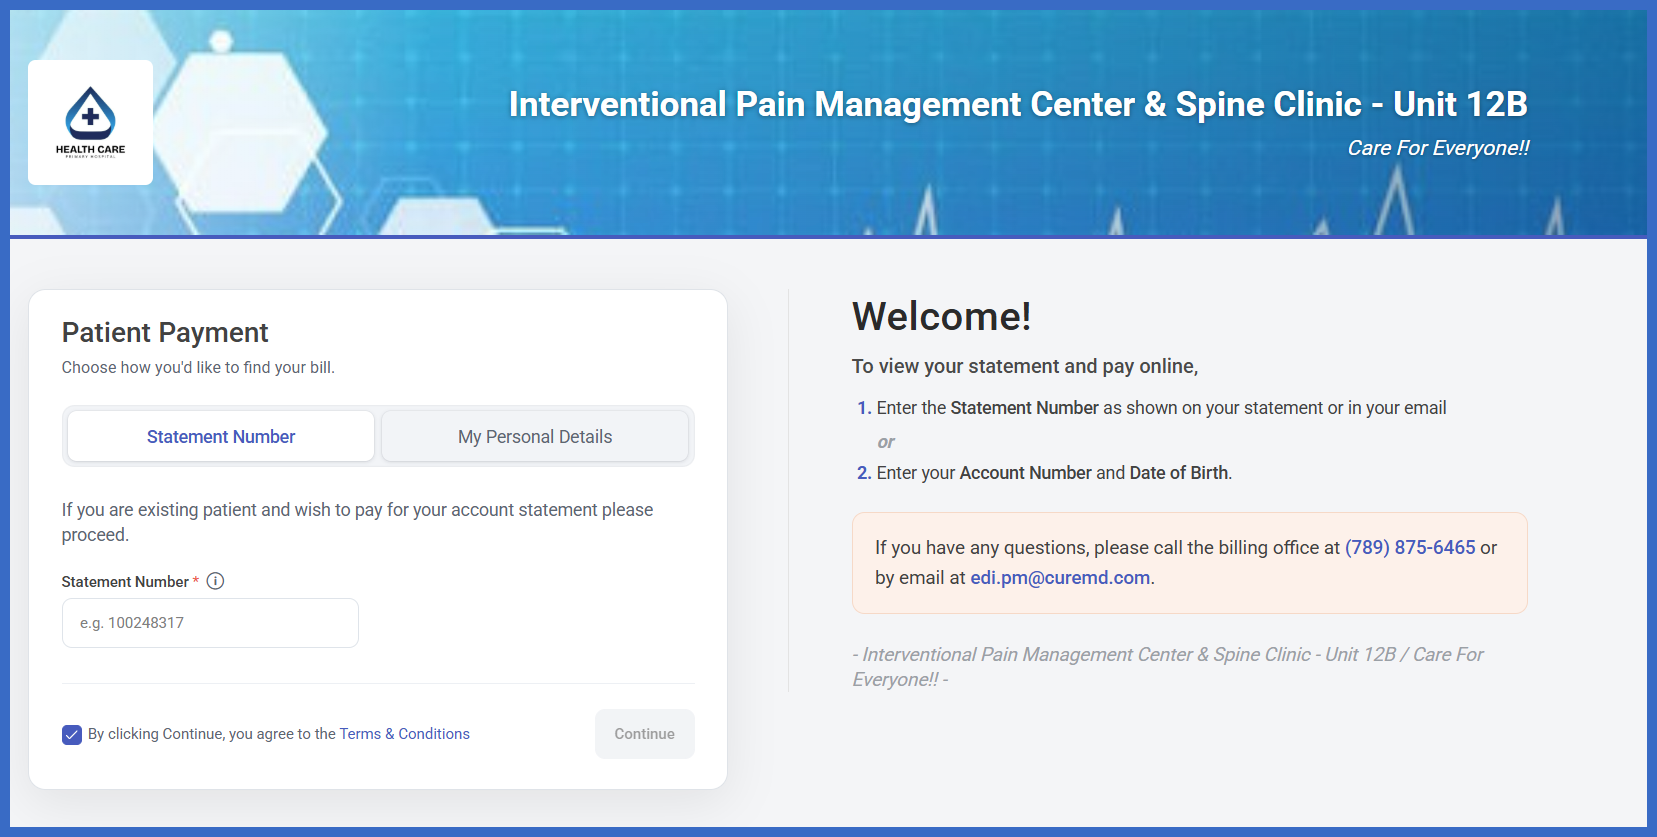
- Saved branding and configuration settings are reflected in the patient-facing Web Payment Portal.
- Existing Web Payments, Total Patient Balance, and Advance Payment controls remain available.
- Consumer Secret remains a mandatory field.
- Existing Web Payments Link instructions and URL remain available.
- Only authorized users can modify Web Payment settings, and configurations are maintained separately for each practice.
How It Works
- Navigate to Settings > My Practice Settings > Web Payment.
- Upload a Header Image and Logo to customize the portal’s appearance.
- Preview the uploaded images or remove them using the X option if changes are needed.
- Enter the desired Punch Line / Slogan.
- Select a Theme Color using the color picker or enter a valid hexadecimal color value.
- Enter the practice’s Phone Number and Email, if applicable.
- Configure the patient search and default landing preferences:
- Require DOB & Account Number to Search
- Open Statement Tab by Default
- Review the existing Web Payment options and ensure Consumer Secret is populated.
- Click Save to retain the configuration.
- Once successfully saved and synchronized, the Web Payment Portal reflects the updated branding and functionality.
Benefits
- Allows practices to create a more personalized and recognizable patient payment experience.
- Provides centralized control over portal branding, colors, and contact information.
- Gives practices flexibility in determining which patient information is required during payment searches.
- Improves patient convenience by allowing the portal to open directly on the Statement tab.
- Reduces reliance on technical assistance for routine portal customization.
- Maintains consistent branding and payment settings across the practice’s Web Payment Portal.
- Preserves existing payment functionality while introducing additional customization options.
