How to Associate Appointment Notes with a UB-04 Charge?
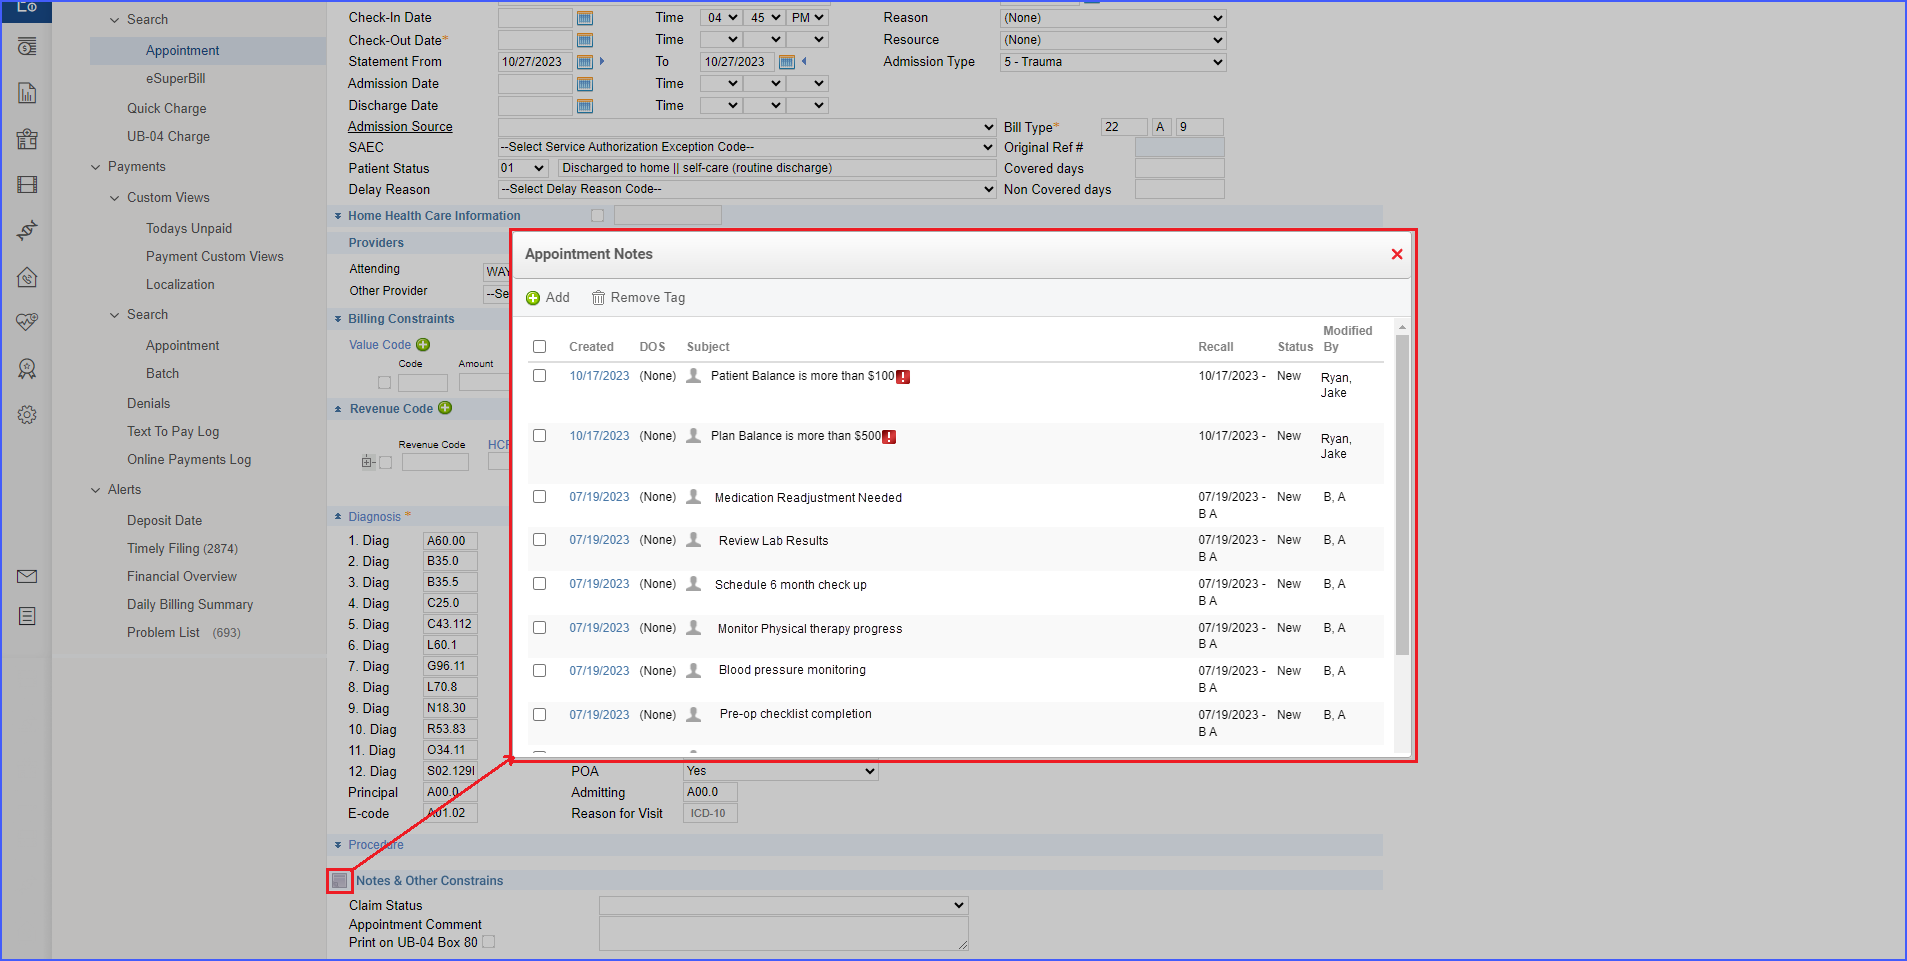
Follow the above workflow to land on the Appointment page. Here, select a particular appointment to view the ‘Add/Edit Charges’
On this page, users have the capability to modify charges linked to appointments.
As they scroll down, users encounter a section labeled ‘Notes & Other Constraints’. By clicking the icon next to this heading, a window titled ‘Appointment Notes’ opens. In this window, users can browse through existing notes related to the appointment, modify them, or add new ones directly within this process. 

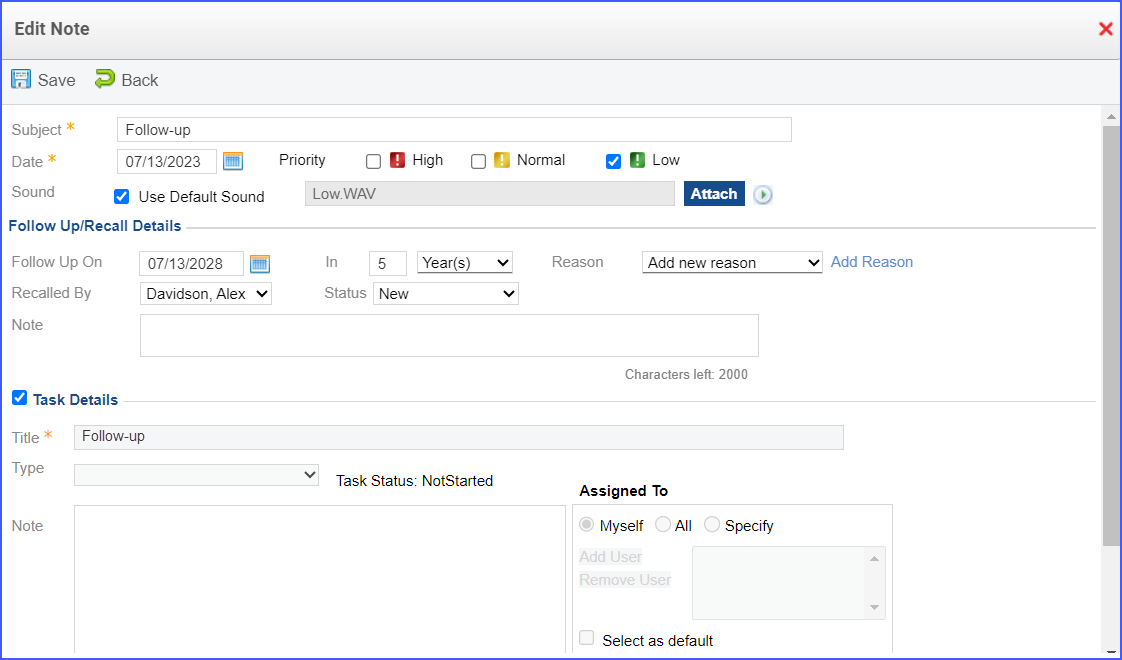
To alter existing appointment notes, users click on the date hyperlink associated with the appointment. This allows them to update any necessary information in the note.
Users also have the option to link tasks to the appointment note by selecting the ‘Task Details’ checkbox. Additionally, access to the follow-up/recall history is available under its designated expandable section. After making any updates, users can save their changes by clicking the ‘Save’ button. It is important to note that fields that are greyed out cannot be edited.

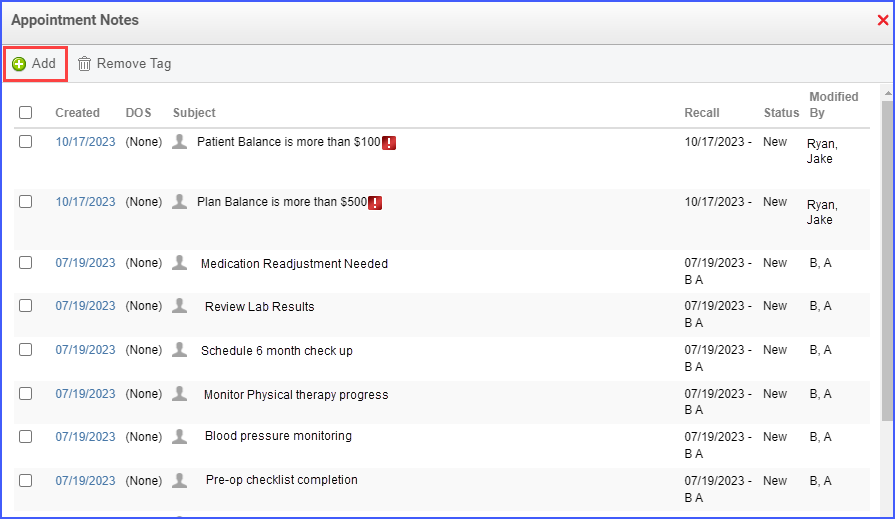
Creating a new appointment note follows a similar process. Users click the ‘Add’ button which displays the ‘Add Note’ window.

The required details can then be entered. If tasks need to be associated with the note, the ‘Task Details’ checkbox should be checked.
The ‘Title’ and ‘Note’ fields are prefilled based on the information provided in the previous section. Once all information is entered, clicking ‘Save’ finalizes the new appointment note.
