How to Accept/Reject Refill Requests?
Users can approve or deny a refill request. Follow the workflow mentioned above to land on the ‘Refill’ screen.
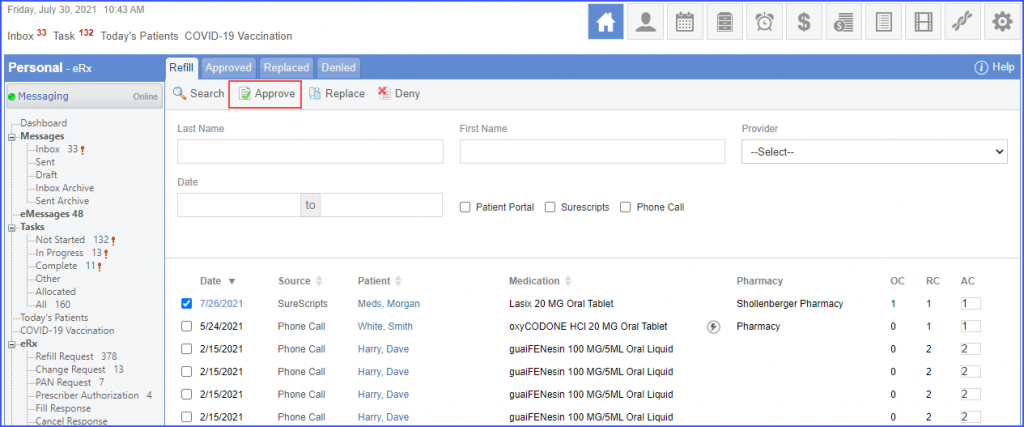
To approve a refill request, enable the checkbox next to the required date and click the ‘Approve’ button.
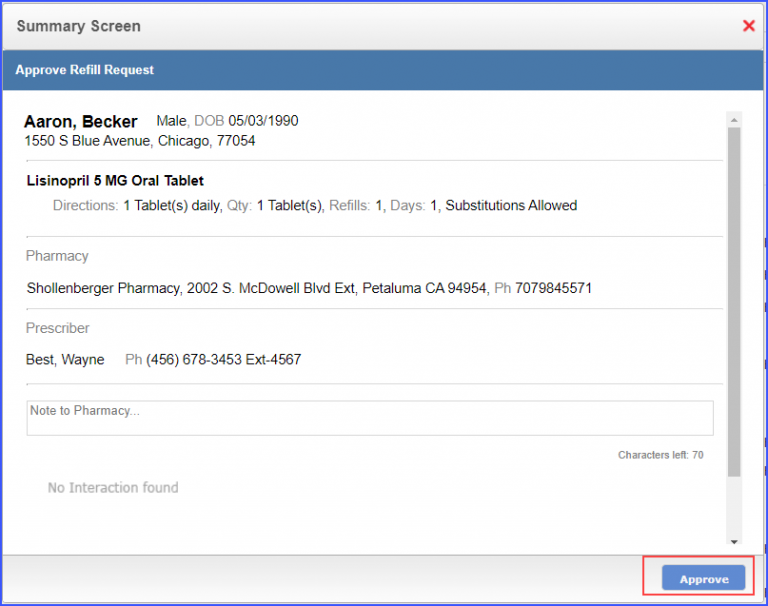
Once the ‘Approve’ button is clicked, the system displays a ‘Summary Screen’ for the selected refill request. Users have the option to add a note for the pharmacy in the ‘Note to Pharmacy’ textbox. Click ‘Approve’ to approve the request.
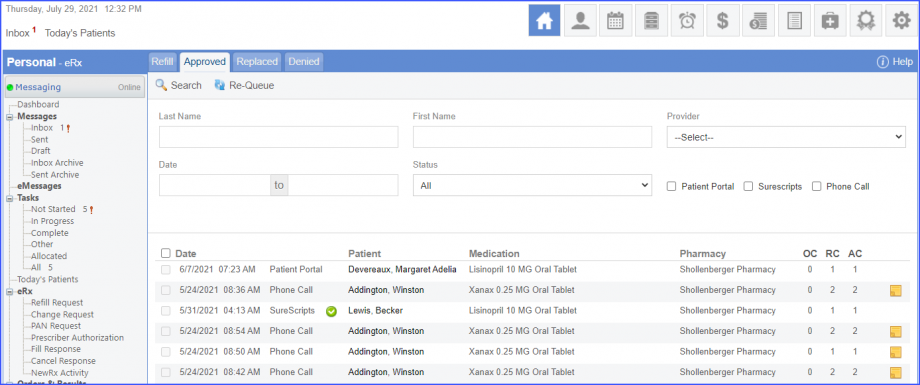
The refill request is moved to the ‘Approved’ tab.
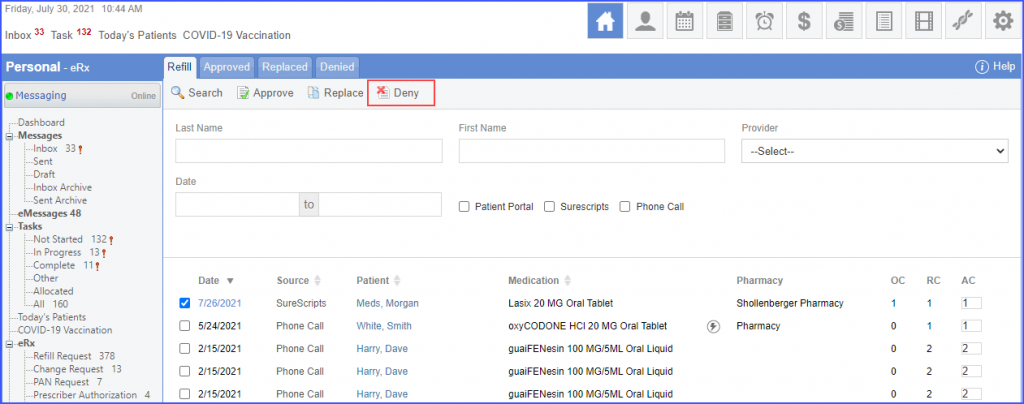
To deny a refill request, enable the checkbox next to the required date and click the ‘Deny’ button.
Once the ‘Deny’ button is clicked, the system displays a ‘Summary Screen’ for the selected refill request. Users can select a reason for denying the refill request from the ‘Denial Reason’ dropdown. Click ‘Deny’ to deny the request.
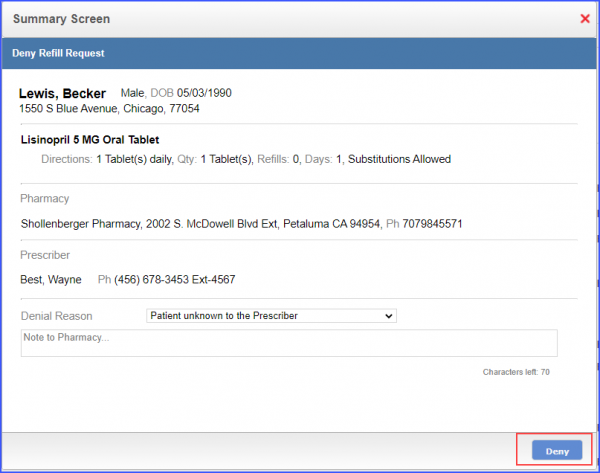
The denied refill request is moved to the ‘Denied’ tab.
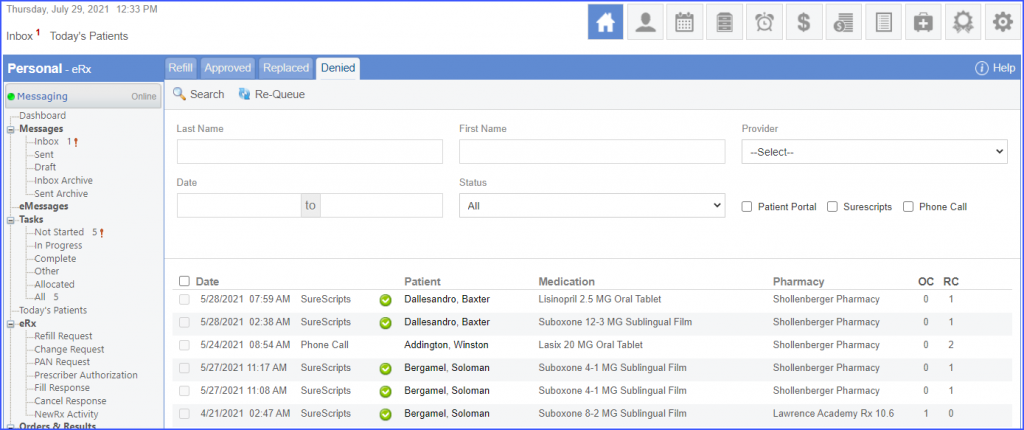
Users can view the denial reason in the refill denied bucket.![]()
This allows users to schedule appointments accordingly.
On the denied tab, the system displays following columns on the screen.
- Date
- Patient Name
- Medication
- Pharmacy
- Denial Reason
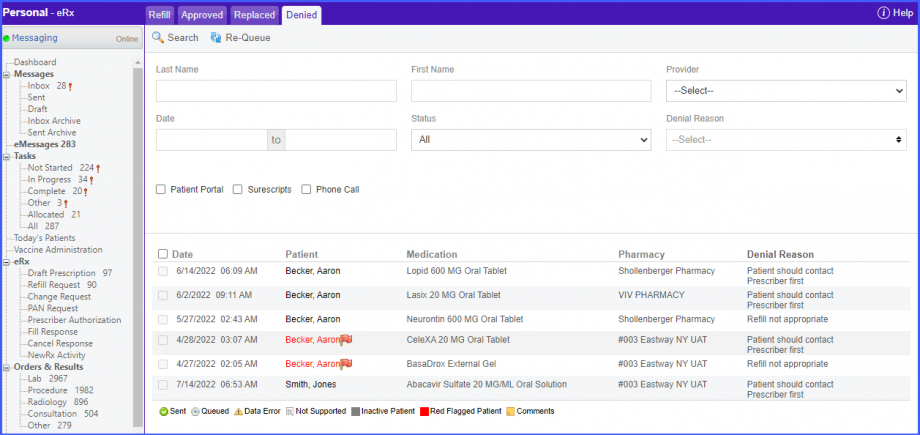
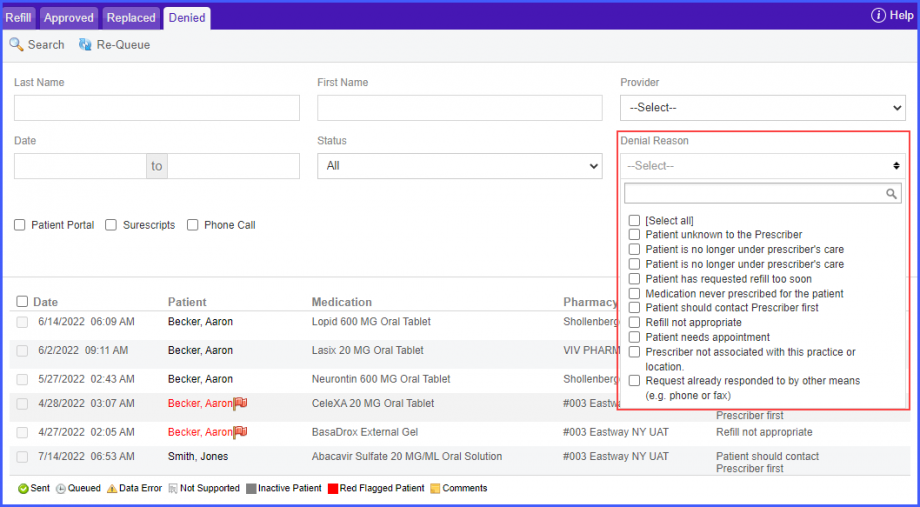
The ‘Denial Reason’ column displays the rejection reasons against each refill request in their respective rows. Moreover, the ‘Denial Reason’ dropdown field present next to ‘Status’ dropdown field can be used to filter medications based on specific denial reason(s).
Meanwhile, upon hovering over any date in the ‘Date’ column, the system displays a tooltip containing the following information:
- Provider Name
- Action Date
- Source
- Status

Similarly, hovering over a medication in the ‘Medication’ column displays a tooltip containing the following information:
- Medication Name
- Day Supply
- Quantity
- Directions
- Requested Count

