How to Add Synonym(s) with a CPT?
To associate a synonym with a CPT code, please follow the workflow mentioned above to navigate to the ‘Procedure’ screen. After navigating to the ‘Procedure’ screen, locate the specific CPT code from the listing for which you want to add a synonym.
Click on the code, and the system directs you to the ‘Edit Procedure’ page. The synonym for the CPT code can be added from the ‘Synonym(s)’ text field.
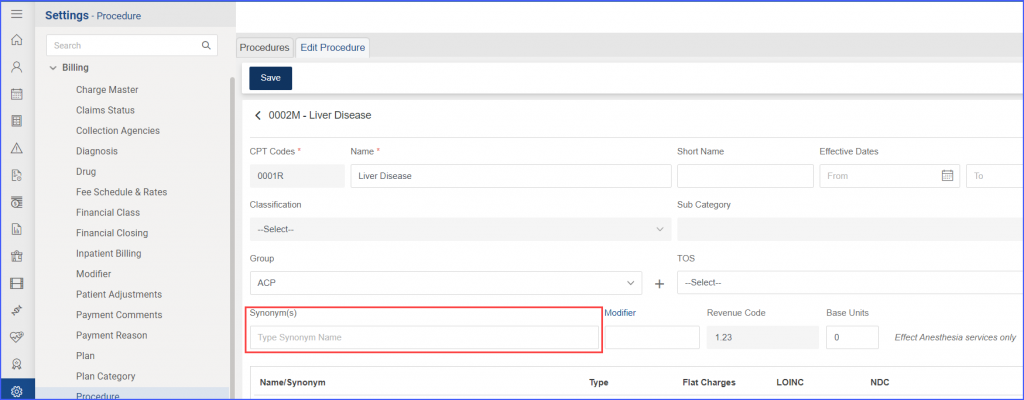
Click on the text field and type the synonym name you want to add and then press ‘Enter’. Once entered, the synonym is displayed in the synonym listing below the text field.
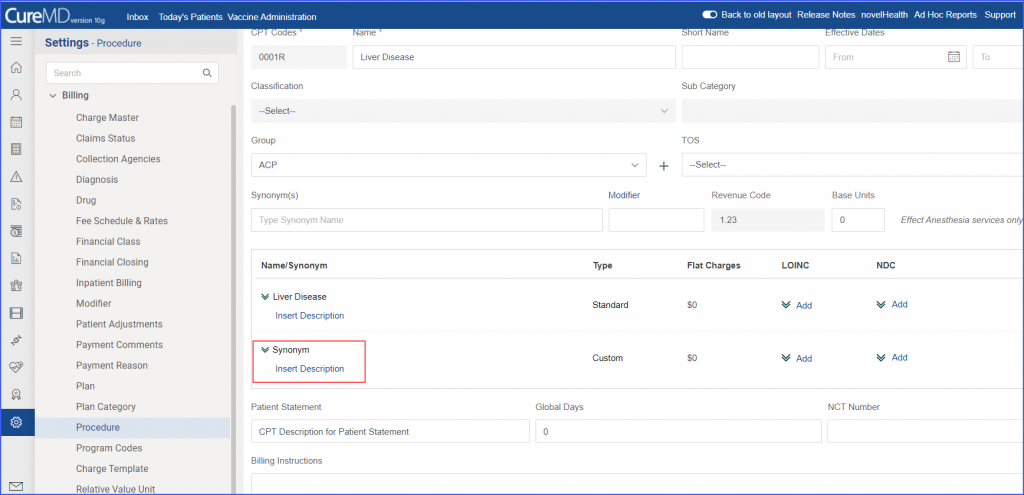
Multiple synonyms can be added with the same CPT code as displayed in the image above. The synonym added by you is displayed with the ‘Custom’ type in the listing, meanwhile, the synonym provided by AMA/CMS as the standard name of the procedure code is displayed with the ‘Standard’ type in the listing.
You can also insert a description with the standard or custom synonym by clicking on the ‘Insert Description’ text under the synonym name. Clicking on ‘Insert Description’ expands the section and a ‘Description’ text box is displayed.

Add the description in the text box, and click on the double arrow icon text to synonym name to compress the expanded section. The added description appears under the synonym name. The added description can be removed or edited later by expanding the section again.

To expand the section after adding a description, click on the description appearing below the synonym name.
A custom synonym can also be deleted by clicking on the ‘Bin’ icon that appears when you hover over that synonym name in the synonym list.

Click on ‘Save’ button after adding a synonym with the CPT. Once saved, you can also search that CPT anywhere in the application (like on provider note, Esuperbill, Charge, Orders, Results, etc.) using the custom synonym you added on this screen.
The existing synonym data of CPTs in the application is categorized on the basis of the ‘Medium CPT Description’ stated in the AMA (American Medical Association) standard library. This means, that the system compares the name of an existing (saved) CPT with the medium description of the same CPT provided by AMA. If the two match, the system makes no change in the CPT data saved in the system. However, if the AMA description is different, the system creates a new standard synonym entry in the application for that CPT using the data provided by the AMA, while the type of existing synonym entry is changed to ‘Custom’. Both synonyms can be used to search and select CPT codes anywhere in the application.
You can add flat charges, LOINC details and an NDC for each synonym.
To add flat charges, click on the pencil icon that appears under ‘Flat Charges’ column when you hover over a synonym tile. A text box appears when you click on the pencil icon. While a tooltip named ‘Edit’ appears by hovering over the pencil icon.

Type-in the charge amount in the textbox and click anywhere on the screen to add it with the synonym. 
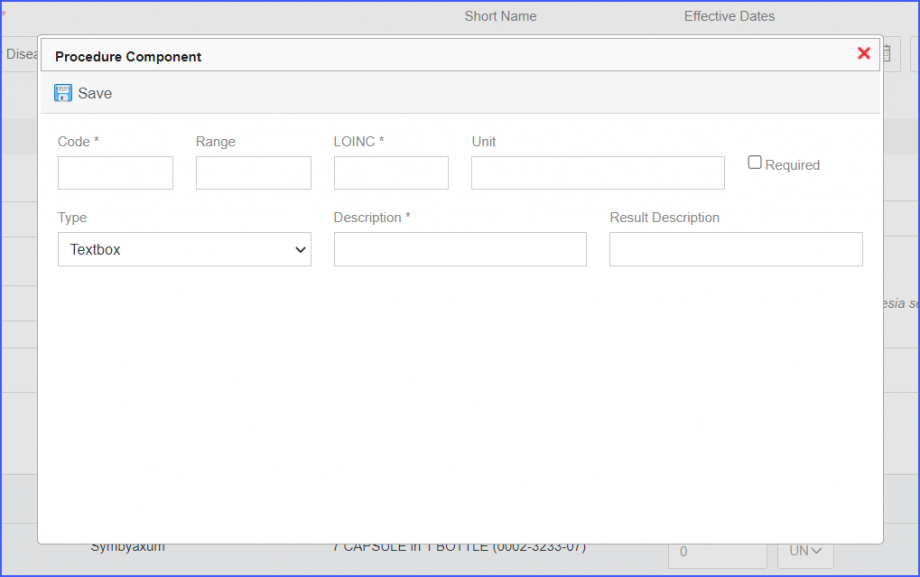
To add LOINC details with a synonym, click on the respective ‘Add’ button or arrow icon in the LOINC column. The system displays a ‘Procedure Component’ popup where you can enter or select the required details and click ‘Save’ to add the details.
Similarly, to add an NDC with a synonym, click on the arrow icon or Add button in the ‘NDC’ column next to that synonym. The system expands the section and the ‘Search from Library’ search box appears.

Type-in the NDC name and click on the ‘Search from Library’ button. The “NDC” popup appears on the screen. From the listing on this popup, click on the NDC code to add that NDC with the synonym. You can select multiple NDCs from the listing to associate them with the synonym.
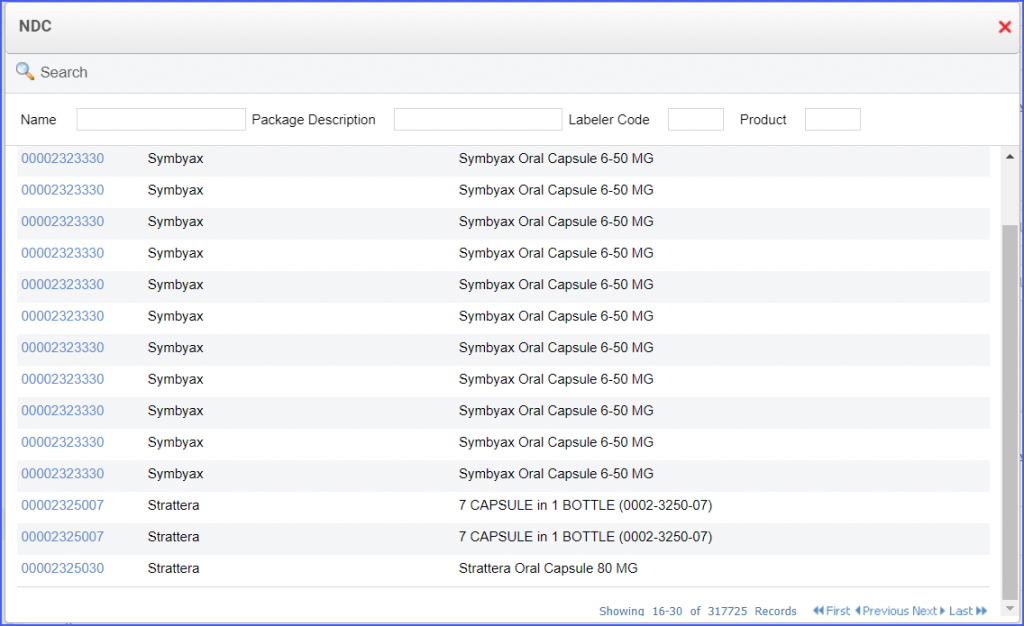
Once all the NDCs are selected from this popup, they are then displayed in the NDC expanded section as shown below.
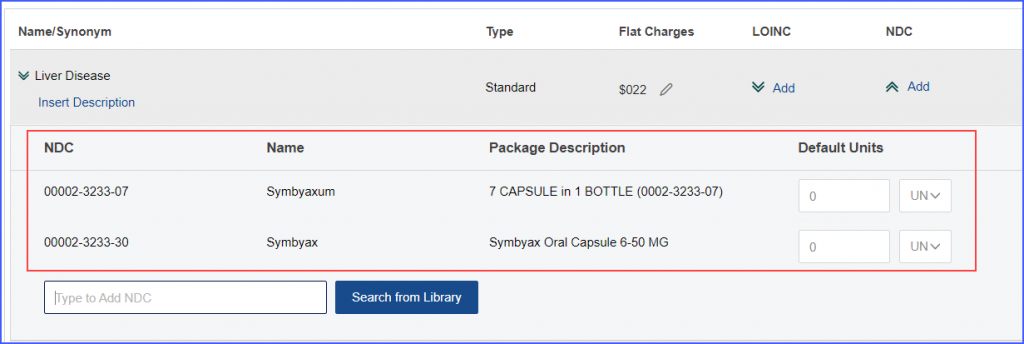
You can delete a selected NDC from the list by clicking on the ‘Bin’ icon that appears when you hover over the NDC entity in the list.
Once all the required changes are made and the details are added, click on the ‘Save’ button at the top bar of the screen.
