How to Upload a Document?
The ‘Document Manager’ module allows users to upload multiple documents at a time.
Land on the ‘Patient’ tab in the ‘Document Manager’. Select a patient from the hotlist or search a patient through the search fields.
Go to the ‘Patient Chart’ and hover on the ‘File’ button. From the dropdown menu, click on ‘Upload’.
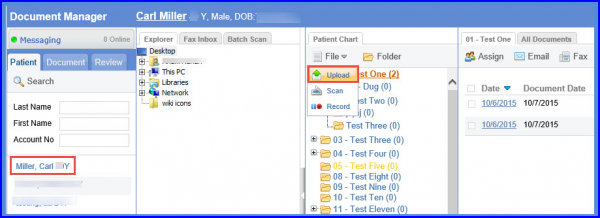
Folders in the ‘Patient Chart’ have to be selected manually. Therefore, the user has to select a folder in order to upload document(s). After selecting a patient, user can select a folder and hover over the ‘File’ dropdown to select ‘Upload’.
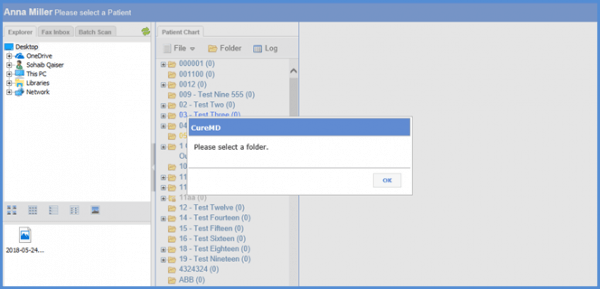
If the ‘Upload’ option is selected without selecting a folder, the application prompts the user to select a folder.
This opens a pop-up window where user can browse and select documents to upload them in the application.
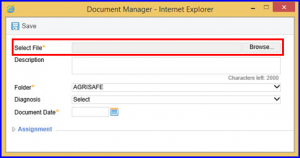
Click ‘Browse’ and select the required file to upload. Once done, click ‘OK’.
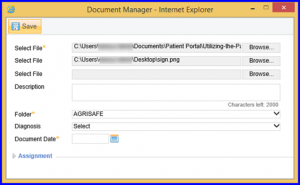
Another field appears in the window allowing users to browse through the directory and select another file to upload. This enables users to select and upload multiple documents at a time. Click ‘Save’ when done.
Users can attach files with radiology orders and results from the document manager. ![]()
Select ‘Radiology Results’ folder. Then hover over ‘File’ and click ‘Upload’.

Click the ‘Add Result’ hyperlink.
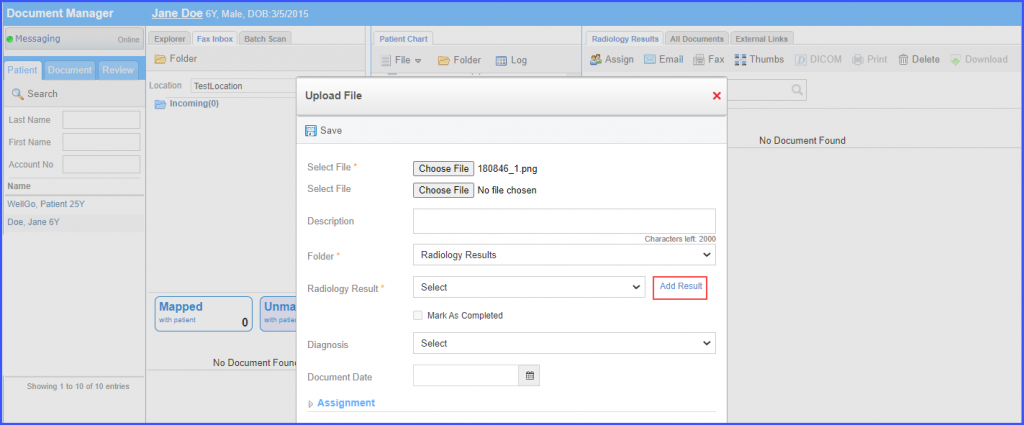
This action opens another pop-up where the users can add the result details and then click ‘Save’.
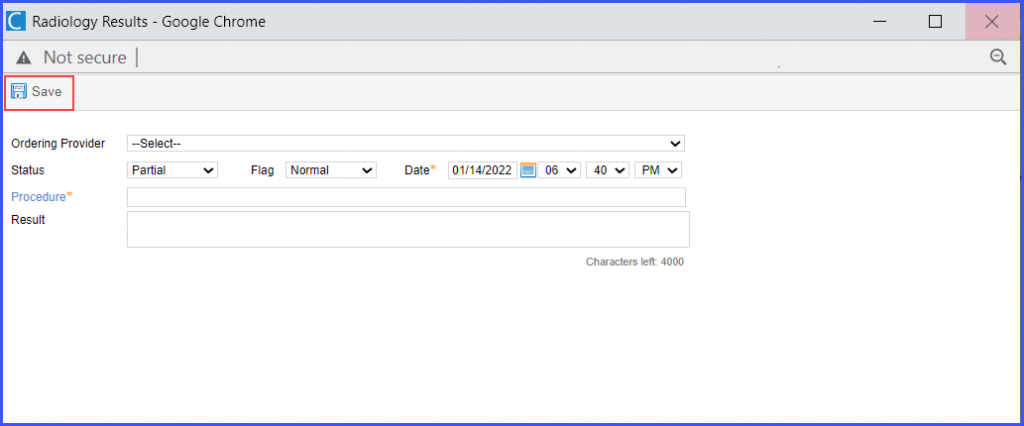
Select the added result from the ‘Radiology Result’ dropdown and click ‘Choose File’ and browse for the desired attachment.
The ‘Mark As Completed’ Checkbox is enabled. Mark the checkbox and click ‘Save’.
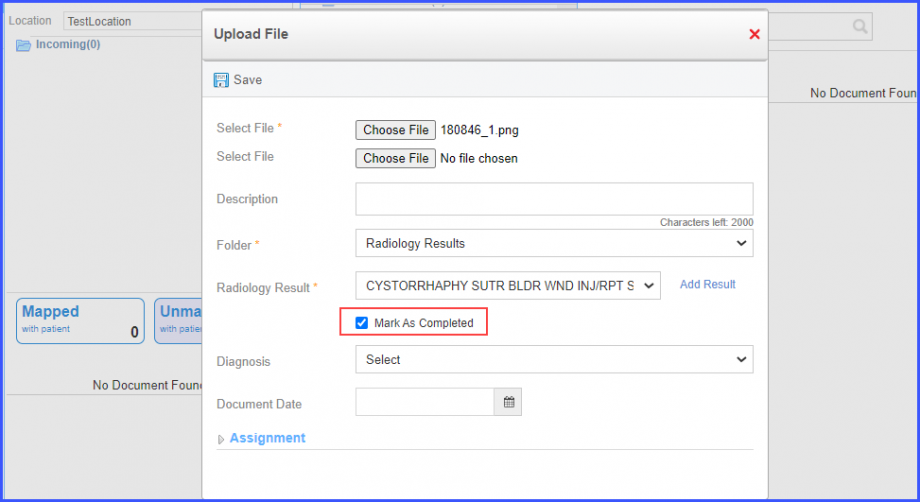
The radiology result is marked as completed and the file is attached to the respective result. Click here to see how to view the completed radiology result along with its attachment in the ‘Personal module.
