New Patient Banner
Equipped with critical patient information, patient banner is considered as an integral part of an EHR system. CureMD’s revamped patient banner is designed for the users to structure the banner space as they like, and conveniently customize the information to view what is most valuable. This helps users to easily process the presented patient data and take actions accordingly. The new banner layout offers modern visual controls, persona-based customization of information, multiple sections and much more.
As the name suggests, Patient Banner is displayed at the top of a patient’s profile. To access the enhanced banner view, click on the toggle button at the top right corner of the screen.
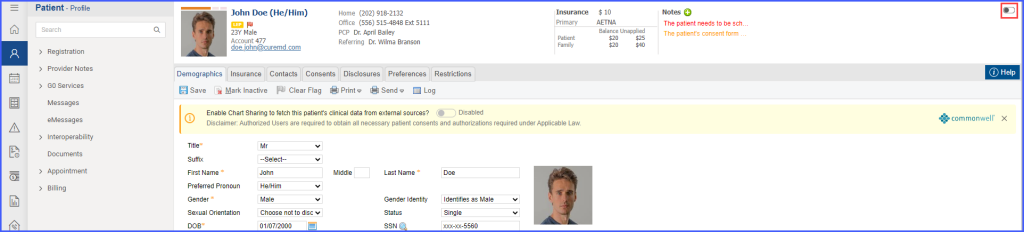
In broad terms, the patient banner consists of two major sections, the header and the body.

The header of the patient banner contains the following patient information:
- First Name
- Last Name
- Title
- Preferred Name
- Preferred Pronoun
- Age
- Gender
- Date of Birth
- Account Number
- Red Flag Status
- LEP (Limited English Proficiency) Status
- Patient’s Inactive status (For Inactive Patients)
- Pregnancy Duration (For Pregnant Patients)
- Patient Portal Status
- Tags

Users can collapse or expand the Patient Banner by clicking on the arrow icon next to patient name in the header section.

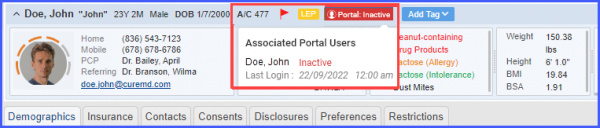
Patient Portal Status
The portal status icon appears as active and in green color if there is a patient portal account associated with the patient. Hovering over the active green icon displays a tooltip with the following details:
Associated Portal Users
- User Name
- Status
- Last Login (Time & Date)

If the associated patient portal account is inactive, the portal status icon appears as ‘Inactive’ and in red color.
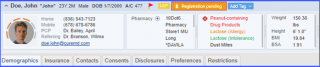
If there is no portal account associated with the patient, the portal status icon appears in orange color and it displays the text ‘Registration pending’.
Tags
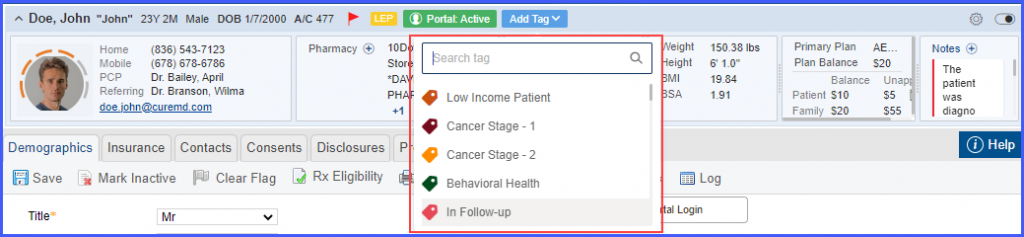
Tags can be associated with a patient by clicking on the ‘Add Tag’ dropdown present in the header section of the patient banner to view the list of tags.
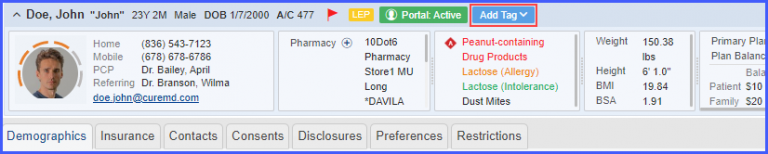
From the ‘Add Tag’ dropdown, the users can either search for their required tag from the ‘Search’ bar, or select any from the given list.
Once a tag is selected, it is then displayed in the header section next to ‘Add Tag’ button.
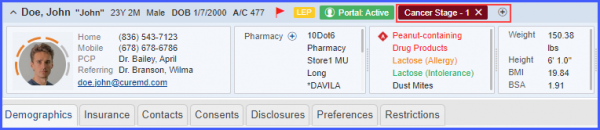
Users can remove an associated tag by clicking on the cross ‘x’ displayed with the tag and add more tags on the banner by clicking on the plus ‘+’ icon present next to the tag.
Multiple tags can be associated with the patient. If the number of tags exceeds the total space of the header section, then the additional tags can be viewed by hovering over the ‘More’ tab.

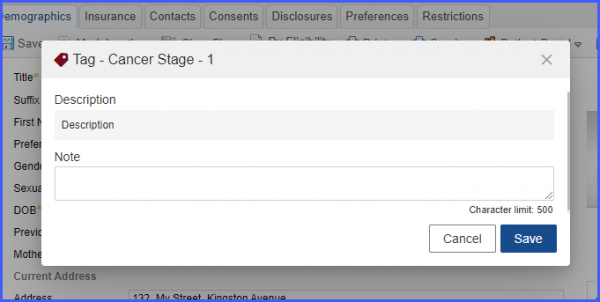
The users have the option to associate notes with the tags. This can be done by clicking on the tag already associated in the header. Clicking on the tag displays a ‘Tag’ popup from where the notes can be added and saved.
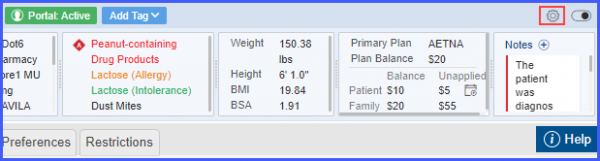
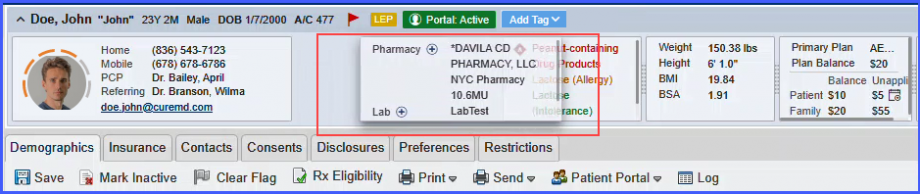
Meanwhile, the body of the banner is further divided into various tiles. Here, users have the ability to choose which tile should appear in the banner and what information is being displayed.
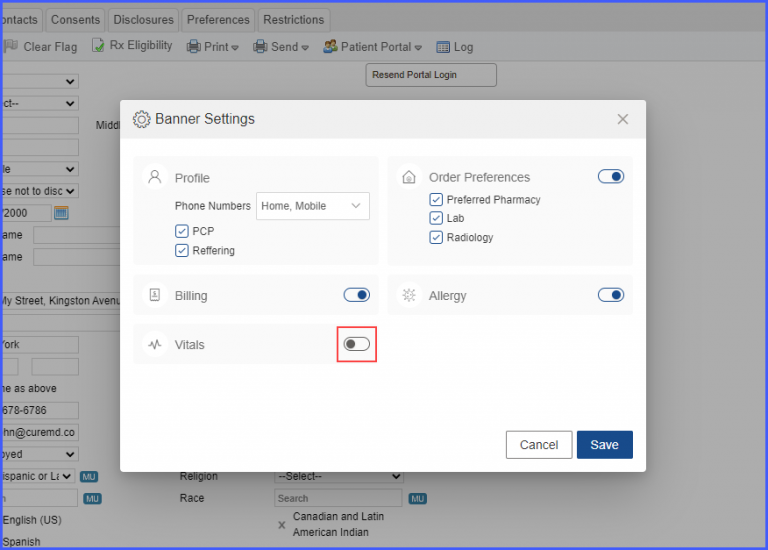
To do that, click on the ‘Settings’ icon at the extreme right of the header, and the ‘Banner Settings’ popup appears on the screen.
On the settings popup, users have the option to turn the toggles on for the tiles and information they want to view in the banner.
Similarly, users can remove the added tile category by switching the toggle off and then clicking on ‘Save’.
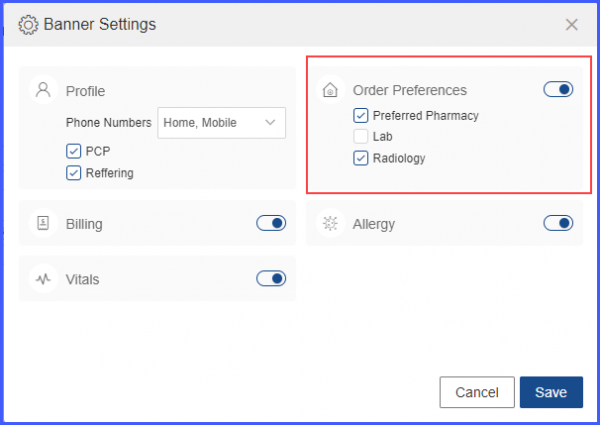
For ‘Order Preferences’ category, users have the option to either view all information (Preferred Pharmacy, Lab, and Radiology) simultaneously in the respective tile, or they can choose one or more options to display. If all three checkboxes in ‘Order Preferences’ are disabled, the system automatically turns the main toggle off for this section.
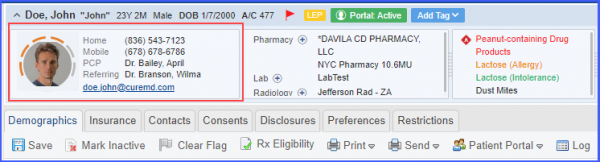
Similarly, the ‘Phone Numbers’ section has additional checkboxes for ‘Primary Care Provider (PCP)’ and ‘Referring Provider’. Users can enable the checkbox(s) of the information they want to display on the patient banner.
The information related to this section is displayed in the first tile on the left.
After making all the required changes in the Banner Settings, click ‘Save’.
Billing Tile
Users can view the household income of the patient and the associated pay rate of programs in the billing tile of patient banner.
If there exists an effective household income of a patient, the system displays the ‘Sliding Fee Scale’ icon in the billing tile in the family unapplied section.
Hovering over this icon displays tooltip containing the following information:
- Household Income
- House Hold Size
- Program Codes
- Pay Rate
In cases if two effective household incomes exist, the system displays information from the latest income record.
This feature is exclusively available when the “Sliding Fee Scale” option is selected for the practice.
Users can adjust the placement of tiles as per their requirement through drag and drop method. All of the tiles can be adjusted except the first one.
The tiles are separated by a resizable divider in between two tiles. Click and drag the divider to resize the tiles.

A total of six tiles can be added in the body of the banner. If the number of tiles in the banner are less than six, the system displays a tile with plus ‘+’ icon appearing on it.

Clicking on this tile displays the ‘Banner Settings’ popup from where the user can add a new tile in the banner as per their requirement.
Patient banner can also be used to upload or change the profile image of a patient. The option to upload the image appears when the user hovers over the profile image in the first tile of the banner.
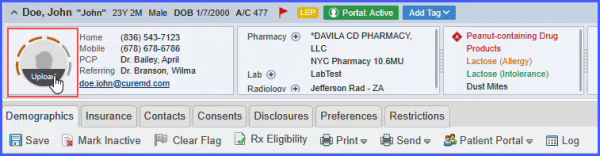
Click on the ‘Upload’ option to open the ‘Profile Photo’ settings popup.
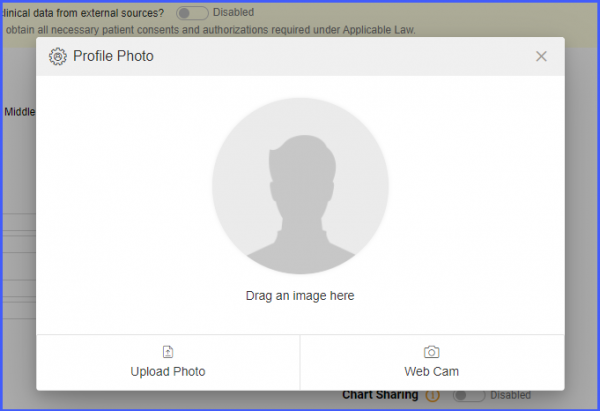
From the settings popup, users can either upload a photo from their system or take a live photo by clicking on the ‘Webcam’ button.
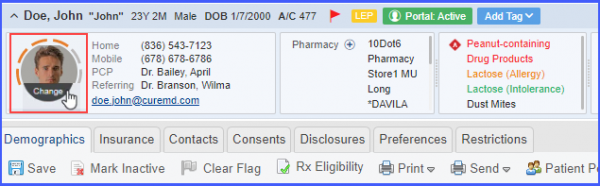
To change a previously uploaded profile photo, simply hover over the profile photo and click on the ‘Change’ option that appears.
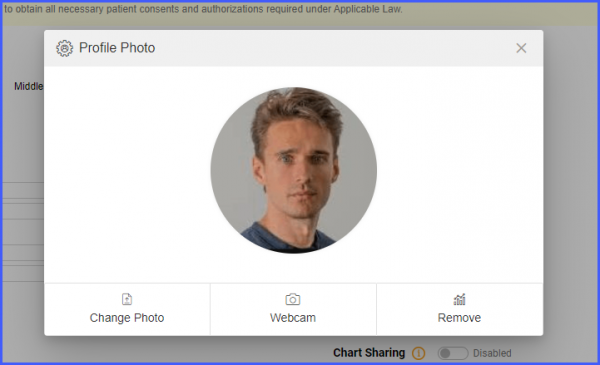
Clicking on ‘Change’ displays the ‘Profile Photo’ settings popup, which includes options to change the photo, upload a new photo using a webcam, or remove the previously uploaded photo.
When a patient is marked as ‘Pregnant’ in the application, the patient banner turns pink and pregnancy button appears in the header. The banner’s header and displayed tiles continue to appear in pink color until the patient’s status is reverted (back) to normal.

The patient banner turns grey when a patient is marked as ‘Inactive’ in the application. The banner’s header and displayed tiles continue to appear in grey color until the patient’s status is reverted (back) to active.

When the user navigates to patient banner, a hyphen is displayed in front of the category that has no corresponding information.

Users have the option to edit recall notes for patient notes directly from the patient banner.
The patient banner features a section titled ‘Notes’ which displays patient notes for a particular patient. To learn how to add patient notes, click here.
When the user navigates to this section and selects an existing patient note, an ‘Add Notes’ window pops up. If this patient note has a previously recorded recall note, a field titled ‘Recall Note’ is displayed. Here, the user can edit the recall note as needed.
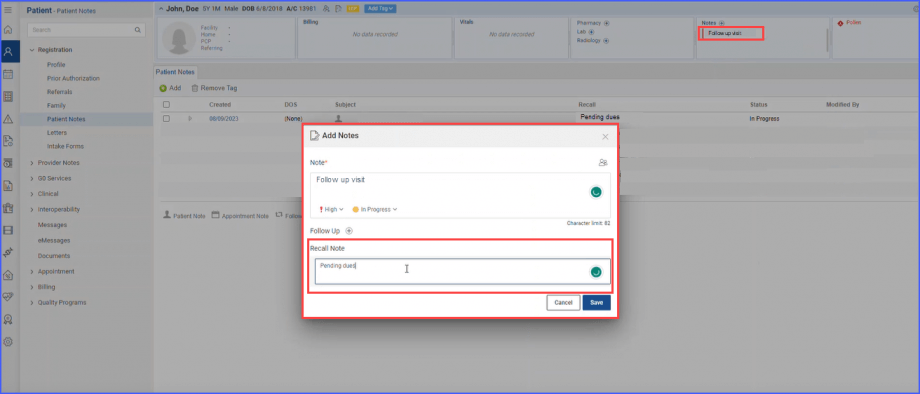
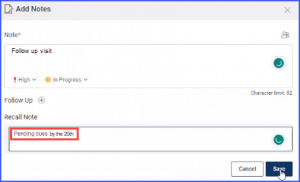
Once done, the user clicks ‘Save’ and the recall note for that patient note is updated.
