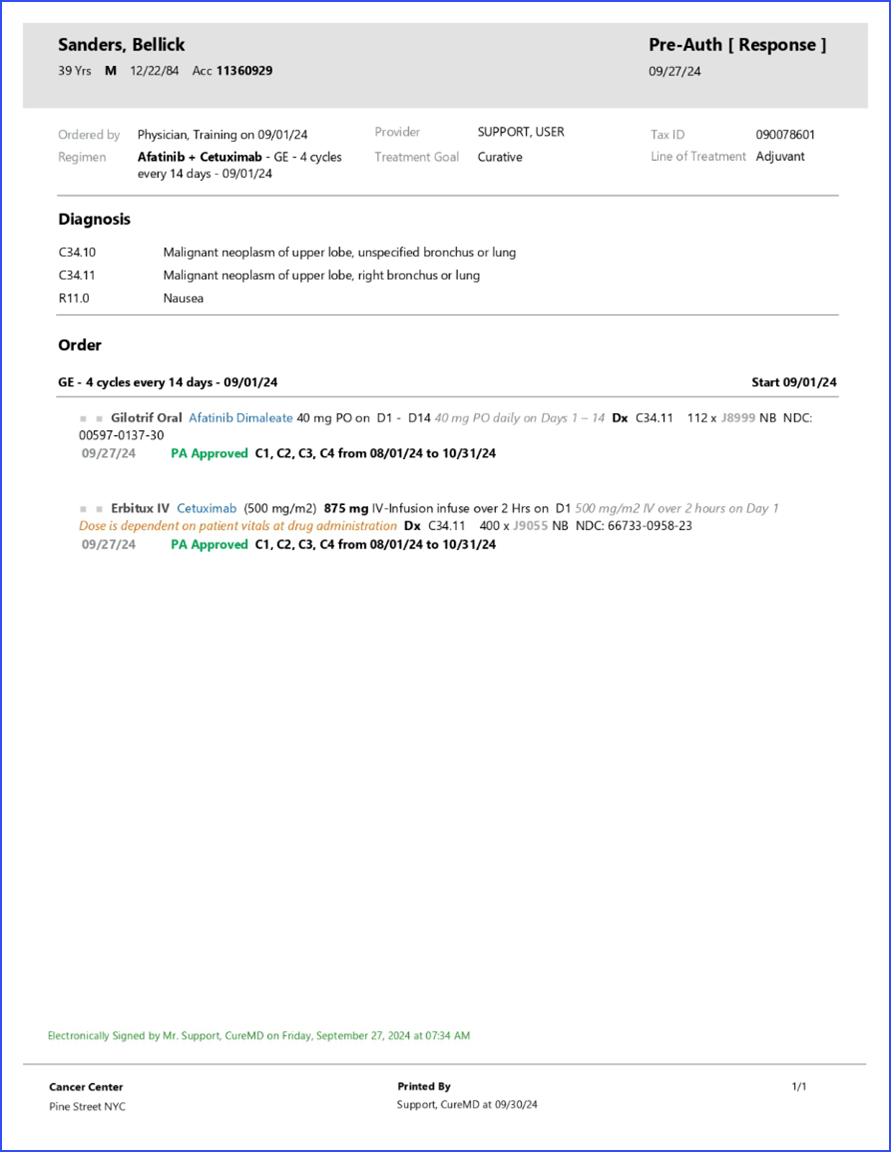
What is Pre-Authorization?
Once a plan is signed, a pre-auth can be initiated.

The planned drugs auto populate when a plan is signed and a new pre-auth is created.
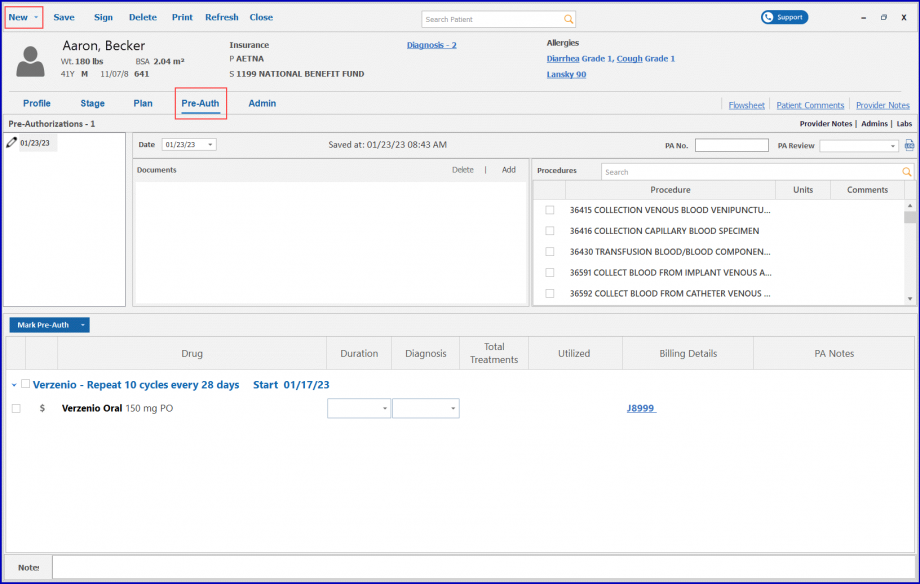
Click on the ‘Mark Pre-Auth’ button to apply group action or select a drug listed in the ‘Mark Pre-Auth’ dropdown section.

Select ‘Requested’ from the dropdown and the pre-auth is requested for the cycle corresponding to the duration.
Then, click the ‘Apply’ button.

Once approved, the drug can be administrated. To approve the pre-auth, select ‘Approved’ from the dropdown.

Click ‘Sign’ to sign the Pre-Auth.
The new pre-auth module allows the practice to tag drugs as ‘white’ or ‘brown’ bag. Tagging drugs as ‘white’ or ‘brown’ bag automatically marks the drug as non-billable.

Uses can also associate a diagnosis to the drugs via the diagnosis tag option. The diagnosis associated with the drugs appear on the pre-auth request report.

Users can also mark requests and responses individually or by applying group action for multiple cycles and days.

The status of Pre-Auth appears as colored bars in the pre-auth section.
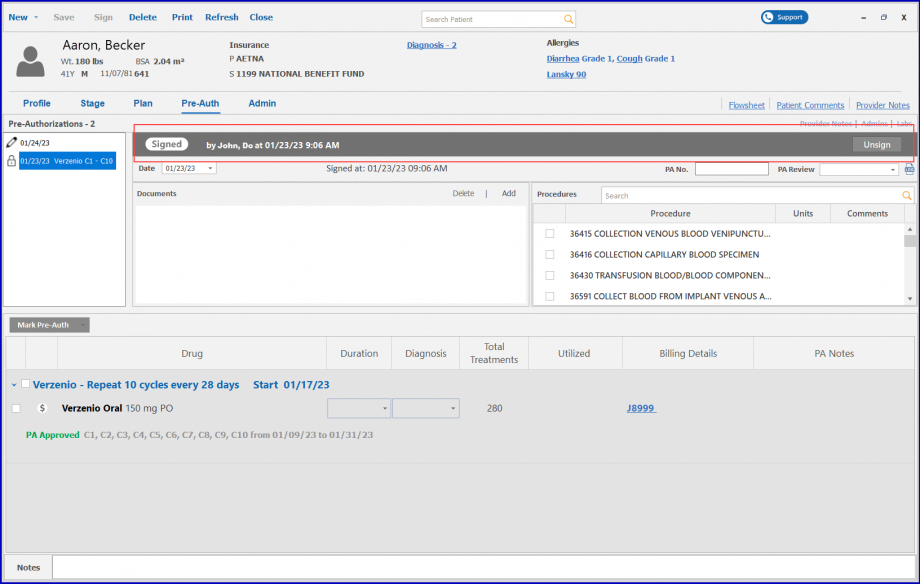
If the Pre-Auth is in its draft state, the bar appears with a ‘Draft’ status label in grey color.

If the Pre-Auth request has been sent, the bar turns blue and has a ‘Request’ status label on it.

If the Pre-Auth request has received a response, the bar turns green and has a ‘Response’ status label on it.

To submit a request, click the ‘Submit Request’ button.
If a request is rejected, users can record and refile for a new response. To submit a request for a change, users can refile for a new response.

‘Request’ and ‘response’ reports can be created separately. Click on the ‘Print’ button and select a report type to generate a report.
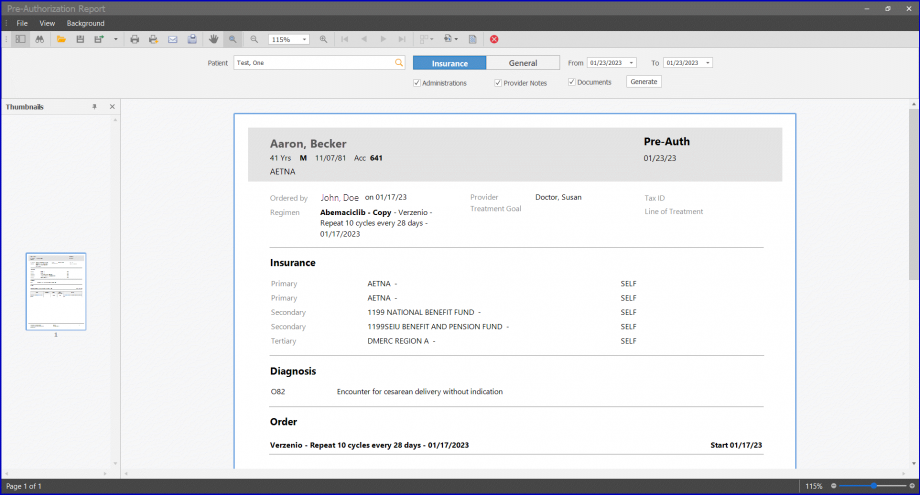
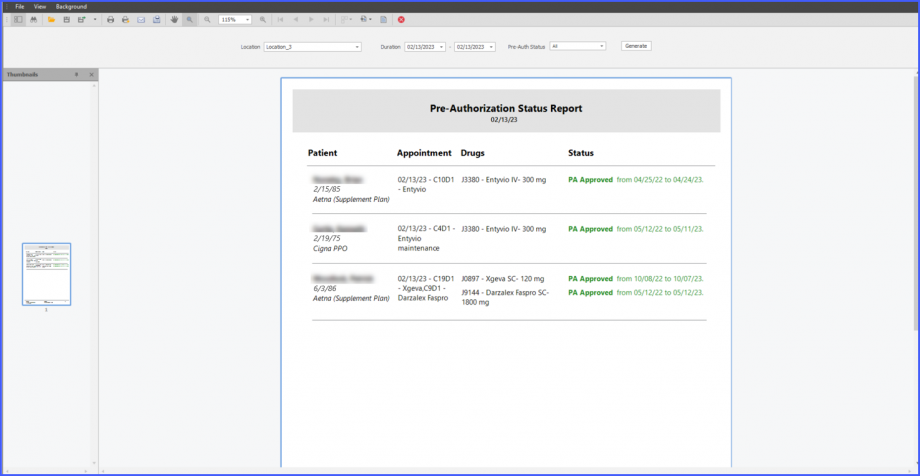
Users can also view the status of Pre-Auth for the selected date on the Pre-Auth Status Report.
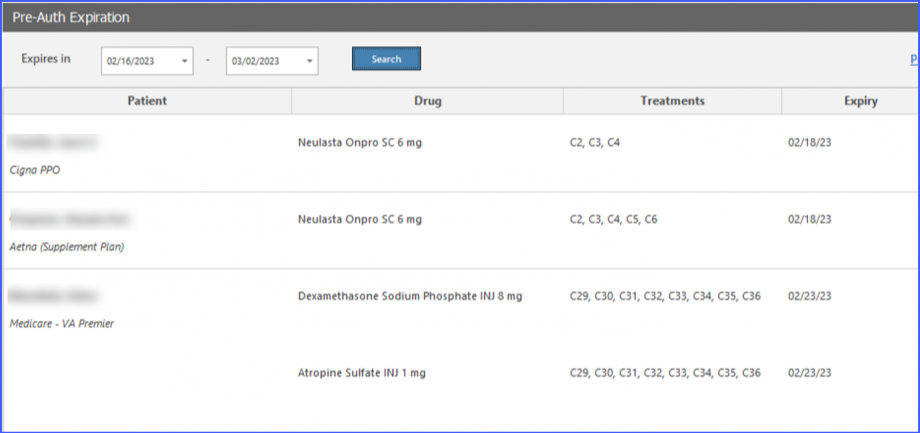
The expiry date of a Pre-Auth can be viewed by accessing the ‘Pre-Auth Expiration’ window from the Home page. On this window, users can view expiry dates next to drugs under the ‘Expiry’ column.
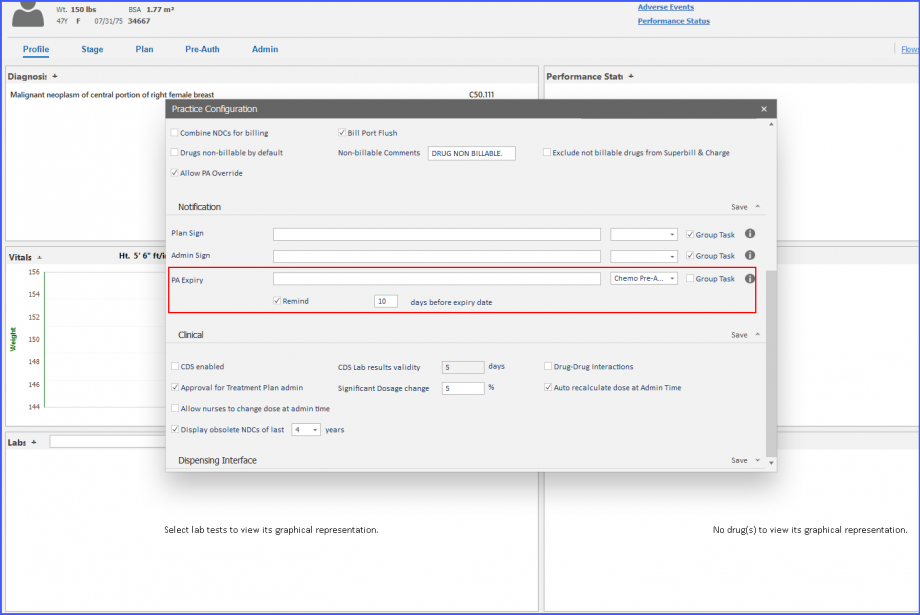
Moreover, practices have the option to receive automatic task notifications for those prior authorizations which are near to their expiry date.
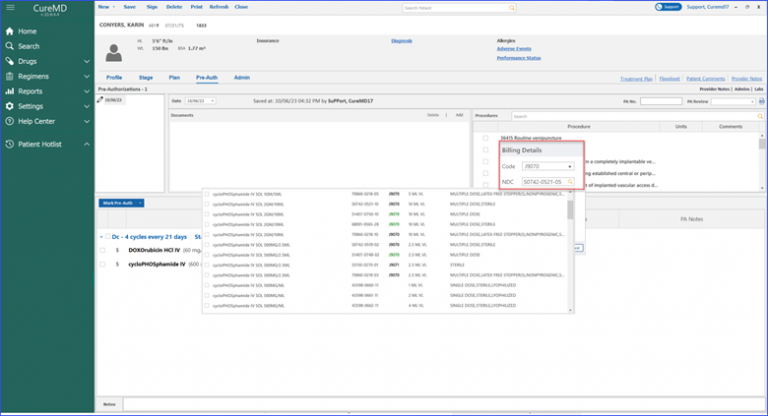
Users can calculate billing units for specific drugs based on their National Drug Code (NDC).
When the user accesses the billing detail beak form and clicks on the NDC search field, the system promptly displays relevant NDCs associated with the chosen drug. Once an NDC is selected, the system calculates the units for the user, eliminating manual errors and reducing the workload.
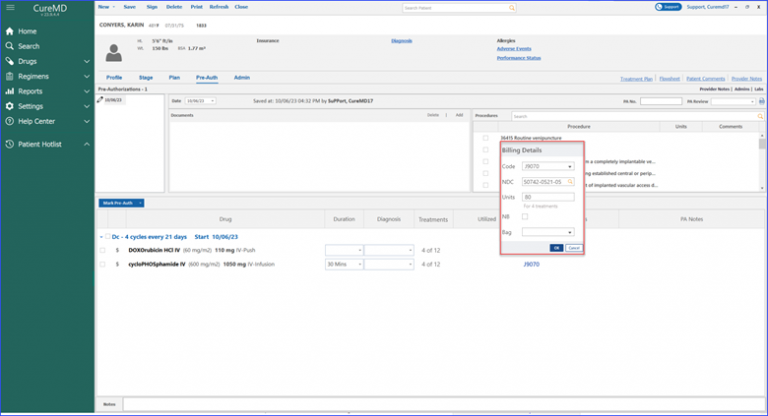
Moreover, marking a pre-authorization for a drug displays associated treatments directly in the “Treatments” column. The billing details beak form provides an NDC search field and a preview row, displaying a number of treatments for which units are being calculated.
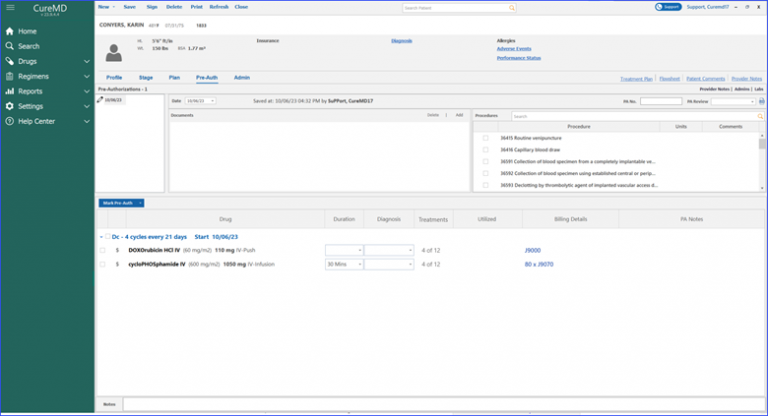
Treatments for which Units are being Calculated
Furthermore, the billing details column showcases information in the format of “unit x billing code.” For instance, the user might see “80 x J9070” as a unit x billing code. To gain a deeper context, hovering over the billing code displays a tool tip to the user. This quick info popup furnishes details like the Units, NDC, and even whether it’s a White or Brown Bag treatment.
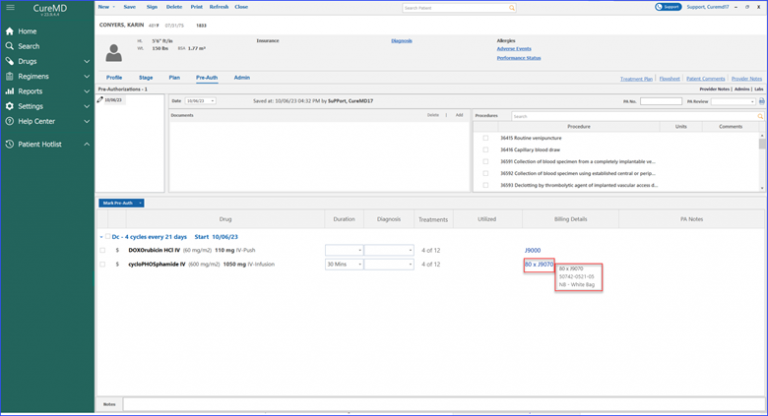
Units, NDC, White or Brown Bag Treatment
When the user navigates to Chemotherapy Manager and accesses the PreAuth section, signing the preauthorization triggers the display of an electronic signature on the printed report. 
The signature includes the name of the user who signed the report, appearing on all associated preauthorization reports, such as requests and responses. This feature ensures that the signature is accurately reflected in every document, providing clarity and traceability in the authorization process.
