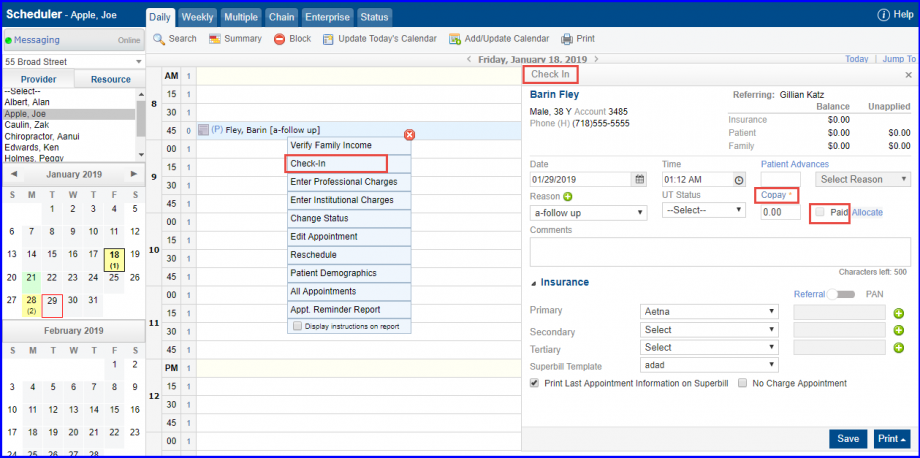
How to Add Patient Copay through Scheduler?
A Co-Pay can be recorded once the Patient is checked-in by the user.
Click an ‘Appointment’ and select ‘Check-In’ to check-in a patient. Here, user can enter copay amount and mark ‘Paid’ checkbox.
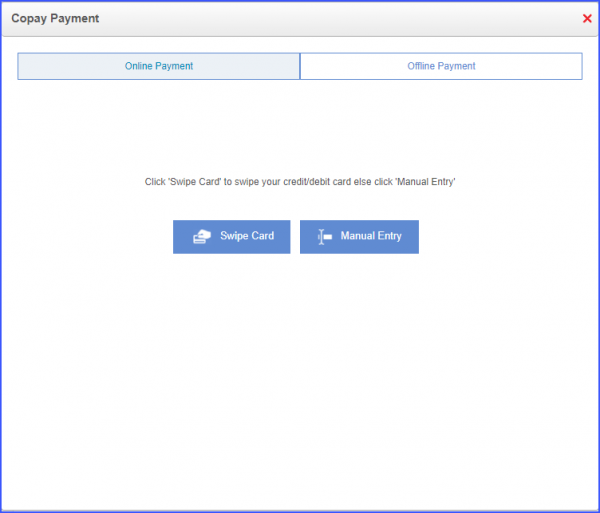
Clicking ‘Copay’ displays ‘Copay Payment’ pop-up. Here, User can select between ‘Online Payment’ or ‘Offline Payment’ modes.
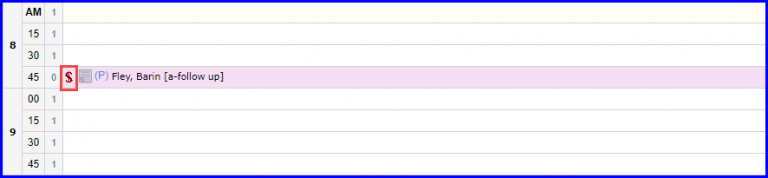
The ![]() sign appears green for paid Copay.
sign appears green for paid Copay.

The ![]() sign appears red for unpaid Copay.
sign appears red for unpaid Copay.
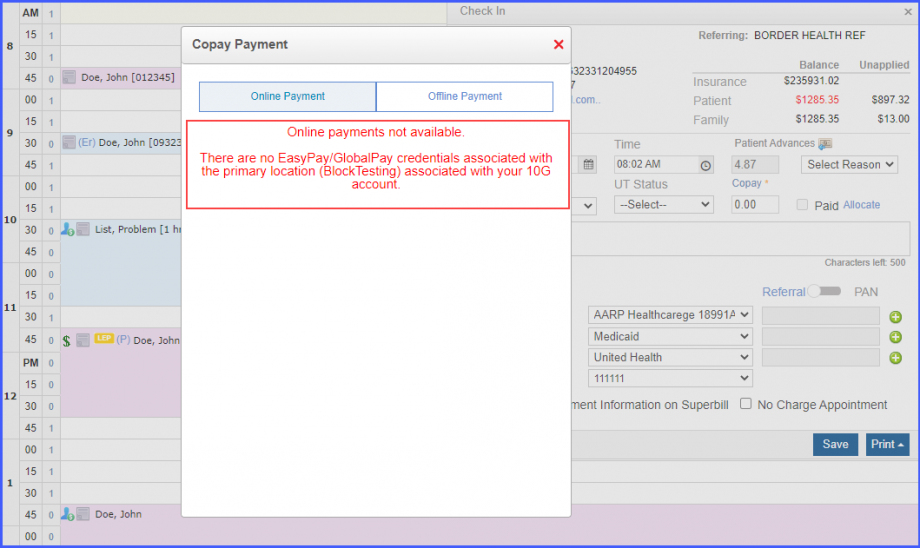
An error screen is displayed when payment is being made from a location having partially configured EasyPay/GlobalPay credentials.![]()
This ensures that payments are only made from locations that are completely configured.
The error is displayed on the ‘Copay Payment’ pop-up. The error message states:
‘Online payments not available. There are no EasyPay/GlobalPay credentials associated with the primary location (Block Testing) associated with your 10G account.’
Click here to see a similar enhancement made in the ‘Billing’ module.
