How to Sign Up on FHIR API from Patient Portal?
Users can sign up on FHIR API through their patient portal account and access the patient’s personal health information.
This ensures the patients’ information is accessed by an authorized FHIR application.
Users can sign up on CureMD’s FHIR API through the Patient Portal.
Click on the ‘Settings’ button adjacent to the patient’s name, to enter the ‘Settings’ module.
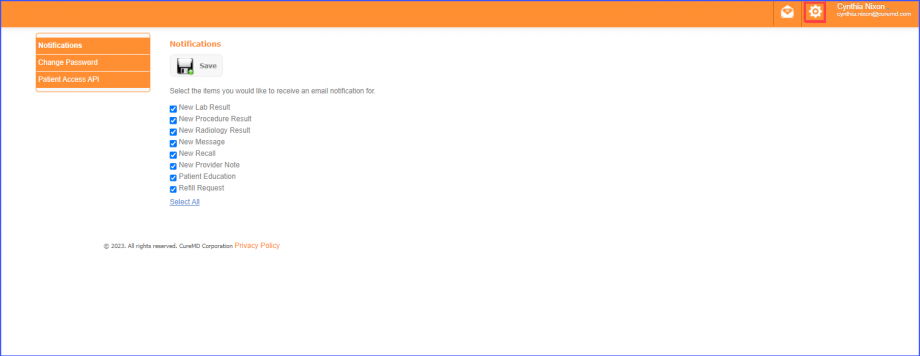
Click on ‘Patient Access API’ to open the ‘Patient Access API’ page.
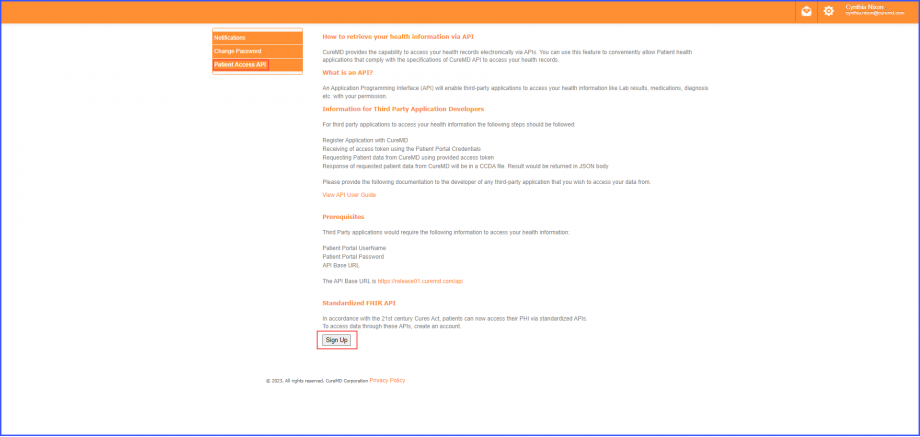
Then click on the ‘Sign Up’ button in the ‘Standardized FHIR API’ section.
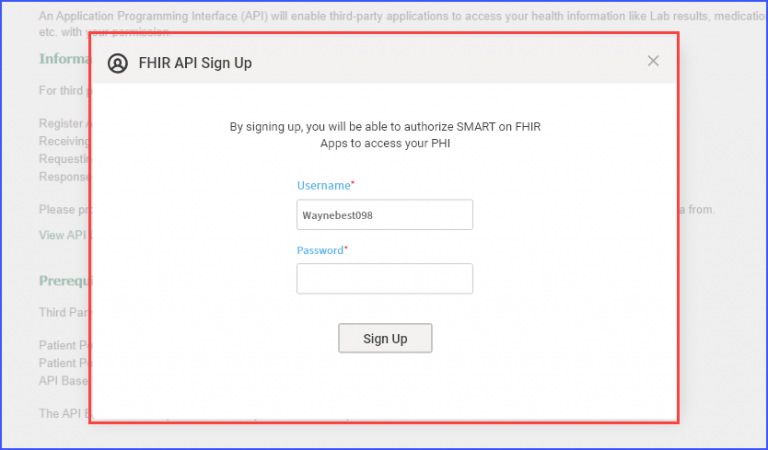
Clicking on the ‘Sign Up’ button displays a ‘FHIR API Sign Up’ popup.
Enter the ‘Username’ and ‘Password’ of choice and then click on the ‘Sign Up’ button.
Upon successfully signing up, the user authorizes ‘SMART on FHIR’ services to access patients’ personal medical information.
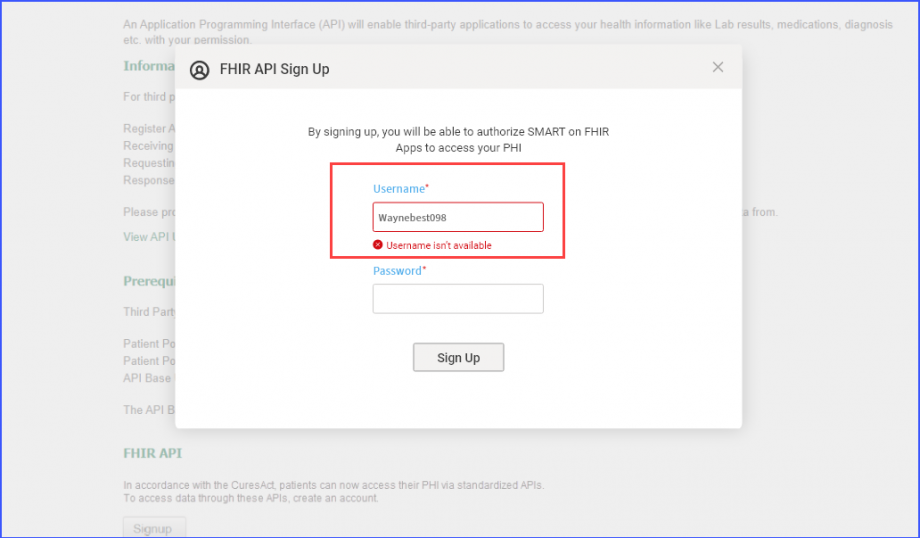
If a username is added that already exists in the system, an error message is displayed that states:
‘Username isn’t available’.
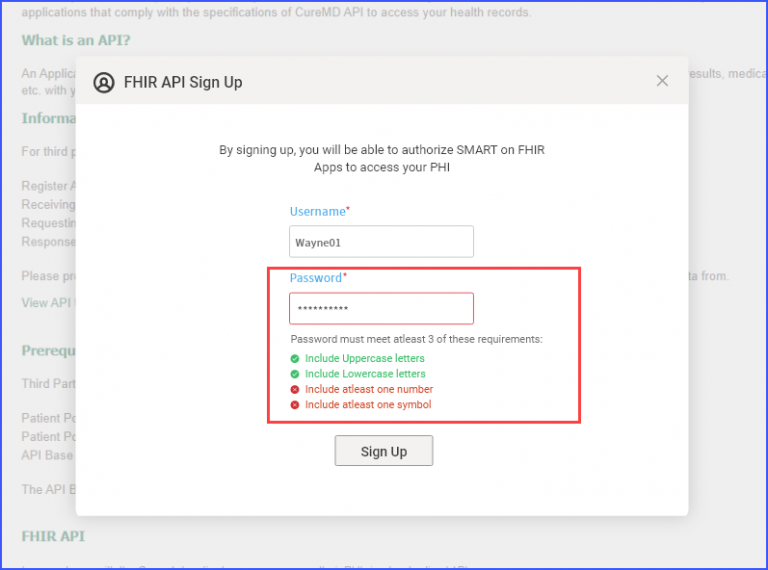
Similarly, once the user enters a password of 8 or more characters, a list of messages is displayed that highlights the password details as the user continue to enter their password.
The details include:
- Include Uppercase Letters
- Include Lowercase Letters
- Include at least one number
- Include at least one number
As the user continues entering their preferred password, a message is displayed above the password requirement details that states:
“Password must meet atleast 3 of these requirements”
The relevant requirement is highlighted in green once it is met in the entered password.
Once at least 3 of the mentioned requirements are met, click on the ‘Sign Up’ button to register the account.
Upon successfully signing up, the following prompt message is displayed.
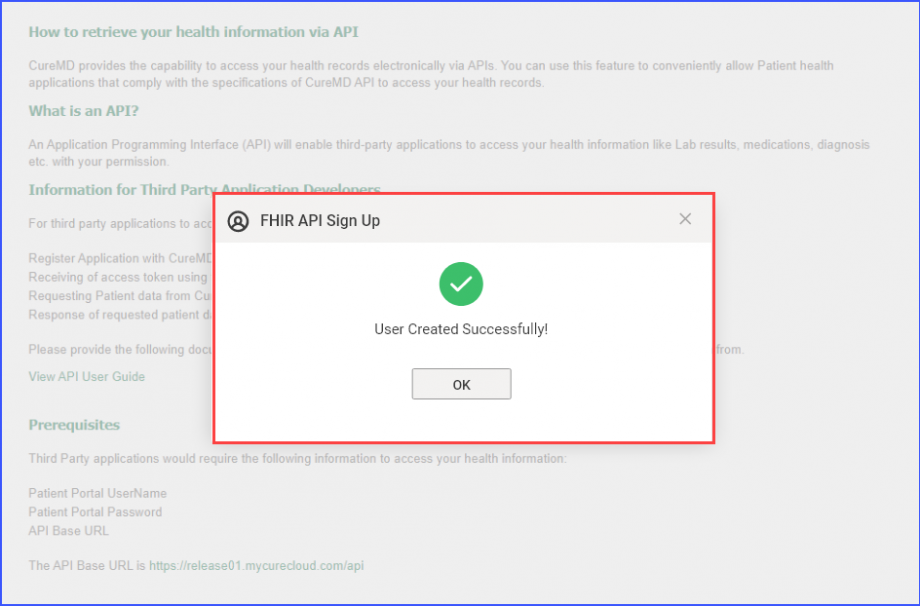
Click on the ‘OK’ button to land on the ‘Patient Access API’ page.
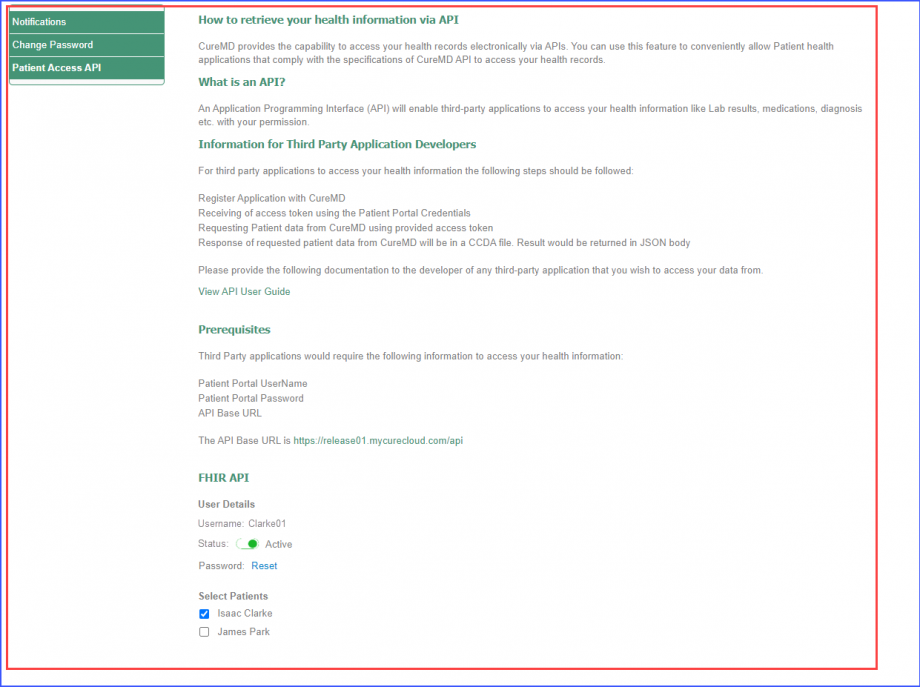
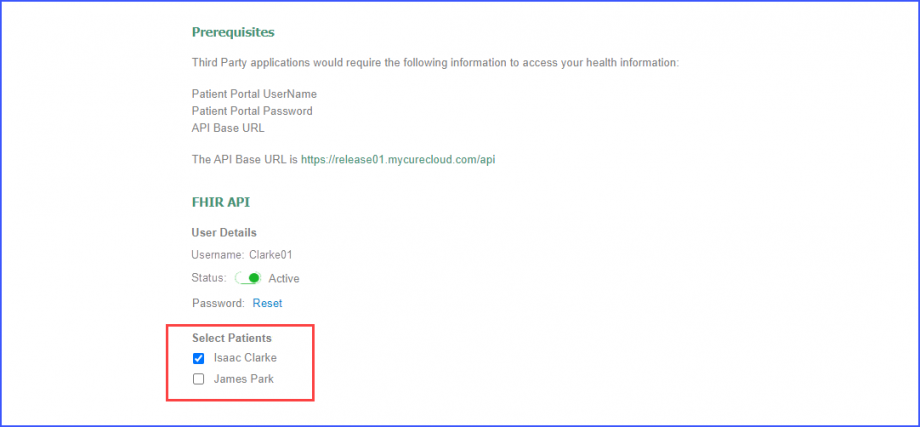
If a patient has multiple linked patients in their profile, a list of the linked patients is displayed from which the user selects one to mark as active.
User can allow access to the relevant patient by clicking on the checkbox adjacent to the patient’s name.
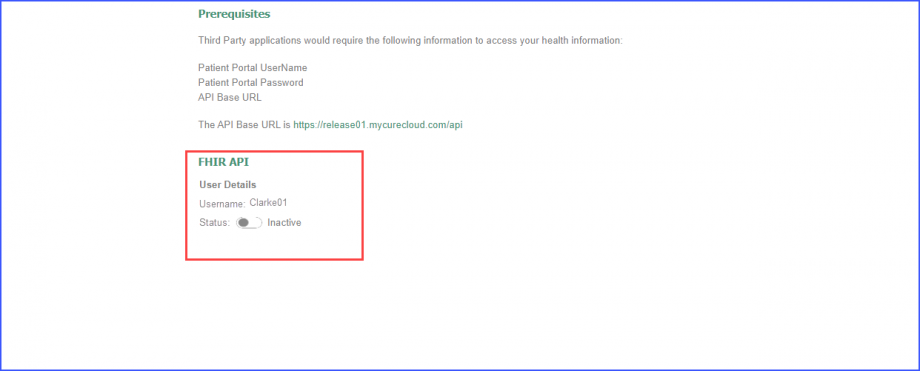
The patient can be marked as Inactive by switching the ‘Status’ toggle off.
Switching the toggle off hides the linked patients and the Password ‘Reset’ hyperlink.
Once the toggle is switched off, all changes made in the 10g application won’t be visible anywhere else until made active again.
Click on the toggle again to mark the patient as ‘Active’.
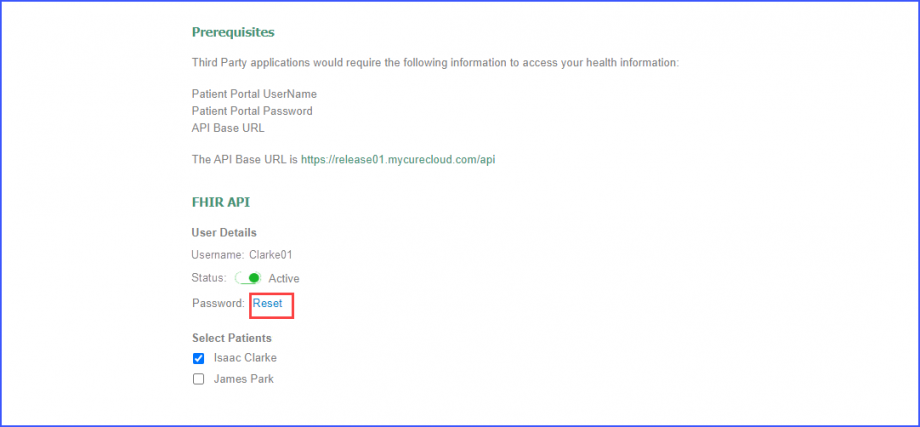
User can reset the password by clicking on the ‘Reset’ hyperlink adjacent to ‘Password’.
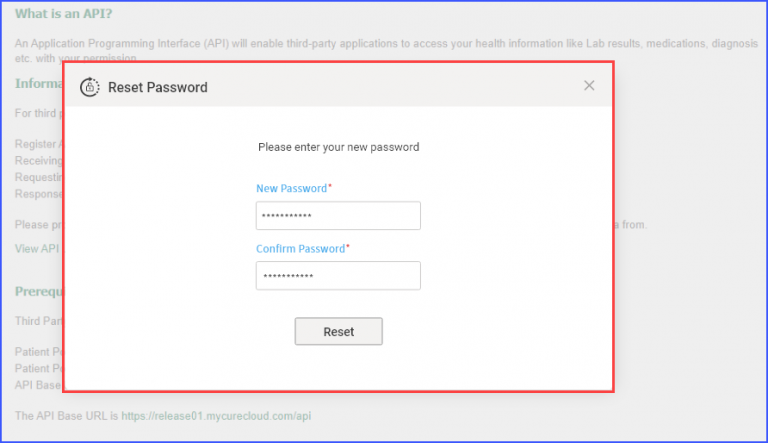
Clicking on the ‘Reset’ hyperlink opens the reset password popup.
Enter the new password and then repeat the same password under the ‘Confirm Password’ label.
Meanwhile, if the user enters a password that does not match, an error message is displayed that states:
“Passwords do not match”

Once the correct password details are entered, click on the ‘Reset’ button.
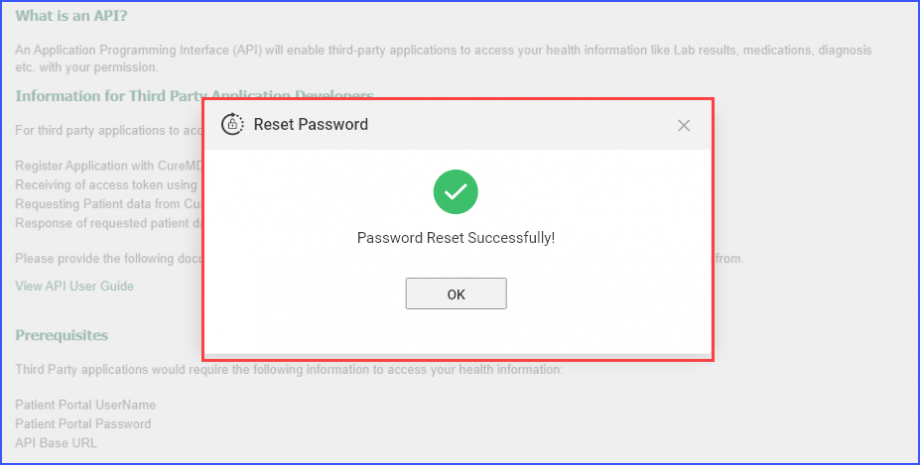
Upon successfully resetting the password, the following popup is displayed.
