How to Add an Appointment to Problem List?
Follow the above-mentioned workflow to land on ‘Payments’ page.
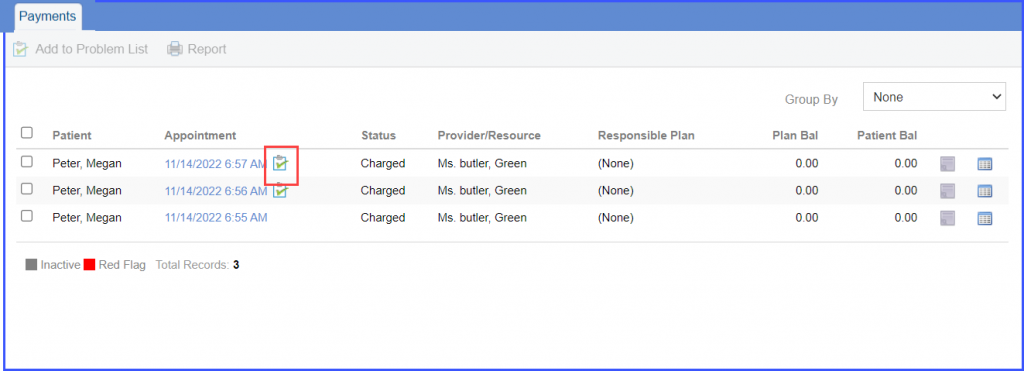
To view payments, navigate to ‘Patient’ module, expand ‘Billing’ and click ‘Payments.’ This page displays all the payments. User can edit these by clicking Appointment ‘Date’ and ‘Time’.
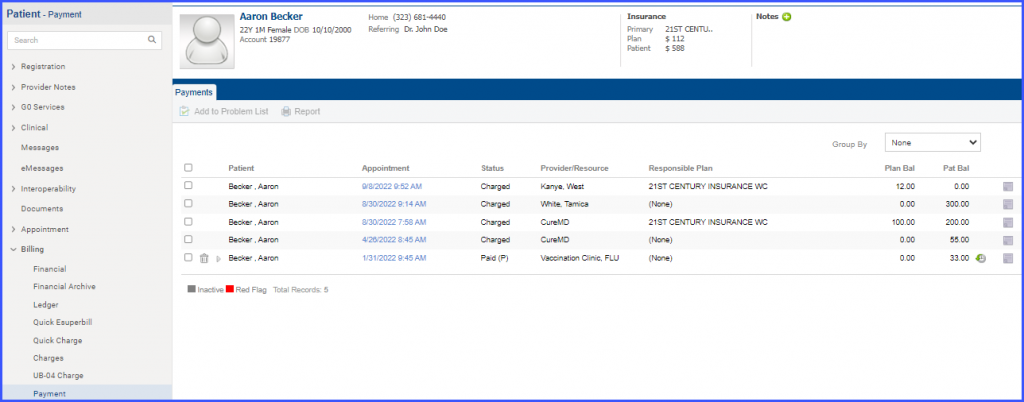
An icon has been added for problematic appointments on the payment page.
This allows users to quickly differentiate problematic appointments from other appointments.
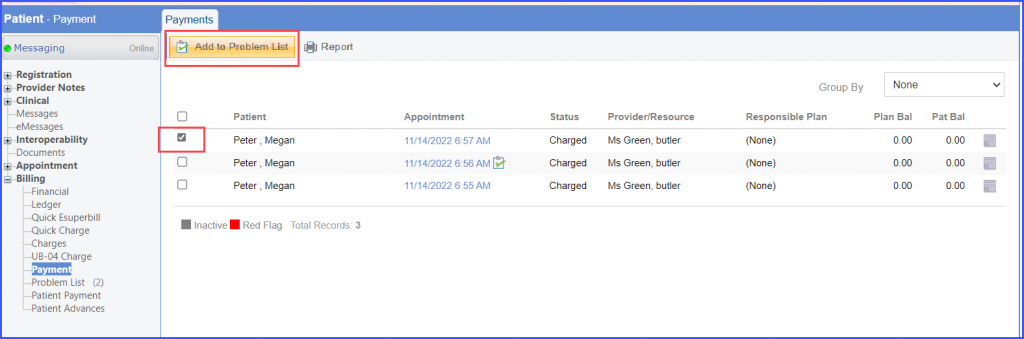
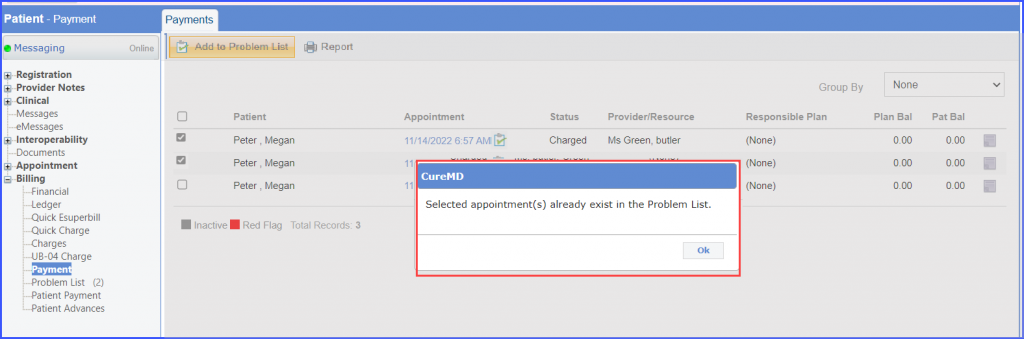
An appointment can be added to the problem list by selecting the desired payment followed by clicking on the ‘Add to Problem List’ button on the top bar.
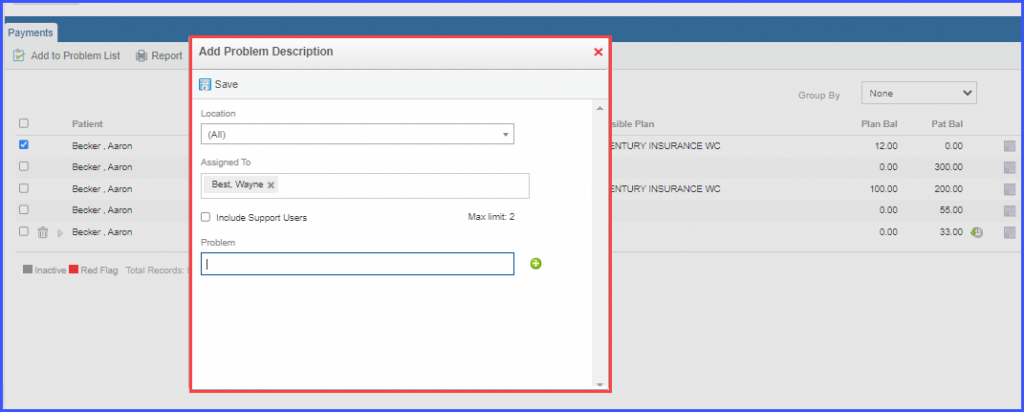
The system displays a pop-up window to add:
- Location
- Assigned to
- Problem
Then, click on ‘Save’ button.
When an appointment is moved into ‘Problem List ‘, the system displays a problem list icon next to the appointment Date of Service (DOS) on the payment page.
If an appointment is already moved into the problem list and the user tries to move it again, a prompt is displayed by the system stating:
“Selected appointment(s) already exist in the Problem List.”
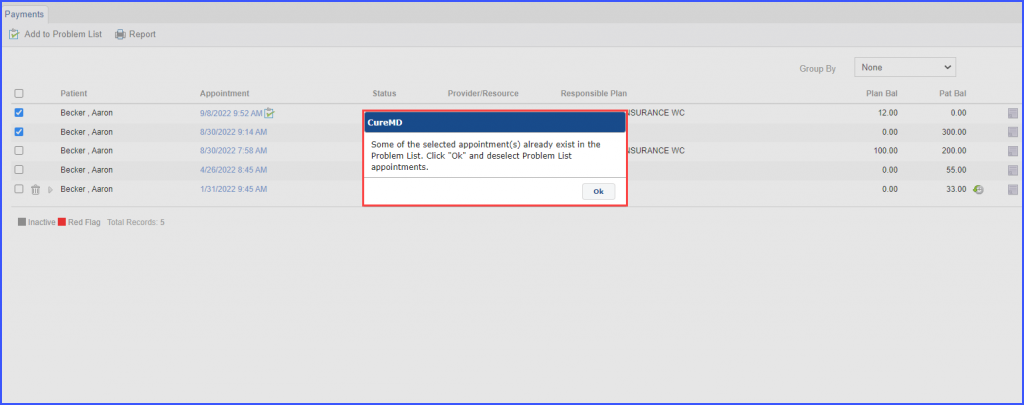
If the user tries to add an appointment to ‘Problem List’ when it already exists in Problem List along with other appointments, the system displays another prompt stating:
“Some of the selected appointment(s) already exist in the Problem List. Click “Ok” and deselect Problem List appointments.”