How to Add a Charge Master?
Follow the above-mentioned workflow to land on the ‘Charge Master’ settings page.
Users can create a Charge Master and set up multiple customized contract rates against it.
User can further specify the Plan, Location, Provider and the contract prices for the relevant contract.
Click here to learn how to enable ‘Charge Master’.
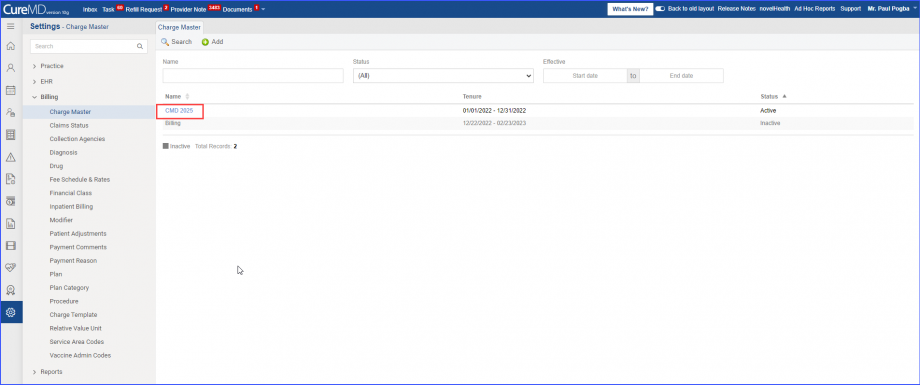
Once ‘Charge Master’ is enabled, the ‘Charge Master’ node is displayed under the ‘Billing’ node in the ‘Settings’ module.
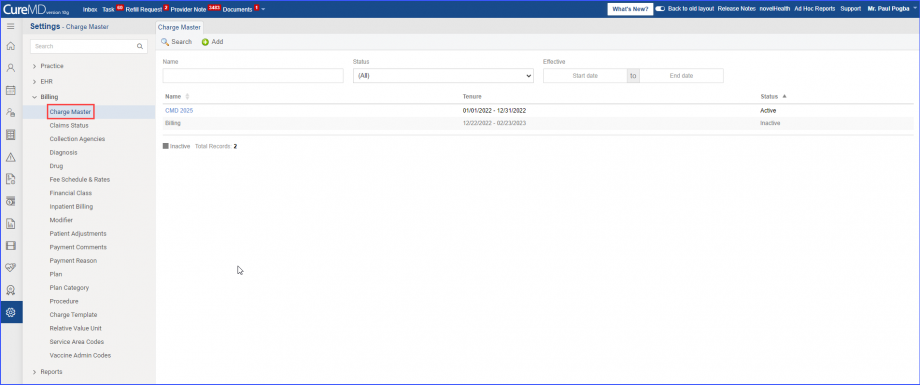
To add charge master for a practice, click on the ‘Charge Master’ option present in the left tree menu.
Here, the system gives user the option to access the existing charge masters and create a new one by clicking on the ‘Add’ button.

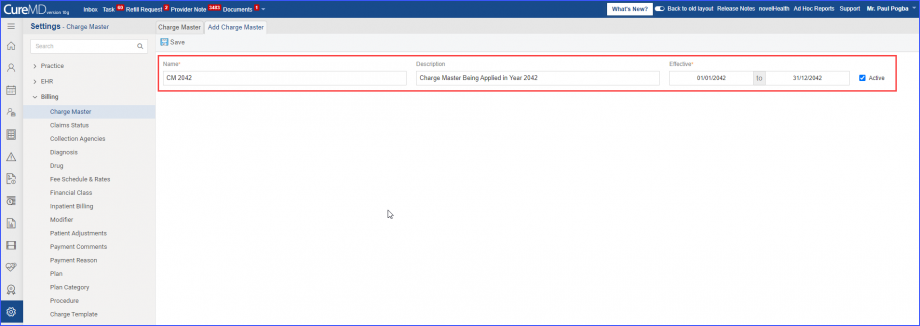
Click on the ‘Add’ button to add a ‘Charge Master’.
The user is then required to enter the following details:
- Name
- Description
- Effective Date
Once the information is added, click ‘Save’ to create the ‘Charge Master’.
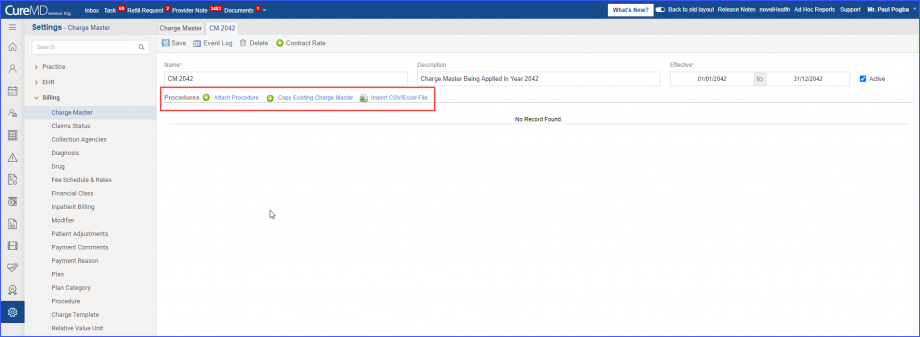
Once saved, a list of options for adding procedure information is displayed.
The user can add procedure codes and information by the following methods:
- Attach Procedure – Procedures are manually added by selecting the relevant CPT and procedure information.
- Copy Existing Charge Master – Procedures in an existing Charge Master is copied into the current Charge Master.
- Import CSV/Excel File – Procedure codes and information are imported from an existing CSV/Excel file.
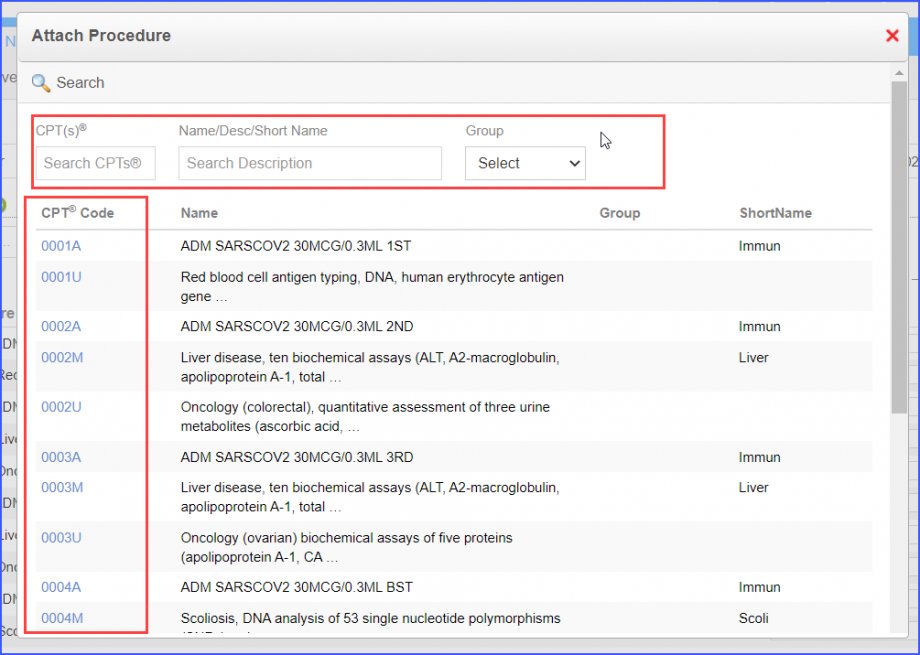
The user can add a procedure by clicking on the ‘+ Attach Procedure’ button.
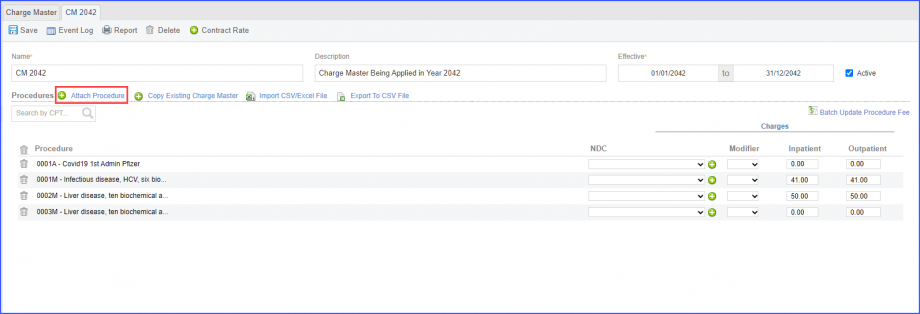
Clicking on the ‘+ Attach Procedure’ button displays an ‘Attach Procedure’ popup.
The user can either search or select a CPT code to add it to the Charge Master.
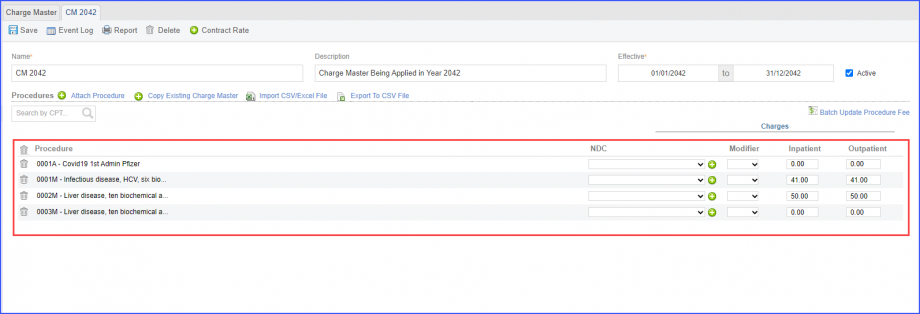
The added procedures are displayed on the Charge master’s page.
Users can create contract rates for the relevant plan.
This allows users to set a customized contract rate for a particular insurance company.
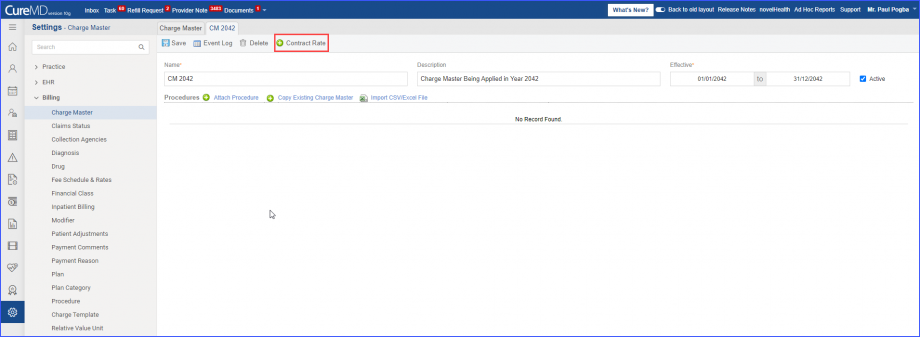
The user navigates to the Charge Master’s page and clicks on a charge master’s ‘Name’ hyperlink.
Clicking on the hyperlink displays the settings for the relevant charge master.
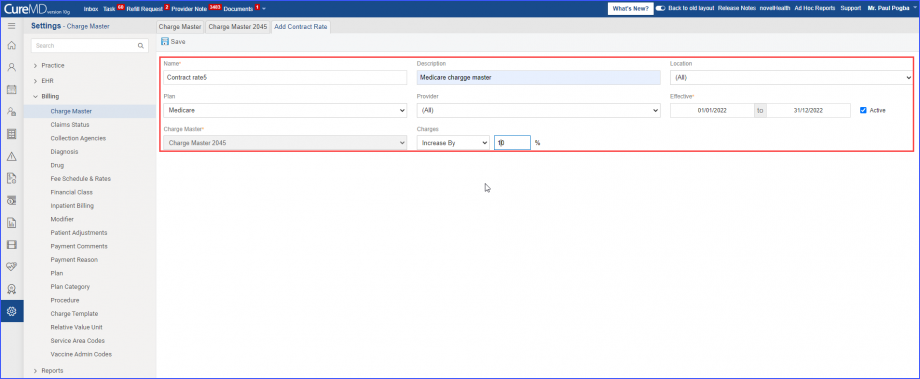
Click on the ‘+ Contract Rate’ button to add a contract rate for the charge master.
On the ‘Add Contract Rate’ page, the following information fields are displayed:
- Name
- Description
- Location
- Plan
- Provider
- Effective Date
- Increase/Decrease charge amount percentage
After filling in the required details, click ‘Save’ to create the new contract rate.
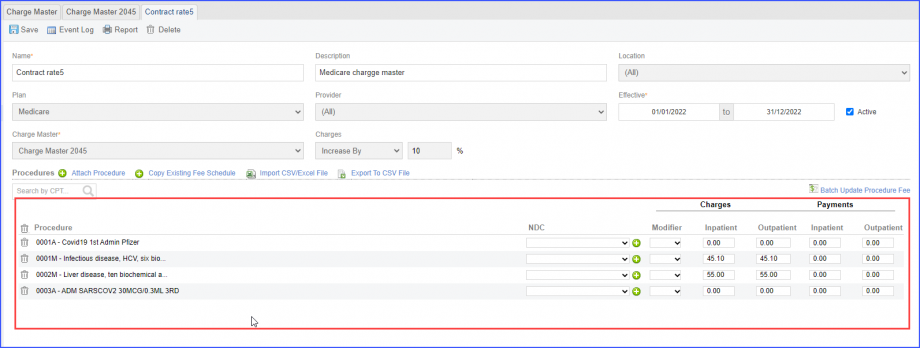
Once saved, the contract rate is populated with the Procedures along with their information, added in the associated ‘Charge Master’.
User can create contract rates on the ‘Fee Schedules and Rates’ page as well.
Click here to view how to add contract rates on the ‘Fee Schedule and Rates’ page.
The updated procedure code information is associated with the relevant Charge Master’s Contract Rates.
This ensures correct procedure information is conveniently updated for the Contract Rates.
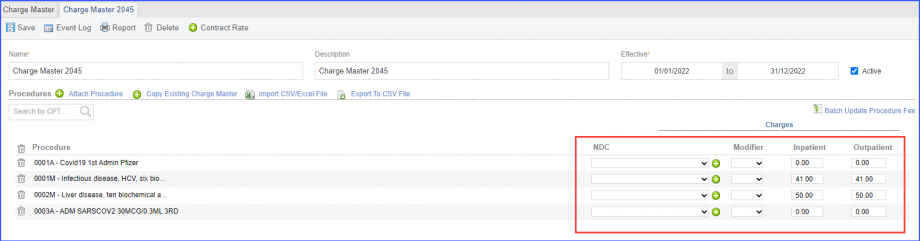
The user has navigated to the relevant charge master’s page.
Then make the required updates on the relevant procedure code’s information.
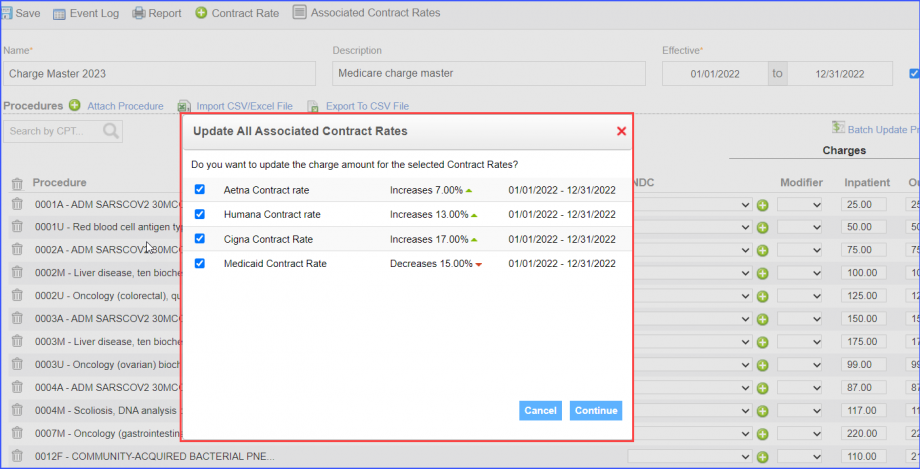
Click ‘Save’ to apply the changes made in the Charge Master’s contract rates.
Clicking ‘Save’ displays a prompt where the user has to select the relevant contract rates to update the CPT information.
All Contract Rates containing the updated CPT are displayed in the prompt and marked by default.
Unmark the checkbox to unselect the contract rate.
Click ‘Continue’ to confirm the selection.
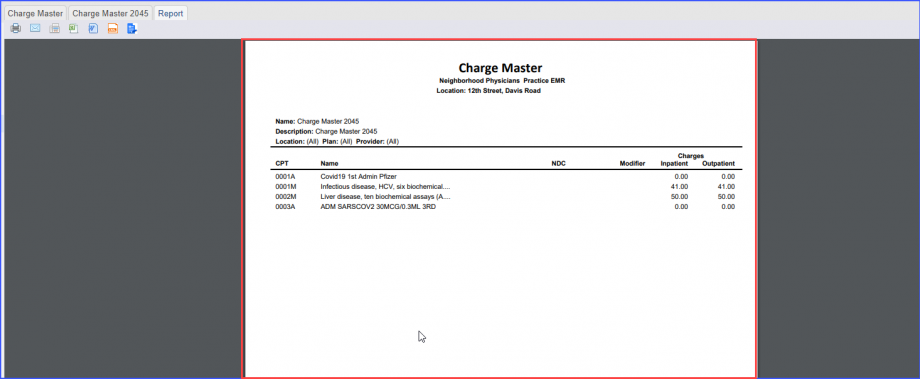
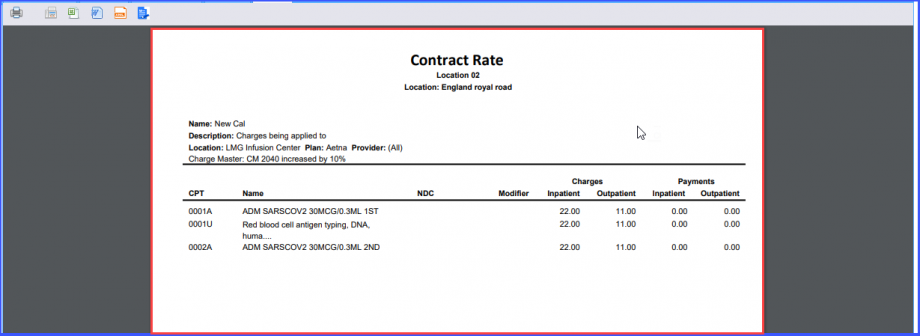
Users can print the Charge Master and its Contract Rates report.
All information regarding the Charge Master and its related Contract Rates can be viewed from the relevant report.
Navigate to the charge master for which report is required.
Then, on the charge master page, click on the ‘Report’ icon to print the report.
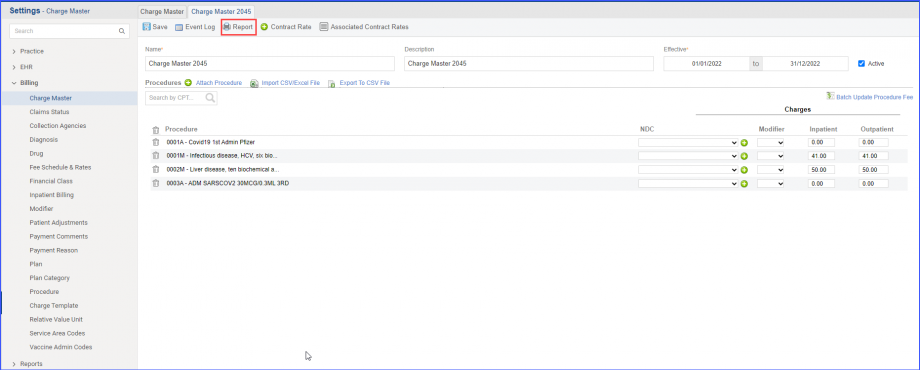
Clicking on the ‘Report’ button retrieves all information and displays it on the printed report.
User can choose to print, send the file as fax or export the file into any of the following formats:
- Excel
- MSWord
- XML
- MSWord Editable
Users can print the report for the Contract Report by clicking on the ‘Associated Contract Rates’.
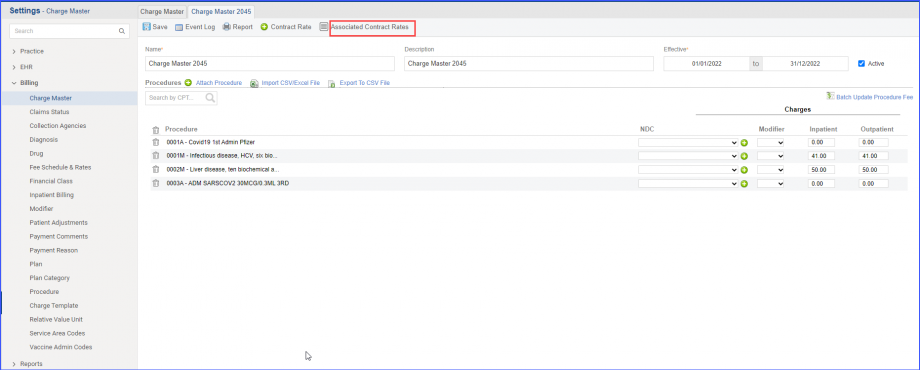
Clicking on the ‘Associated Contract Rates’ displays all associated contract rates for the charge master.
Click on the contract rate’s ‘Name’ hyperlink to open its settings.

Click on the ‘Report’ button to print the ‘Contract Rate’ information.
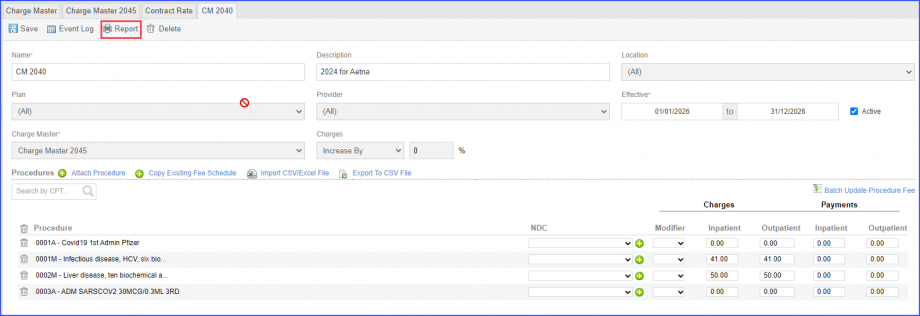
Clicking on the ‘Report’ button retrieves all of the contract rate information against the relevant charge master.
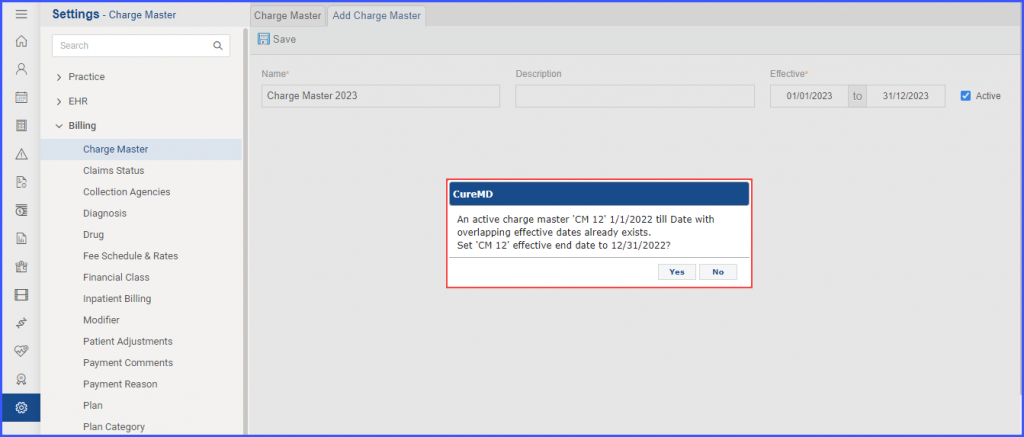
It is mandatory for users to specify the end date of an existing active charge master if it is overlapping with the new one.![]()
This ensures effective dates of two charge masters do not overlap.
When the user clicks the ‘Save’ button, a prompt is displayed which states ‘An effective charge master ‘[Name of the Active Charge Master]’ [Start Date] till Date with overlapping effective dates already exists. Set ‘[Name of the Active Charge Master]’ effective end date to [End Date]?’
By clicking ‘Yes’, the user can set the end date of the open-ended charge master to the one displayed in the prompt.
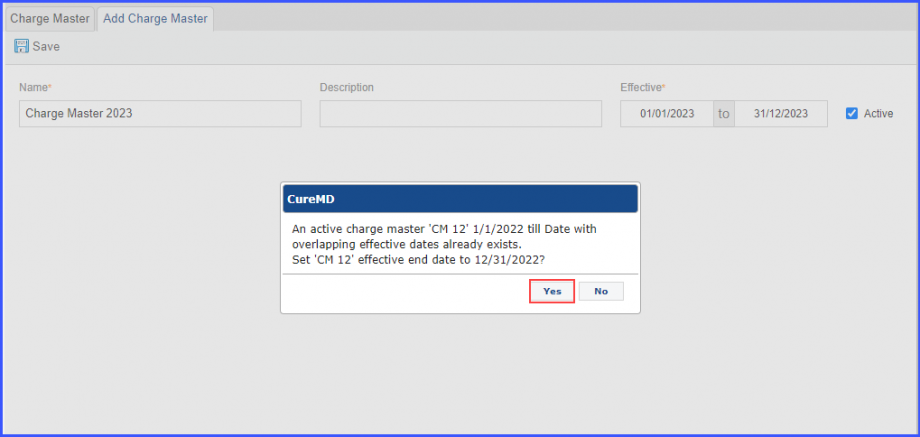
Once the user clicks ‘Yes’, the end date of the existing charge master is automatically updated to be one day before the start date of the new charge master.
Alternatively, the user can click on the ‘No’ button to cancel the generation of the new charge master.
