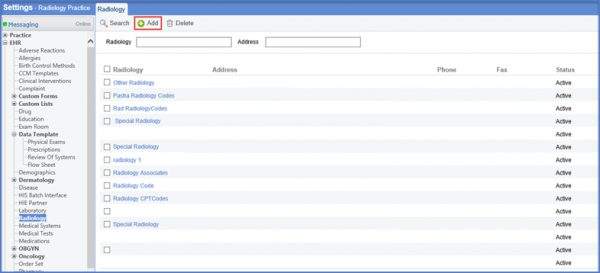
How to Add a Radiology Report?
Follow the workflow above to land on the ‘Radiology’ screen.
Click ‘+Add’ button.
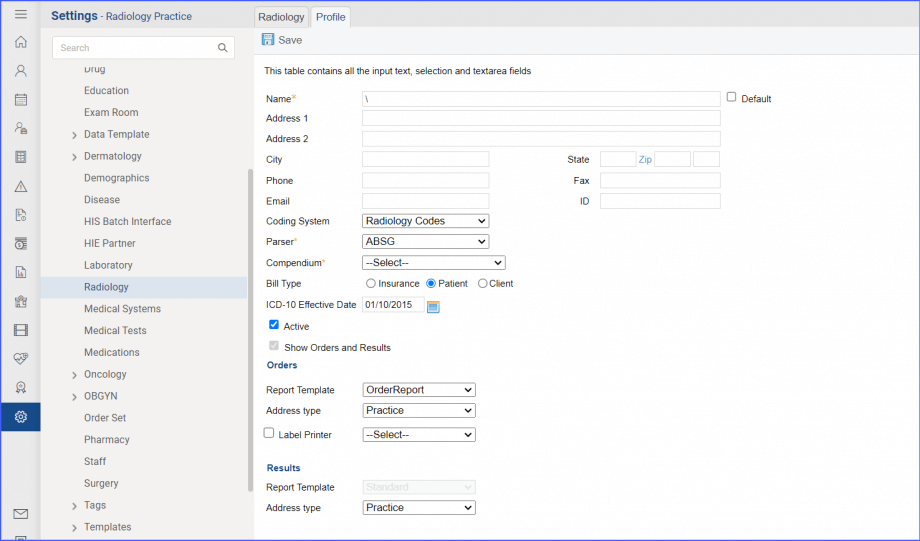
Clicking on add displays the profile details window. Here, the users can enter all required information to setup a ‘Radiology Report’. The coding system must be selected as ‘Radiology Codes’ from the ‘Coding System’ dropdown.
To select the report template for the order requisition, click on the ‘Report Template’ dropdown and choose the required option from the given list
Click ‘Save’ when all details have been entered.
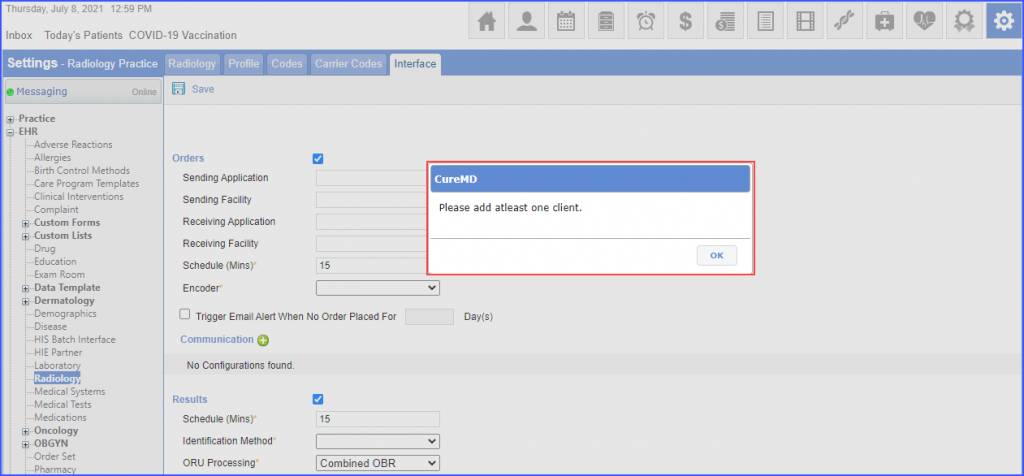
The system prevents users from saving an electronic radiology without adding any client.
This ensures that the user’s clinical workflow is not interrupted.
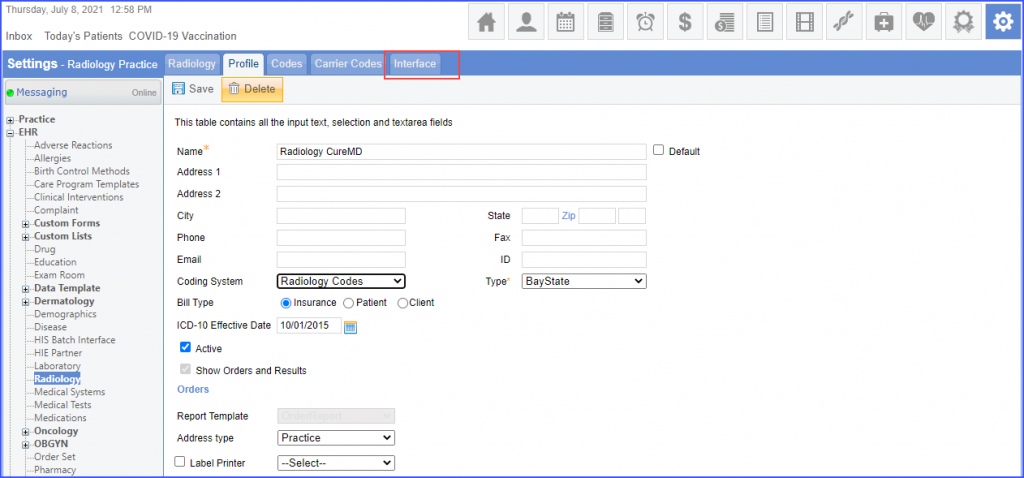
Add a new radiology profile and select ‘Radiology Codes’ from the ‘Coding System’ dropdown. Then navigate to the ‘Interface’ tab.
When the user has enabled ‘Orders’ or ‘Results’ interface and clicks ‘Save’ without adding any client, the system displays the following error message:
‘Please add at least one client’
However, when the user saves the radiology profile without enabling ‘Order’ or ‘Results’ interface, the system successfully saves the radiology profile. Moreover, the system does not display an error message for the missing electronic interface configurations when the user saves/signs a radiology order.
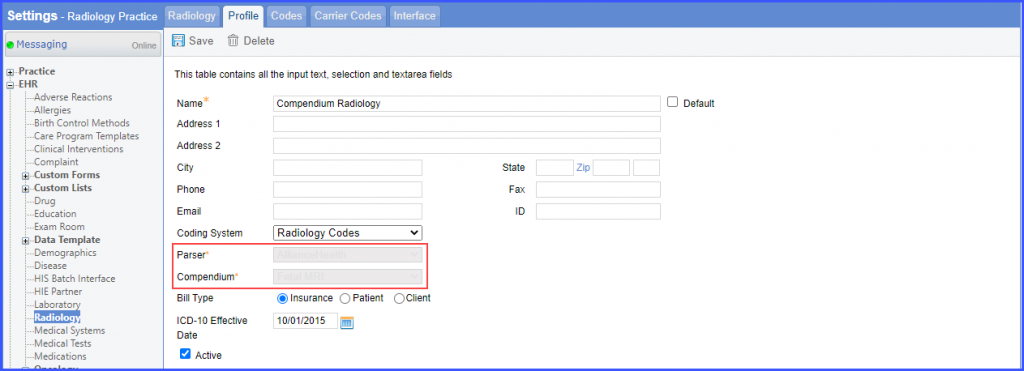
Users have the option to add a ‘Parser’ and a ‘Compendium’ to a radiology.
The ‘Coding System’ must be ‘Radiology Codes’ for the radiology profile.
Select a parser from the ‘Parser’ dropdown and a compendium from the ‘Compendium’ dropdown.
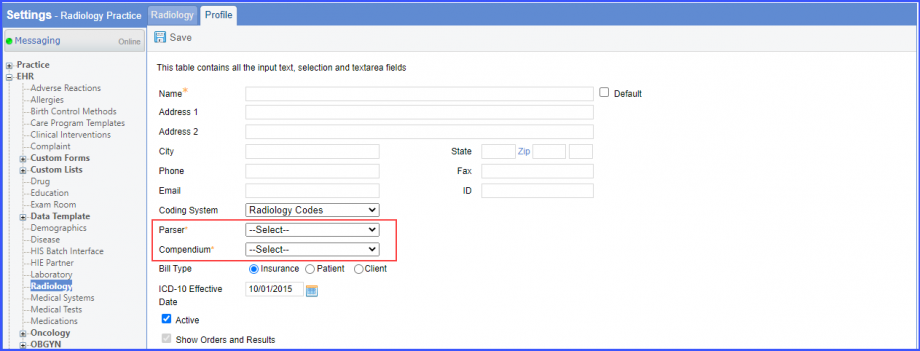
The parser specifies the HL7 message specifications and compendium determines the radiology type. The parser and compendium fields are greyed out once the radiology profile is saved. They cannot be changed.
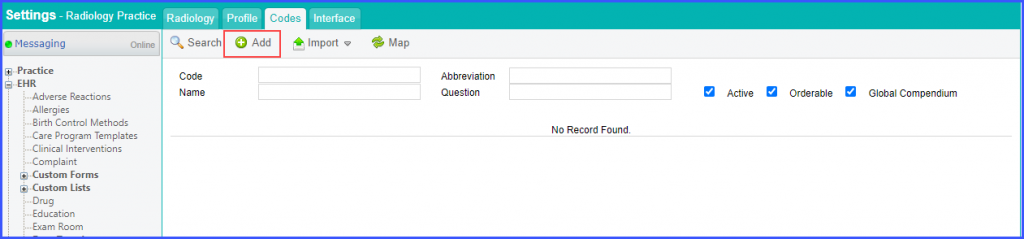
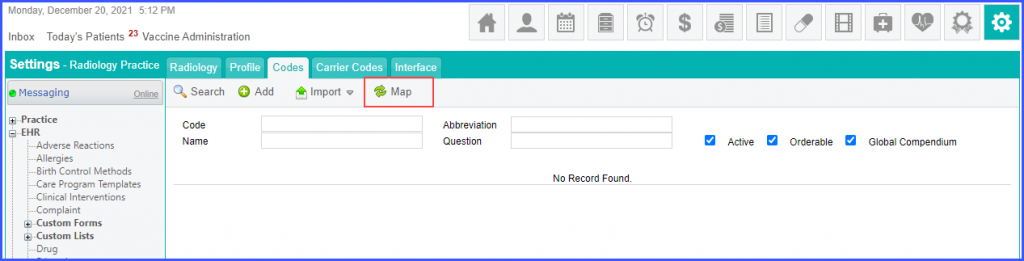
Users can add codes to the radiology from the global compendium. Select a radiology profile to edit.
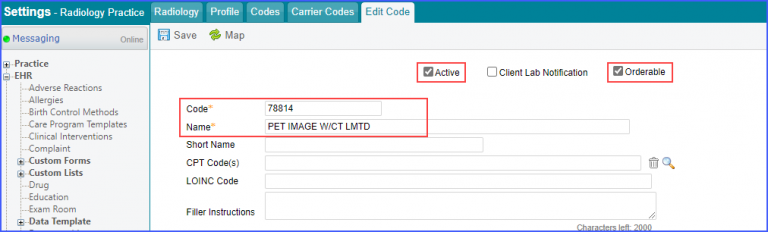
In the ‘Codes’ tab, click ‘+ Add’ to add a code.
Type a code in the search bar to search the code in the global compendium. The search results are fetched from the compendium selected in the radiology profile.
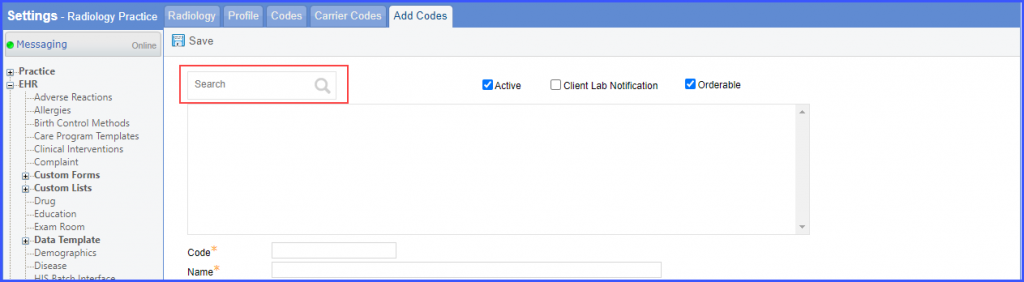
Select a code from the search results and the system populates the ‘Code’ and the ‘Name’ fields accordingly.

Alternatively, if no compendium has been selected in the radiology profile, then the users can enter the code and name manually in the ‘Code’ and ‘Name’ textboxes. Click ‘Save’ after adding the code.
Once the codes have been added to or imported into the radiology profile, the system displays the unmapped codes in red.
Additionally, there is a ‘Global Compendium’ checkbox in the ‘Codes’ tab. Marking the checkbox displays the mapped codes and unmarking the checkbox displays the unmapped codes.

Radiology codes can be mapped to the global compendium. This allows users to place orders for the mapped codes via treatment plan.
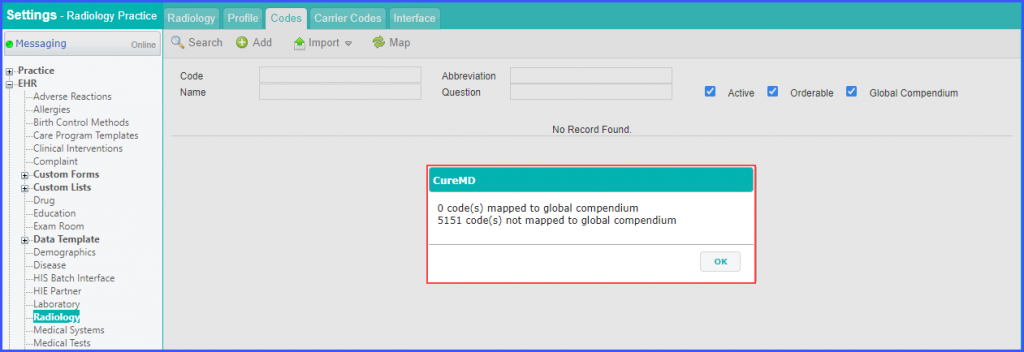
To map codes, click the ‘Map’ button. This action maps all common codes which are active and orderable to the global compendium.
Once the map button is clicked, the system displays a message which mentions the number of codes which are mapped and the number of codes which could not be mapped.
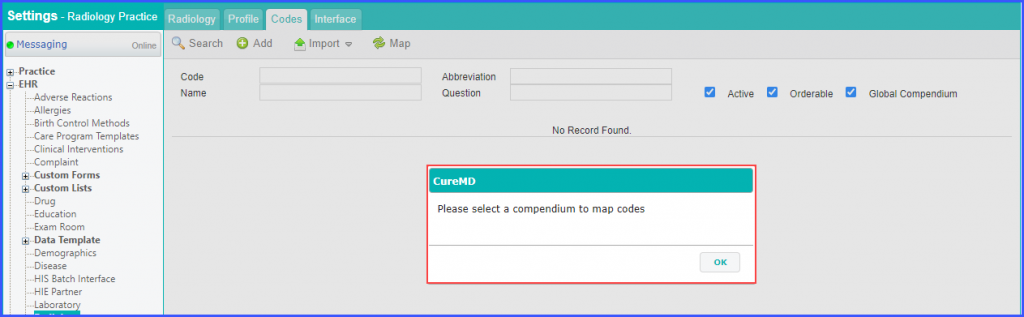
In case, a compendium has not been selected in the radiology profile and the user clicks the map button, an alert message is displayed with the following message:
‘Please select a compendium to map codes.’
Radiology codes can be unmapped from the global compendium.
This allows users to mark a radiology code as inactive and edit its details before mapping it again.
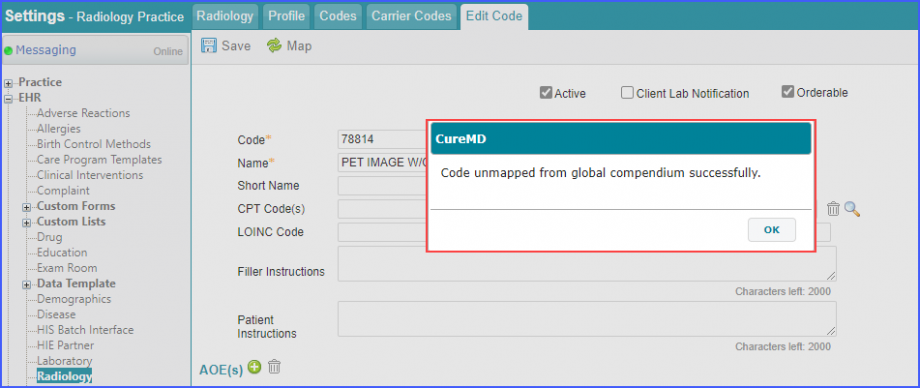
Select a radiology code which needs to be un-mapped from the compendium. Then, click the ‘UnMap’ button.

The system displays an alert message:
‘Code unmapped from global compendium successfully’.
Once the code is unmapped, the system enables ‘Active’ and ‘Orderable’ checkboxes, along with ‘Code’ and ‘Name’ fields. In addition, the ‘UnMap’ button changes to ‘Map’ button.
Users can edit the code details and map the code back to the compendium by clicking the ‘Map’ button.
Users can identify duplicate codes in the radiology compendiums. This allows users to update their radiology compendiums with new codes and mark old codes as inactive.
Click ‘Add Code’ button to add a new code in the compendium. In case the user adds a radiology code with a name that is already present in the compendium and clicks ‘Save’, the system displays a ‘Duplicate Codes’ pop-up.
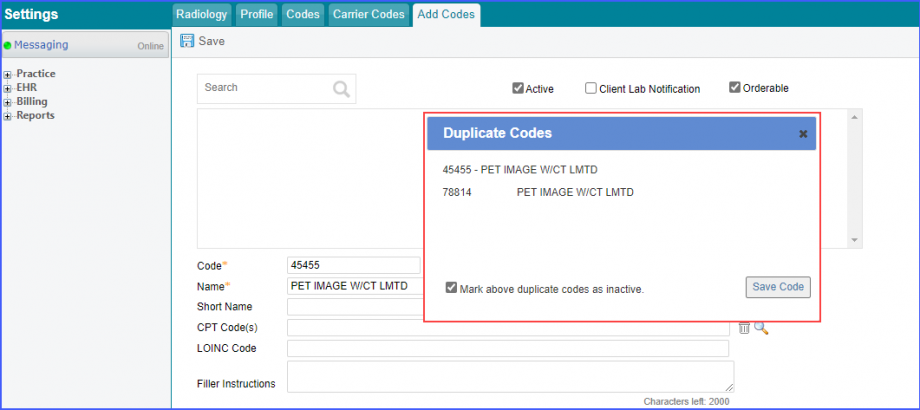
If the user checks ‘Mark above duplicate codes as inactive’ and clicks ‘Save Code’, the system saves the new code in the compendium and the existing code is marked inactive.
Alternatively, if the user unchecks ‘Mark above duplicate codes as inactive’ and clicks ‘Save Code’, the system does not mark the existing code as inactive and the new code is saved in the compendium.
The system also checks for duplicate code names when a user selects an unmapped radiology code and clicks the ‘Map’ button. A ‘Duplicate Codes’ prompt is displayed if codes with similar description already exist.

Furthermore, if a user uploads an excel file having codes with duplicate names, the ‘Duplicate Codes’ pop-up is displayed with a list of the duplicate names.

Character limit of CPT Codes range field has been increased.![]()
This ensures that users are compliant with CLIA requirements.
Navigate to ‘Result Codes and LIONCs’ section.
Click on the ‘Range’ field to add the reference range for a code. The system allows the user to type a maximum of 60 characters in the field.

A similar enhancement has been made in the ‘Patient’ module, click here, to view.
